

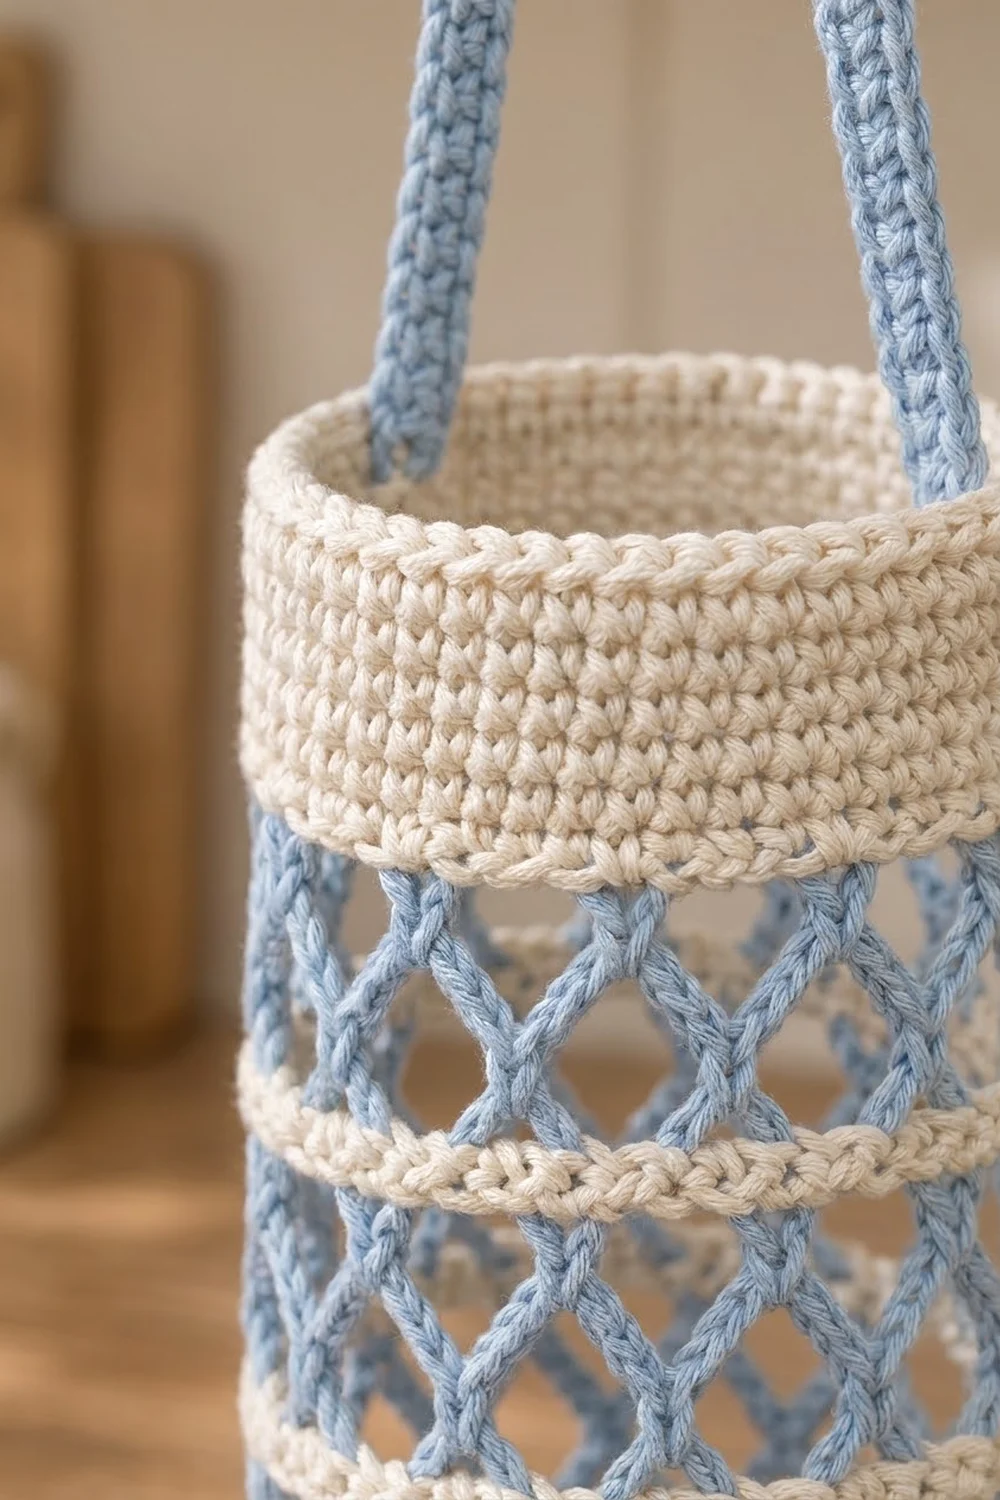
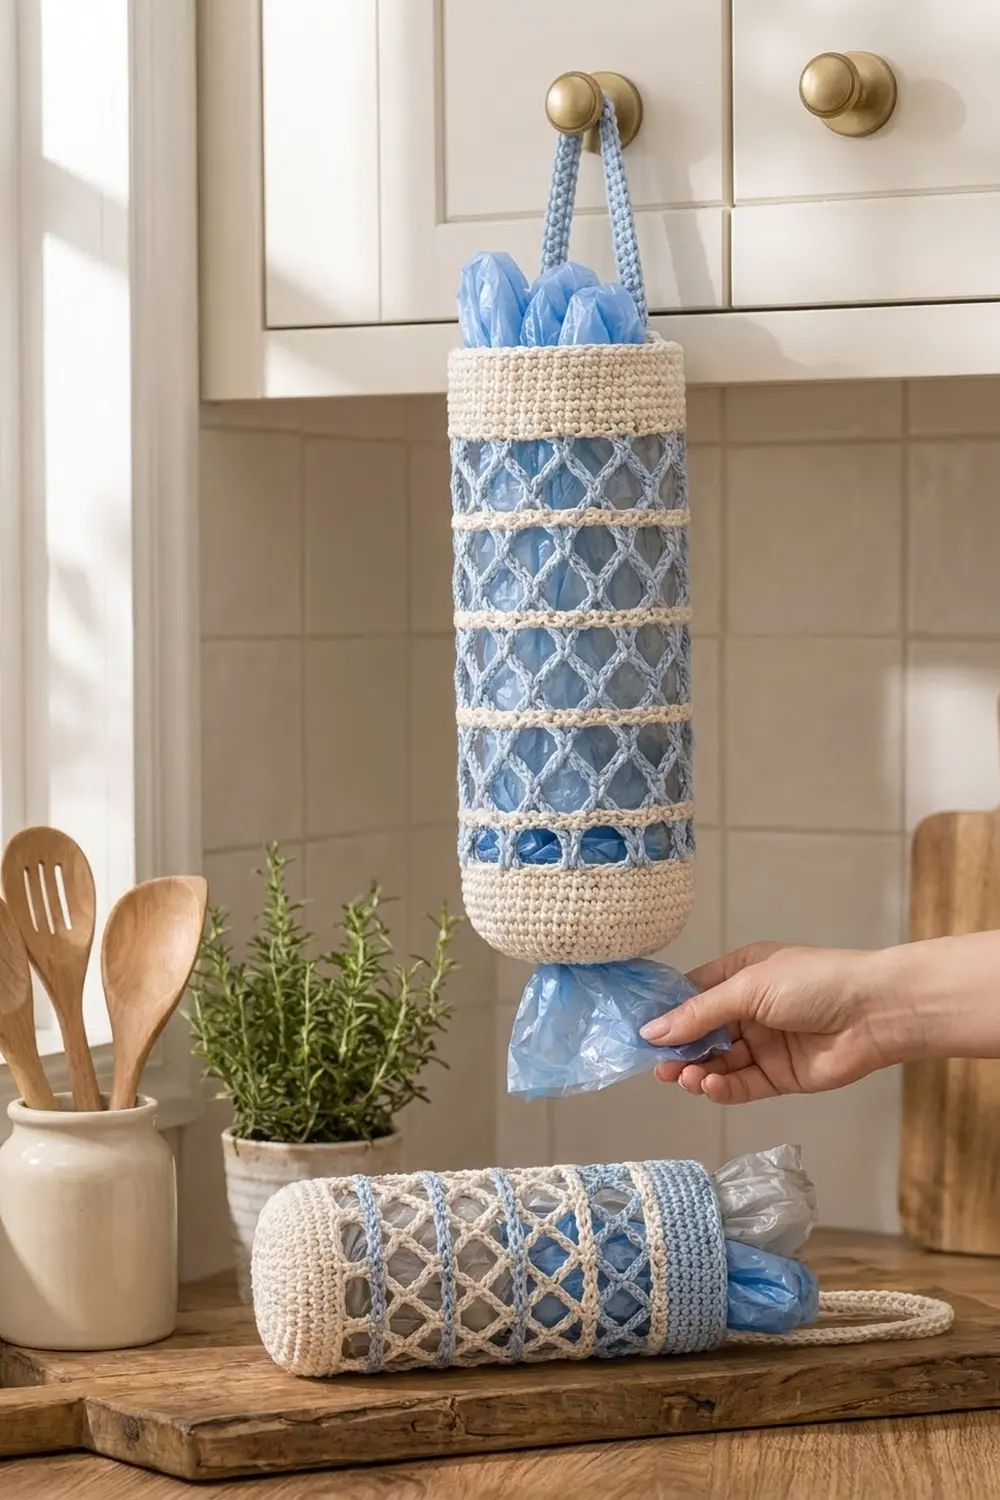
The Seaside Lattice Bag Holder is a tall, slim cylinder that hangs from a cabinet knob or hook and keeps loose grocery bags in one place. The open diamond mesh lets you see at a glance how many bags are left. The solid bands at the base and rim keep the shape steady.
This design uses two calm colors, cream and light powder blue. The base, three narrow stripes and the top rim are cream. The mesh and the strap handle are blue. You can swap the colors for a reversed version with cream mesh and blue stripes.
This pattern uses US crochet terms. The finished holder is about 3.75 in (9.5 cm) across and 11.25 in (28.6 cm) tall, not counting the handle. The circumference is 12 in (30.5 cm).
You work the holder in one piece from the bottom up. You start with a flat single-crochet circle, turn the wall up with a back-loop round, then alternate blue chain-mesh bands with cream stripes. A solid cream rim band finishes the top. Then you work a blue strap from the rim and sew its end to the opposite side.
Finished Size and Construction
- Finished size: 3.75 in (9.5 cm) diameter × 11.25 in (28.6 cm) tall
- Circumference: 12 in (30.5 cm), 48 stitches
- Skill level: Easy
- Terminology: US crochet terms
- Yarn weight: Worsted (#4) cotton
- Hook: 4.5 mm (US 7)
- Number of pieces: 1 body with an integrated strap
- Layout: base disc → cream wall → 4 mesh bands with 3 cream stripes between them → cream rim → strap
- Piece size before the rim band: 9.25 in (23.5 cm) tall
- Rim band depth: 2 in (5.1 cm)
- Strap: 0.75 in (1.9 cm) wide × 12 in (30.5 cm) long
Materials
Use a smooth worsted-weight cotton or cotton blend. Cotton holds its shape, doesn’t stretch much when the holder is full, and washes well. Avoid fuzzy yarns, because they hide the mesh.
- Color A (cream): 50 g, about 85 m (93 yd)
- Color B (light blue): 30 g, about 51 m (56 yd)
These amounts include a small safety margin.
Tools:
– 4.5 mm (US 7) crochet hook
– Stitch marker
– Tapestry needle
– Scissors
– Measuring tape
– Rust-proof pins and a tall bottle or rolled towel for blocking
Abbreviations (US Terms)
- ch – chain
- sc – single crochet
- sl st – slip stitch
- st(s) – stitch(es)
- sk – skip
- BLO – back loop only
- inc – 2 sc in the same stitch
- rnd – round
- ch-5 loop – a loop of 5 chains in the mesh
Special stitch: mesh loop. A mesh loop is a ch-5 that is anchored with 1 sc at each end. Stacked rounds of these loops, anchored at the centers of the loops below, form the diamond lattice.
Gauge and Checkpoints
Gauge: 16 sc and 18 rnds = 4 in (10.2 cm) in sc worked in the round.
Work the base first and treat it as your gauge swatch. Your measurements should match these checkpoints:
- After Rnd 8 (base): the flat circle measures 3.75 in (9.5 cm) across.
- After Rnd 16 (cream wall): the wall is 1.75 in (4.4 cm) tall from the fold.
- Each mesh band (3 rnds): about 1.5 in (3.8 cm) tall when lightly stretched.
- Each cream stripe (2 rnds): about 0.5 in (1.3 cm).
- Before the rim band: 9.25 in (23.5 cm) tall.
If your base is too big, go down 0.5 mm in hook size. If it is too small, go up 0.5 mm. Don’t change the stitch count, because every section depends on 48 stitches.
Pattern
Work in joined rounds. Start each round with ch 1, which doesn’t count as a stitch, and end each round with a sl st to the first sc. Place a marker in the first stitch of each round.
Base (Color A)
Rnd 1: Make a magic ring, 6 sc in the ring, join. (6 sts)
Rnd 2: Inc in each st around, join. (12 sts)
Rnd 3: Sc 1, inc 6 times, join. (18 sts)
Rnd 4: Sc 2, inc 6 times, join. (24 sts)
Rnd 5: Sc 3, inc 6 times, join. (30 sts)
Rnd 6: Sc 4, inc 6 times, join. (36 sts)
Rnd 7: Sc 5, inc 6 times, join. (42 sts)
Rnd 8: Sc 6, inc 6 times, join. (48 sts)
Checkpoint: the base lies flat and measures 3.75 in (9.5 cm) across.
Cream Wall (Color A)
Rnd 9: Sc in BLO of each st around, join. (48 sts) The unused front loops make a crisp fold, so the wall stands straight up from the base.
Rnds 10–16: Sc in each st around, join. (48 sts each round)
Checkpoint: the wall is 1.75 in (4.4 cm) tall, with 8 wall rounds in total. Change to Color B on the final sl st of Rnd 16. Cut Color A, leaving a 6 in (15.2 cm) tail.
Mesh Band 1 (Color B)
Rnd 17 (set-up mesh): Ch 1, sc in first st, ch 5, sk 3 sts, sc in next st 11 times, ch 5, sk 3 sts, sl st to first sc. (12 ch-5 loops)
The math: 12 loops × 4 sts each (1 sc + 3 skipped) = 48 sts. Every stitch of the wall is used once.
Rnd 18: Sl st in each of the next 3 ch to reach the center of the first loop. Ch 1, sc in the same loop, ch 5, sc in next ch-5 loop 11 times, ch 5, sl st to first sc. (12 ch-5 loops)
Rnd 19: Repeat Rnd 18. (12 ch-5 loops)
Each new sc sits at the center of a loop below, which turns the loops into diamonds. Change to Color A on the final sl st.
Cream Stripe 1 (Color A)
Rnd 20 (conversion round): Ch 1, work 4 sc in each ch-5 loop around, skipping the sc between loops. Join. (12 loops × 4 sc = 48 sts)
Rnd 21: Sc in each st around, join. (48 sts) Change to Color B.
Checkpoint: the stitch count is back to 48 exactly, so the next mesh band starts on the same count as the first.
Remaining Bands
Mesh Band 2 (Color B): Rnds 22–24. Work Rnd 22 like Rnd 17, then Rnds 23–24 like Rnd 18. (12 ch-5 loops each round)
Cream Stripe 2 (Color A): Rnds 25–26. Work Rnd 25 like Rnd 20, then Rnd 26 like Rnd 21. (48 sts each round)
Mesh Band 3 (Color B): Rnds 27–29, worked like Rnds 17–19. (12 ch-5 loops each round)
Cream Stripe 3 (Color A): Rnds 30–31, worked like Rnds 20–21. (48 sts each round)
Mesh Band 4 (Color B): Rnds 32–34, worked like Rnds 17–19. (12 ch-5 loops each round) Change to Color A at the end of Rnd 34.
Checkpoint: the holder measures 9.25 in (23.5 cm) tall: a 1.75 in (4.4 cm) wall, plus 4 mesh bands at 1.5 in (3.8 cm), plus 3 stripes at 0.5 in (1.3 cm).
Carry the unused color up the inside only if it is a short jump. Otherwise, cut and rejoin, then weave in the ends inside the cream stripes, where they stay hidden.
Border: Top Rim Band
The top rim works as this piece’s border. It gives the opening a firm edge that holds the cylinder round and supports the strap.
Border gauge: the same as the body, 16 sc and 18 rnds = 4 in (10.2 cm).
Rnd 35 (conversion round, Color A): Ch 1, work 4 sc in each ch-5 loop around. Join. (12 loops × 4 sc = 48 sts)
Rnds 36–43: Sc in each st around, join. (48 sts each round)
Fasten off after Rnd 43.
Laid flat, the rim has 24 sts per side along the front and 24 along the back. 24 + 24 = 48, with no extra corner stitches because the piece is a tube.
Why the math works: the rim has 9 rounds, and 9 rnds ÷ 4.5 rnds per in = 2 in (5.1 cm). Its circumference is 48 sts ÷ 4 sts per in = 12 in (30.5 cm), which matches the base and the cream wall. The conversion round puts exactly 4 sc into each of the 12 loops, so the rim doesn’t flare or pull in. Total height: 9.25 in + 2 in = 11.25 in (28.6 cm).
Strap Handle (Color B)
Flatten the holder so the join of the rounds sits at one side fold. Count 3 consecutive sts centered on the front fold line. Those are your strap stitches.
Row 1: Join Color B with a sl st in the first strap st. Ch 1, sc in the same st and in the next 2 sts, turn. (3 sts)
Rows 2–54: Ch 1, sc in each st across, turn. (3 sts each row)
Checkpoint: the strap measures 12 in (30.5 cm) long and 0.75 in (1.9 cm) wide.
Fasten off, leaving a 12 in (30.5 cm) tail. Count 24 sts around the rim from the first strap stitch to find the opposite side; the strap end lands on sts 25–27. Make sure the strap isn’t twisted. Whipstitch the last row to the inside of the rim across those 3 sts, then go back over them a second time for strength.
Final Blocking
- Weave in all ends inside the cream sections, not in the mesh.
- Lightly dampen the whole holder with a spray bottle.
- Slide it over a tall bottle or a tightly rolled towel about 3.75 in (9.5 cm) across.
- Gently pull downward so each mesh band reaches 1.5 in (3.8 cm), and make sure the diamonds line up in straight columns.
- Pat the rim band flat and smooth, and check that it measures 2 in (5.1 cm).
- Pin the strap flat on a towel at 12 in (30.5 cm).
- Let everything dry completely, about 24 hours, before hanging.
Final Quality-Control Checklist
- The base lies flat with no cupping or ruffling.
- The fold at Rnd 9 is crisp and the wall stands upright.
- Every mesh round has exactly 12 loops.
- Every cream conversion round has exactly 48 sc.
- The diamonds line up in vertical columns, not a spiral.
- The holder measures 11.25 in (28.6 cm) tall and 12 in (30.5 cm) around.
- The strap is attached at points 24 sts apart and isn’t twisted.
- All ends are hidden in the cream sections.
Troubleshooting
The base cups upward. Your tension is too tight on the increase rounds. Loosen up or go up a hook size, then redo the base.
The base ruffles. Check that each round adds exactly 6 sts.
The mesh slants into a spiral. You probably started a mesh round outside the center of a loop. Always sl st across exactly 3 ch before the first sc.
A stripe flares or pinches. Count the sc per loop. It must be 4, no more and no fewer.
The mesh sags when the holder is full. Your chains are loose. Tighten the ch-5s or use ch 4 with sk 2 in the set-up round (16 loops × 3 sts = 48). Keep the 4-sc conversion rounds as written; they will still total 48 only if you work 3 sc per loop for the 16-loop version.
The strap stretches. Sew a strip of cotton ribbon along the inside of the strap.
Care
Hand wash or machine wash on a gentle cycle in cool water, then reshape over a bottle and let it dry flat. Do not tumble dry, because heat can shrink cotton unevenly.
Final Notes
Everything in this holder comes from the 48 stitches set by the base. That gives you a 3.75 in (9.5 cm) base, a 12 in (30.5 cm) circumference, and a 1.75 in (4.4 cm) wall. Four mesh bands at 1.5 in (3.8 cm) and three stripes at 0.5 in (1.3 cm) bring the height to 9.25 in (23.5 cm). The 2 in (5.1 cm) rim finishes it at 11.25 in (28.6 cm). The 12 in (30.5 cm) strap then crosses to the opposite side, 24 stitches away. Check each measurement as you go and the finished holder will turn out right.
Happy crocheting!