
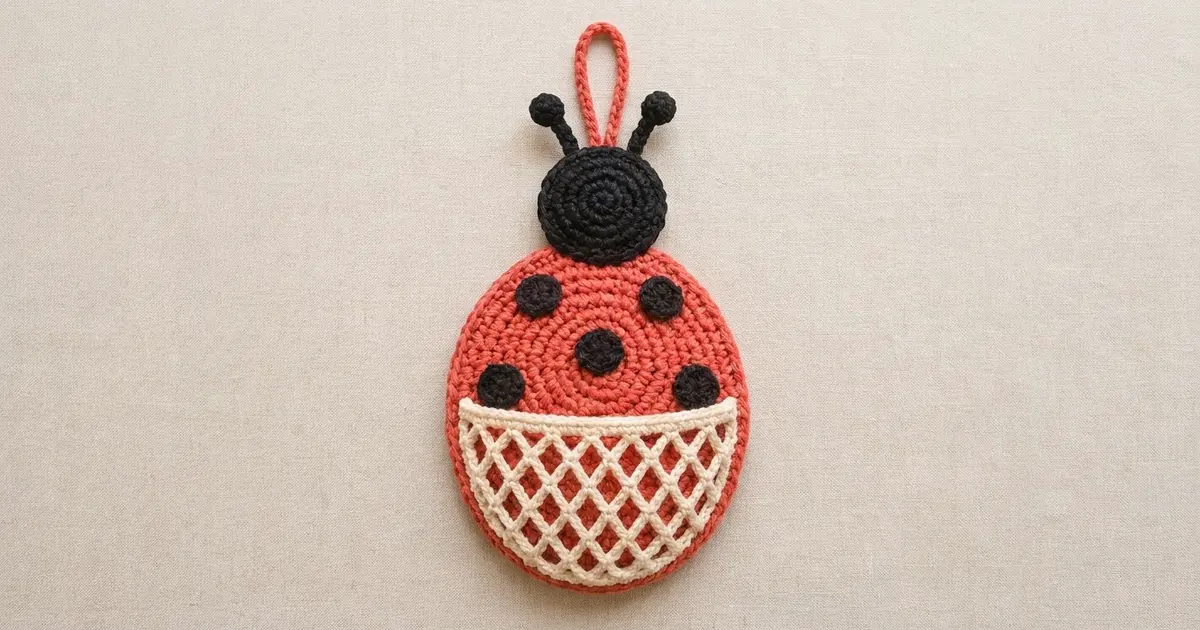
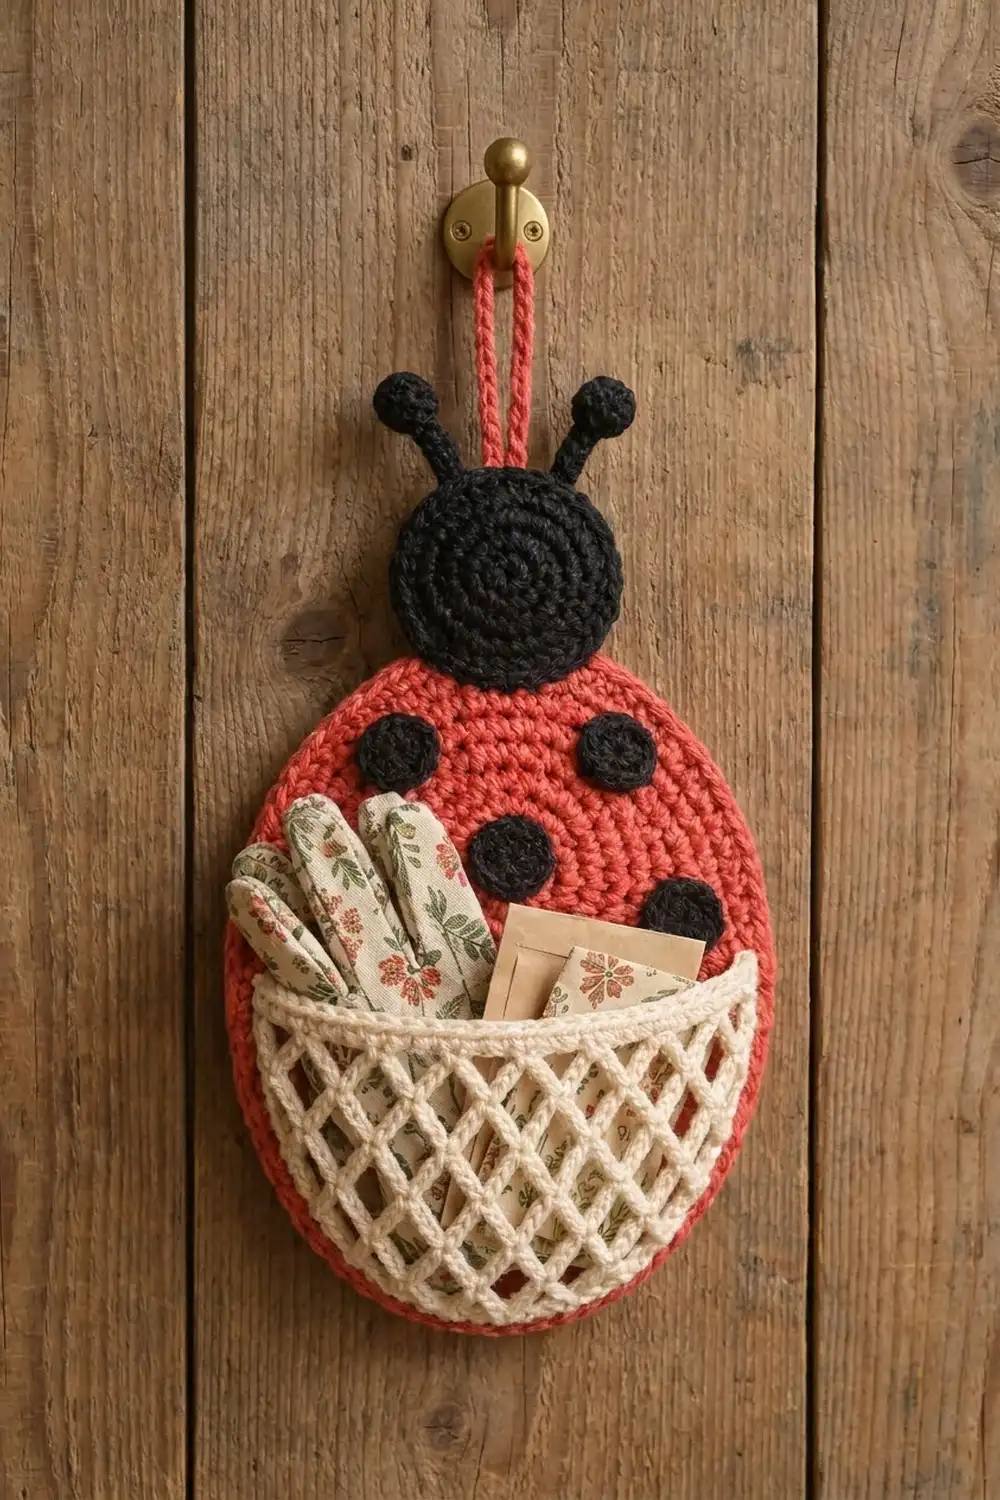
This cheerful ladybug wall pocket has a coral-red oval body, a round black head, five black spots and two antennae with round tips. Across the lower half sits a cream pocket with an open diamond net, so the red body shows through the lattice. A red cord loop at the top lets it hang from a hook. It’s handy for seed packets, garden gloves, letters or small tools.
The style is simple: solid single-crochet rounds for the body and head, and a light chain-loop net for the pocket. The pattern uses US crochet terms throughout.
The finished wall pocket is about 7.5 in (19.1 cm) wide and 14 in (35.6 cm) tall from the bottom edge to the top of the hanging loop. The body alone is 7.5 in × 8.25 in (19.1 cm × 21.0 cm) after the border.
You’ll crochet an oval body in joined rounds, a cream pocket in rows from the top down, a round head, five spots, two antennae and a cord loop. One red border round attaches the pocket to the body and finishes the edge. Then you sew on the head, spots, antennae and loop.
Finished Size and Construction
- Finished size: 7.5 in × 14 in (19.1 cm × 35.6 cm) including the loop
- Skill level: Easy–Intermediate
- Terminology: US crochet terms
- Yarn weight: #4 worsted
- Hook: 5.0 mm (H-8)
- Number of pieces: 11 (1 body, 1 pocket, 1 head, 5 spots, 2 antennae, 1 loop)
- Layout: head at top center, body below, pocket covering the lower end of the body
- Body size before border: 7 in × 7.75 in (17.8 cm × 19.7 cm)
- Pocket size: 7 in wide × 3.5 in deep (17.8 cm × 8.9 cm)
- Border depth: 1 round of sc, about 0.25 in (0.6 cm) per edge
Materials
Use a smooth worsted cotton or cotton blend so the stitches look crisp and the pocket holds its shape. Acrylic also works, but it stretches more under weight. The amounts below assume about 200 m per 100 g (2 m per gram).
- Red (coral): 25 g / 50 m (body, border, loop)
- Black: 15 g / 30 m (head, spots, antennae)
- Cream: 15 g / 30 m (pocket)
Tools:
- 5.0 mm (H-8) crochet hook
- Tapestry needle
- Stitch marker
- Scissors
- Rust-proof pins and a blocking mat
- Measuring tape
The quantities include a margin of about 30% for swatching and sewing.
Abbreviations (US Terms)
- ch – chain
- sc – single crochet
- dc – double crochet
- sl st – slip stitch
- st(s) – stitch(es)
- sp – space
- MR – magic ring
- RS – right side
- tch – turning chain
- 2 sc in next – increase: 2 sc in the same stitch
Special stitch – joined-layer sc: insert the hook through the pocket edge stitch first, then through the matching body stitch behind it, and complete a sc through both layers.
Gauge and Checkpoints
Gauge: 16 sc × 16 rounds = 4 in (10.2 cm) in sc.
Make the head first as your test piece. After Rnd 7 it should measure 3.5 in (8.9 cm) across.
- Too big: go down to a 4.5 mm hook.
- Too small: go up to a 5.5 mm hook.
Body checkpoints (width × height):
- After Rnd 4: 2 in × 2.75 in (5.1 cm × 7.0 cm)
- After Rnd 8: 4 in × 4.75 in (10.2 cm × 12.1 cm)
- After Rnd 14: 7 in × 7.75 in (17.8 cm × 19.7 cm)
Pocket checkpoint: the top band should measure 7 in (17.8 cm) across, matching the body width.
Body (Red)
The body is an oval worked in joined rounds around a short foundation chain. Each round adds 6 stitches: 3 at each curved end. The 3 stitches along each straight side stay the same throughout.
Ch 6.
Rnd 1: 3 sc in 2nd ch from hook, sc in next 3 ch, 3 sc in last ch. Working along the other side of the chain, sc in next 3 ch. Join with sl st to first sc. (12 sts: 3 end, 3 side, 3 end, 3 side)
Every round from here starts with ch 1 (doesn’t count as a stitch) and ends with a sl st to the first sc.
Rnd 2: [2 sc in each of next 3 sts, sc in next 3] twice. (18 sts)
Rnd 3: [(sc in next st, 2 sc in next) 3 times, sc in next 3] twice. (24 sts)
Rnd 4: [(sc in next 2, 2 sc in next) 3 times, sc in next 3] twice. (30 sts)
Rnds 5–14: Keep the same pattern, adding 1 more plain sc before each increase every round. On round number n, work [(sc in next n−2, 2 sc in next) 3 times, sc in next 3] twice. The total for each round is 6n + 6:
- Rnd 5: 36
- Rnd 6: 42
- Rnd 7: 48
- Rnd 8: 54
- Rnd 9: 60
- Rnd 10: 66
- Rnd 11: 72
- Rnd 12: 78
- Rnd 13: 84
- Rnd 14: [(sc in next 12, 2 sc in next) 3 times, sc in next 3] twice (90 sts)
After Rnd 14 each curved end has 42 sts and each side has 3 sts. Fasten off and weave in the ends.
The end worked first in every round is the bottom end. Put a marker in the first stitch of Rnd 14.
Pocket (Cream)
The pocket is worked top-down in rows: first a solid band, then a diamond net that narrows to make the U shape.
Ch 29.
Row 1 (RS): Sc in 2nd ch from hook and in each ch across. Turn. (28 sc)
Row 2: Ch 1, sc in each st across. Turn. (28 sc)
Row 3 (net setup): Ch 1, sc in first st, (ch 5, skip 2 sts, sc in next st) 9 times. Turn. (9 ch-5 loops; 1 + 27 = 28 sts used)
Row 4: Ch 5 (counts as dc + ch 2), sc in first ch-5 sp, (ch 5, sc in next ch-5 sp) 8 times, ch 2, dc in last sc. Turn. (8 full loops + 2 half loops)
Row 5: Ch 1, sc in first dc, (ch 5, sc in next ch-5 sp) 8 times, ch 5, sc in 3rd ch of tch. Turn. (9 loops)
Rows 4 and 5 keep the pocket at full width, so the top of the pocket stays straight before it starts to curve.
Row 6 (decrease): Sl st in first 3 ch, ch 1, sc in same sp, (ch 5, sc in next sp) 8 times. Turn. (8 loops)
Rows 7–11: Repeat Row 6, working the bracketed repeat 1 fewer time each row:
- Row 7: 7 loops
- Row 8: 6 loops
- Row 9: 5 loops
- Row 10: 4 loops
- Row 11: 3 loops
Fasten off.
Edging Row: With RS facing, join cream at the top left corner of the band.
- 1 sc in each row-end of Rows 1–2 (2 sc)
- 2 sc in each row-end of Rows 3–10 down the side (16 sc)
- 2 sc in each of the 3 loops of Row 11 (6 sc)
- 2 sc in each row-end of Rows 10–3 up the other side (16 sc)
- 1 sc in each row-end of Rows 2–1 (2 sc)
Fasten off. Total: 2 + 16 + 6 + 16 + 2 = 42 sc.
Each net row is about 0.3 in (0.8 cm) tall. The pocket measures about 7 in × 3.5 in (17.8 cm × 8.9 cm). The bottom looks slightly flat at this stage. It rounds out when it’s joined to the curved body.
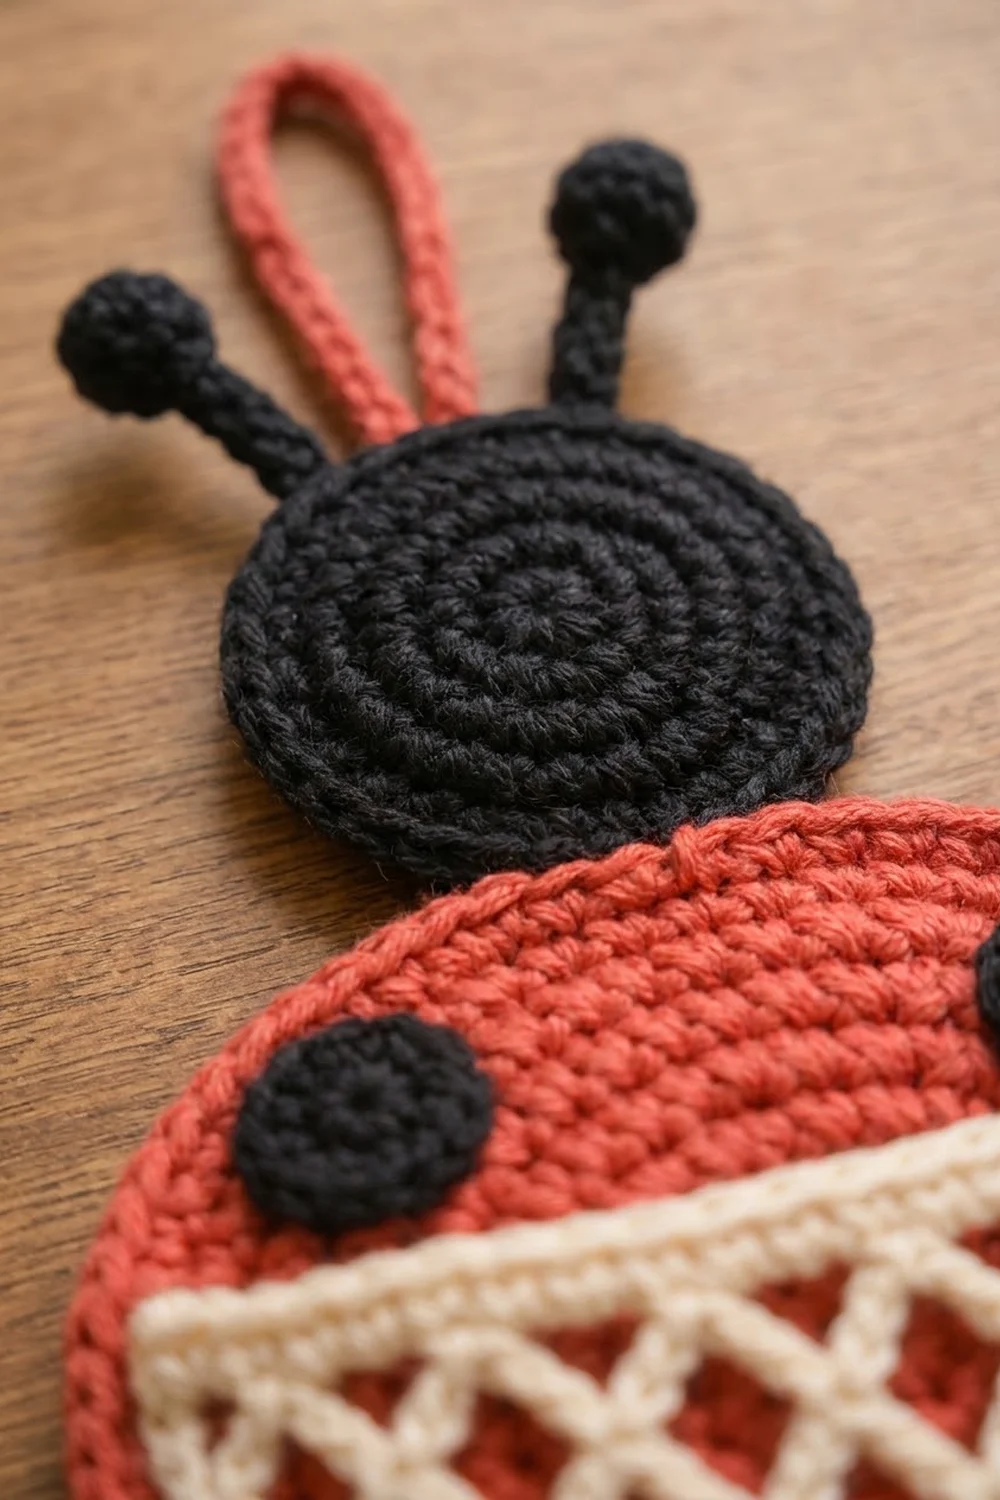
Head (Black)
Rnd 1: MR, 6 sc in ring. Join. (6)
Rnd 2: Ch 1, 2 sc in each st. Join. (12)
Rnd 3: Ch 1, (sc in next st, 2 sc in next) 6 times. Join. (18)
Rnds 4–7: Add 1 plain sc before each increase every round:
- Rnd 4: (sc in next 2, 2 sc in next) 6 times (24)
- Rnd 5: (sc in next 3, 2 sc in next) 6 times (30)
- Rnd 6: (sc in next 4, 2 sc in next) 6 times (36)
- Rnd 7: (sc in next 5, 2 sc in next) 6 times (42)
Fasten off, leaving a 16 in (40.6 cm) tail for sewing. The head should measure 3.5 in (8.9 cm) across.
Spots (Black, make 5)
Rnd 1: MR, 6 sc in ring. Join. (6)
Rnd 2: Ch 1, 2 sc in each st. Join. (12)
Fasten off, leaving an 8 in (20.3 cm) tail. Each spot is 1 in (2.5 cm) across.
Antennae (Black, make 2)
Tip: MR, 6 sc in ring, pull the ring tight, join with sl st. This makes a small round tip.
Stem: Ch 9, sc in 2nd ch from hook and in each ch across. (8 sc)
Fasten off, leaving a tail. Each antenna is about 2.5 in (6.4 cm) long including the tip.
Hanging Loop (Red)
Ch 41. Sc in 2nd ch from hook and in each ch across. (40 sc)
Fasten off, leaving a tail. The cord is about 10 in (25.4 cm) long.
Make All Pieces
Before you assemble, check that you have:
- Red: 1 body, 1 hanging loop
- Cream: 1 pocket
- Black: 1 head, 5 spots, 2 antennae
Layout (front view, top to bottom):
        [loop]
   [ant]      [ant]
        [HEAD]
  [spot]        [spot]
        [spot]
  [spot]        [spot]
  =====POCKET BAND=====
  \\\  diamond net  ///
   \\\_____________///
Joining
Spots: Lay the body RS up with the marked bottom end at the bottom. Sew the spots with whipstitch through their outer stitches, sewing through the body only so the stitches don’t show on the back.
- Upper pair: 1.25 in (3.2 cm) below the top edge, 1.5 in (3.8 cm) in from each side
- Center spot: on the center line, 2.75 in (7.0 cm) below the top edge
- Lower pair: 0.5 in (1.3 cm) above where the pocket band will sit, 1.25 in (3.2 cm) in from each side
Pocket position: Lay the pocket on the body, RS up. Line up the 42 edging sc with the 42 stitches of the body’s bottom end in Rnd 14. The pocket’s top corners land where the straight side sections begin. Pin every 6 stitches.
Keep the net relaxed. Don’t stretch it flat against the body, because the slight ease is what gives the pocket room for its contents.
Checkpoint: The pocket band should lie straight across the body at 7 in (17.8 cm).
Border (Red)
The border uses the same gauge as the body: 4 sc per inch (2.54 cm). It works through both layers to attach the pocket, then continues around the rest of the body.
Rnd 15: Join red in the marked first stitch of Rnd 14 together with the first pocket edging sc. Ch 1.
- Bottom end (through both layers, using the joined-layer sc): (sc in next 13, 2 sc in next) 3 times. Each pocket sc joins to one body stitch. (45 sts)
- Side: sc in next 3, through the body only. (3 sts)
- Top end: (sc in next 13, 2 sc in next) 3 times. (45 sts)
- Side: sc in next 3. (3 sts)
Join with sl st to the first sc. Total: 90 worked 1 per stitch + 6 increases = 96 sts.
Why the math works: The pocket edge (42) matches the body end (42) exactly, so the join lies flat with no puckering. Rnd 15 adds 6 stitches at the same rate as every body round, so the border lies flat too.
After Rnd 15 the body measures 7.5 in × 8.25 in (19.1 cm × 21.0 cm). Fasten off and weave in the ends.
Head: Center the head over the top end so it overlaps the body by 0.75 in (1.9 cm). Whipstitch around the overlap on the back, plus a few tacking stitches on the front.
Antennae: Sew the stems to the back of the head, 1 in (2.5 cm) apart at the base and angled outward. About 2 in (5.1 cm) of each antenna should show above the head.
Loop: Fold the cord in half and sew both ends 2 in (5.1 cm) down the center back of the head. Sew through 2 layers firmly, because the loop carries the weight of the pocket. The loop stands about 3 in (7.6 cm) above the head.
Final Blocking
- Lightly mist the assembled piece with water.
- Lay it RS up on a blocking mat.
- Pin the body into a smooth oval, 7.5 in × 8.25 in (19.1 cm × 21.0 cm).
- Gently open the net diamonds with your fingers so they’re evenly spaced.
- Pin the pocket band straight across.
- Round the head and spots with your fingertips.
- Leave it to dry completely before hanging.
Final Quality-Control Checklist
- [ ] Body Rnd 14 has 90 sts and the border has 96 sts
- [ ] Pocket edging has 42 sc and is joined 1:1 with no skipped stitches
- [ ] Pocket band is level and 7 in (17.8 cm) wide
- [ ] Head is 3.5 in (8.9 cm) across and centered
- [ ] Spots are placed symmetrically and none are hidden by the pocket
- [ ] Antennae point outward evenly
- [ ] Loop is sewn through 2 layers and holds firm when tugged
- [ ] All ends are woven in on the back
Troubleshooting
- Body ripples: extra increases or a hook that’s too large. Count each round and go down a hook size.
- Body cups: missed increases or tight tension. Recount, or go up a hook size.
- Corners look pointed: stacked increases can make the ends look slightly angular. Steam blocking softens them.
- Pocket edge count is off: adjust the sc in the row-ends until you have exactly 42.
- Pocket sags: use cotton yarn, or work Rows 1–2 with a 4.5 mm hook.
- Head tilts: add tacking stitches at both sides of the overlap.
Care
Hand wash in cool water, press out the water gently, and reshape flat to dry. Don’t tumble dry, because the net can lose its shape.
Final Notes
The sizes build on each other:
- 16 sc = 4 in (10.2 cm)
- 14 body rounds = 7 in × 7.75 in (17.8 cm × 19.7 cm)
- 28-stitch pocket band = 7 in (17.8 cm), matching the body width
- 42 pocket edge stitches = 42 body end stitches
- 1 border round = 7.5 in × 8.25 in (19.1 cm × 21.0 cm)
- Head, antennae and loop bring the total to 14 in (35.6 cm) tall
If your gauge checks match at each stage, everything fits together without fudging.
Happy crocheting!