
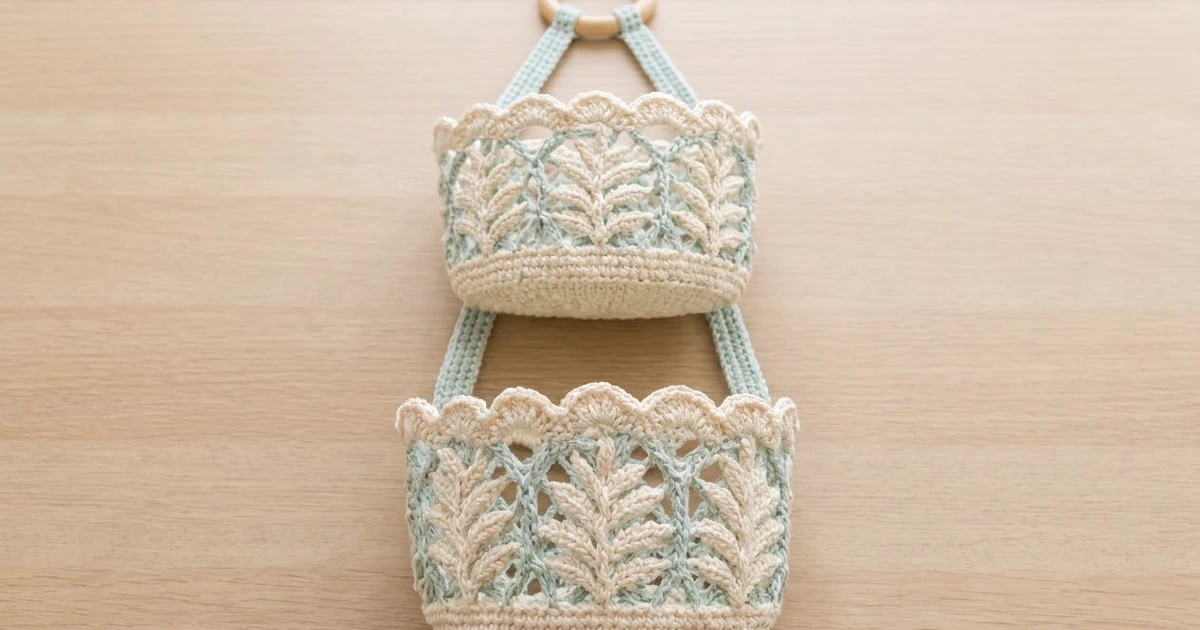
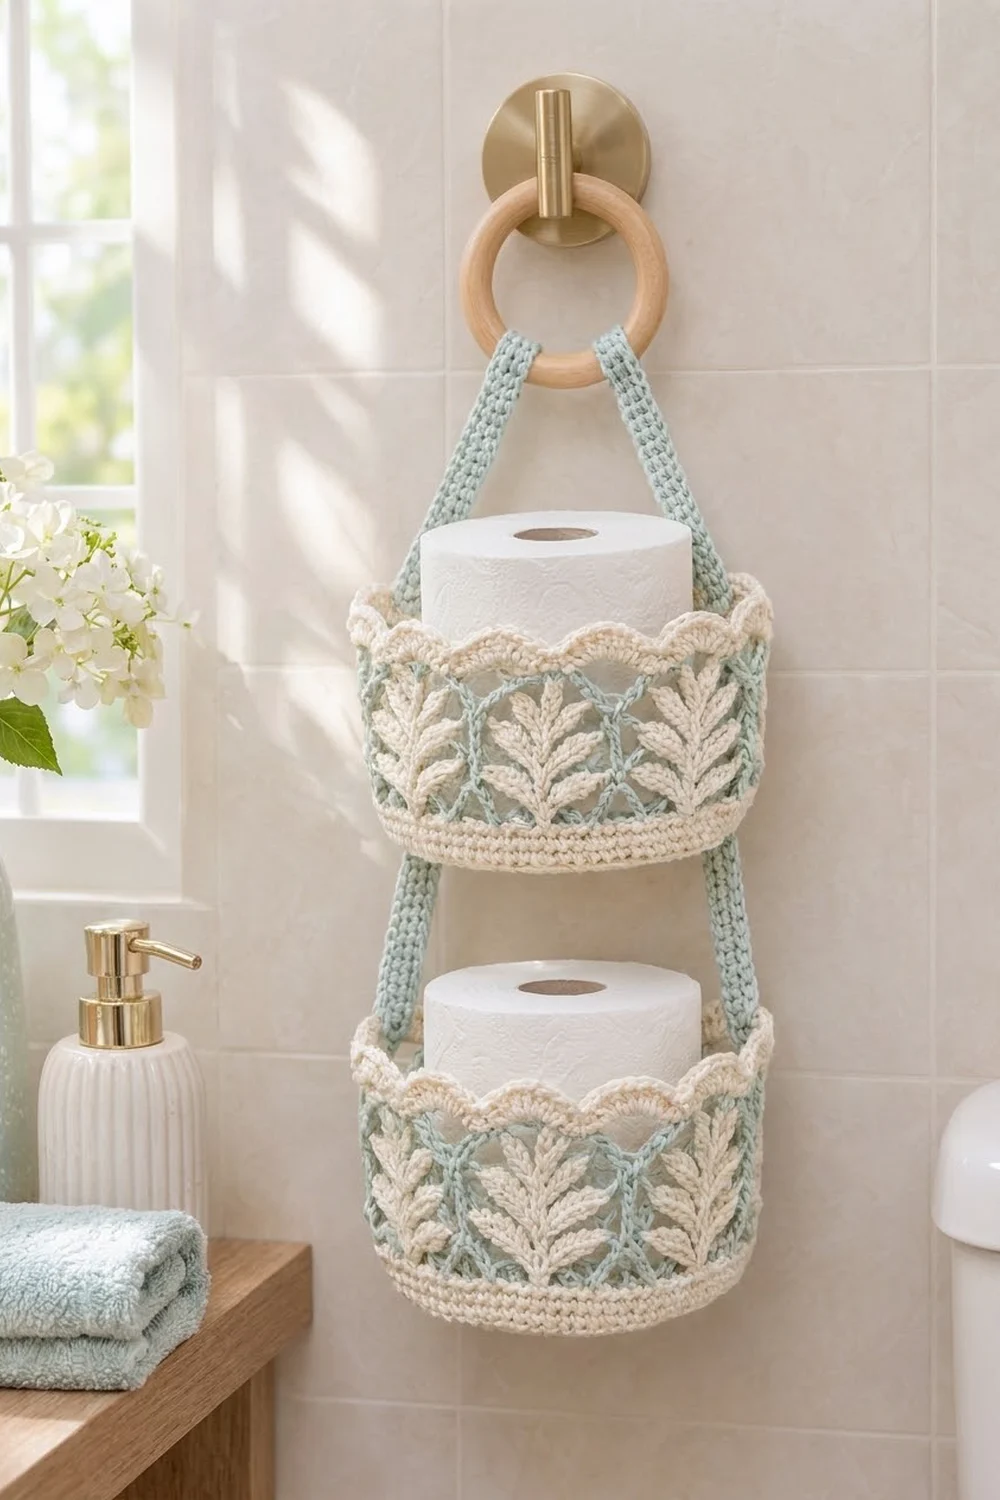
This hanging holder has two round baskets stacked one above the other on soft mint straps. Each basket holds one standard toilet roll. The cream walls have raised fern sprigs set inside a seafoam diamond lattice, and the top has two layers of scallops.
Cream and pale mint give it a calm, spa-like look that suits light bathroom tiles and wood accents. All instructions use US crochet terms.
Each basket measures 5.5 in (14.0 cm) across and 4 in (10.2 cm) tall. From the top of the ring to the bottom of the lower basket, the holder hangs about 19 in (48.3 cm).
Here is the construction in brief. Each basket starts with a flat single-crochet circle, turns up into the wall, and moves into a two-round mint lattice. A solid cream round closes the lattice, and a three-round scalloped edging finishes the top. You make the fern sprigs separately and sew them into the lattice. Two long straps join both baskets to a wooden ring.
Finished Size and Construction
- Basket size: 5.5 in (14.0 cm) diameter × 4 in (10.2 cm) tall
- Total hanging length: about 19 in (48.3 cm), including the ring
- Skill level: Intermediate
- Terminology: US
- Yarn weight: Worsted (#4) cotton
- Hook: 4.0 mm (G-6)
- Number of pieces: 28 (2 baskets, 24 fern sprigs, 2 straps)
- Layout: two baskets in a vertical column with a strap on each side
- Piece size: each basket wall is 18 in (45.7 cm) around
- Size before edging: wall height 2.6 in (6.6 cm) after Rnd 19
- Edging depth: 1.4 in (3.6 cm), Rnds 20–22
Materials
Use a smooth, firm worsted-weight cotton or cotton blend. Cotton holds the basket shape and handles bathroom humidity well. Avoid fuzzy or very stretchy acrylic, because the lattice will sag.
- Cream (Color A): 100 g / 170 m (186 yd)
- Seafoam mint (Color B): 50 g / 85 m (93 yd)
These quantities include a margin of about 20% for gauge swatching and seaming.
Tools:
– 4.0 mm (G-6) crochet hook
– Wooden ring, 2.5 in (6.4 cm) diameter
– Wall hook or towel hook
– Tapestry needle
– 4 stitch markers
– Scissors and rust-proof pins
– A round container about 5.5 in (14.0 cm) across, for blocking
Abbreviations (US Terms)
- ch – chain
- sl st – slip stitch
- sc – single crochet
- hdc – half double crochet
- dc – double crochet
- BLO – back loop only
- st(s) – stitch(es)
- sk – skip
- rnd – round
Special stitch – Leaf: Ch 4, sc in 2nd ch from hook, hdc in next ch, dc in last ch, then sl st in the same stem stitch the leaf started from. This makes one angled leaflet.
Shell: 5 dc in the same stitch.
Gauge and Checkpoints
Gauge: 16 sc and 18 rnds = 4 in (10.2 cm) in sc, worked in the round.
Make one basket base first and check it before you go on.
Checkpoints:
– After Rnd 6 (36 sts): the base measures 2.75 in (7.0 cm) across.
– After Rnd 12 (72 sts): the base measures 5.5 in (14.0 cm) across.
– After Rnd 16: the solid wall band is 0.9 in (2.3 cm) tall.
– After Rnd 18: the wall is 2.4 in (6.1 cm) tall.
– After Rnd 19: the wall is 2.6 in (6.6 cm) tall.
– After Rnd 22: the wall is 4 in (10.2 cm) tall.
If your base is too big, go down to a 3.75 mm hook. If it is too small, go up to a 4.5 mm hook. A standard roll is about 4.5 in (11.4 cm) wide, so the base should not be smaller than 5.25 in (13.3 cm).
Basket (Make 2)
Base
Work in continuous rounds with Color A. Mark the first stitch of each round.
Rnd 1: Magic ring, 6 sc in ring. (6 sts)
Rnd 2: 2 sc in each st around. (12 sts)
Rnd 3: Sc in next st, 2 sc in next st around. (18 sts)
Rnd 4: Sc in next 2 sts, 2 sc in next st around. (24 sts)
Rnd 5: Sc in next 3 sts, 2 sc in next st around. (30 sts)
Rnd 6: Sc in next 4 sts, 2 sc in next st around. (36 sts)
Rnd 7: Sc in next 5 sts, 2 sc in next st around. (42 sts)
Rnd 8: Sc in next 6 sts, 2 sc in next st around. (48 sts)
Rnd 9: Sc in next 7 sts, 2 sc in next st around. (54 sts)
Rnd 10: Sc in next 8 sts, 2 sc in next st around. (60 sts)
Rnd 11: Sc in next 9 sts, 2 sc in next st around. (66 sts)
Rnd 12: Sc in next 10 sts, 2 sc in next st around, sl st to first sc. (72 sts)
Check: 5.5 in (14.0 cm) across, lying flat.
Wall
From here on, join each round with a sl st and begin with ch 1. The ch 1 does not count as a stitch.
Rnd 13: Sc in BLO of each st around. (72 sts) This makes the fold line where the wall turns up.
Rnds 14–16: Sc in each st around. (72 sts) Fasten off Color A after Rnd 16.
Mint Lattice
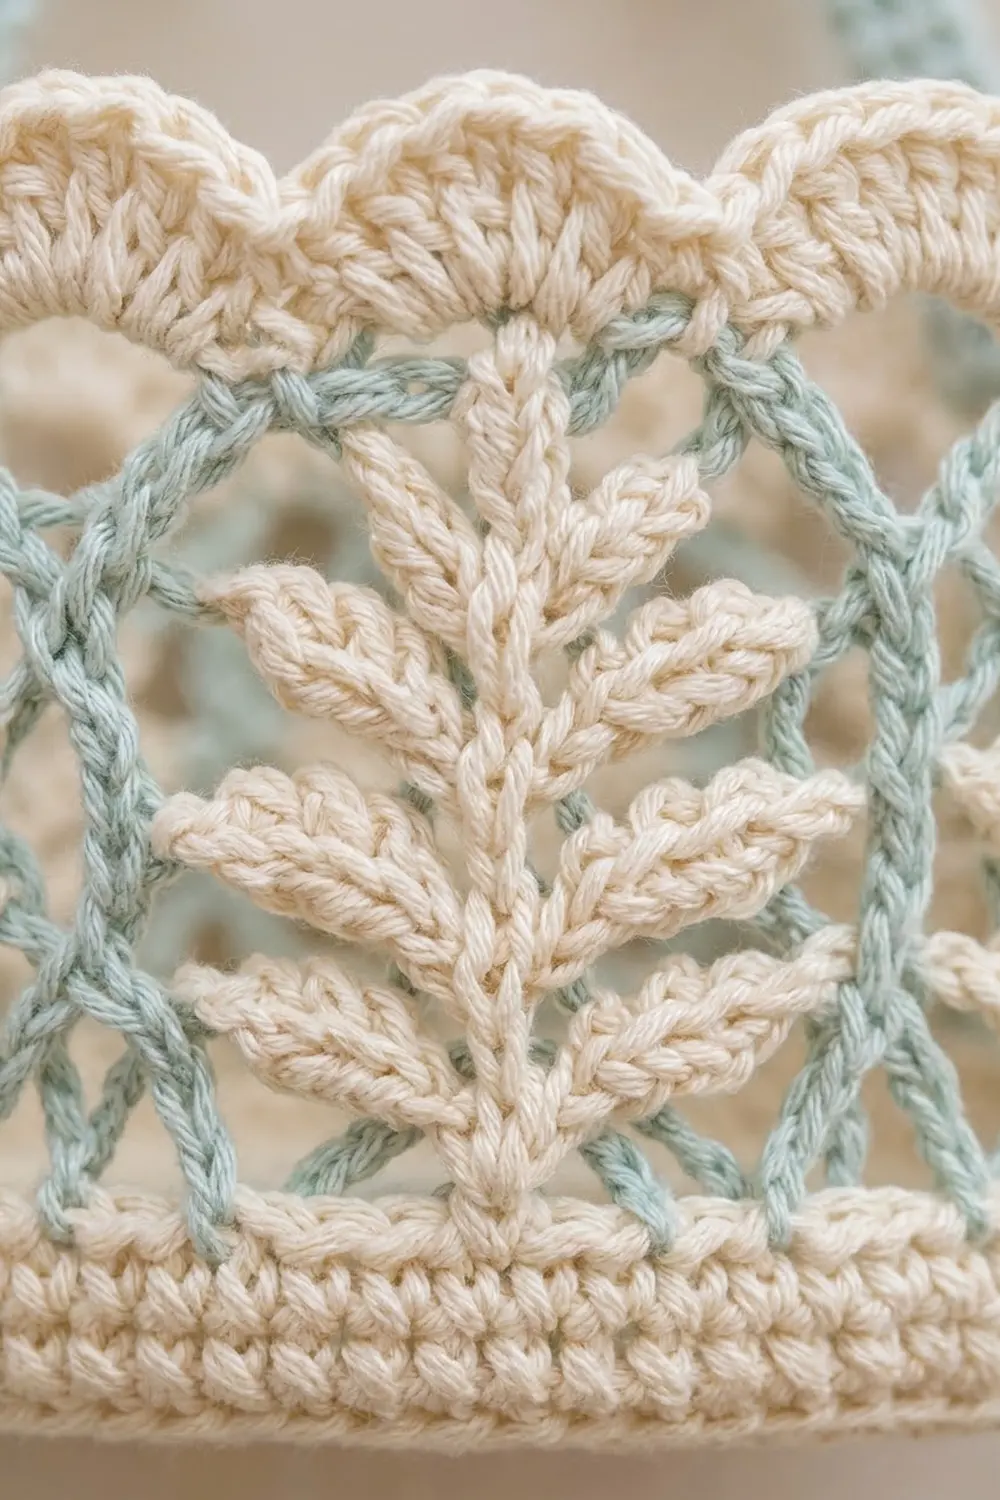
Rnd 17: Join Color B in any st. Ch 1, sc in same st, ch 7, sk 5 sts, sc in next st 11 times, ch 7, sk 5 sts, sl st to first sc. (12 sc, 12 ch-7 loops)
Check: 12 sc + (12 × 5 skipped sts) = 72. Every stitch from Rnd 16 is used.
Rnd 18: Sl st in next 3 ch to reach the center of the loop. Ch 1, sc in same ch-7 loop, ch 7, sc in next ch-7 loop 11 times, ch 7, sl st to first sc. (12 sc, 12 ch-7 loops) Fasten off.
The Rnd 18 sc sit at the peaks of the Rnd 17 loops, so the two rounds make a diamond lattice.
Closing Round
Rnd 19 (conversion): Join Color A in any Rnd 18 sc. Ch 1, sc in same st, 5 sc in next ch-7 loop, sc in next sc, 5 sc in next ch-7 loop 11 times, sl st to first sc.
Count: 12 sc (1 per existing sc) + 60 sc (5 per loop) = 72 sts.
Working 5 sc into each 7-chain loop pulls the lattice slightly snug, so the top stays the same width as the base. Do not fasten off.
Fern Sprigs (Make 24)
Use Color A and leave a 12 in (30.5 cm) tail for sewing.
Ch 8.
Side 1 (working down the chain): Sl st in 2nd ch from hook, Leaf (this is the tip leaf). Sl st in next 2 ch, Leaf twice. Sl st in next 2 ch. You are now at the base of the stem.
Side 2 (working up the free loops of the chain): Sl st in next 3 ch, Leaf. Sl st in next 2 ch, Leaf. Sl st in last 2 ch. Fasten off.
Each sprig has 5 leaflets: 1 at the tip and 2 on each side, mirrored across the stem. It measures about 2 in (5.1 cm) long and 1.5 in (3.8 cm) wide.
Straps (Make 2)
Use Color B.
Foundation: Ch 5.
Row 1: Sc in 2nd ch from hook and in each ch across, turn. (4 sts)
Rows 2–72: Ch 1, sc in BLO of each st across, turn. (4 sts)
Fasten off and leave a 24 in (61.0 cm) tail. Each strap measures 1 in (2.5 cm) wide by 16 in (40.6 cm) long. The BLO rows give the strap a ridged, cord-like texture.
Make All Pieces
- Color A: 2 basket bodies (Rnds 1–16, 19, 20 and 22) and 24 fern sprigs
- Color B: 2 lattice sections (Rnds 17–18), 2 arch rounds (Rnd 21) and 2 straps
Layout grid:
        [ RING ]
       /        \
   strap        strap
     |            |
   [ UPPER BASKET ]   12 sprigs
     |            |
   strap        strap
     |            |
   [ LOWER BASKET ]   12 sprigs
Joining
Sewing the Sprigs
Count the stitches of Rnd 16. The center of each Rnd 17 loop sits above the 3rd skipped stitch. Pin one sprig there, with the stem base at Rnd 13 and the tip just below Rnd 19.
Each sprig lines up under one Rnd 18 sc, so it sits centered in its lattice cell. Sew the stem down with small backstitches through the wall stitches. Then tack each leaflet tip with one stitch. Leave the leaf edges free so they stay raised.
Sew 12 sprigs per basket. They sit 1.5 in (3.8 cm) apart, because 18 in ÷ 12 = 1.5 in (45.7 cm ÷ 12 = 3.8 cm).
Sewing the Straps
Mark these points on each strap with markers or pins:
– 2 in (5.1 cm) from the top: the fold
– 5.5 in (14.0 cm) below the fold: the free upper section
– 3.5 in (8.9 cm) below that: the upper basket section
– 3.5 in (8.9 cm) below that: the gap
– The last 1.5 in (3.8 cm): the lower basket section
These add up to 16 in (40.6 cm).
- Wrap the top 2 in (5.1 cm) of each strap around the ring and whipstitch it to itself, 4 sts to 4 sts.
- Choose the sl st above any shell gap on the upper basket. Count 6 scallop repeats around to find the point directly opposite. These are your two strap positions, 180° apart.
- Center each strap over its point on the outside wall. Whipstitch both long edges from the rim down 3.5 in (8.9 cm), going through every row edge of the strap and one wall stitch per row.
- Let 3.5 in (8.9 cm) of strap hang free. Then sew the last 1.5 in (3.8 cm) to the lower basket at the matching opposite points, using the same method.
Tension: Sew firmly but don’t pull, or the wall will pucker. The strap should lie flat against the basket.
Size checkpoint: Hang the holder before you weave in the ends. The length from the ring top to the lower basket bottom should be about 19 in (48.3 cm), and both baskets should hang level.
Border (Top Edging)
Work these rounds after Rnd 19 on each basket.
Edging gauge: one 6-st repeat = 1.5 in (3.8 cm). There are 12 repeats around, which is 18 in (45.7 cm). On a round basket, the front half and the back half each count as one “side” of 6 repeats.
Rnd 20 (shells): Continuing with Color A, ch 1, sc in first st, sk 2 sts, Shell in next st, sk 2 sts, sc in next st 11 times, sk 2 sts, Shell in next st, sk 2 sts, sl st to first sc. Fasten off.
Count: 12 shells + 12 sc = 72 sts (60 dc + 12 sc). That is 6 shells per half.
Rnd 21 (mint arches): Join Color B in the 3rd dc of any shell. Ch 1, sc in same st, ch 6, sc in 3rd dc of next shell 11 times, ch 6, sl st to first sc. Fasten off.
Count: 12 sc and 12 ch-6 arches, with 6 arches per half.
Rnd 22 (scalloped edge): Join Color A in any Rnd 21 sc. Sl st in same st, (sc, hdc, 5 dc, hdc, sc) in next ch-6 arch, sl st in next sc 11 times, (sc, hdc, 5 dc, hdc, sc) in last arch, sl st to first sl st. Fasten off.
Count: 12 sl st (1 per existing sc) + 108 scallop sts (9 per arch) = 120 sts. That is 60 per half.
Why the math works: 72 divides evenly by 6, so each shell repeat uses exactly 6 stitches and there are no partial repeats. Each arch spans one shell repeat, so Rnds 21 and 22 keep the same 12 repeats. With 12 repeats, the strap points can sit at exactly opposite positions, 6 repeats apart.
Final Blocking
- Weave in all ends except the strap tails. Leave those until after you test-hang the holder.
- Lightly mist each basket with water.
- Fit each basket over a 5.5 in (14.0 cm) round container, upside down. Smooth the base flat and pull the wall straight.
- Pin the scallops of Rnd 22 so they point evenly outward.
- Press each sprig flat with your fingers and lift the leaflet tips slightly.
- Let the baskets dry completely, about 24 hours.
- Lay the straps flat and steam them lightly. Do not stretch them.
- Hang the holder, check that it is level, and then weave in the last tails.
Final Quality-Control Checklist
- [ ] Each base has 72 sts and measures 5.5 in (14.0 cm) across.
- [ ] Each basket has 12 lattice loops in Rnds 17 and 18.
- [ ] Rnd 19 has 72 sts.
- [ ] Each basket has 12 shells, 12 arches and 12 scallops.
- [ ] All 24 sprigs are centered in their cells, with leaf tips tacked.
- [ ] The straps are 16 in (40.6 cm) long and 4 sts wide.
- [ ] The straps sit exactly opposite each other on both baskets.
- [ ] The total hanging length is about 19 in (48.3 cm).
- [ ] A toilet roll drops in easily.
Troubleshooting
The base cups or ruffles: Your tension is off. Cupping means it’s too tight, so go up a hook size. Ruffling means it’s too loose, so go down one size.
The lattice sags: Your chains are too loose. Work them on a hook 0.5 mm smaller, or change to ch 6 in Rnds 17–18. Keep 5 sc per loop in Rnd 19.
Rnd 19 flares outward: Work 4 sc per loop instead, which gives 12 + 48 = 60 sts. Then use a 5-st repeat in Rnd 20: sk 1, Shell, sk 2, sc. Only do this if needed.
The scallops curl: Steam-block Rnd 22 flat while it is pinned.
The holder tilts: One strap section is longer than the other. Re-sew the strap so the two sides match.
The sprigs twist: Backstitch the full length of each stem, not just the ends.
Care
Hand wash in cool water with mild soap. Reshape over the blocking container and let it dry flat.
Final Notes
Each measurement depends on the one before it. A 16-sc gauge gives a 72-st base that is 5.5 in (14.0 cm) across. That makes an 18 in (45.7 cm) wall with 12 repeats of 6 sts, so each lattice cell and fern sprig takes up 1.5 in (3.8 cm). The wall reaches 2.6 in (6.6 cm) before the edging and 4 in (10.2 cm) after it. Two 16 in (40.6 cm) straps then hang both baskets to a total length of 19 in (48.3 cm). If you check each step as you go, the finished holder will hang level and hold its shape.
Happy crocheting!