

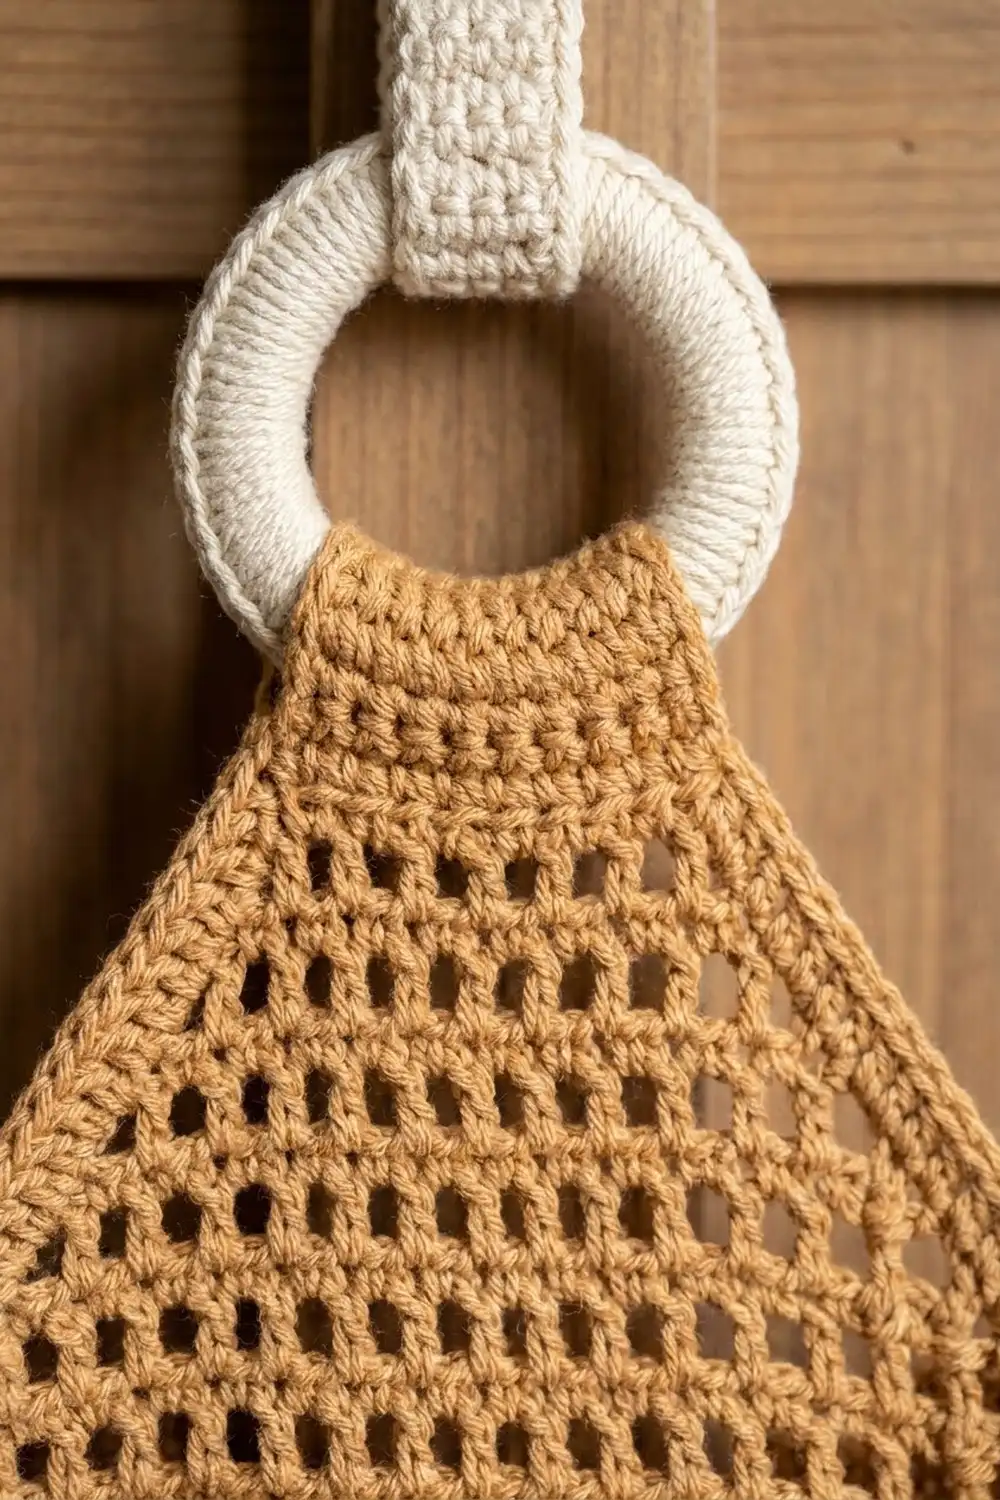
This hanging organizer has three oval baskets stacked down a filet mesh back panel. It hangs from a covered ring and holds spare toilet rolls, washcloths or small toiletries. Each basket has a solid oatmeal base, an open diamond lattice wall and thick cream bands at the bottom and top.
The bases, lattice walls and mesh panel are warm tan (oatmeal). The basket bands and the ring cover are soft cream. The style is calm and natural, like simple macramé, and it suits a neutral bathroom.
The pattern uses US crochet terms. The finished organizer is about 10 in (25.4 cm) wide across the baskets and about 26 in (66.0 cm) long including the ring. Each basket is 10 in (25.4 cm) long, 5 in (12.7 cm) deep and 5 in (12.7 cm) tall.
You will make five pieces:
– Three baskets, worked in joined rounds from an oval base
– One mesh panel, worked in rows from the bottom up, with a tapered top
– One cream-covered ring
You sew the baskets to the panel, add a single crochet edging to the panel and fold the panel tip around the ring.
Finished Size and Construction
- Finished size: about 10 in x 26 in (25.4 cm x 66.0 cm) including the ring
- Skill level: Intermediate
- Terminology: US
- Yarn weight: Worsted (#4) cotton
- Hook: 4.5 mm (US 7)
- Number of pieces: 5 (3 baskets, 1 back panel, 1 covered ring)
- Layout: 1 column of 3 baskets, evenly spaced on the panel
- Piece size: basket 10 in x 5 in x 5 in (25.4 cm x 12.7 cm x 12.7 cm); ring 3 in (7.6 cm) across
- Panel size before border: 8 in x 24 in (20.3 cm x 61.0 cm)
- Border depth: 0.25 in (0.6 cm). The bordered panel is 8.5 in x 24.5 in (21.6 cm x 62.2 cm) before folding.
Materials
Choose a smooth, firm worsted-weight cotton or cotton blend at about 170 m per 100 g. Cotton gives the baskets more body than acrylic and copes well with bathroom humidity. Avoid fluffy or very soft yarn, because the lattice will sag.
- Color A, tan/oatmeal: 250 g (about 425 m) for the bases, lattice walls and panel
- Color B, cream: 100 g (about 170 m) for the basket bands and ring cover
These quantities include a margin of about 25%. You will use roughly 182 g of A and 67 g of B.
Tools:
– 4.5 mm (US 7) crochet hook
– One 3 in (7.6 cm) metal or plastic ring
– Locking stitch markers (at least 4)
– Tapestry needle and scissors
– Measuring tape
– Rust-proof pins and a blocking mat
Abbreviations (US Terms)
- ch: chain
- sl st: slip stitch
- sc: single crochet
- dc: double crochet
- BLO: back loop only
- sk: skip
- sp: space
- st(s): stitch(es)
- rep: repeat
- RS: right side
Special stitch: mesh square. One mesh square is (ch 1, sk 1, dc in next dc). Each square is 0.5 in (1.3 cm) wide and one row tall.
Special stitch: lattice loop. One lattice loop is (ch 5, sc in the next anchor). When you stack rounds of these loops, they form the diamond net.
Gauge and Checkpoints
- Single crochet: 16 sts and 16 rnds = 4 in (10.2 cm)
- Mesh: 8 squares and 8 rows = 4 in (10.2 cm)
- Lattice: 1 loop repeat = 1 in (2.5 cm) wide; 5 lattice rounds = 3.5 in (8.9 cm) tall
Make one basket first and check it before you start the others.
Checkpoints:
1. Base after Rnd 6: about 8 in x 3 in (20.3 cm x 7.6 cm).
2. Base after Rnd 10: 10 in x 5 in (25.4 cm x 12.7 cm), lying flat.
3. Finished basket: 5 in (12.7 cm) tall.
4. Panel after Row 8: 8 in (20.3 cm) wide and 4 in (10.2 cm) tall.
If your pieces are too big, go down to a 4.0 mm hook. If they are too small, go up to 5.0 mm. Match the mesh width carefully, because the sewing in the Joining section depends on it.
Basket (Make 3)
Base
With A, ch 23.
Rnd 1: Sc in 2nd ch from hook, sc in next 20 ch, 3 sc in last ch. Working along the other side of the foundation, sc in next 20 ch, 2 sc in last ch (the same ch as the first sc). Join with sl st to first sc. (46 sts)
Rnd 2: Ch 1, 2 sc in first st, sc in next 20 sts, 2 sc in each of next 3 sts, sc in next 20 sts, 2 sc in each of last 2 sts; join. (52 sts)
Rnds 3–10: Ch 1, sc in first X sts, 2 sc in next st, sc in next 20 sts, [sc in next X sts, 2 sc in next st] 3 times, sc in next 20 sts, [sc in next X sts, 2 sc in next st] twice; join. X is the round number minus 2 (X = 1 on Rnd 3, X = 8 on Rnd 10).
Each round adds 6 sts, 3 on each curved end. Round totals:
– Rnd 3: 58
– Rnd 4: 64
– Rnd 5: 70
– Rnd 6: 76
– Rnd 7: 82
– Rnd 8: 88
– Rnd 9: 94
– Rnd 10: 100
The two straight sides stay at 20 sts each, so the base keeps its oval shape. Fasten off A.
Bottom Band
Rnd 11 (conversion): Join B in any st. Ch 1, sc in BLO of each st around; join. (100 sts: 100 worked 1-per-st + 0 added) The unworked front loops make a crisp fold where the wall turns up.
Rnd 12: Ch 1, sc in each st around; join. (100 sts) Fasten off B.
Lattice Wall
Rnd 13: Join A in any st. Ch 1, sc in same st, ch 5, sk next 3 sts, sc in next st; rep from * 23 more times, ch 5, sk last 3 sts; join to first sc. (25 sc, 25 ch-5 loops)*
Each repeat uses 4 sts, and 25 x 4 = 100, so the loops are spread evenly.
Rnd 14: Sl st in next 3 ch (the center of the first loop), ch 1, sc in same ch, ch 5, sc in 3rd ch of next loop; rep from * 23 more times, ch 5; join to first sc. (25 loops)*
Rnds 15–17: Rep Rnd 14. (25 loops each)
Anchoring each sc in the center of a loop below makes the diamonds. Fasten off A.
Top Rim
Rnd 18 (conversion): Join B in any sc. Ch 1, sc in next sc, 3 sc in next ch-5 loop; rep from * 25 times; join. (100 sts: 25 worked 1-per-sc + 75 worked into the loops)*
Rnds 19–21: Ch 1, sc in each st around; join. (100 sts)
Fasten off and weave in the ends. The basket should be 5 in (12.7 cm) tall:
– Bottom band: 0.5 in (1.3 cm)
– Lattice: 3.5 in (8.9 cm)
– Rim: 1 in (2.5 cm)
Back Panel (Make 1)
Rectangle
With A, ch 36.
Row 1: Dc in 6th ch from hook (the skipped ch count as dc, ch 1 and a skipped ch), ch 1, sk next ch, dc in next ch; rep from * across, turn. (16 squares, 17 dc)*
Row 2: Ch 4 (counts as dc and ch 1), sk ch-1 sp, dc in next dc, ch 1, sk ch-1 sp, dc in next dc; rep from * across, working the last dc in the 4th ch of the turning ch-5, turn. (16 squares)*
Rows 3–38: Rep Row 2, working the last dc in the 3rd ch of the turning ch-4. (16 squares each row)
The rectangle now measures 8 in x 19 in (20.3 cm x 48.3 cm). Do not fasten off.
Tapered Top
Rows 39–45 (decrease rows): Sl st in next ch-1 sp and next dc, ch 4 (counts as dc and ch 1), sk ch-1 sp, dc in next dc, *ch 1, sk ch-1 sp, dc in next dc; rep from * until 1 square remains. Leave the last square unworked and turn.
Each row loses 1 square at each end. Row totals:
– Row 39: 14 squares
– Row 40: 12 squares
– Row 41: 10 squares
– Row 42: 8 squares
– Row 43: 6 squares
– Row 44: 4 squares
– Row 45: 2 squares
Rows 46–48 (neck): Ch 4, sk ch-1 sp, dc in next dc, ch 1, sk ch-1 sp, dc in 3rd ch of turning ch, turn. (2 squares each row)
Fasten off. The panel measures 8 in x 24 in (20.3 cm x 61.0 cm) from the bottom edge to the tip.
Covered Ring (Make 1)
Join B with a sl st around the ring. Ch 1, then work sc around the ring, pushing the sts together as you go, until the ring is completely covered (about 60 sc). Join with sl st to first sc. Fasten off, leaving a 6 in (15.2 cm) tail.
Make All Pieces
- 3 baskets, each with 10 rnds A + 2 rnds B + 5 rnds A + 4 rnds B
- 1 panel in A only
- 1 ring in B only
Layout on the panel, top to bottom:
Rows 46–48   neck, folded around ring
Rows 39–45   tapered triangle
Rows 29–38   BASKET 1
Rows 25–28   gap, 2 in (5.1 cm)
Rows 15–24   BASKET 2
Rows 11–14   gap, 2 in (5.1 cm)
Rows 1–10    BASKET 3
Each basket zone is 10 rows = 5 in (12.7 cm), the same as the basket height. 3 x 10 + 2 x 4 = 38 rows, which fills the rectangle exactly.
Joining
Use A and a tapestry needle. Attach each basket with two whipstitched seams: one at the top rim (Rnd 21) and one at the bottom band (Rnd 12).
Find the back stitches. Lay a basket flat and mark the center stitch of one straight side on Rnd 21. Count 16 sts to each side of the center and mark the ends, giving 32 back sts. Mark the matching 32 sts on Rnd 12 directly below.
Stitch-to-stitch logic. The panel is 16 squares wide, and you sew 2 rim sts to each square: 16 x 2 = 32. At 16 sc per 4 in, 32 sts is 8 in (20.3 cm), the same as the panel width. The back of the basket lies flat without stretching or puckering.
Sew the rim. Place Basket 1 with its top edge at Row 38. Whipstitch each pair of marked rim sts around the dc and ch-1 sp of one square in Row 38. Work from one side of the panel to the other.
Sew the bottom band. Sew the 32 marked Rnd 12 sts to Row 29 in the same way.
Repeat for Basket 2 (rim at Row 24, band at Row 15) and Basket 3 (rim at Row 10, band at Row 1).
Tension. Pull each whipstitch snug but not tight. If the mesh squares narrow or the rim dimples, you are pulling too hard. Leave the side edges of the panel free for the border.
Checkpoint: Each gap between baskets shows 4 mesh rows, 2 in (5.1 cm). Basket 3 sits flush with the bottom edge of the panel.
Border
Border gauge: 16 sc = 4 in (10.2 cm), or 4 sc per inch.
Rnd 1: With RS facing, join A at the bottom right corner. Ch 1 and work around the panel, moving the baskets out of the way:
- Bottom: 3 sc in first foundation st, sc in next 31 sts, 3 sc in last st. (37 sc: 33 worked 1-per-st + 4 added at the corners)
- Left side: 2 sc around each row end of Rows 1–38. (76 sc)
- Left diagonal: 1 sc in the exposed ch-1 sp of the step, 2 sc around the end of the next row; rep from * 7 times. (21 sc)*
- Left neck: 2 sc around each row end of Rows 46–48. (6 sc)
- Top: 3 sc in first dc, sc in next 3 sts, 3 sc in last dc. (9 sc: 5 worked 1-per-st + 4 added at the corners)
- Right neck: Work as for the left neck. (6 sc)
- Right diagonal: 2 sc around the row end, 1 sc in the exposed ch-1 sp of the step; rep from * 7 times. (21 sc)*
- Right side: 2 sc around each row end of Rows 38–1. (76 sc)
Join to first sc. (252 sc total: 37 + 76 + 21 + 6 + 9 + 6 + 21 + 76) Fasten off.
Why the math works:
– Sides: Each dc row is 0.5 in (1.3 cm) tall, so 2 sc per row end gives 4 sc per inch. This matches the border gauge.
– Diagonals: Each step is 0.5 in across and 0.5 in up, about 0.7 in (1.8 cm) of edge, so 3 sc per step keeps the edge flat.
– Bottom: The 33 bottom sts cover 8 in (20.3 cm), close to the 32 sts the gauge calls for. The corner increases turn the corners cleanly.
Attach the ring: Pass Rows 47–48 through the covered ring from front to back. Fold them down behind Row 46 and sew the top edge to the back of Row 45 with A.
Final Blocking
- Spray the whole organizer until it is damp.
- Lay the panel flat, RS up, and pin it to 8.5 in (21.6 cm) wide, keeping the mesh squares square.
- Stuff each basket with a folded towel so it holds its oval shape and 5 in (12.7 cm) height.
- Open each lattice diamond with your fingers so the net looks even.
- Pin the cream rims straight and level.
- Let it dry completely, at least 24 hours, before you remove the pins and stuffing.
Final Quality-Control Checklist
- Each base has 100 sts and lies flat at 10 in x 5 in (25.4 cm x 12.7 cm).
- Each basket has 25 lattice loops per round and stands 5 in (12.7 cm) tall.
- The panel is 16 squares wide in Rows 1–38 and tapers to 2 squares at Row 45.
- Each basket is sewn with 32 sts at the rim and 32 sts at the band.
- The gaps between baskets are 2 in (5.1 cm).
- The border has 252 sc and lies flat.
- The ring is fully covered.
- All ends are woven in securely.
Troubleshooting
Base ruffles: Go up a hook size and check that each round adds exactly 6 sts.
Base cups: Go down a hook size and check that you have not skipped an increase.
Lattice looks floppy: Use a firmer cotton or work the chains more tightly.
Basket tips forward when full: Add a third seam halfway up the lattice, catching 4 lattice anchors to the panel.
Panel is wider than the basket backs: Your mesh gauge is loose. Rework the panel with a smaller hook.
Diagonal edge ripples: Work 2 sc per step instead of 3.
Care
Hand wash in cool water with mild soap and press out the water in a towel. Reshape the baskets and dry flat. Do not tumble dry.

Final Notes
The measurements build on each other:
– The base grows to 100 sts at 10 in x 5 in (25.4 cm x 12.7 cm).
– The wall keeps those 100 sts through the bands, with 25 lattice loops, and stands 5 in (12.7 cm) tall.
– The panel is 16 squares, 8 in (20.3 cm) wide, and gives each basket a 10-row zone that matches its height.
– Sewing 32 rim sts across 16 squares makes the baskets lie flat.
– The 252-st border brings the panel to 8.5 in (21.6 cm).
If your gauge matches at each checkpoint, the organizer will hang straight and hold its shape.
Happy crocheting!