
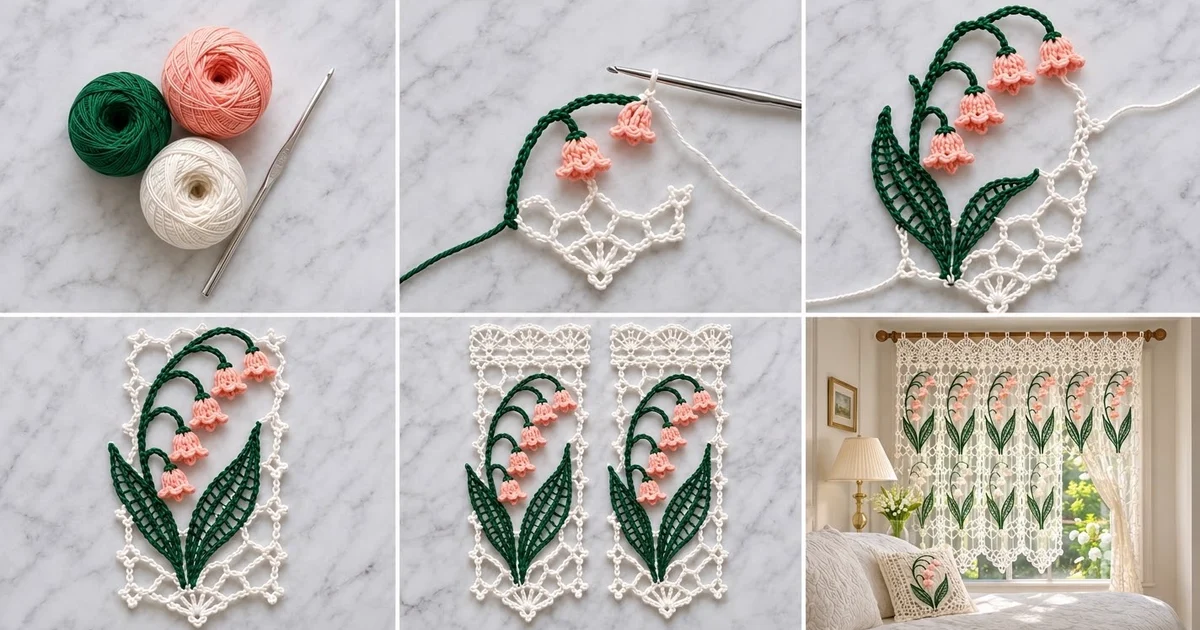
The Valley Bells Lace Panel is a rectangle of white picot net with a lily of the valley spray sewn on top. A forest-green stem rises from the bottom center and arches to the right, carrying five peach bells. Two openwork leaves frame the base.
The colors are crisp white, deep forest green and soft peach. The style is inspired by Irish lace appliqué, but every part uses basic stitches. All terms are US crochet terms.
The finished panel measures 6.5 x 10 in (16.5 x 25.4 cm). A small fan at the bottom center adds 0.5 in (1.3 cm), so the panel is 10.5 in (26.7 cm) long at the point.
You work the net flat in rows and then add a three-round picot border with the fan. Next you make the stem, five bells and two leaves separately, and finally you sew them onto the panel.
Finished Size and Construction
- Finished size: 6.5 x 10 in (16.5 x 25.4 cm); 10.5 in (26.7 cm) at the fan point
- Skill level: Intermediate
- Terminology: US crochet terms
- Yarn weight: Sport weight (#2 fine) mercerized cotton
- Hook: 3.25 mm (US D/3)
- Number of pieces: One background panel plus 8 appliqué parts (1 stem, 5 bells, 2 leaves). No panels are joined.
- Layout: Single rectangle, portrait orientation
- Panel size before border: 5.5 x 9 in (14.0 x 22.9 cm)
- Border depth: 0.5 in (1.3 cm) per side, plus a 0.5 in (1.3 cm) fan at bottom center
Materials
Use a smooth mercerized cotton. It gives the net and bell edges sharp definition and blocks flat. Fuzzy or stretchy yarns will blur the lace.
- White: 40 g, about 124 m (net and border)
- Forest green: 15 g, about 47 m (stem and leaves)
- Peach: 8 g, about 25 m (bells)
These quantities include a margin of about 15 percent for swatching and tails.
Tools:
- 3.25 mm (US D/3) crochet hook
- Tapestry needle
- 4 locking stitch markers
- Rust-proof pins and a blocking mat
- Spray bottle with water
- Tape measure
Abbreviations (US Terms)
- ch: chain
- sl st: slip stitch
- sc: single crochet
- hdc: half double crochet
- dc: double crochet
- tr: treble crochet
- FPdc: front post double crochet
- sp: space
- st(s): stitch(es)
- rnd: round
Picot: Ch 3, sl st in 3rd ch from hook.
Back bump: This is the bar on the back of a chain. Slip stitches worked into the back bumps give the stem a rounded, cord-like front.
Gauge and Checkpoints
The border math depends on exact counts, and the appliqué has to fit the panel. Check gauge before you go further.
- Net: 9 ch-5 loops = 5.5 in (14.0 cm) wide; 22 rows = 9 in (22.9 cm) tall
- Stem: 6 ch = 1 in (2.5 cm)
- Bell: about 0.75 in (1.9 cm) tall and wide
Test first: Work Rows 1 to 11 of the panel and measure. Make one bell before you make the rest.
Checkpoints:
- After Row 11: 4.5 in (11.4 cm) tall
- After Row 22: 5.5 x 9 in (14.0 x 22.9 cm)
- After Border Rnd 1: 5.75 x 9.25 in (14.6 x 23.5 cm)
- After Border Rnd 3: 6.5 x 10 in (16.5 x 25.4 cm)
If your piece is too big, use a 3.0 mm hook. If it is too small, use a 3.5 mm hook. Change your hook, not the stitch counts, because every count feeds into the border.
Part 1: Background Net Panel
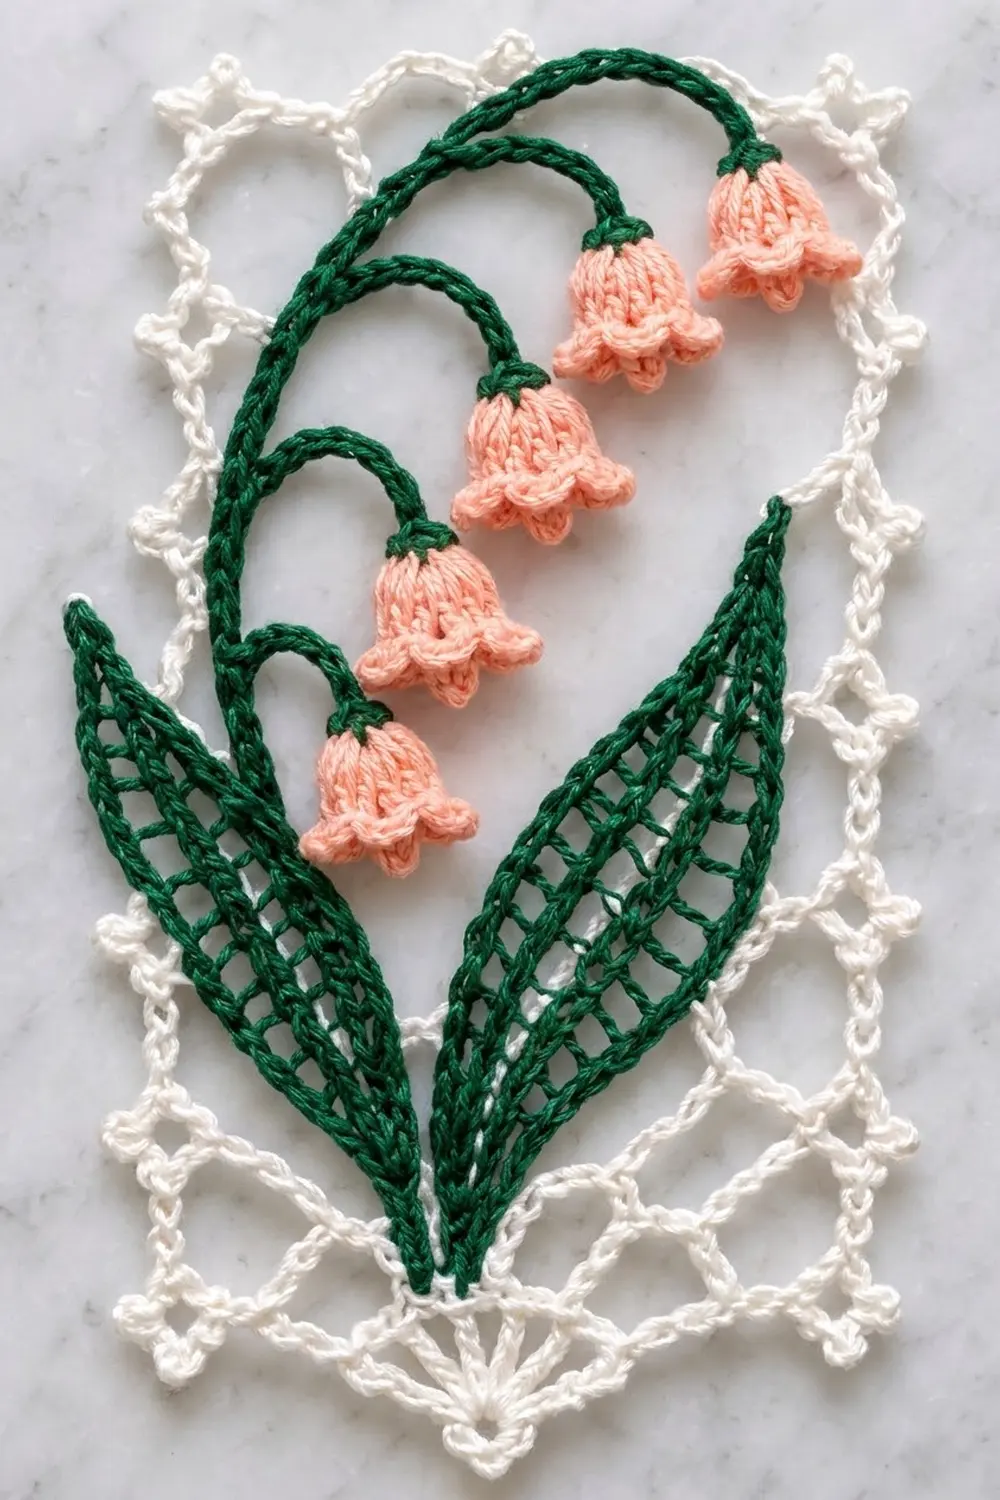
With white, ch 38.
Row 1: Sc in 2nd ch from hook, *ch 5, skip 3 ch, sc in next ch; repeat from * 8 more times. (10 sc, 9 ch-5 loops)
Row 2: Ch 5 (counts as dc + ch 2), turn, sc in first ch-5 loop, *ch 5, sc in next loop; repeat from * 7 more times, ch 2, dc in last sc. (9 sc, 8 ch-5 loops, plus a half loop at each end)
Row 3: Ch 1, turn, sc in first dc, *ch 5, sc in next loop; repeat from * 7 more times, ch 5, sc in 3rd ch of turning ch. (10 sc, 9 ch-5 loops)
Rows 4 to 21: Repeat Rows 2 and 3 nine more times. Row 21 is a Row 3 type row. (10 sc, 9 ch-5 loops)
Row 22 (conversion row): Ch 1, turn, sc in first sc, *3 sc in next loop, sc in next sc; repeat from * 8 more times. (10 sc worked 1-per-sc + 27 sc worked in loops = 37 sc)
Row 22 gives the top a solid edge of 37 sts, which matches the 37 foundation chains at the bottom. Don’t fasten off. Go straight to the Border section.
Part 2: Stem
With green, ch 46.
Tip and first pedicel: Sl st in back bump of 2nd ch from hook and next 3 ch (4 sl st). Ch 8, sl st in back bump of 2nd ch from hook and next 6 ch. (1 pedicel, 7 sl st)
Remaining pedicels: [Sl st in back bump of next 5 ch of main stem, ch 8, sl st in back bump of 2nd ch from hook and next 6 ch] 4 times. (5 pedicels; 24 main-stem ch used)
Base: Sl st in back bump of the remaining 21 ch. (45 sl st along main stem)
Fasten off and leave a 12 in (30.5 cm) tail. The stem is about 7.5 in (19.1 cm) long, and each pedicel is about 1.25 in (3.2 cm). All the pedicels hang from the top 4.5 in (11.4 cm) of the stem, which forms the arch.
Part 3: Bells (Make 5)
With peach, work in continuous rounds and mark the first st of each round.
Rnd 1: Magic ring, 6 sc in ring. (6 sc)
Rnd 2: 2 sc in each st. (12 sc)
Rnd 3: *Sc in next st, FPdc around next st; repeat from * 5 more times. (6 sc + 6 FPdc = 12 sts)
Rnd 4: *Sc in next sc, FPdc around next FPdc; repeat from * 5 more times. (12 sts)
Rnd 5: *2 sc in next sc, FPdc around next FPdc; repeat from * 5 more times. (12 sc + 6 FPdc = 18 sts)
Rnd 6 (petal edge): *Sl st in next st, (hdc, dc) in next st, (dc, hdc) in next st; repeat from * 5 more times, join with sl st to first sl st. (6 sl st + 24 petal sts = 30 sts, 6 petals)
The FPdc columns form the vertical ribs. Rnd 6 makes the flared, scalloped mouth. Fasten off and leave an 8 in (20.3 cm) tail. Pull the ring closed.
Part 4: Leaves (Make 2)
With green, ch 32. You’ll work down one side of the chain, around the base and back up the other side.
Rnd 1, side 1: Sl st in 2nd ch from hook, sc in next 2 ch, hdc in next 2 ch, dc in next 2 ch, *ch 2, skip 1 ch, tr in next ch; repeat from * 8 more times, dc in next 2 ch, hdc in next 2 ch, sc in next ch. (21 sts, 9 ch-2 sps)
Base: (Sc, ch 2, sc) in last ch.
Side 2 (in free loops): Sc in next ch, hdc in next 2 ch, dc in next 2 ch, *tr in next ch, ch 2, skip 1 ch; repeat from * 8 more times, dc in next 2 ch, hdc in next 2 ch, sc in next 2 ch, sl st in last ch. (21 sts, 9 ch-2 sps)
The tr sts on both sides share chains, so the spaces line up across the center vein. Rnd 1 total: 44 sts, 18 ch-2 sps, 1 base ch-2 sp.
Rnd 2: Ch 1. Work sc in each st and 2 sc in each ch-2 sp along side 1, then 3 sc in the base sp. Work sc in each st and 2 sc in each ch-2 sp along side 2, ch 2 for the tip, and join with sl st to first sc. (44 + 36 + 3 = 83 sc, plus tip ch-2)
Each leaf is about 5 in (12.7 cm) long and 1.25 in (3.2 cm) wide, with a solid outline around an open ladder center.
Part 5: Appliqué Placement
Sew the appliqué after the border is done and the panel has been lightly blocked.
- Lay the panel right side up and mark the 19th foundation ch, which is the bottom center.
- Pin the stem base there, 1 in (2.5 cm) above the bottom edge of the border.
- Run the stem straight up for 3 in (7.6 cm), then curve it up the left half and arch it right. The tip should sit 1 in (2.5 cm) below the top and 1 in (2.5 cm) from the right edge.
- Let the pedicels hang down. Push each pedicel end into the ring of a bell and stitch it in place with the peach tail.
- Tuck both leaf bases against the stem base, angling one leaf up to the left and the other up to the right.
- Whipstitch the stem along its center and the leaves around their outlines. Sew each bell at its top only, so the mouth hangs free.
Border
Border gauge: Rnd 1 adds 0.125 in (0.3 cm) per side, and Rnds 2 and 3 add 0.375 in (1.0 cm). That makes 0.5 in (1.3 cm) per side.
Rnd 1: Continuing from Row 22, ch 1, turn. Along the top, work 3 sc in first st, sc in next 35 sts, 3 sc in last st. Down the side, work 2 sc in each row end (44 sc). Along the bottom foundation, work 3 sc in first ch, sc in next 35 ch, 3 sc in last ch. Up the other side, work 2 sc in each row end (44 sc). Join to first sc. (12 corner sc + 35 + 44 + 35 + 44 = 170 sc)
Counting from corner center to corner center, inclusive, the top and bottom each have 37 sts and each long side has 46 sts.
Rnd 2: Sl st into the next sc (the corner center). Ch 1, (sc, ch 4, sc) in the same st. [Ch 4, skip 2 sts, sc in next st] 11 times, ch 4, skip 2, (sc, ch 4, sc) in corner center. [Ch 4, skip 2 sts, sc in next st] 14 times, ch 4, skip 2, (sc, ch 4, sc) in corner center. Repeat from * to * once more. On the final side, replace the last corner group with a join to the first sc. (12 + 15 + 12 + 15 = 54 side loops + 4 corner loops = 58 ch-4 loops)
Rnd 3: Sl st into the corner loop and ch 1. Work (2 sc, picot, sc, picot, 2 sc) in each corner loop and (2 sc, picot, 2 sc) in each side loop. Skip the sc between loops. Fan: On the bottom edge, between the 6th and 7th loops, work (tr, ch 1) 6 times, then tr, all in the center sc. Join and fasten off. (54 x 4 = 216 sc + 4 x 5 = 20 sc = 236 sc, 62 picots, one 7-tr fan)
Why the math works: Each Rnd 2 loop covers 3 sts. The top and bottom have 36 sts between corner centers, and 36 / 3 = 12 loops. The sides have 45 sts between corner centers, and 45 / 3 = 15 loops. Every side lands exactly on its corner. Because the bottom has 12 loops, the 6th sc falls on the 19th foundation ch, which centers the fan under the stem.
Final Blocking
- Weave in all ends through solid stitches, not through the net.
- Spray the piece until it is evenly damp.
- Pin the corners to a 6.5 x 10 in (16.5 x 25.4 cm) rectangle.
- Pin each corner loop and every third side loop to keep the edges straight.
- Pin the picots outward and the fan into a half circle.
- Open the net loops into even diamonds, flare the bell petals by hand and smooth the leaves flat.
- Let it dry at least 8 hours before unpinning.
Final Quality-Control Checklist
- Panel is 6.5 x 10 in (16.5 x 25.4 cm), and 10.5 in (26.7 cm) at the point
- Row 22 and the foundation both have 37 sts
- Border Rnd 2 has 58 loops
- Fan is centered directly below the stem base
- All 5 bells have 6 even petals and visible ribs
- Both leaves match and lie flat
- Stem arches smoothly without puckering the net
- No ends show on the front
Troubleshooting
Net skews: You’re probably missing the turning chain. End each Row 3 type row in the 3rd ch of the turning ch.
Side edges ruffle: Keep the 44 sc count, but work the row ends more tightly.
Corners cup: Check that each corner has its own ch-4 loop in Rnd 2.
Bells curl inward: Use a hook 0.25 mm larger for Rnds 5 and 6.
Stem twists: Work every sl st into the back bump, then steam lightly.
Leaves bow: Check that each ch-2 sp has exactly 2 sc, then block flat.
Care
Hand wash in cool water with a mild soap. Roll in a towel to press out the water, then lay flat and reshape the picots and bells while damp.
Final Notes
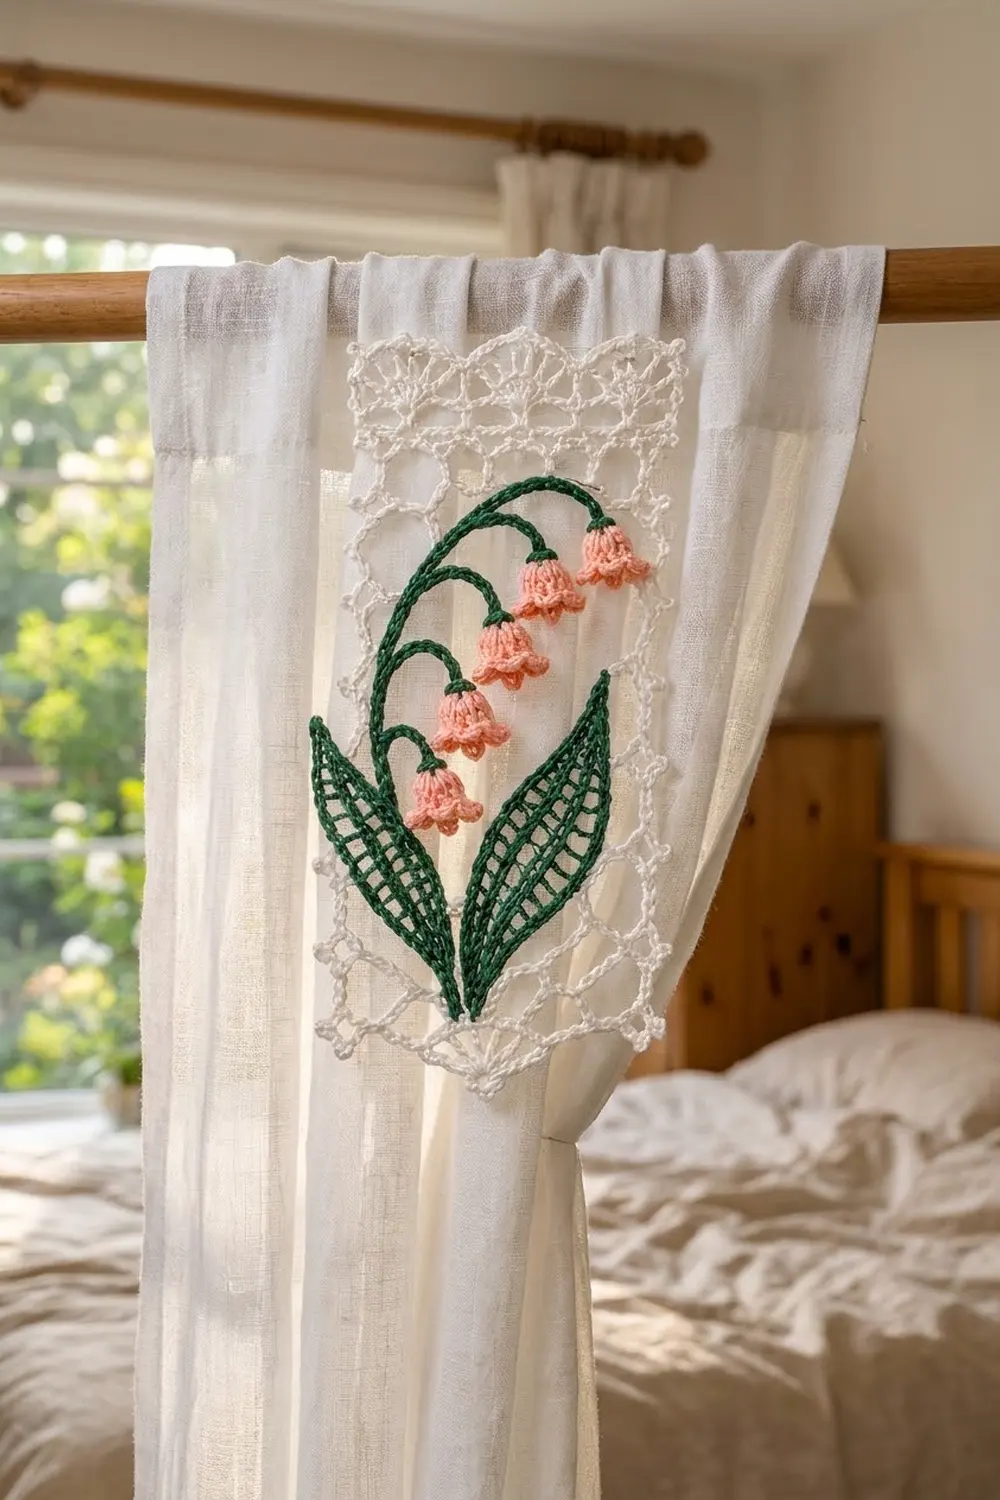
The measurement chain works like this. A 37-st foundation and 22 net rows give 5.5 x 9 in (14.0 x 22.9 cm). Border Rnd 1 sets 37 and 46 sts per side, which divide evenly into 12 and 15 loops. Rnds 2 and 3 bring the panel to 6.5 x 10 in (16.5 x 25.4 cm), and the fan adds 0.5 in (1.3 cm) at the bottom center. If you check gauge at each stage, the stem, bells and leaves will sit exactly where they belong.
Happy crocheting!