
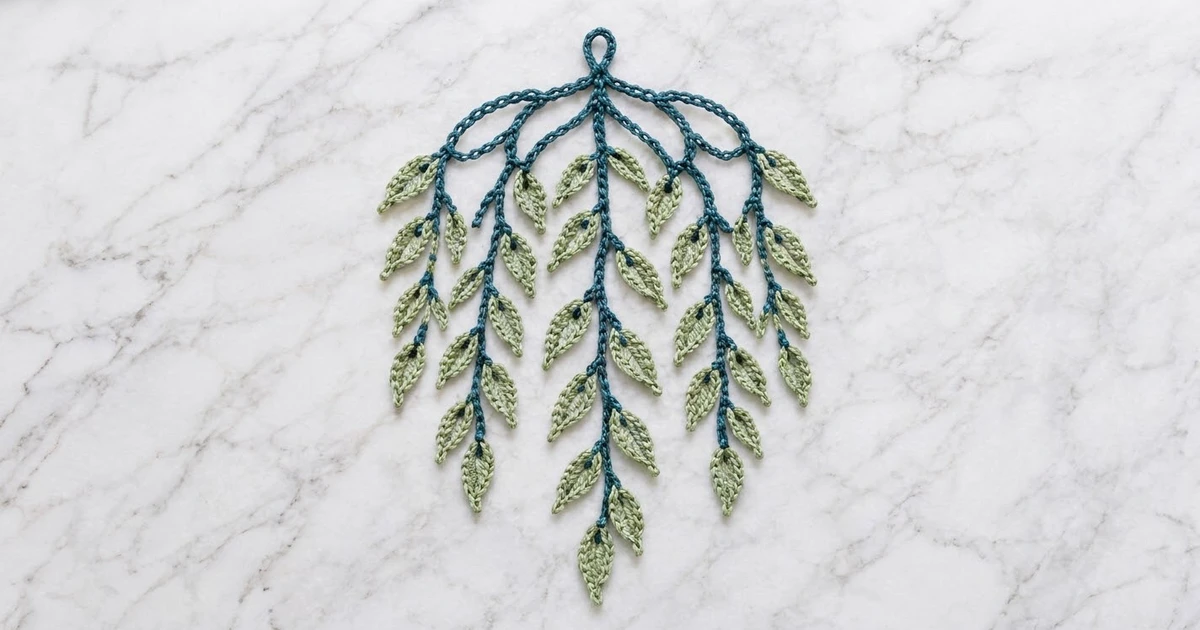
This Weeping Willow Branch Motif is a lacy, freeform piece that looks like one drooping willow bough. Small sage-green leaves hang from twisted teal-blue branches. A neat hanging ring sits at the top, and two canopy arches give the motif its graceful umbrella shape.
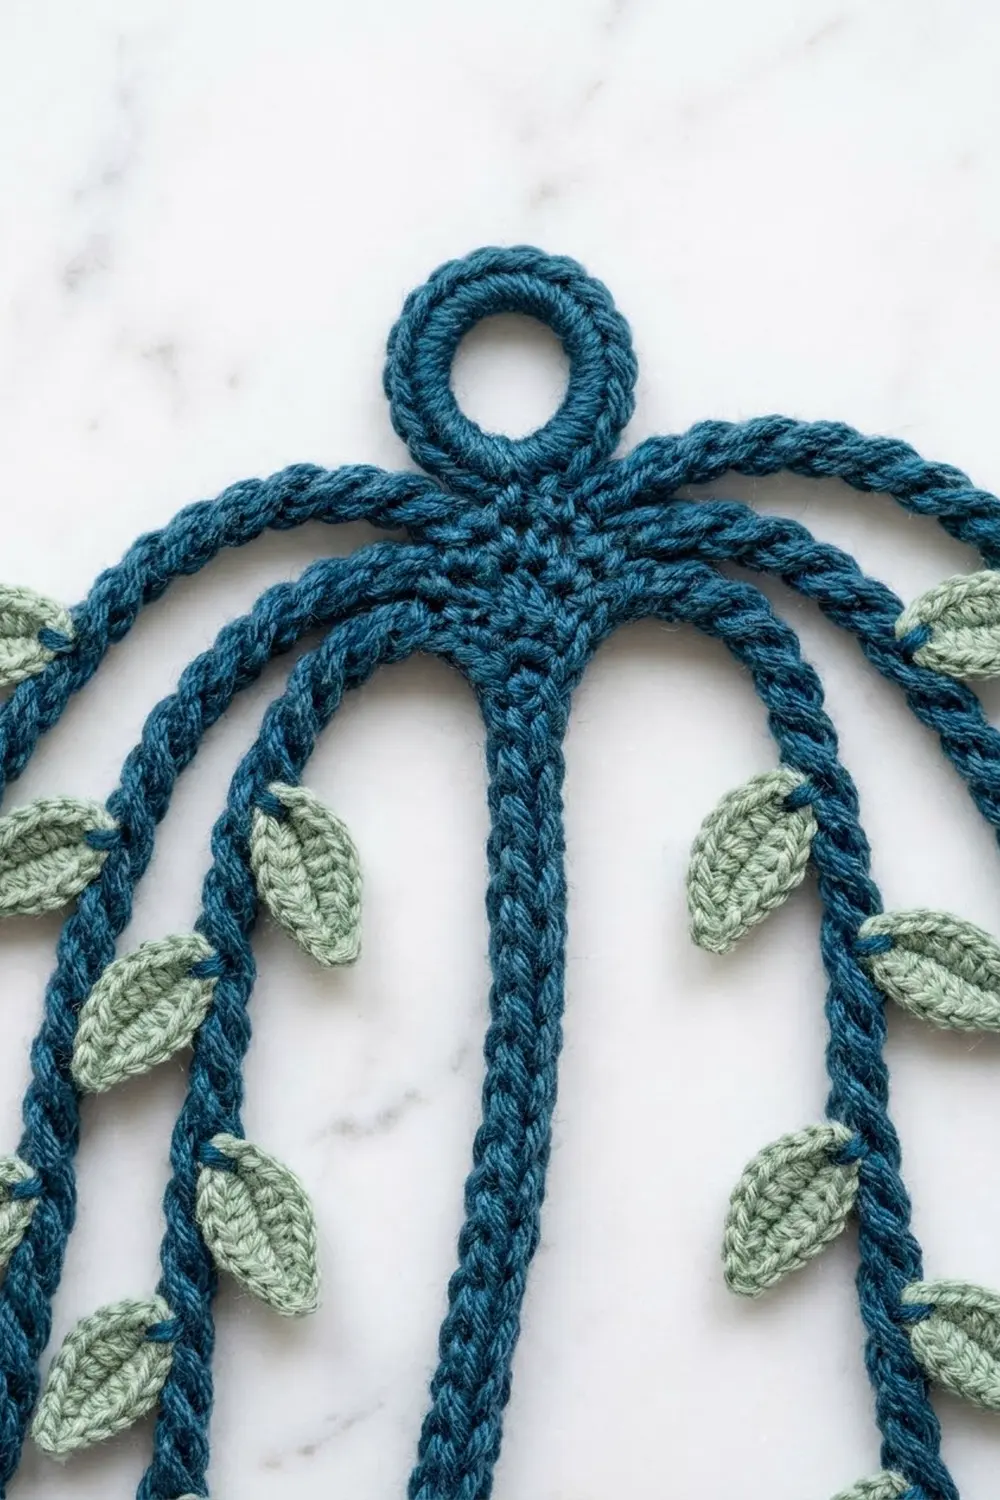
The two-color palette is calm and botanical: deep teal for the structure and soft sage for the foliage. Each leaf has a raised center vein and a pointed tip. A tiny teal stitch at its base attaches it to the branch, which reads like a small bud or node.
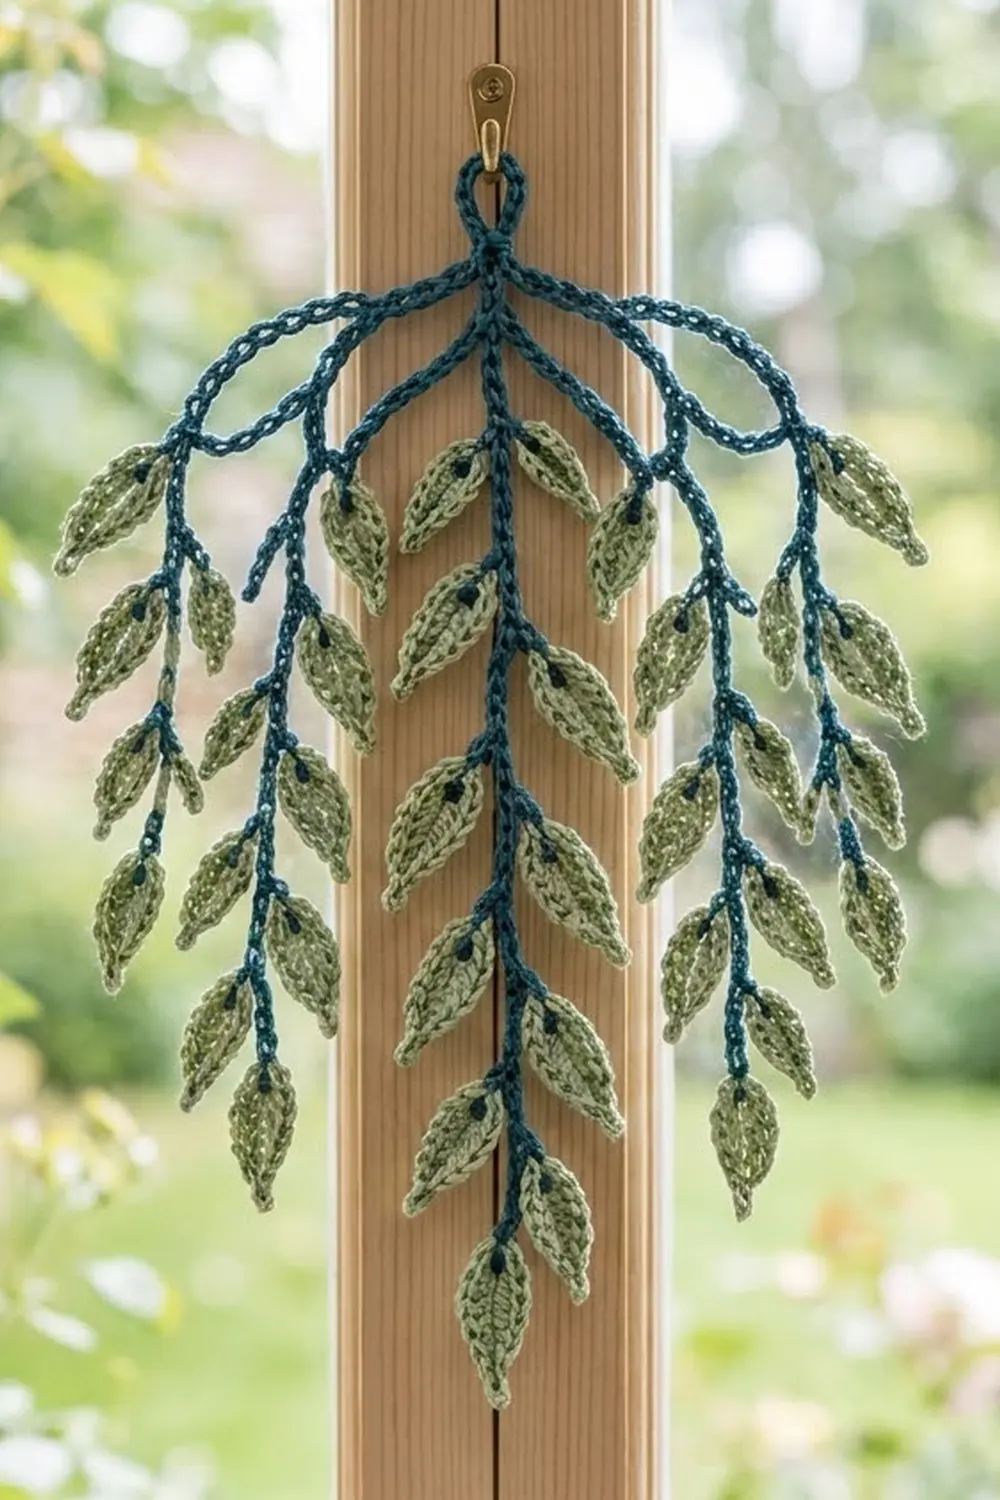
The pattern uses US crochet terms. The finished motif measures about 9 in (22.9 cm) wide by 9.5 in (24.1 cm) tall after blocking. You can hang it on a wall, tack it to a window, or appliqué it onto a pillow or tote.
The construction is simple. First you make 53 small leaves in sage. Then you crochet the teal branches in one continuous pass. You chain down each strand and slip stitch back up it, attaching leaves as you climb. A short edging round wraps the hanging ring to finish.
Finished Size and Construction
- Finished size: 9 in (22.9 cm) wide x 9.5 in (24.1 cm) tall
- Skill level: Intermediate (simple stitches, careful counting)
- Terminology: US crochet terms
- Yarn weight: Fingering / super fine (#1) mercerized cotton
- Hook: 2.5 mm (US B/1–C/2)
- Number of pieces: 1 finished motif (53 leaves attached as you go)
- Layout: hanging ring, 1 central trunk, 2 canopy arches, 6 side strands
- Piece size: 9 in x 9.5 in (22.9 cm x 24.1 cm)
- Size before border: 9 in x 9.25 in (22.9 cm x 23.5 cm)
- Border depth: 0.25 in (0.6 cm), ring wrap only
Materials
Use a smooth mercerized cotton in fingering weight. It gives crisp stitch definition, keeps the leaves flat, and blocks into sharp points. Avoid fuzzy or very stretchy yarn, because the branches would lose their cord look.
- Color A, Teal Blue (branches, ring): 10 g, about 35 m
- Color B, Sage Green (leaves): 25 g, about 85 m
These quantities include a margin of about 25% for gauge swatching and weaving in ends.
Tools:
- 2.5 mm crochet hook
- Tapestry needle
- Stitch markers (at least 6)
- Rust-proof pins and a blocking mat
- Spray bottle with water (optional: light spray starch)
- Ruler or tape measure
- Scissors
Abbreviations (US Terms)
- ch – chain
- sl st – slip stitch
- sc – single crochet
- hdc – half double crochet
- dc – double crochet
- st(s) – stitch(es)
- sp – space
- BB – back bump of a chain (the horizontal bar on the back)
Special stitch – Leaf Join (LJ): Insert your hook through the ch-3 base loop of a leaf, then into the BB of the next chain. Yarn over and pull through everything on the hook. This is one slip stitch that attaches the leaf flush to the branch. It leaves the small teal dot at the leaf base.
Gauge and Checkpoints
Make one leaf and one test cord before starting the full motif.
- Chain gauge: 8 ch = 1 in (2.5 cm), measured relaxed.
- Leaf: 1.25 in (3.2 cm) long x 0.6 in (1.5 cm) wide.
- Test cord: Ch 24, then sl st in the BB of each ch back to the start. It should measure 3 in (7.6 cm).
Checkpoints during the work:
- After the first 5 leaves: all should match the leaf size above within 0.1 in (0.3 cm).
- After the trunk: 7 in (17.8 cm) of cord from ring to the base of the tip leaf.
- After each arch: 6 in (15.2 cm), measured along the curve.
- Strands: inner 5 in (12.7 cm), middle 4 in (10.2 cm), outer 3 in (7.6 cm).
If your pieces are too big, go down to a 2.25 mm hook. If too small, go up to a 2.75 mm hook. Keep the same chain counts and fix the size with the hook only, or the leaf spacing will drift.
Part 1: Leaves (make 53 in Color B)
Each leaf is worked all the way around a short foundation chain. The chain becomes the raised center vein.
Leaf:
Ch 9.
Side 1: Starting in the 2nd ch from the hook, sc in the 1st ch, hdc in the next ch, dc in each of the next 3 ch, hdc in the next ch, sc in the next ch. (7 sts)
Base: In the last ch (the slip-knot end), work (sc, ch 3, sc). The ch-3 is the base loop used to attach the leaf later. (2 sts + ch-3 loop)
Side 2: Working along the opposite side of the foundation chain, sc in the next ch, hdc in the next ch, dc in each of the next 3 ch, hdc in the next ch, sc in the next ch. (7 sts)
Tip: Ch 2, sl st in the first sc of Side 1 to form the point.
Leaf total: 7 + 2 + 7 = 16 sts, plus the ch-3 base loop and the ch-2 tip.
Fasten off and weave in both ends now. The leaf should measure 1.25 in (3.2 cm) x 0.6 in (1.5 cm). Make 53 leaves in total. Keep them in a small bag so none go missing.
Leaf allocation:
- Central trunk: 11 leaves
- Inner strands: 2 x 9 = 18 leaves
- Middle strands: 2 x 7 = 14 leaves
- Outer strands: 2 x 5 = 10 leaves
- Total: 11 + 18 + 14 + 10 = 53 leaves
Part 2: Hanging Ring (Color A)
Ch 16. Sl st in the first ch to form a ring. Do not fasten off.
Number the ring chains 1 to 16, starting at the join (ch 1). Ch 1 is the bottom of the ring. Place markers in ch 3 and ch 15. The ring circumference is 2 in (5.1 cm).
Part 3: Central Trunk (Color A)
Every strand uses the same method: chain down, attach the tip leaf, then slip stitch back up through the back bumps while attaching side leaves.
- From ch 1 of the ring, ch 56.
- Sl st through the base loop of one leaf. This is the tip leaf, and it hangs straight down.
- Climb: sl st in the BB of each of the next 3 ch. Work an LJ with a new leaf laid to the left. (4 ch used)
- Sl st in the BB of the next 3 ch, then LJ with a new leaf laid to the right. (4 ch used)
- Repeat Steps 3–4 until 10 side leaves are attached, alternating left and right. That uses 40 ch.
- Sl st in the BB of each of the remaining 16 ch. These form the bare upper stem.
- Sl st into ring ch 1.
Check: 40 + 16 = 56 ch climbed. The trunk holds 1 tip leaf + 10 side leaves = 11 leaves and measures 7 in (17.8 cm).
The chain-and-slip-stitch return twists the cord a little, which gives the branch its texture.
Part 4: Right Canopy Arch and Strands (Color A)
Sl st along the ring to the marked ch 3.
Arch: Ch 48. Let the chain curve outward and downward. Place a marker in the 16th ch and the 32nd ch from the ring.
Outer strand (at the arch end):
- Ch 24, then sl st through the base loop of a tip leaf.
- Climb: (sl st in BB of next 3 ch, LJ) 4 times, alternating left and right. (16 ch, 4 leaves)
- Sl st in the BB of the remaining 8 ch to return to the arch end.
Check: 16 + 8 = 24 ch. 1 tip + 4 side = 5 leaves. Length 3 in (7.6 cm).
Return along the arch: Sl st in the BB of the next 16 arch ch to reach the 32nd-ch marker.
Middle strand:
- Ch 32, then sl st through the base loop of a tip leaf.
- Climb: (sl st in BB of next 3 ch, LJ) 6 times, alternating. (24 ch, 6 leaves)
- Sl st in the BB of the remaining 8 ch.
Check: 24 + 8 = 32 ch. 1 tip + 6 side = 7 leaves. Length 4 in (10.2 cm).
Return along the arch: Sl st in the BB of the next 16 arch ch to reach the 16th-ch marker.
Inner strand:
- Ch 40, then sl st through the base loop of a tip leaf.
- Climb: (sl st in BB of next 3 ch, LJ) 8 times, alternating. (32 ch, 8 leaves)
- Sl st in the BB of the remaining 8 ch.
Check: 32 + 8 = 40 ch. 1 tip + 8 side = 9 leaves. Length 5 in (12.7 cm).
Finish the arch: Sl st in the BB of the last 16 arch ch, then sl st into ring ch 3.
Arch check: 16 + 16 + 16 = 48 ch returned. The right side holds 5 + 7 + 9 = 21 leaves.
Part 5: Left Canopy Arch and Strands (Color A)
Sl st along the bottom of the ring (ch 2, ch 1, ch 16) to the marked ch 15.
Repeat Part 4 exactly, letting the arch curve to the left. On every strand, lay the first side leaf toward the outside (left) so the two halves mirror each other.
Left side check: 21 leaves. Whole motif: 11 + 21 + 21 = 53 leaves.
Do not fasten off. Sl st along the ring to ch 4 to get ready for the border.
Border: Hanging Loop Wrap (Color A)
This motif has no square outline, so the only border is a sc wrap around the free top of the hanging ring. It thickens the loop for hanging and frames the top of the canopy.
Border gauge: 8 sc = 1 in (2.5 cm) around a chain ring. The chain gauge is the same 8 per inch, so the wrap needs about 1.5 sc per chain to lie flat around the curve.
Free chains: Trunk at ch 1, right arch at ch 3, left arch at ch 15. That leaves ch 4–14 free, which is 11 ch.
Wrap round (conversion round):
- Right side, ch 4–8 (5 ch): 2 sc in ch 4, sc in ch 5, 2 sc in ch 6, sc in ch 7, 2 sc in ch 8. That is 5 sc (1 per ch) + 3 extra = 8 sc.
- Top, ch 9 (1 ch): sc in ch 9. That is 1 sc.
- Left side, ch 10–14 (5 ch): 2 sc in ch 10, sc in ch 11, 2 sc in ch 12, sc in ch 13, 2 sc in ch 14. That is 5 sc + 3 extra = 8 sc.
Round total: 11 sc worked 1 per existing ch + 6 extra = 17 sc (8 + 1 + 8).
Sl st into ch 15, fasten off, and weave in.
Why the math works: A chain ring’s outer edge is longer than its inner edge. One sc per chain would cup the loop inward. Adding 6 sc across 11 chains (about 1.5 per ch) matches the outer curve, so the loop lies flat. The wrap adds 0.25 in (0.6 cm) at the top, taking the height from 9.25 in (23.5 cm) to 9.5 in (24.1 cm).
Final Blocking
- Soak the motif in cool water for 10 minutes, then press out the water in a towel. Do not wring.
- Lay it face up on a blocking mat.
- Pin the ring at the top center and run the trunk straight down for 7 in (17.8 cm) to the tip-leaf base.
- Pin each arch tip so the motif is 9 in (22.9 cm) across at the widest leaves.
- Let each strand hang straight down from its arch point. Check that the left and right strands match in length.
- Pin every leaf tip outward at a slight downward angle so the leaves fan away from the stem.
- Mist with light spray starch if you want a stiffer piece for hanging.
- Let it dry completely, at least 12 hours, before you unpin it.
Final Quality-Control Checklist
- 53 leaves attached: 11 on the trunk, 21 on each side.
- Every strand ends in a single tip leaf.
- Side leaves alternate left and right, with 4 ch between leaf joins.
- Mirrored strands match: 3 in (7.6 cm), 4 in (10.2 cm), 5 in (12.7 cm).
- The trunk measures 7 in (17.8 cm).
- The ring wrap has 17 sc and lies flat.
- Overall size is 9 in x 9.5 in (22.9 cm x 24.1 cm).
- All ends are woven in on the back with no loose tails.
Troubleshooting
Branches are curling or spiraling. Your slip stitches are too tight. Loosen your tension on the climb or go up 0.25 mm for the return only.
Leaves flip to the back. Lay each leaf face up before the LJ and push the hook through from front to back.
Leaves look rounded instead of pointed. Make sure you work the ch-2 tip and pin the point firmly when blocking.
One side is longer than the other. Recount the arch markers. The strands must sit exactly at ch 16, ch 32, and ch 48.
The ring wrap ruffles. Replace one 2-sc group on each side with a single sc, so the round has 15 sc.
You ran out of leaves. Count again against the allocation list: 11 + 18 + 14 + 10 = 53.
Care
Hand wash in cool water with mild soap, press dry in a towel, and reshape flat to dry. Re-starch after washing if you display the motif as a hanging.
Final Notes
The size of this willow comes from one chain gauge: 8 ch = 1 in (2.5 cm). That gives a 2 in (5.1 cm) ring, a 7 in (17.8 cm) trunk, 6 in (15.2 cm) arches, and 3 in (7.6 cm), 4 in (10.2 cm), and 5 in (12.7 cm) strands. With 1.25 in (3.2 cm) leaves added, the motif before the border is 9 in x 9.25 in (22.9 cm x 23.5 cm). The 0.25 in (0.6 cm) ring wrap brings the final size to 9 in x 9.5 in (22.9 cm x 24.1 cm). If you check your leaf and cord gauge first, every branch will fall into place.
Happy crocheting!