
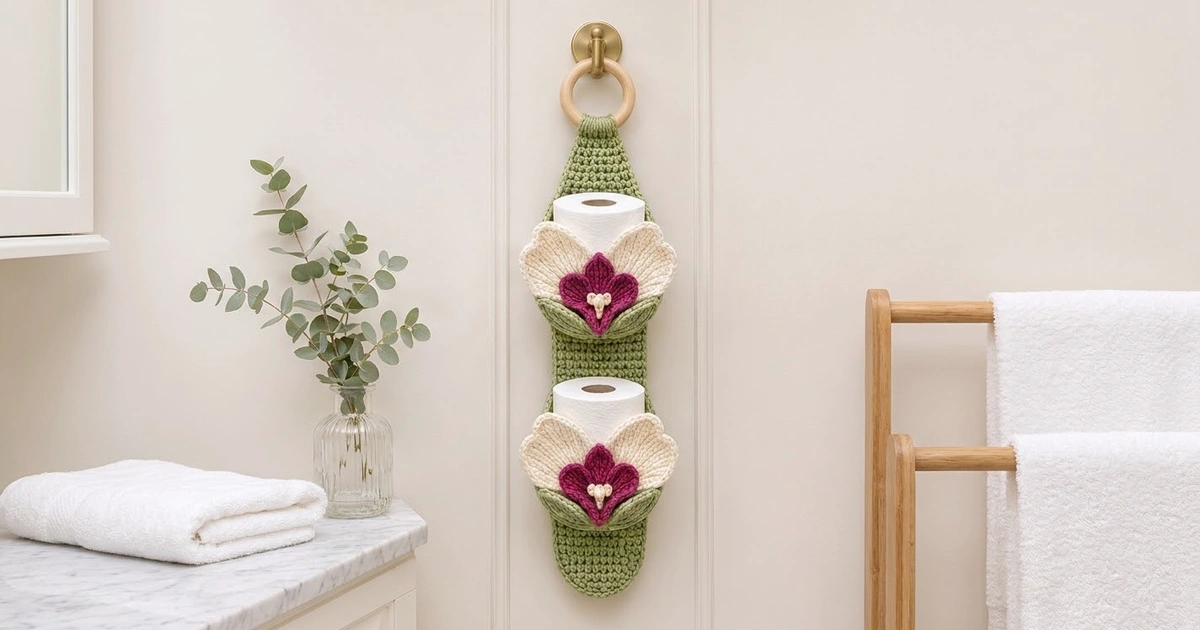
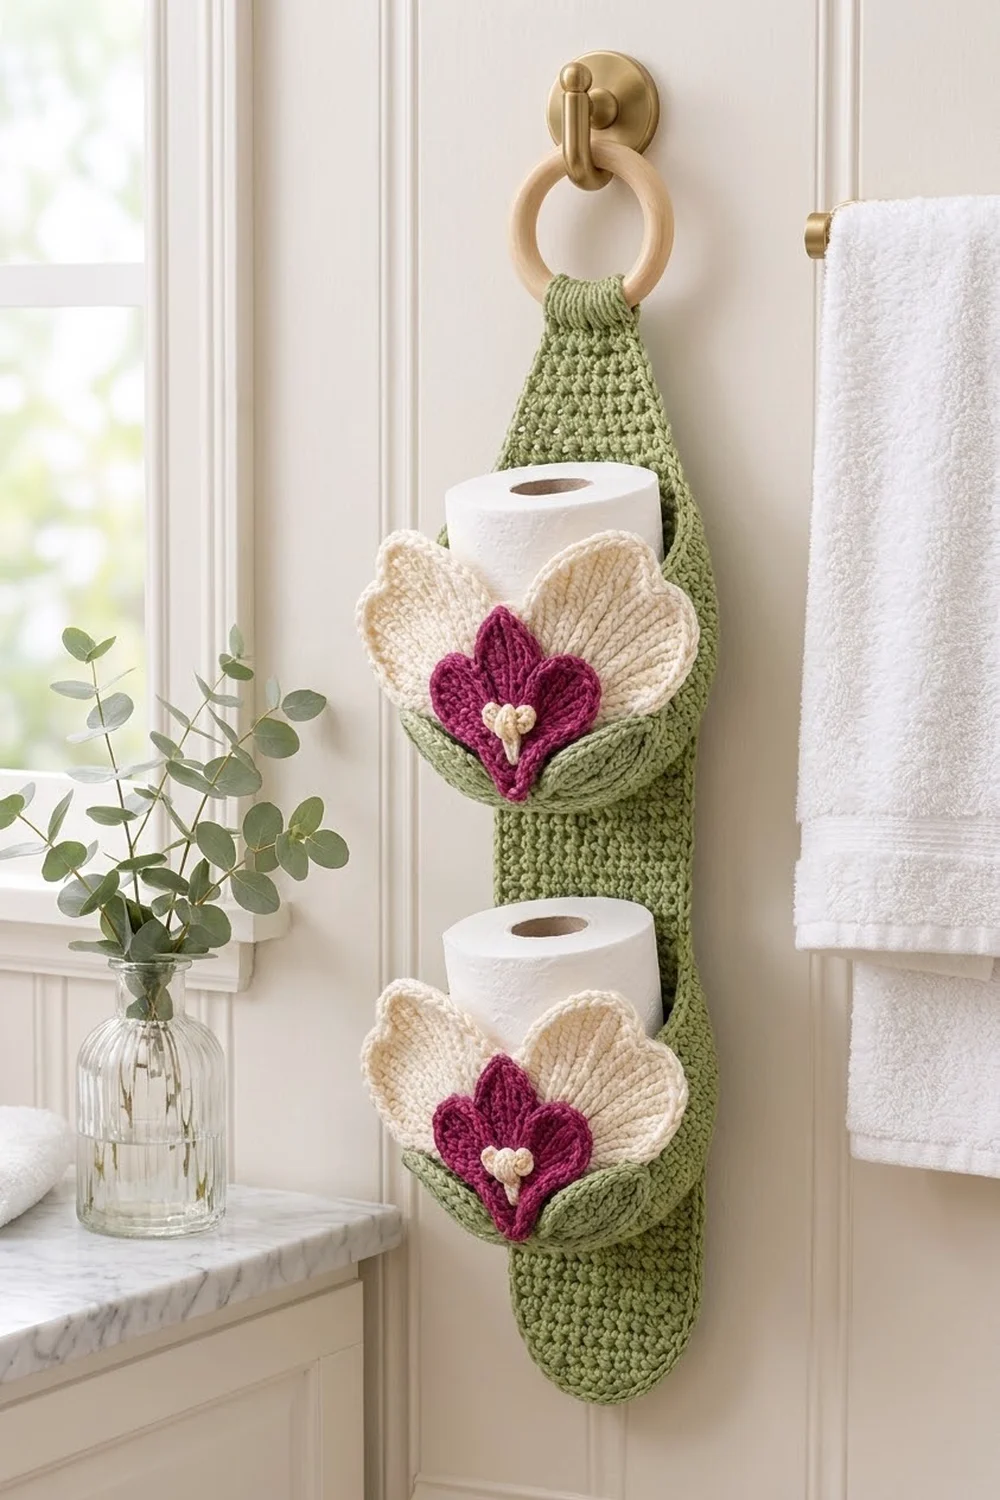
The Orchid Bloom holder is a hanging storage piece for two spare toilet rolls. A long sage-green strap hangs from a wooden ring, and two deep green cups are sewn to the front. Each roll stands upright in its own cup.
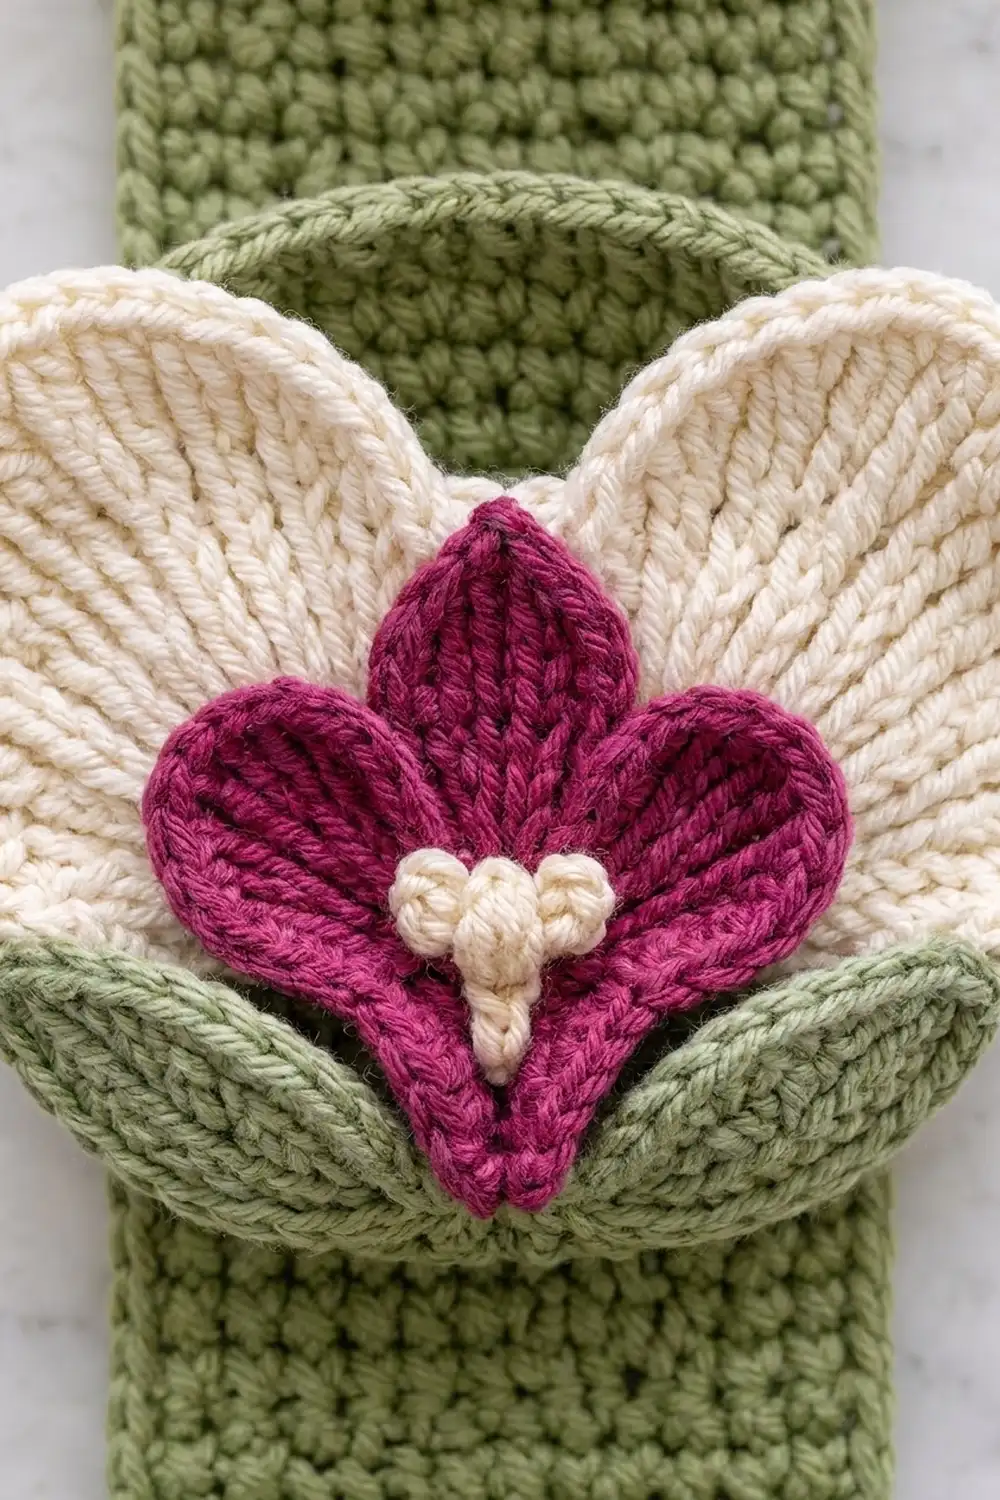
Each cup has a layered orchid on the front: two cream fan petals with scalloped tops, a magenta fleur-shaped lip, a small cream bobble column, and two pointed green leaves. The colors are soft sage green, warm cream, and deep magenta. The look is fresh and a little botanical, and it suits a calm bathroom.
This pattern uses US crochet terms. The finished strap is 4 in (10.2 cm) wide and 20.25 in (51.4 cm) long after the border. With the ring it hangs about 23 in (58.4 cm). Each cup is 4.8 in (12.2 cm) across and about 3 in (7.6 cm) deep.
You crochet the strap flat in rows, work the cups in spiral rounds, and make the appliqué parts separately. Then you sew the flowers to the cups, add a border to the strap, sew the cups on, and fold the top tab around the ring.
Finished Size and Construction
- Finished size: 4 in x 20.25 in (10.2 cm x 51.4 cm) strap; about 23 in (58.4 cm) hanging length with ring
- Skill level: Intermediate
- Terminology: US
- Yarn weight: Worsted (#4) cotton
- Hook: 4.5 mm (US 7)
- Number of pieces: 1 strap, 2 cups, 2 orchid appliqués (each made of 8 small parts)
- Layout: 1 column, 2 cups stacked vertically on the strap
- Cup size: 4.8 in (12.2 cm) diameter, 3 in (7.6 cm) deep
- Strap size before border: 3.5 in x 20 in (8.9 cm x 50.8 cm), plus a 2.2 in (5.6 cm) tab
- Border depth: 0.25 in (0.6 cm) per side
Materials
Use a smooth worsted-weight cotton or cotton blend. Cotton holds the cup shape well and handles bathroom humidity. Acrylic also works, but the cups will be softer and floppier.
Quantities below assume about 190 m per 100 g:
- Sage green: 250 g (475 m) – strap, cups, leaves, border
- Cream: 30 g (57 m) – upper petals and columns
- Magenta: 20 g (38 m) – lips
Tools:
- 4.5 mm (US 7) hook
- Wooden ring, 2.75 in (7.0 cm) outer diameter
- Tapestry needle
- 8 stitch markers
- Rust-proof pins
- Scissors and a measuring tape
- Blocking mat and spray bottle
All quantities include about a 15% margin for your gauge swatch and tails.
Abbreviations (US Terms)
- ch – chain
- sl st – slip stitch
- sc – single crochet
- hdc – half double crochet
- dc – double crochet
- inc – 2 sc in the same stitch
- sc2tog – single crochet 2 together
- BLO – back loop only
- MR – magic ring
- st(s) – stitch(es)
Special stitch – bobble: (Yarn over, insert hook, yarn over and pull up a loop, yarn over and pull through 2 loops) 3 times in the same place; yarn over and pull through all 4 loops on hook.
Gauge and Checkpoints
Gauge: 16 sc x 18 rows = 4 in (10.2 cm) in sc worked flat.
Make one cup before you start the strap. A cup uses every main skill in the pattern and shows your gauge in rounds and rows.
Checkpoints for the cup base (measure flat, across the center):
- After Rnd 4 (24 sts): 1.9 in (4.8 cm)
- After Rnd 7 (42 sts): 3.3 in (8.4 cm)
- After Rnd 10 (60 sts): 4.8 in (12.2 cm)
Checkpoints for the strap:
- Row 4 width: 3.5 in (8.9 cm)
- Row 45 length: 10 in (25.4 cm)
- Row 90 length: 20 in (50.8 cm)
If your pieces come out more than 0.25 in (0.6 cm) too big, go down 0.5 mm in hook size. If they are too small, go up 0.5 mm. The cups need tight cotton fabric, so choose the smaller hook if you are between sizes.
Strap
Worked flat in rows from the bottom up. Ch 1 at the start of each row does not count as a stitch.
Row 1: Ch 9, sc in 2nd ch from hook and in each ch across, turn. (8 sts)
Row 2: Ch 1, 2 sc in first st, sc in next 6, 2 sc in last st, turn. (10 sts)
Row 3: Ch 1, 2 sc in first st, sc in next 8, 2 sc in last st, turn. (12 sts)
Row 4: Ch 1, 2 sc in first st, sc in next 10, 2 sc in last st, turn. (14 sts)
Rows 1–4 build the rounded bottom end.
Rows 5–74: Ch 1, sc in each st across, turn. (14 sts)
Row 75: Ch 1, sc2tog, sc in next 10, sc2tog, turn. (12 sts)
Rows 76–78: Ch 1, sc in each st, turn. (12 sts)
Row 79: Ch 1, sc2tog, sc in next 8, sc2tog, turn. (10 sts)
Rows 80–82: Ch 1, sc in each st, turn. (10 sts)
Row 83: Ch 1, sc2tog, sc in next 6, sc2tog, turn. (8 sts)
Rows 84–86: Ch 1, sc in each st, turn. (8 sts)
Row 87: Ch 1, sc2tog, sc in next 4, sc2tog, turn. (6 sts)
Rows 88–90: Ch 1, sc in each st, turn. (6 sts)
Rows 75–90 form the 3.6 in (9.1 cm) taper.
Rows 91–100 (tab): Ch 1, sc in each st, turn. (6 sts)
Fasten off and leave a 24 in (61.0 cm) tail for sewing the tab.
Cups (make 2)
Worked in a continuous spiral. Mark the first stitch of each round.
Rnd 1: 6 sc in MR. (6)
Rnd 2: Inc in each st. (12)
Rnd 3: (Sc 1, inc) 6 times. (18)
Rnd 4: (Sc 2, inc) 6 times. (24)
Rnd 5: (Sc 3, inc) 6 times. (30)
Rnd 6: (Sc 4, inc) 6 times. (36)
Rnd 7: (Sc 5, inc) 6 times. (42)
Rnd 8: (Sc 6, inc) 6 times. (48)
Rnd 9: (Sc 7, inc) 6 times. (54)
Rnd 10: (Sc 8, inc) 6 times. (60)
On Rnds 6–10, stagger the increases so the base stays round instead of turning hexagonal. To do this, start some repeats with half of the plain sc.
Rnd 11: Sc in BLO of each st. (60) This ridge turns the base into the wall.
Rnds 12–23: Sc in each st. (60)
Rnd 24: Sl st loosely in each st, sl st to first sl st. (60)
Fasten off and weave in. Wall height is 2.9 in (7.4 cm) to the top of Rnd 23.
Orchid Appliqué (make 2 sets)
Each set has 2 upper petals, 1 center lobe, 2 side lobes, 1 column, and 2 leaves.
Upper Petals (cream, make 2 per set)
Ch 2 at the start of a row does not count as a stitch.
Row 1: MR, ch 2, 6 dc in ring, turn. Pull ring closed. (6)
Row 2: Ch 2, 2 dc in each st, turn. (12)
Row 3: Ch 2, (dc 1, 2 dc in next) 6 times, turn. (18)
Row 4 (scallops): Ch 1, (skip 2, 7 dc in next, skip 2, sl st in next) 3 times. (3 shells over 18 sts)
The stacked dc columns make the fine radiating lines, and the shells make the scalloped top edge. Each petal is 3.5 in (8.9 cm) wide and 1.75 in (4.4 cm) tall.
Lip Lobes (magenta)
Center lobe (1 per set): Ch 9.
Rnd 1: Sc in 2nd ch from hook, hdc in next, dc in next 3, hdc in next, sc in next, 3 sc in last ch; working along the other side of the chain, sc in next, hdc in next, dc in next 3, hdc in next, sc in last ch. Sl st to first sc. (17)
Rnd 2: Ch 1, sc in BLO of each st, working (sc, ch 2, sc) in the center sc of the 3-sc tip. Sl st to first sc. (17 worked + 1 extra = 18 sc, plus ch-2 tip)
Fasten off. The BLO round gives the ridged edge. Length: 2.25 in (5.7 cm).
Side lobes (2 per set): Ch 7.
Rnd 1: Sc in 2nd ch from hook, hdc in next, dc in next, hdc in next, sc in next, 3 sc in last ch; along the other side, sc, hdc, dc, hdc, sc. Sl st to first sc. (13)
Rnd 2: As center lobe Rnd 2. (13 worked + 1 extra = 14 sc, plus ch-2 tip)
Length: 1.75 in (4.4 cm).
Column (cream, 1 per set)
MR, (ch 2, bobble in ring, ch 2, sl st in ring) 3 times. Pull ring closed. (3 bobbles) Fasten off and leave a 12 in (30.5 cm) tail.
Leaves (green, 2 per set)
Ch 11.
Rnd 1: Sc in 2nd ch from hook, hdc in next, dc in next 5, hdc in next, sc in next, 3 sc in last ch; along the other side, sc, hdc, dc in next 5, hdc, sc. Sl st to first sc. (21)
Rnd 2: As center lobe Rnd 2. (21 worked + 1 extra = 22 sc, plus ch-2 tip)
Length: 2.75 in (7.0 cm).
Assembling Each Orchid
- Overlap the two upper petals by 1.75 in (4.4 cm) at their ring ends, with the scallops facing up and out. Sew the overlap. Combined width: about 5.25 in (13.3 cm).
- Place the center lobe over the overlap, pointing up. Place one side lobe on each side with the tips angled outward. All three bases meet in one point at the bottom. Sew around the edge of each lobe.
- Sew the column where the lobe bases meet. Use its tail to work 2 surface chain stitches below it as a short stem.
- Sew the two leaves below the flower with their bases together at the center and the tips spreading out in a shallow V.
The finished orchid is about 5.25 in (13.3 cm) wide and 4.5 in (11.4 cm) tall.
Make All Pieces
Green: 1 strap, 2 cups, 4 leaves. Cream: 4 upper petals, 2 columns. Magenta: 2 center lobes, 4 side lobes.
Layout on the strap (bottom row = Row 1):
Rows 91-100   [ tab around ring ]
Rows 75-90    [ taper ]
Rows 55-74    [ plain strap ]
Rows 41-54    [ UPPER CUP + orchid ]
Rows 23-40    [ plain strap ]
Rows 9-22     [ LOWER CUP + orchid ]
Rows 1-8      [ rounded bottom ]
Joining
First sew each orchid to its cup, centered on the front, with the leaves 0.5 in (1.3 cm) above the Rnd 11 ridge. The petals rise 1.25 in (3.2 cm) above the rim.
Next, whipstitch each cup to the strap with green yarn. The back of the cup lies flat against the strap as a panel 14 sts wide and 13 rounds tall.
- Mark the 14 Rnd 11 sts directly opposite the orchid. These form the bottom edge of the back panel.
- Lower cup: Pin those 14 sts across the 14 sts of strap Row 9, one to one. Sew them stitch to stitch.
- Sew each side of the back panel to the strap: 13 wall rounds (Rnds 11–23) to 13 strap rows (Rows 9–21), one round to one row.
- Sew the 14 matching Rnd 24 sts across strap Row 22.
- Upper cup: Repeat using Row 41 for the bottom, Rows 41–53 for the sides, and Row 54 for the rim.
Both fabrics have 4 sts and 4.5 rows per inch, so a one-to-one seam lies flat. Keep the whipstitch snug but not pulled, so the strap does not pucker. Checkpoint: the bottom of the lower cup sits 2 in (5.1 cm) above Row 1, and the bottom of the upper cup sits about 9 in (22.9 cm) above Row 1.
Work the border (below) before you fold the tab. Then fold Rows 91–100 over the ring and use the tail to sew Row 100 to the back of Row 90.
Border
Border gauge: 4 sc per inch along the edges. With the right side facing, join green at the right edge of Row 90.
Border Row 1:
- Right side: Work 8 sc over every 9 row ends (sc in 8, skip the 9th), down to Row 1. (80 sc)
- Bottom: 2 sc in first foundation ch, sc in next 6, 2 sc in last. (10 sc)
- Left side: Work 8 sc over every 9 row ends, up to Row 90. (80 sc)
Total: 80 + 10 + 80 = 170 sc. Turn.
Border Row 2: Sl st in each sc. (170) Fasten off.
Why the math works: 90 rows at 4.5 rows per inch is 20 in (50.8 cm), and 80 sc at 4 sc per inch is also 20 in. The bottom edge has 8 foundation sts plus 2 extra sts to ease the curve. The border skips the tab, so the fold stays thin.
Final Blocking
- Spray the strap until it is damp but not soaked.
- Pin it flat to 4 in x 20.25 in (10.2 cm x 51.4 cm).
- Fill each cup with a towel or spare roll so the walls stand straight.
- Pin the orchid petals flat and open the scallops with your fingers.
- Let everything dry completely, for at least 24 hours.
Final Quality-Control Checklist
- Strap is 4 in (10.2 cm) wide with straight edges
- Border counts are 80, 10, and 80
- Both cups are 60 sts around with a clean ridge at Rnd 11
- Cups sit square and level on the strap
- Orchids are centered and all tails are woven in
- Tab is sewn securely around the ring
- A roll slides into each cup easily
Troubleshooting
Cup is too floppy: Go down a hook size or use a stiffer cotton.
Base is hexagonal: Stagger your increase positions.
Strap edge ruffles: On the border, skip 1 more row end in every 9 rows.
Strap edge pulls in: Work 1 sc in every row end instead.
Petals curl: Wet them again and pin the scallops open.
Cup sags forward: Add a second line of whipstitch along the Rnd 11 seam.
Care
Hand wash in cool water and lay flat to dry, reshaping the cups while damp. Do not wring or tumble dry.
Final Notes
The measurement chain is simple. A gauge of 16 sc x 18 rows = 4 in (10.2 cm) gives a 3.5 in (8.9 cm) strap, a 20 in (50.8 cm) body, and a 4.8 in (12.2 cm) cup base. The one-to-one seams keep the cups square. The 80-10-80 border brings the strap to 4 in x 20.25 in (10.2 cm x 51.4 cm). Check each stage, and your Orchid Bloom holder will hang straight and hold its shape.
Happy crocheting!