
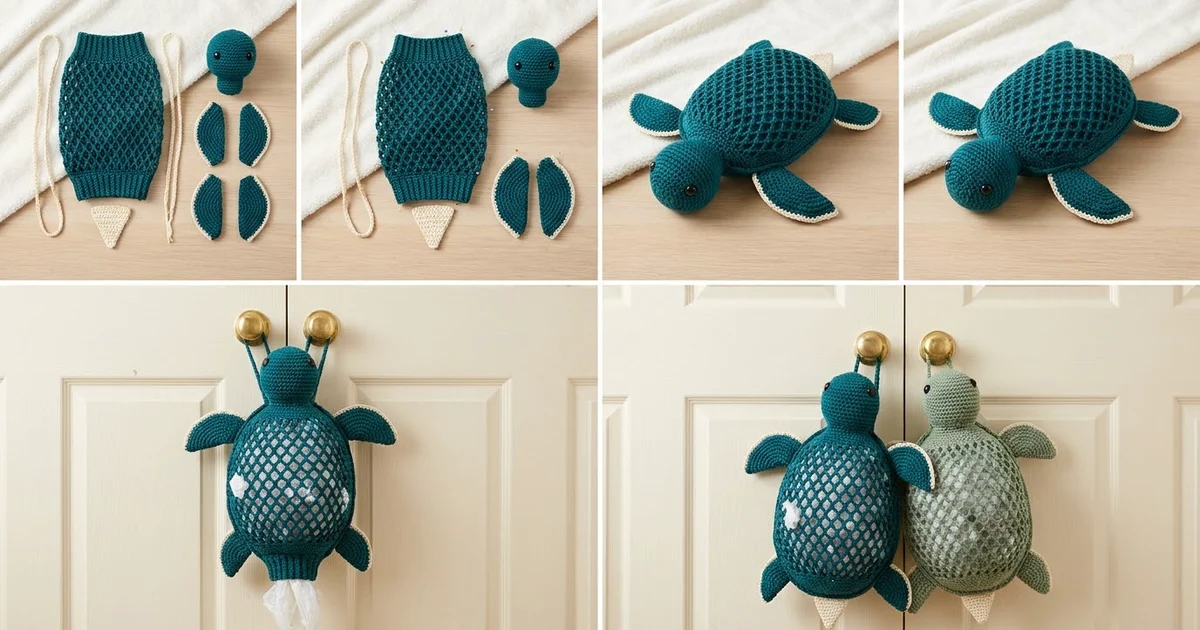
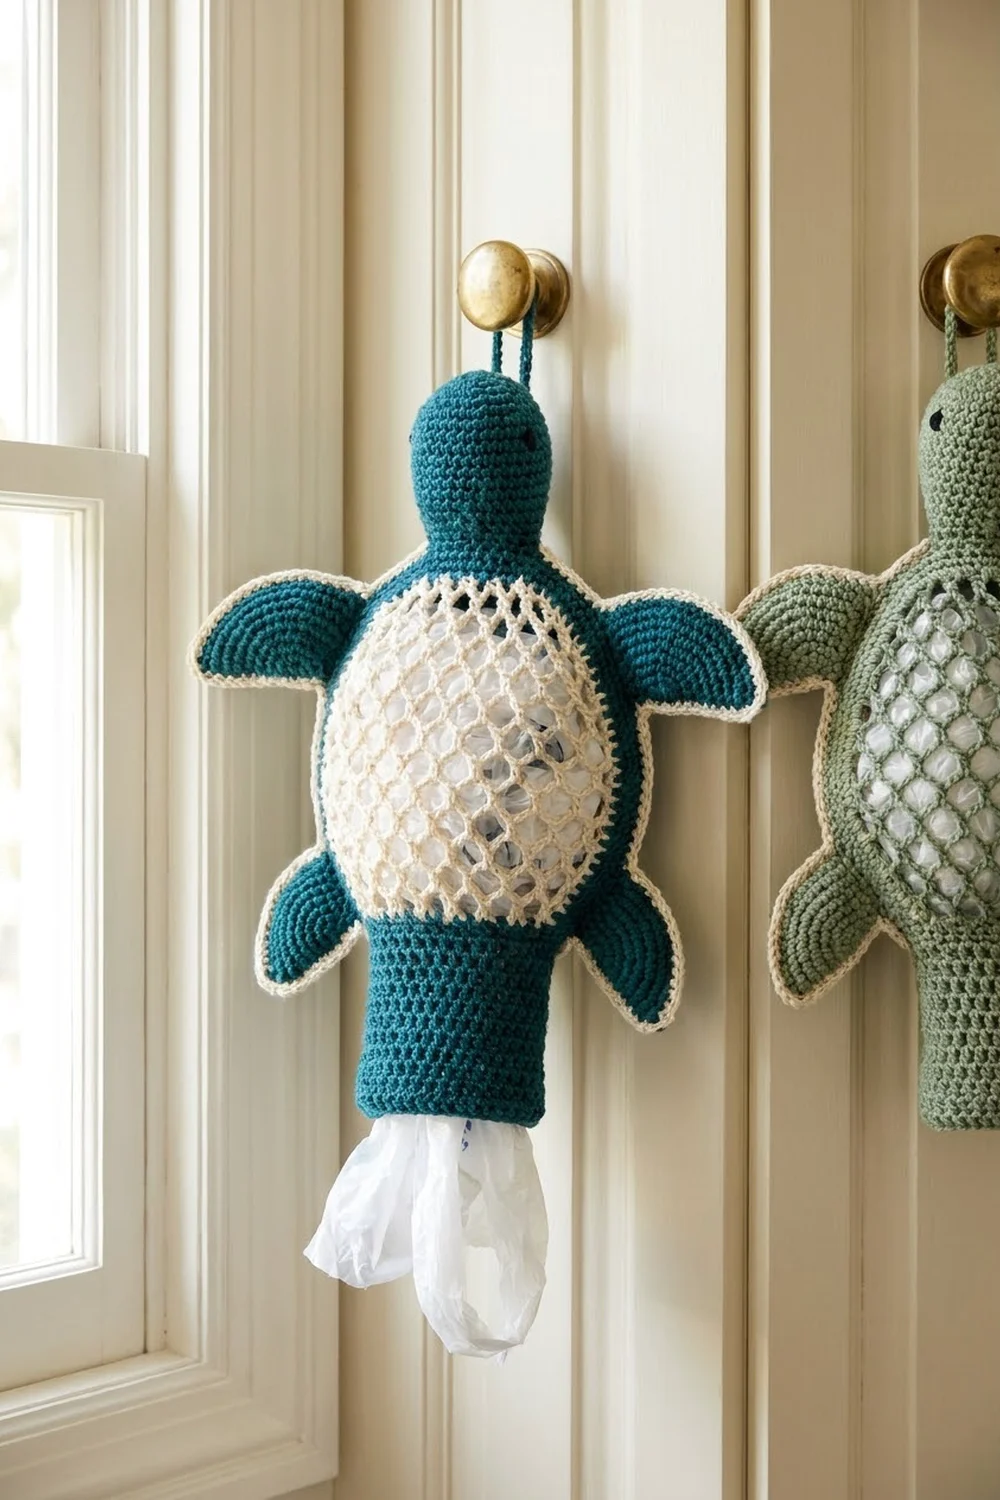
This turtle is a plastic bag holder that hangs from a door knob or hook. Its open diamond mesh shell holds a stash of grocery bags, and you pull them out one at a time through the knit-look cuff at the bottom.
The sample is deep teal with cream flipper edging, a cream tail, and small black safety eyes. Sage green with cream trim works just as well. The solid head and flippers stand out against the light, airy net.
The pattern uses US crochet terms. The finished turtle is about 14.5 in (36.8 cm) long from head to tail tip and 12 in (30.5 cm) wide across the front flippers. The hanging loop adds about 6 in (15.2 cm).
You work the body bottom-up in one piece: first a waistcoat-stitch cuff, then mesh rounds that widen and narrow, then a solid top band. The head, four flippers, tail, and two strap loops are made separately and sewn on.
Finished Size and Construction
- Finished size: about 14.5 in (36.8 cm) x 12 in (30.5 cm), plus a 6 in (15.2 cm) hanging loop
- Skill level: Intermediate
- Terminology: US
- Yarn weight: Worsted (#4) cotton or cotton blend
- Hook: 4.0 mm (US G-6)
- Number of pieces: 9 (body, head, 2 front flippers, 2 back flippers, tail, 2 strap loops)
- Layout: head up, front flippers angled up, back flippers angled down, tail below the cuff
- Body size: 11 in (27.9 cm) long x 7 in (17.8 cm) wide at the widest point, laid flat
- Front flipper before border: 3 in (7.6 cm) x 1.5 in (3.8 cm)
- Back flipper before border: 2 in (5.1 cm) x 1 in (2.5 cm)
- Border depth: 0.25 in (0.6 cm) of cream on every flipper edge
Materials
Use a smooth worsted cotton or cotton blend with a firm twist. Cotton shows the mesh crisply and doesn’t sag under the weight of the bags.
- Main color (MC), deep teal: 100 g, about 170 m (186 yd)
- Contrast color (CC), cream: 15 g, about 26 m (28 yd)
These quantities include a margin of about 15 percent for swatching and yarn tails.
Tools:
- 4.0 mm (US G-6) crochet hook
- 2 black safety eyes, 9 mm
- About 10 g (0.35 oz) polyester fiberfill
- Tapestry needle and 6 locking stitch markers
- Scissors, tape measure, rustproof pins, blocking mat
Abbreviations (US Terms)
- ch – chain
- sl st – slip stitch
- sc – single crochet
- hdc – half double crochet
- dc – double crochet
- sc2tog – single crochet 2 together
- st(s) – stitch(es)
- lp(s) – loop(s)
- MC / CC – main color / contrast color
Special stitches:
- Waistcoat stitch (ksc): insert the hook through the center of the “V” of the next sc, between its two legs, and complete a sc. This makes vertical columns that look like knitting.
- Round start (RS): sl st in each ch up to the center of the first loop of the previous round, ch 1, then sc around that loop.
- sc2tog over 2 loops: insert the hook in the next loop and pull up a loop, insert it in the following loop and pull up a loop, then yarn over and pull through all 3 loops on the hook.
Gauge and Checkpoints
Gauge: 16 sc x 18 rounds = 4 in (10.2 cm) in sc worked in the round. That is 4 sts and 4.5 rounds per inch.
Gauge matters most in the cuff, the top band, and the head. Make the cuff first and use it as your test piece.
Checkpoints:
- After Rnd 7 (cuff): 3.75 in (9.5 cm) wide flat, 1.5 in (3.8 cm) tall
- After Rnd 12: about 5.5 in (14.0 cm) wide flat
- After Rnd 16: about 7 in (17.8 cm) wide flat, about 8 in (20.3 cm) long
- After Rnd 22: top band 5 in (12.7 cm) wide flat, body 11 in (27.9 cm) long
Measure the mesh relaxed, without stretching it.
If your cuff is too big, go down to a 3.5 mm hook. If it’s too small, go up to a 4.5 mm hook. A loose cuff lets bags fall out, and a tight one makes them hard to pull.
Body
Work from the bottom up in joined rounds. Do not turn. Use MC.
Cuff
Ch 30, then sl st in the first ch to form a ring without twisting it.
Rnd 1: Ch 1, sc in each ch around, sl st in first sc. (30 sts)
Rnds 2–7: Ch 1, ksc in each st around, sl st in first st. (30 sts)
Checkpoint: a firm tube 3.75 in (9.5 cm) wide flat and 1.5 in (3.8 cm) tall. Place a marker at the join. This line is the center back.
Mesh
Rnd 8 (conversion round): Ch 1, sc in first st, ch 5, sk 2 sts, sc in next st, ch 5, sk 2 sts; repeat from * 8 more times, sl st in first sc. (10 sc + 10 ch-5 lps; 30 sts = 10 x [1 sc + 2 skipped])
Rnd 9: RS, (ch 5, sc in next lp) 9 times, ch 5, sl st in first sc. (10 lps)
Rnd 10 (growth round): RS, (ch 5, sc in next lp) 4 times, ch 5, sc in same lp, (ch 5, sc in next lp) 5 times, ch 5, sc in same lp, ch 5, sl st in first sc. (12 lps)
Rnds 11–12: RS, (ch 6, sc in next lp) 11 times, ch 6, sl st in first sc. (12 lps)
Rnds 13–16: RS, (ch 7, sc in next lp) 11 times, ch 7, sl st in first sc. (12 lps) This is the widest part of the shell.
Rnd 17: Work as Rnd 11. (12 lps)
Rnd 18: RS, (ch 5, sc in next lp) 11 times, ch 5, sl st in first sc. (12 lps)
Rnd 19 (decrease round): RS, (ch 5, sc in next lp) 4 times, ch 5, sc2tog over next 2 lps, (ch 5, sc in next lp) 3 times, ch 5, sc2tog over next 2 lps, ch 5, sl st in first sc. (10 lps)
Rnd 20: RS, (ch 4, sc in next lp) 9 times, ch 4, sl st in first sc. (10 lps)
Top Band
Rnd 21 (conversion round): Ch 1, sc in same sc as join, 3 sc in next ch-4 lp, sc in next sc, 3 sc in next ch-4 lp; repeat from * 8 more times, sl st in first sc. (10 sc worked 1 per existing sc + 30 sc worked 3 per lp = 40 sts)
Rnd 22: Ch 1, sc in each st around, sl st in first sc. (40 sts)
Fasten off. Checkpoint: the band is 10 in (25.4 cm) around and 5 in (12.7 cm) wide flat, and the body is 11 in (27.9 cm) long.
Head
Use MC and work in joined rounds from the top down. Begin every round with ch 1 and end it with sl st in the first sc.
Rnd 1: 6 sc in a magic ring. (6)
Rnd 2: 2 sc in each st. (12)
Rnd 3: (Sc in next st, 2 sc in next st) 6 times. (18)
Rnd 4: (Sc in next 2 sts, 2 sc in next st) 6 times. (24)
Rnd 5: (Sc in next 3 sts, 2 sc in next st) 6 times. (30)
Rnd 6: (Sc in next 4 sts, 2 sc in next st) 6 times. (36)
Rnds 7–12: Sc in each st. (36)
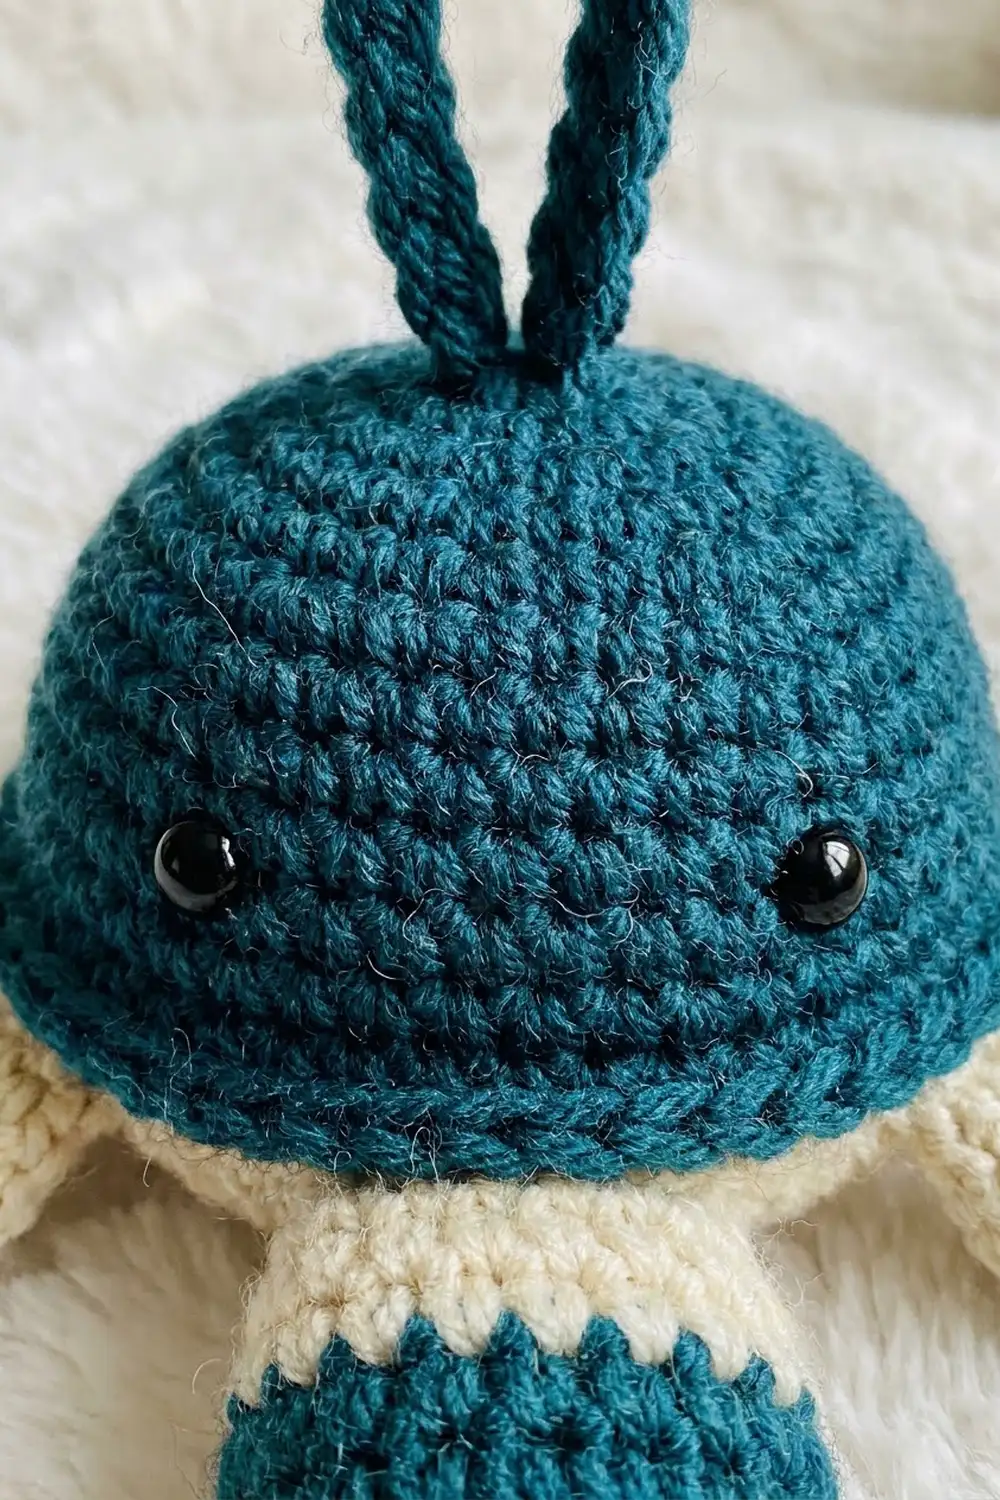
Insert the eyes between Rnds 9 and 10, 7 sts apart, centered on the side opposite the join.
Rnd 13: (Sc in next 4 sts, sc2tog) 6 times. (30)
Rnd 14: (Sc in next 3 sts, sc2tog) 6 times. (24)
Stuff the head firmly, keeping it round.
Rnd 15: (Sc in next 2 sts, sc2tog) 6 times. (18)
Rnd 16: (Sc in next st, sc2tog) 6 times. (12)
Rnd 17: Sc2tog 6 times. (6)
Close the hole and leave a 16 in (40.6 cm) tail. Checkpoint: about 3.25 in (8.3 cm) wide and 3 in (7.6 cm) tall.
Flippers
Work each flipper in MC around both sides of a chain. The first end of the chain becomes the pointed tip, and the dc fan becomes the wide base.
Front flipper (make 2): Ch 13.
Rnd 1: Sc in 2nd ch from hook, sc in next ch, hdc in next 3 ch, dc in next 6 ch, 7 dc in last ch. Working along the underside: dc in next 6 ch, hdc in next 3 ch, sc in next ch, 2 sc in the same ch as the first sc, sl st in first sc. (30 sts: 11 + 7 fan + 12)
Fasten off. Checkpoint: 3 in (7.6 cm) x 1.5 in (3.8 cm).
Back flipper (make 2): Ch 9.
Rnd 1: Sc in 2nd ch from hook, hdc in next 2 ch, dc in next 4 ch, 5 dc in last ch. Working along the underside: dc in next 4 ch, hdc in next 2 ch, 2 sc in the same ch as the first sc, sl st in first sc. (20 sts: 7 + 5 fan + 8)
Fasten off. Checkpoint: 2 in (5.1 cm) x 1 in (2.5 cm).
On both flippers, the last st of Rnd 1 is the center of the 3 sc at the tip.
Tail
Use CC and work flat. Start every row after Row 1 with ch 1, and turn at the end of each row.
Row 1: Ch 7, sc in 2nd ch from hook and in each ch across. (6)
Row 2: Sc in each st. (6)
Row 3: Sc2tog, sc in next 2 sts, sc2tog. (4)
Row 4: Sc in each st. (4)
Row 5: Sc2tog twice. (2)
Row 6: Sc2tog. (1)
Fasten off and leave a 10 in (25.4 cm) tail. Checkpoint: a triangle 1.5 in (3.8 cm) wide x 1.25 in (3.2 cm) tall.
Strap Loops
Use MC and make 2. Ch 50, then sl st in the first ch to form a ring without twisting it. Sl st in the back bump of each ch around, then sl st in the first sl st. (50 sl sts) Each loop is about 12.5 in (31.8 cm) around.
Make All Pieces
- MC (teal): 1 body, 1 head, 2 front flippers, 2 back flippers, 2 strap loops
- CC (cream): 1 tail, plus the 4 flipper borders below
Placement guide, front view:
                [ strap loops ]
                   [ HEAD ]
 [front flipper]   [ band ]   [front flipper]
                   [ mesh ]
 [back flipper]    [ mesh ]   [back flipper]
                   [ cuff ]
                   [ tail ]
Border (Flipper Edging)
Border gauge: one round of CC sc adds 0.25 in (0.6 cm) to every edge, at 4 sts per inch.
Front flipper (make 2): Join CC in the first st of Rnd 1. Ch 1, sc in same st and next 10 sts (side 1: 11 sc). Over the 7 fan dc: 2 sc in next dc, (sc in next dc, 2 sc in next dc) 3 times (base: 11 sc). Sc in next 11 sts (side 2: 11 sc). 3 sc in last st (tip: 3 sc). Sl st in first sc. (30 sts worked 1 per st + 4 extra at base + 2 extra at tip = 36 sts)
Back flipper (make 2): Join CC in the first st of Rnd 1. Ch 1, sc in same st and next 6 sts (side 1: 7 sc). 2 sc in each of the 5 fan dc (base: 10 sc). Sc in next 7 sts (side 2: 7 sc). 3 sc in last st (tip: 3 sc). Sl st in first sc. (20 sts worked 1 per st + 5 extra at base + 2 extra at tip = 27 sts)
Leave a 12 in (30.5 cm) CC tail on each flipper.
Why the math works: a 0.25 in (0.6 cm) border around a closed shape makes the outer edge about 2 x 3.14 x 0.25 in longer, which is roughly 1.6 in (4.1 cm). At 4 sts per inch, that is 6 to 7 sts. The front flipper adds 6 and the back flipper adds 7, all placed on the curves. The straight sides stay at 1 sc per st, so the edge lies flat.
Finished flippers: front 3.5 in (8.9 cm) x 2 in (5.1 cm); back 2.5 in (6.4 cm) x 1.5 in (3.8 cm).
Joining (Assembly)
Whipstitch through both loops of each edge stitch. Pull each stitch snug enough to hide the yarn, but not so tight that it puckers.
- Head: Lay the body flat with the center-back marker at the back. Sew 12 sts of head Rnd 14, on the side opposite the eyes, to the 12 band sts centered on the marker, matching 1 st to 1 st. The front 28 band sts stay free as the opening for loading bags. Sew this seam twice because it carries the weight of the bags.
- Front flippers: Pin each base to a side fold over Rnds 19–21 with the tip angled up. Sew the center 6 base sts to the band and the mesh knots.
- Back flippers: Pin each base to a side fold over Rnds 9–10 with the tip angled down. Sew the center 4 base sts to the mesh knots.
- Tail: Sew the 6 sts of Row 1 to 6 sts at the center front of cuff Rnds 1–2. The tail should hang 1 in (2.5 cm) below the cuff.
- Straps: Stack the 2 loops and sew 0.5 in (1.3 cm) of one end across head Rnds 1–3.
Size checkpoint: about 14.5 in (36.8 cm) long and 12 in (30.5 cm) across the front flippers.
Final Blocking
- Lightly mist the flippers and the cuff. Don’t soak the head.
- Pin each flipper flat. Ease the front flippers into a gentle paisley curve.
- Slip a rolled towel inside the body so the mesh opens into even diamonds.
- Shape the top band into a smooth oval 5 in (12.7 cm) wide.
- Let everything dry completely before you hang the turtle.
Final Quality-Control Checklist
- Cuff: 30 sts, 3.75 in (9.5 cm) wide flat
- Mesh: 12 lps at the widest, 10 lps at Rnd 20
- Band: 40 sts, 5 in (12.7 cm) wide flat
- Head: 36 sts at the widest, eyes level and locked
- Borders: 36 sts on the front flippers and 27 sts on the back, all lying flat
- Head seam doubled and firm, tail centered
- Ends woven in at least 1.5 in (3.8 cm)
Troubleshooting
- Mesh spirals: start every round with RS and keep the joins over the center back.
- Uneven diamonds: recount the chains. One extra ch shows clearly.
- Bags fall out: the cuff is too loose. Remake it with a smaller hook.
- Bags stick: the cuff is too tight. Remake it with a larger hook.
- Border ruffles: remove one base increase. Border cups: add one.
- Head tips forward: add a third pass of stitching at the center of the head seam.
Care
Take out the bags, hand wash in cool water with mild soap, and lay flat to dry.
Final Notes
The 30-st cuff sets a base 3.75 in (9.5 cm) wide. The mesh opens to 7 in (17.8 cm) at 12 loops and closes to 10 loops. The 40-st band finishes at 5 in (12.7 cm) under a 3.25 in (8.3 cm) head. The flippers and tail bring the turtle to 14.5 in (36.8 cm) x 12 in (30.5 cm). If each checkpoint matches, the turtle will hang straight and dispense neatly.
Happy crocheting!