
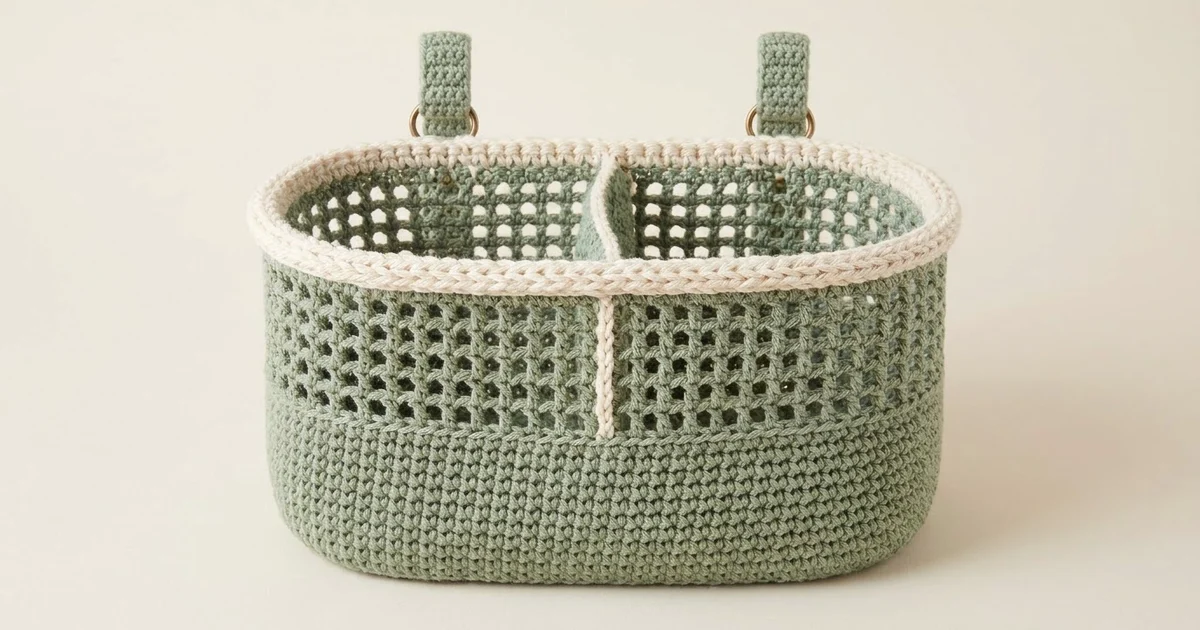
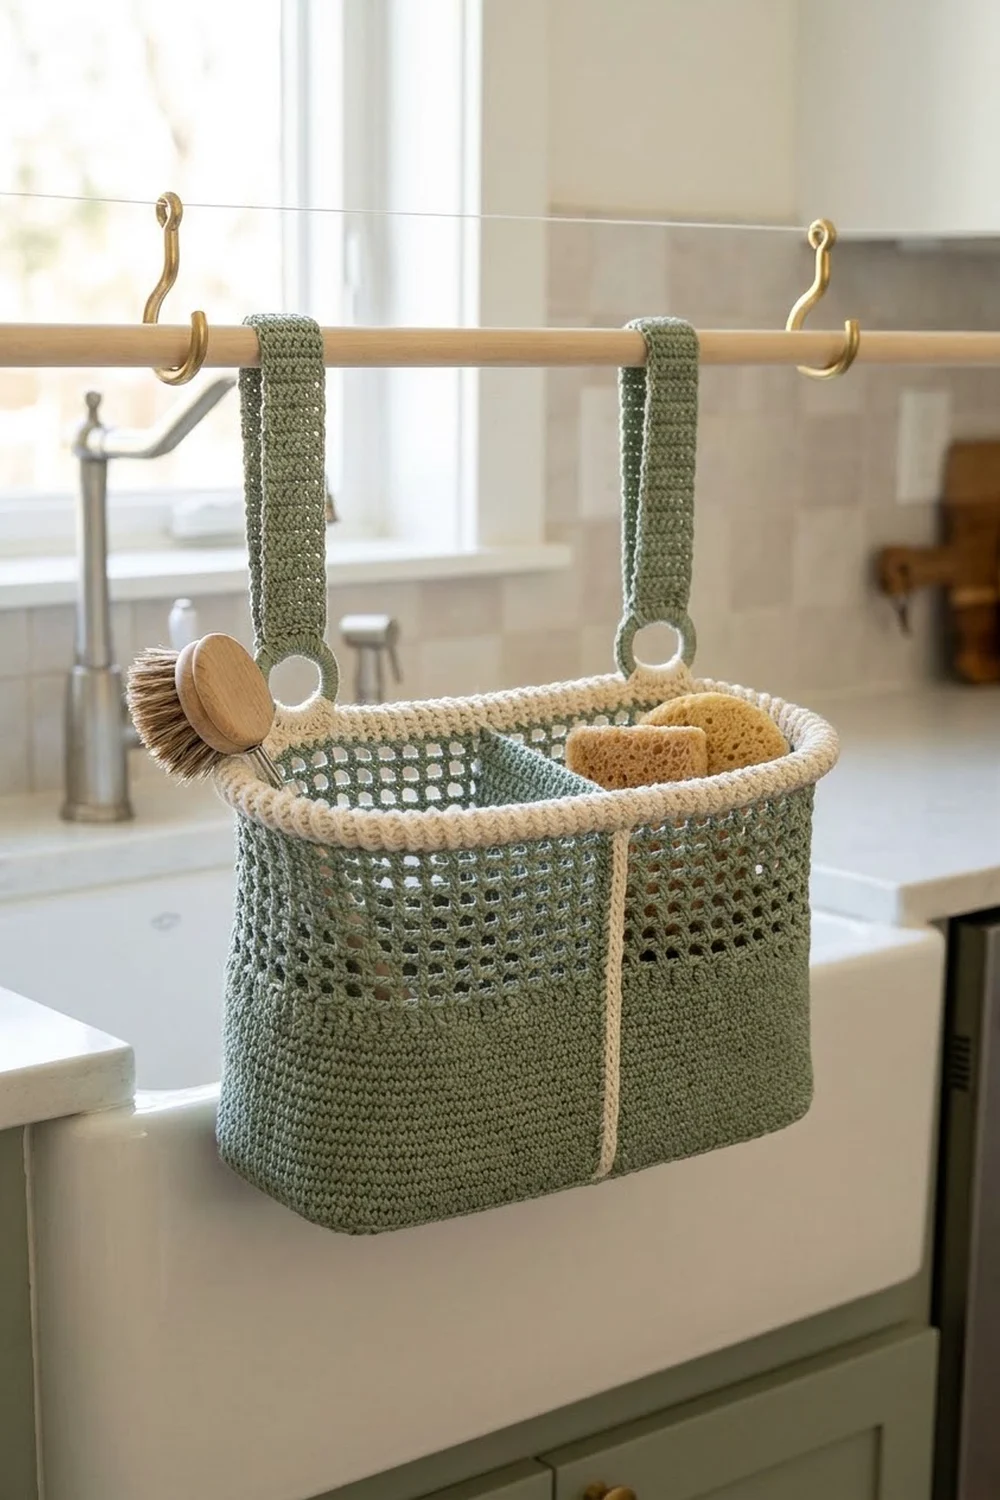
This hanging sink caddy keeps your dish brush and sponges off the counter and lets them dry. The lower walls are solid single crochet, so they’re firm. The upper walls are open filet mesh, so air moves through and water drains away. A cream rim and a cream center divider finish the sage green basket.
The style is simple and practical: two colors, no fussy stitches, and a shape that suits a modern or farmhouse kitchen. The basket hangs from a short wooden dowel on two cup hooks. Two crocheted straps with ring ends slide onto the dowel.
This pattern uses US crochet terms. The finished basket is 10 in (25.4 cm) long, 4 in (10.2 cm) deep and 5 1/4 in (13.3 cm) tall.
You crochet an oval base in rounds, then work the walls straight up from it with no seam. First come the solid rounds, then the mesh, then a three-round cream border. After that, you make a divider panel and two straps and sew them in.
Finished Size and Construction
- Finished size: 10 in long x 4 in deep x 5 1/4 in tall (25.4 x 10.2 x 13.3 cm)
- Skill level: Intermediate (simple stitches, careful counting)
- Terminology: US
- Yarn weight: Worsted (#4) cotton
- Hook: 4.0 mm (G-6)
- Number of pieces: 4 (basket body, divider, 2 straps)
- Layout: One basket split into two compartments, with 2 straps on the back wall
- Base size: 10 x 4 in (25.4 x 10.2 cm), 96 sts around
- Size before border: 10 x 4 x 4 1/2 in tall (25.4 x 10.2 x 11.4 cm)
- Border depth: 3/4 in (1.9 cm), 3 rounds
Materials
Use a 100% cotton worsted yarn. Cotton doesn’t stretch much, so it holds its shape when wet, and it stands up to kitchen use. Acrylic will sag. The amounts below assume a yarn of about 120 yd (109.7 m) per 2.5 oz (71 g) ball.
- Sage green: 90 g, about 152 yd (139 m)
- Cream: 25 g, about 43 yd (39 m)
Both amounts include a margin of roughly 15% for your gauge swatch and seaming.
Tools and hardware:
- 4.0 mm (G-6) crochet hook
- Tapestry needle
- 4 stitch markers
- Scissors and a tape measure
- Wooden dowel, 12 in (30.5 cm) long and 3/4 in (1.9 cm) across
- 2 brass cup hooks, plus wall anchors if your wall needs them
Abbreviations (US Terms)
- ch – chain
- sl st – slip stitch
- sc – single crochet
- dc – double crochet
- inc – 2 sc in the same stitch
- BLO – back loop only
- st(s) – stitch(es)
- sp – space
- rnd – round
Reverse sc (crab stitch): Work from left to right (right-handed). Insert the hook into the next stitch to the right, yarn over, pull up a loop, then yarn over and pull through both loops. The result is a rolled, rope-like edge.
Gauge and Checkpoints
Gauge: 16 sc x 16 rows = 4 in (10.2 cm). In filet mesh, 8 squares x 8 rnds = 4 in (10.2 cm).
Make the divider (below) before you start the basket. It’s a flat piece in plain sc, 16 sts wide, so it doubles as a gauge swatch. It should measure 4 in (10.2 cm) wide.
Checkpoints:
- After Rnd 8 (base): 10 x 4 in (25.4 x 10.2 cm), lying flat with no ripples.
- After Rnd 16 (solid walls): 2 in (5.1 cm) from the base edge ridge.
- After Rnd 21 (mesh): 4 1/2 in (11.4 cm) from the base edge ridge.
- After Rnd 24 (border): 5 1/4 in (13.3 cm) total height.
If your piece is too big, go down to a 3.75 mm hook. If it’s too small, go up to a 4.5 mm hook. Don’t add or remove stitches. Every round from Rnd 8 up has exactly 96 sts, and the mesh and border depend on that number.
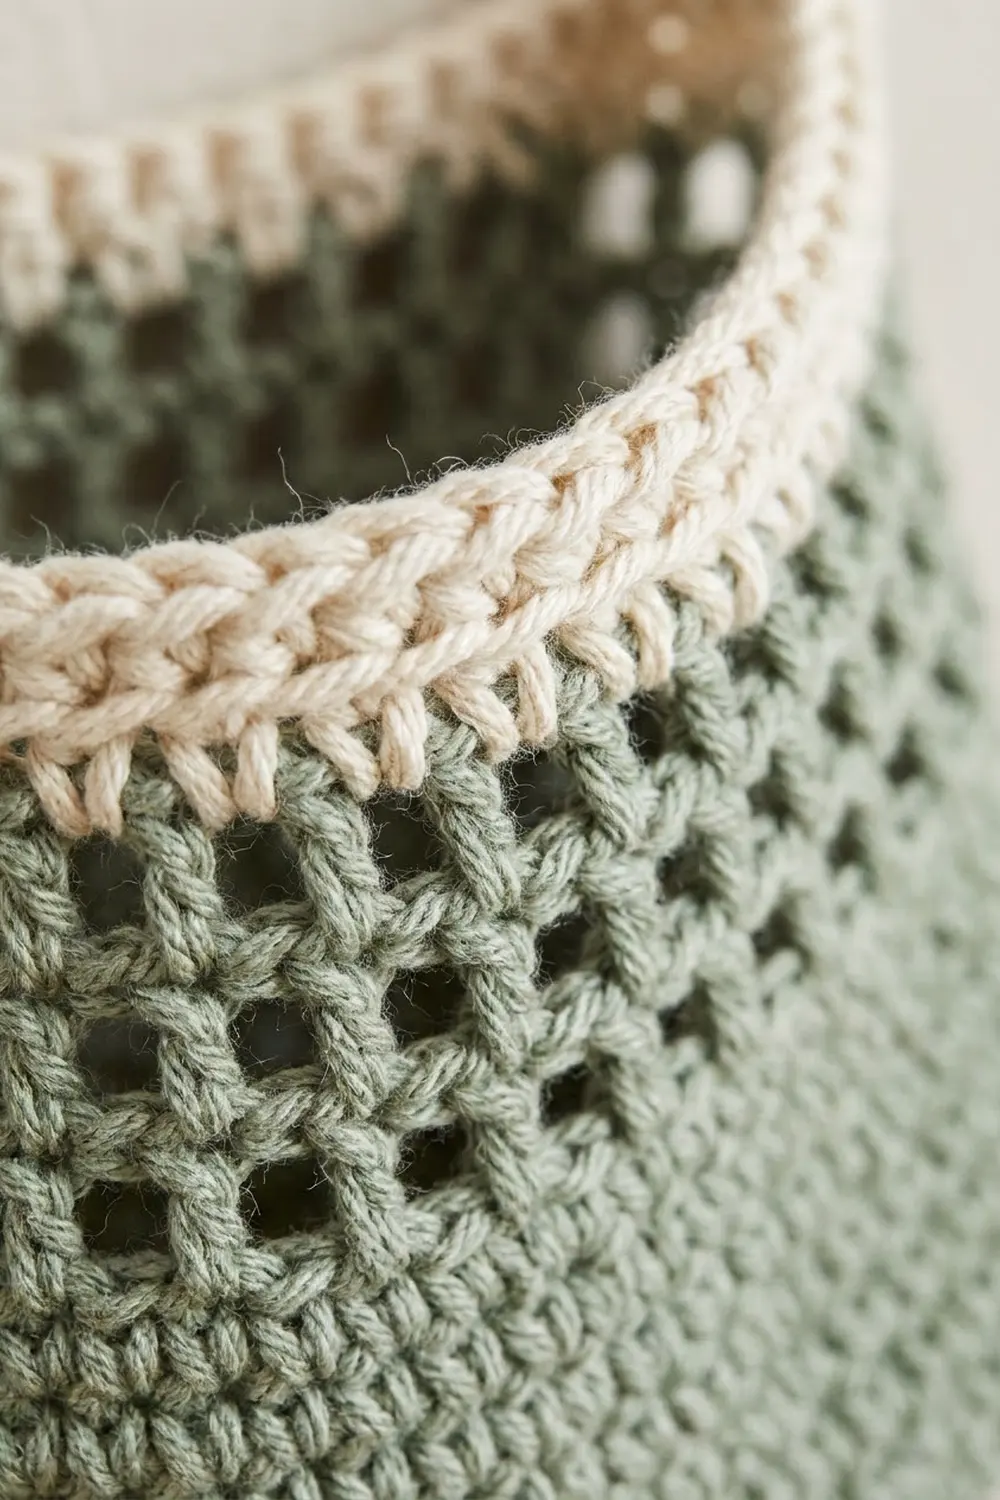
Basket Base (Sage)
The base is an oval with two straight sides and two rounded ends. Every round works in the same order: end group, side group, end group, side group. The side groups stay at 24 sts. Each end group grows by 3 sts per round.
Work in joined rounds. Join each round with a sl st to the first sc. Ch 1 to begin each round; it doesn’t count as a stitch.
With sage, ch 27.
Rnd 1: 3 sc in 2nd ch from hook, sc in next 24 ch, 3 sc in last ch. Rotate and work along the bottom of the chain: sc in next 24 ch. Join. (54 sts: 3 + 24 + 3 + 24)
Rnd 2: [Inc in each of next 3 sts, sc in next 24] twice. Join. (60 sts: end groups of 6)
Rnd 3: [(Sc in next st, inc) 3 times, sc in next 24] twice. Join. (66 sts: end groups of 9)
Rnd 4: [(Sc in next 2, inc) 3 times, sc in next 24] twice. Join. (72 sts: end groups of 12)
Rnd 5: [(Sc in next 3, inc) 3 times, sc in next 24] twice. Join. (78 sts: end groups of 15)
Rnd 6: [(Sc in next 4, inc) 3 times, sc in next 24] twice. Join. (84 sts: end groups of 18)
Rnd 7: [(Sc in next 5, inc) 3 times, sc in next 24] twice. Join. (90 sts: end groups of 21)
Rnd 8: [(Sc in next 6, inc) 3 times, sc in next 24] twice. Join. (96 sts: 24 + 24 + 24 + 24)
Checkpoint: The base should measure 10 x 4 in (25.4 x 10.2 cm). The straight sides account for 6 in (15.2 cm) of the length (24 sts at 4 sts per in). The two rounded ends add 2 in (5.1 cm) each.
Place markers on Rnd 8: Sts 1–24 are End 1, sts 25–48 are the Front side, sts 49–72 are End 2, and sts 73–96 are the Back side. Put a marker in st 37 (Front center) and st 85 (Back center).
Solid Walls (Sage)
Rnd 9: Ch 1, sc in BLO of each st around. Join. (96 sts)
Working into the back loops only leaves a ridge, so the walls turn up sharply from the base.
Rnds 10–16: Ch 1, sc in each st around. Join. (96 sts each rnd)
Checkpoint: Rnds 9–16 make 8 rounds, about 2 in (5.1 cm) of solid wall. Keep the same stitch count and the walls will rise straight up without flaring.
Mesh Walls (Sage)
Rnd 17 (conversion round): Ch 4 (counts as dc + ch 1), skip next st, dc in next st, ch 1, skip next st; repeat from * around. Sl st to 3rd ch of beginning ch-4. (48 dc + 48 ch-1 sps = 96 sts; 48 mesh squares)*
The dc posts land on the odd-numbered stitches, so st 37 (Front center) and st 85 (Back center) each get a dc. Move your markers up to those dc posts.
Rnds 18–21: Ch 4 (counts as dc + ch 1), dc in next dc, ch 1; repeat from * around, skipping each ch-1 sp. Sl st to 3rd ch of beginning ch-4. (48 dc + 48 ch-1 sps = 96 sts each rnd)*
Keep each dc right above the dc below it so the squares stay straight. Each side and each end has 12 squares.
Checkpoint: The 5 mesh rounds add 2 1/2 in (6.4 cm). The wall should now be 4 1/2 in (11.4 cm) tall, measured from the Rnd 9 ridge. Fasten off sage.
Border (Cream)
Border gauge: The border has the same gauge as the sc walls: 4 sts per in (2.54 cm), and each round is 1/4 in (0.6 cm) tall. Three rounds make a 3/4 in (1.9 cm) rim.
Rnd 22 (trim round): Join cream in any dc on End 1. Ch 1, sc in the dc, sc in the next ch-1 sp; repeat from * around. Join. (48 sc into dc + 48 sc into ch-1 sps = 96 sts)*
Per section: End 1 has 24, Front has 24, End 2 has 24, Back has 24.
Rnd 23: Ch 1, sc in each st around. Join. (96 sts; 24 per section)
Rnd 24: Ch 1, reverse sc in each st around. Join. (96 sts; 24 per section) Fasten off.
Why the math works: The base finished with 96 sts, split 24/24/24/24. Every wall round keeps 96 sts. The mesh turns those 96 sts into 48 dc plus 48 spaces, which is still 96. The border’s first round puts 1 sc in every dc and 1 sc in every space, so it lands back on 96 sts in the same four groups of 24. At 4 sts per in, each straight side of the rim is 6 in (15.2 cm) long, the same as the base. That keeps the rim from rippling or pulling in.
Divider (Sage + Cream)
This flat rectangle stands across the middle of the basket.
With sage, ch 17.
Row 1: Sc in 2nd ch from hook and in each ch across. Turn. (16 sts)
Rows 2–19: Ch 1, sc in each st across. Turn. (16 sts)
Change to cream.
Row 20: Ch 1, sc in each st across. (16 sts) Fasten off, leaving a 30 in (76.2 cm) cream tail for sewing.
Checkpoint: 4 in wide x 5 in tall (10.2 x 12.7 cm). The cream row is the top edge.
Straps (Make 2, Sage)
Each strap begins with a ring, and a strip of rows is worked up from it.
Ring: Ch 12, sl st to the first ch to form a ring.
Rnd 1: Ch 1, 20 sc into the ring. Join to first sc. (20 sts)
Strip Row 1: Ch 1, sc in the same st as the join and in next 4 sts. Turn. (5 sts)
Rows 2–24: Ch 1, sc in each st across. Turn. (5 sts)
Fasten off, leaving a 16 in (40.6 cm) tail.
Checkpoint: The strip is 1 1/4 in (3.2 cm) wide and 6 in (15.2 cm) long. The ring’s hole is about 1 in (2.5 cm) across, and its outside edge is about 1 1/2 in (3.8 cm) across. Each strap measures about 7 1/2 in (19.1 cm) from end to end.
Make All Pieces
| Piece | Qty | Color |
|---|---|---|
| Basket body (base + walls + border) | 1 | Sage, cream border |
| Divider | 1 | Sage, cream top row |
| Strap with ring | 2 | Sage |
Top-view layout:
            BACK (sts 73–96)
     [Strap]                 [Strap]
   ( ____________|____________ )
  (              |              )
 E1   Left       |   Right      E2
  (  section     |  section     )
   ( ____________|____________ )
           FRONT (sts 25–48)
       divider at st 37 / st 85
Joining
Divider: Set the divider inside the basket with its cream row at the top. Line up its side edges with the Front-center dc column (st 37) and the Back-center dc column (st 85). Thread the cream tail. Whipstitch one side edge of the divider to the dc column, from the base up through the border: work 1 stitch per divider row, catching the dc post or the sc wall stitch next to it. Your cream stitches will show on the outside as a neat vertical cream line. Repeat on the other side. Then use sage to whipstitch the bottom edge of the divider along the center of the base, from st 37 straight across to st 85.
Straps: On the inside of the Back wall, place one strap over sts 73–77 and the other over sts 92–96. Each ring should point up. Overlap the bottom 6 rows of each strip, 1 1/2 in (3.8 cm), down over the inside of the border and the top mesh round. Whipstitch around all 4 edges of the overlap, through the strap and the wall. The centers of the straps end up 4 3/4 in (12.1 cm) apart.
Tension: Sew firmly but don’t pull the stitches tight. The wall should stay flat behind the seam, with no puckers.
Checkpoint: The basket still measures 10 x 4 in (25.4 x 10.2 cm) at the rim. Each strap extends 4 1/2 in (11.4 cm) above the rim, not counting the ring.
Final Blocking
- Weave in all ends. Run each end through at least 2 in (5.1 cm) of stitches.
- Soak the basket in cool water for 10 minutes.
- Press out the water with a towel. Don’t wring it.
- Stuff the basket firmly with a rolled towel, or set it over a box about 10 x 4 in (25.4 x 10.2 cm).
- Square up the base, straighten the mesh columns and roll the cream rim gently outward.
- Lay the straps flat and smooth each ring into a round shape.
- Let everything dry completely, usually 24 hours.
Final Quality-Control Checklist
- Base is 10 x 4 in (25.4 x 10.2 cm) and lies flat.
- Every wall and border round has 96 sts.
- Each side and each end has 12 mesh squares, with the dc columns in straight lines.
- Cream rim is 3/4 in (1.9 cm) deep, with no ripples.
- Divider is centered, upright and flush with the rim.
- Straps are 4 3/4 in (12.1 cm) apart and sewn on all 4 edges.
- The dowel slides through both rings.
Troubleshooting
- The base ripples: You’ve added too many stitches, or your hook is too large. Recount the end groups against the pattern.
- The base cups: Your tension is too tight. Go up half a hook size.
- The walls flare: The stitch count has crept above 96. Count each round.
- The mesh slants: You’re working the dc into the ch-sp instead of the dc. Always work into the dc.
- The rim waves: Rnd 22 has too many sts. Work exactly 1 sc per dc and 1 sc per space.
- The divider leans: Sew it to the dc column, not to a ch-1 space.
- The straps stretch: Sew a longer overlap, 8 rows instead of 6.
Care
Hand wash in cool water with mild soap, then reshape the basket and air dry. Let it dry fully between uses to keep it fresh.
Final Notes
The size of this basket comes down to one number: 96. The oval base finishes at 96 sts and 10 x 4 in (25.4 x 10.2 cm). The walls stay at 96 sts through 2 in (5.1 cm) of solid sc and 2 1/2 in (6.4 cm) of mesh. The border adds 3/4 in (1.9 cm) at 96 sts, for a total height of 5 1/4 in (13.3 cm). Check your gauge and count at each checkpoint, and the divider and straps will line up with the stitches marked for them.
Happy crocheting!