

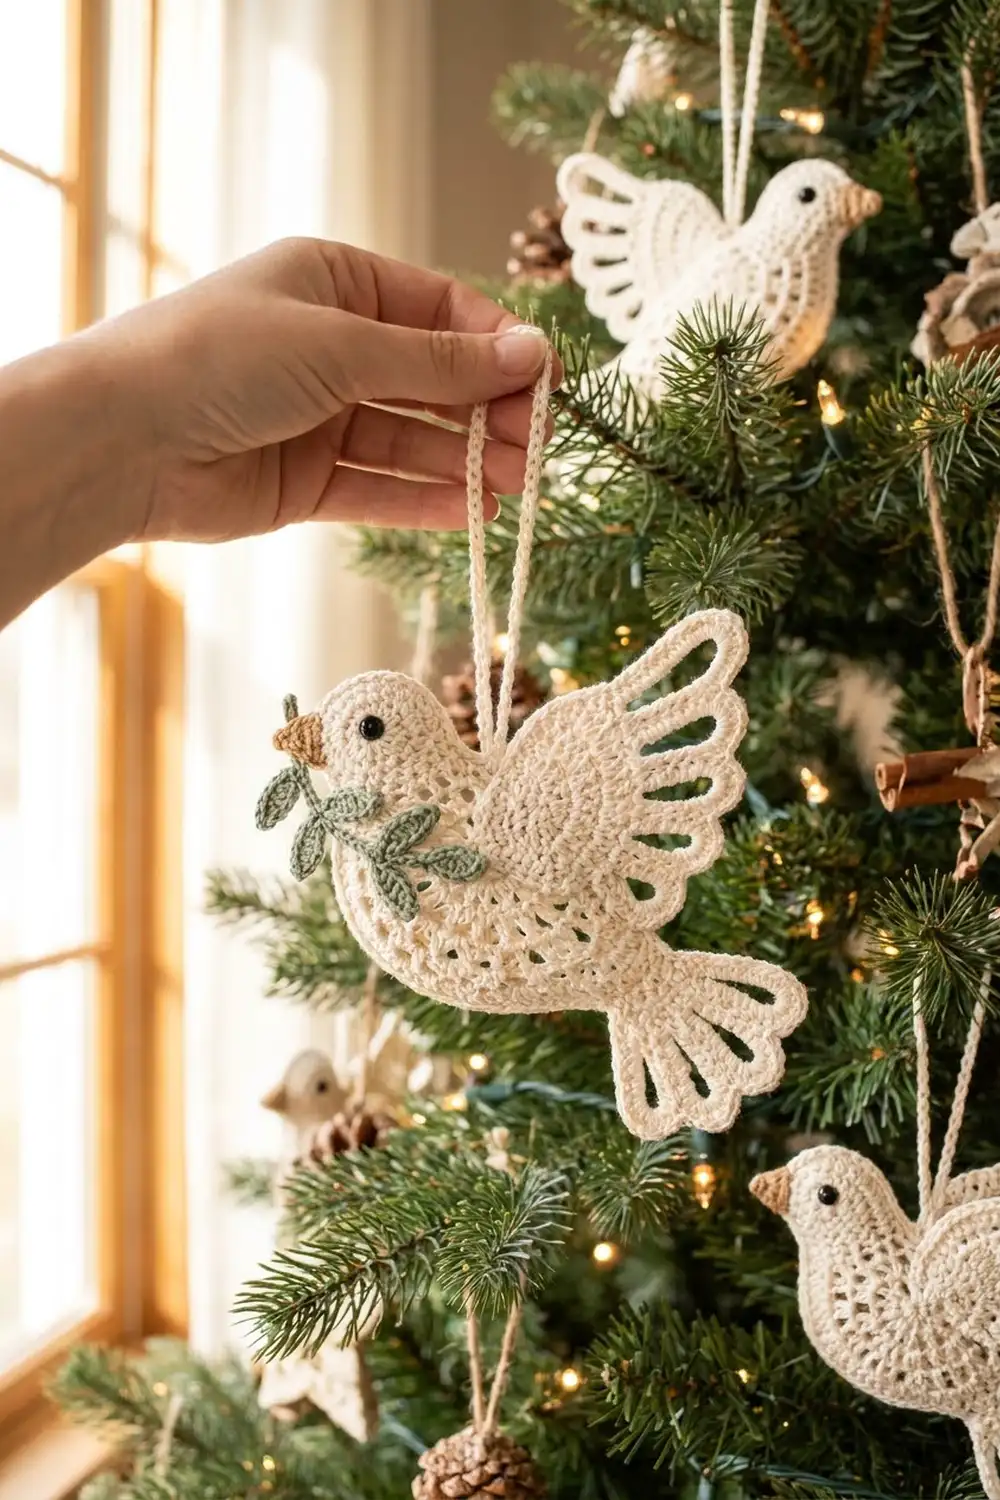
This peace dove is a lacy, cream-colored Christmas ornament with a fanned wing, a scalloped tail and a small sage-green olive sprig in its beak. It looks delicate, but every part uses basic stitches and simple chain loops.
The colors are quiet and classic: cream for the bird, sage green for the olive leaves, a touch of tan for the beak and a tiny black eye. It suits a natural, Scandinavian-style tree, and it also works as a gift topper or a window decoration.
The pattern uses US crochet terms. The finished dove measures about 6 in wide x 5 in tall (15.2 cm x 12.7 cm), not counting the hanging loop.
Construction is simple. You crochet a half-circle lace body, a round head, a feather wing, a tail fan, an olive sprig and a tiny beak. Then you add a border to the body, sew the parts together in layers and chain a hanging loop.
Finished Size and Construction
- Finished size: about 6 in x 5 in (15.2 cm x 12.7 cm), not counting the loop
- Skill level: Intermediate (easy stitches, careful assembly)
- Terminology: US crochet terms
- Yarn weight: Super Fine (#1), size 3 mercerized cotton thread or fingering-weight cotton
- Hook: 2.0 mm
- Number of pieces: one ornament made from 6 crocheted parts plus a chained hanging loop
- Layout: head at front left, body in the center, wing rising up and back, tail fanning down and back, sprig at the beak
- Body size: 3.8 in x 1.9 in (9.7 cm x 4.8 cm)
- Body size before border: 3.5 in x 1.75 in (8.9 cm x 4.4 cm)
- Border depth: 0.15 in (0.4 cm), one round of sc
Materials
Choose a smooth, tightly plied mercerized cotton. It shows the stitches crisply, holds starch well and keeps the feather loops open. Avoid fuzzy or very soft yarns, because the lace will collapse.
- Cream: 15 g / 37 m
- Sage green: 3 g / 7 m
- Tan: 1 m (scrap)
- Black: one 4 mm black bead, or 30 cm of black thread for a French knot
All quantities include a margin of about 25 percent for your gauge test and for the tails you sew with.
Tools:
- 2.0 mm crochet hook
- Fine tapestry needle, plus a beading needle if you use a bead
- Scissors
- Rust-proof pins and a blocking mat or folded towel
- Spray starch or diluted fabric stiffener
Abbreviations (US Terms)
- ch – chain
- sl st – slip stitch
- sc – single crochet
- hdc – half double crochet
- dc – double crochet
- st(s) – stitch(es)
- sp – space
- tch – turning chain
- ch-L loop – a feather loop made of L chains (L is given for each feather)
Special stitch – Leaf: ch 7, sc in 2nd ch from hook, hdc in next ch, dc in next 2 ch, hdc in next ch, sc in last ch (6 sts), sl st in the stem ch you started from.
Gauge and Checkpoints
Make the body first. It is your gauge test, and every other part is sized against it.
- Chain gauge: 8 ch = 1 in (2.5 cm)
- Dc row height: 1 row = 0.35 in (0.9 cm)
- Border gauge: 10 sc = 1 in (2.5 cm) along the curved edge
Checkpoints:
- After body Row 2: half circle 1.4 in (3.6 cm) wide and 0.7 in (1.8 cm) tall
- After body Row 5: 3.5 in (8.9 cm) wide and 1.75 in (4.4 cm) tall
- After the body border: 3.8 in (9.7 cm) wide and 1.9 in (4.8 cm) tall
- Head: 1.25 in (3.2 cm) across
- Wing: about 2.75 in (7.0 cm) from base to the tip of the longest feather
- Tail: about 2 in (5.1 cm) long and 2.25 in (5.7 cm) wide
If the body is more than 0.25 in (0.6 cm) too wide after Row 5, switch to a 1.75 mm hook. If it is too small, switch to a 2.25 mm hook. If the half circle ruffles, your chains are too loose. If it cups, they are too tight. Fix your gauge before making the other parts.
Body
The body is a lace half circle worked in rows, starting from the center of the back. The straight edge becomes the dove’s back, and the curved edge becomes the belly. Pairs of dc form ribs that spread outward, and the chain spaces get longer each row, forming a row of open arches along the belly.
With cream:
Row 1: Ch 4, 7 dc in 4th ch from hook. Turn. (8 dc; the skipped ch counts as 1 dc)
Row 2: Ch 3 (counts as dc), dc in same st, 2 dc in each of next 7 sts. Turn. (16 dc)
Row 3: Ch 3 (counts as dc), dc in next st, ch 2, dc in next 2 sts; repeat from * 6 more times. Turn. (16 dc in 8 pairs, 7 ch-2 sps)
Row 4: Ch 3 (counts as dc), dc in next dc, ch 3, skip ch-2 sp, dc in next 2 dc; repeat from * 6 more times. Turn. (16 dc, 7 ch-3 sps)
Row 5: Ch 3 (counts as dc), dc in next dc, ch 4, skip ch-3 sp, dc in next 2 dc; repeat from * 6 more times. Turn. (16 dc, 7 ch-4 sps)
Check that the body measures 3.5 in x 1.75 in (8.9 cm x 4.4 cm). Don’t fasten off. Go straight on to the Body Border section.
Head
With cream:
Rnd 1: Make a magic ring, ch 3 (counts as dc), 11 dc in ring, sl st to top of ch-3. (12 dc)
Rnd 2: Ch 2 (does not count), 2 hdc in each st around, sl st to first hdc. (24 hdc)
Fasten off, leaving a 10 in (25.4 cm) tail. The head measures 1.25 in (3.2 cm) across.
Wing
The wing is a small fan with six long, open feather loops.
With cream:
Row 1: Ch 4, 5 dc in 4th ch from hook. Turn. (6 dc)
Row 2: Ch 3 (counts as dc), dc in same st, ch 1, 2 dc in next st, ch 1; repeat from * 3 more times, 2 dc in last st. Turn. (12 dc in 6 pairs, 5 ch-1 sps)
Row 3: Ch 1, (sc, ch L, sc) in next dc, sc in next dc, skip ch-1 sp; repeat from * 5 more times (the last pair has no ch-1 sp after it). Use L = 20, 22, 24, 26, 28 and 30 for feathers 1 to 6. Turn. (18 sc, 6 feather loops)
Row 4: Ch 1, sc in next sc, work (L + 4) sc evenly over the next ch-L loop, sc in next 2 sc; repeat from * 5 more times. (192 sc)
In Row 4, the six feathers get 24, 26, 28, 30, 32 and 34 sc, which adds up to 174 sc. The 18 sc from Row 3 bring the total to 192. Leave the middle of each loop open. Fasten off, leaving a 12 in (30.5 cm) tail.
Tail
With cream:
Row 1: Ch 4, 4 dc in 4th ch from hook. Turn. (5 dc)
Row 2: Ch 3 (counts as dc), dc in same st, ch 1, 2 dc in next st, ch 1; repeat from * 2 more times, 2 dc in last st. Turn. (10 dc in 5 pairs, 4 ch-1 sps)
Row 3: Ch 1, sc in next dc, ch 14, sc in next dc, skip ch-1 sp; repeat from * 4 more times (the last pair has no ch-1 sp after it). Turn. (10 sc, 5 ch-14 loops)
Row 4: Ch 1, sc in next sc, (3 sc, 10 dc, 3 sc) in ch-14 loop, sc in next sc; repeat from * 4 more times. (90 sts)
The 3 sc on each side pinch the base of the loop. The 10 dc spread into a rounded scallop with a small open ring at the tip. Fasten off, leaving a 10 in (25.4 cm) tail.
Olive Sprig
With sage green:
Ch 12 for the stem.
Tip leaf: Work 1 Leaf, ending with sl st in the 12th (last) stem ch.
Now work back along the stem: sl st in next 3 ch. Work 1 Leaf, then work 1 more Leaf in the same stem ch, laying it to the opposite side. This makes a leaf pair.
Sl st in next 3 ch. Work a second leaf pair the same way. Sl st in the remaining 5 ch.
You now have 5 leaves: one tip leaf and two pairs. Each leaf is 0.75 in (1.9 cm) long, and the sprig is about 2 in (5.1 cm) long. Fasten off, leaving a 6 in (15.2 cm) tail.
Beak
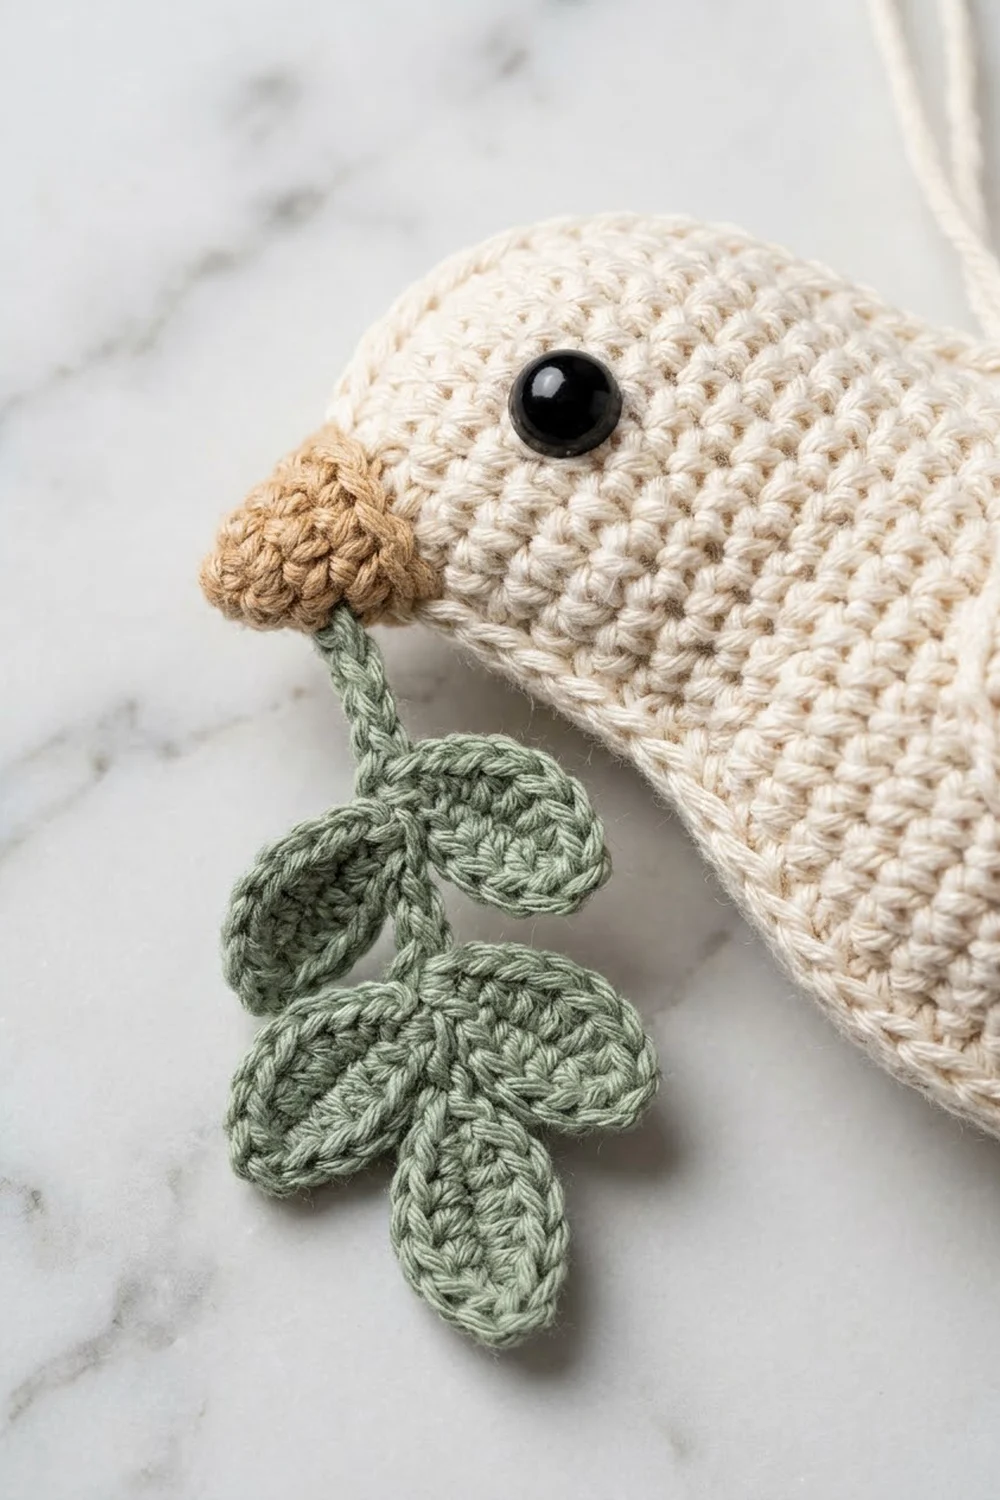
With tan: ch 3, sl st in 2nd ch from hook, sc in next ch. Fasten off, leaving a 4 in (10.2 cm) tail. The tiny wedge measures about 0.25 in (0.6 cm).
Make All Pieces
This is one ornament, but it has several parts. Check off each one before you start sewing:
| Part | Color | Quantity |
|---|---|---|
| Body (with border) | Cream | 1 |
| Head | Cream | 1 |
| Wing | Cream | 1 |
| Tail | Cream | 1 |
| Olive sprig | Sage green | 1 |
| Beak | Tan | 1 |
| Eye | Black bead or knot | 1 |
Layout grid (front view):
                 [ Wing ]  <- loop on longest feather
[Sprig][Beak][Head][   Body   ][Tail]
                    \_ belly arches
- Back layer: tail
- Middle layer: body
- Front layer: head (left) and wing (top)
Body Border
The border is one round of sc. It smooths the arches along the belly and finishes the straight back edge so the wing sews on neatly. Border gauge: 10 sc = 1 in (2.5 cm) on the curve.
Rnd 6: Work along the curved edge, into the stitches of Row 5: ch 1, 3 sc in first dc (corner), sc in next dc, 6 sc in next ch-4 sp, sc in next 2 dc; repeat from * 5 more times, 6 sc in last ch-4 sp, sc in next dc, 3 sc in top of tch (corner).
Curved edge count: 62 sc. That is 16 sc (1 in each existing dc), plus 42 sc in the seven ch-4 sps (7 x 6), plus 4 extra sc at the corners (2 extra at each corner).
Turn the piece to work along the straight back edge. Work 3 sc in each of the 5 row ends, 1 sc in the base of the Row 1 dc group (the center), then 3 sc in each of the 5 row ends on the other half. Sl st to first sc.
Straight edge count: 31 sc (15 + 1 + 15). Round total: 93 sc. Fasten off, leaving a 12 in (30.5 cm) tail.
Why the math works: After the border, the curve sits about 1.9 in (4.8 cm) from the center, so the curved edge is about 6 in (15.2 cm) long. At 10 sc per inch, that calls for about 60 sc. With the corner increases, 62 sc lies flat. The straight edge is 3.8 in (9.7 cm) long. With 31 sc, it is a little snug on purpose. That keeps the back edge firm where the wing is attached.
Joining
Sew the dove together with the fine tapestry needle and the cream tails. Use small whipstitches through the back loops only, so the seams don’t show on the front.
- Tail: Lay the tail behind the body so its base sits 0.5 in (1.3 cm) behind the body’s right corner. Fan the feathers down and to the right. Whipstitch the edge of tail Row 2 to the back of body Rows 4–5, stitch to stitch.
- Head: Place the head over the body’s left corner so it overlaps the body by 0.25 in (0.6 cm). Whipstitch the lower half of the head (12 of its 24 hdc) to the body border sc underneath, one hdc to one sc.
- Wing: Lay the wing’s straight base along the body’s back edge, starting 0.5 in (1.3 cm) from the head. Angle it so the longest feather points straight up and the shorter feathers fan back toward the tail. Sew the wing’s straight edge, about 1.4 in (3.6 cm) long, to the body’s back edge. That edge covers about 11 back-edge sc, so plan on about 2 sc for each wing row end. Lightly tack the lower feather edges to the body so they don’t flip forward.
- Beak and eye: Sew the beak to the front of the head, centered at the left. Sew on the bead, or work a French knot, 0.25 in (0.6 cm) behind the beak and slightly above it.
- Sprig: Tuck the end of the stem under the beak and tack it down with 2–3 stitches. Let the leaves fan forward.
- Hanging loop: With cream, join with sl st in the center sc at the tip of the longest feather (the 17th of its 34 sc). Ch 36, then sl st in the same st. Fasten off. The 36-ch loop is 4.5 in (11.4 cm) long and hangs about 2.25 in (5.7 cm) tall.
Keep your sewing tension relaxed. Tight stitches pull the body’s curve inward and distort the belly arches.
Size checkpoint: The assembled dove should measure about 6 in x 5 in (15.2 cm x 12.7 cm), within 0.25 in (0.6 cm).
Final Blocking
- Wet the ornament with cool water, then roll it in a towel to press out the extra water.
- Lay it face up on the blocking mat and pin the body to 3.8 in x 1.9 in (9.7 cm x 4.8 cm).
- Pin each wing feather open at its tip, spacing the six feathers evenly into a fan.
- Pin the 5 tail scallops open, with a pin through each tip ring.
- Spray generously with starch, or brush on diluted stiffener.
- Let it dry completely, at least 12 hours, before you remove the pins.
- Reshape the hanging loop by hand and trim any stray fibers.
Final Quality-Control Checklist
- The body has 7 clear arches along the belly and 8 straight dc ribs.
- The body border has 93 sc: 62 on the curve and 31 on the back.
- The wing has 6 open feathers that increase in length, with 192 sc in Row 4.
- The tail has 5 rounded scallops, with 90 sts in Row 4.
- The sprig has 5 leaves: 1 tip leaf and 2 pairs.
- The eye and beak are secure and level.
- All tails are woven in and can’t be seen from the front.
- The ornament hangs upright from its loop.
- The finished size is 6 in x 5 in (15.2 cm x 12.7 cm).
Troubleshooting
- Body ruffles: Your chains are too loose. Use a hook one size smaller for the chain spaces only.
- Body cups: Your chains are too tight. Relax your tension, or add 1 ch to each space in Rows 4–5.
- Feathers twist: You worked into the chains instead of around the loop. Work Row 4 around the whole loop.
- Tail scallops look flat: Make sure all 10 dc go into the loop between the two groups of 3 sc.
- Dove tips forward when hanging: Move the loop one feather toward the tail.
- Leaves curl: Steam them flat and add starch.
Care
Hand wash in cool water with mild soap, roll in a towel and re-block with starch. Store flat in tissue paper between seasons.
Final Notes
The measurements build on each other in a simple chain. The body reaches 3.5 in (8.9 cm) after Row 5 and 3.8 in (9.7 cm) after the border. The head measures 1.25 in (3.2 cm), the wing 2.75 in (7.0 cm) and the tail 2 in (5.1 cm). Together they make a dove about 6 in x 5 in (15.2 cm x 12.7 cm). If your body matches its checkpoints, everything else will fit.
Happy crocheting!