

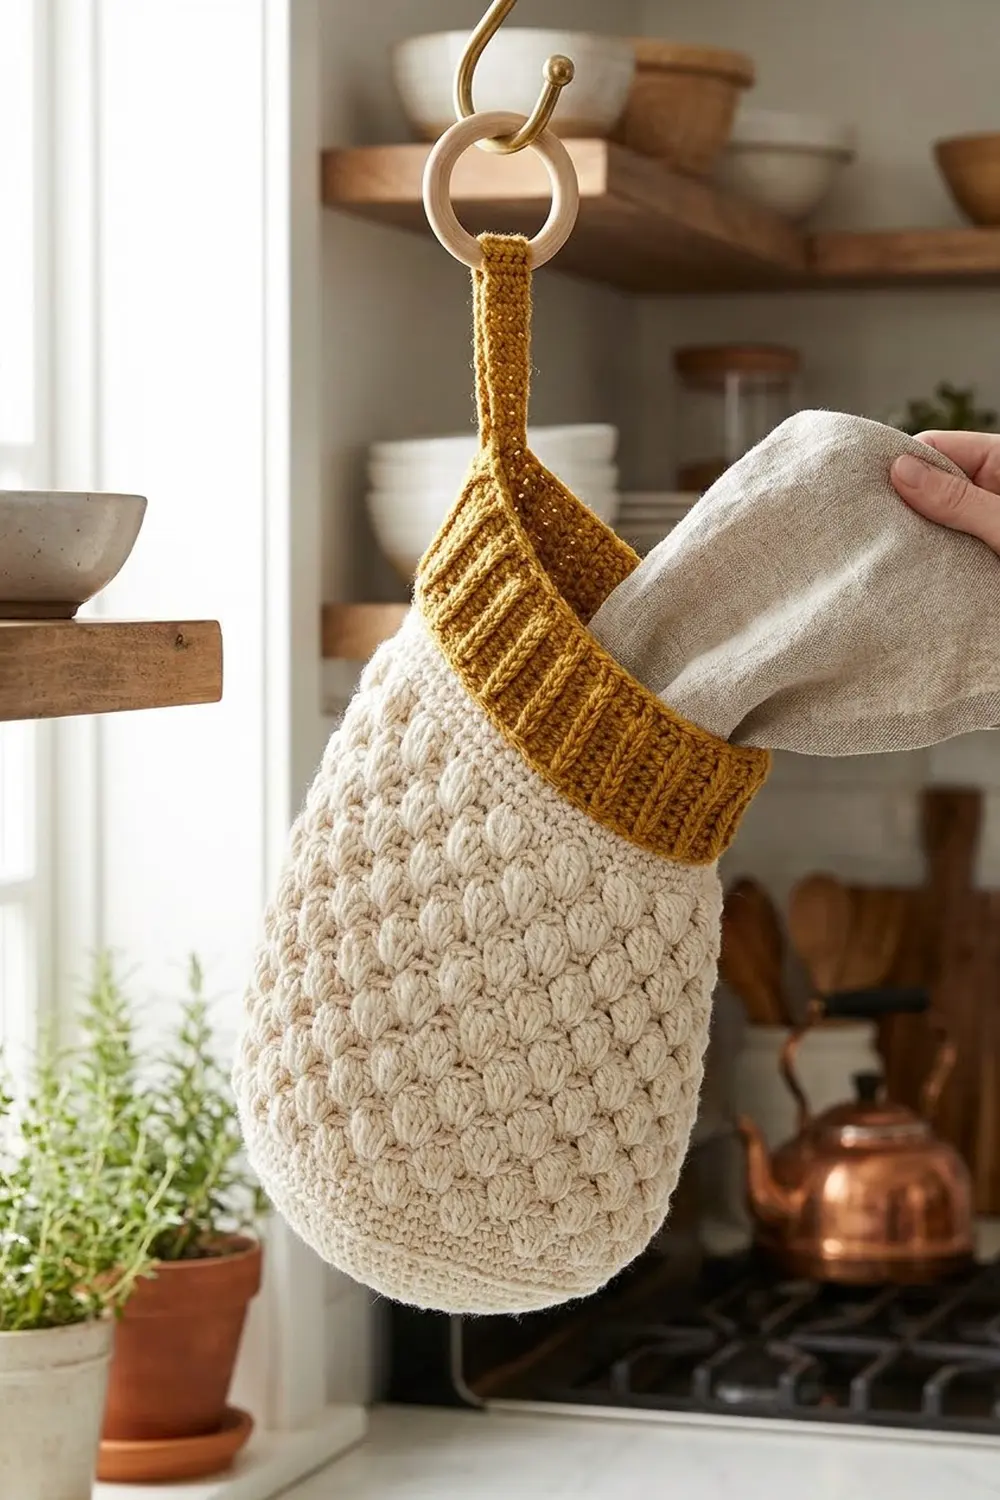
The Honey Puff Bag Holder is a soft, egg-shaped hanging holder for plastic grocery bags, produce bags or rolled tea towels. You push bags in through the wide top and pull them out through the small opening at the bottom.
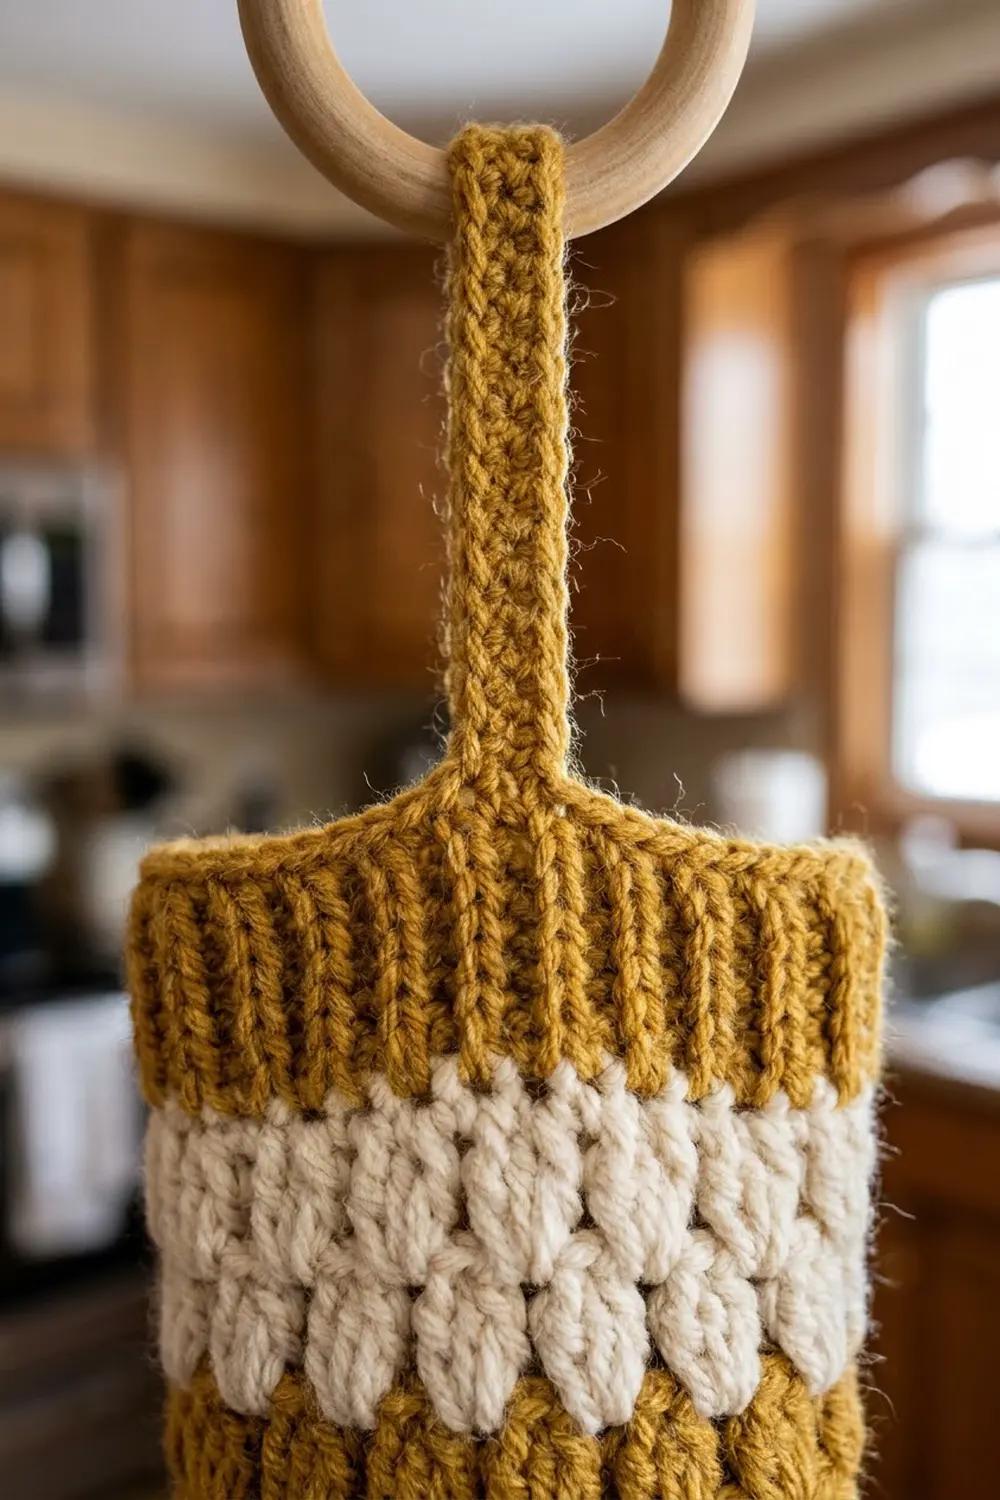
The body is cream puff stitches set in staggered rows, like a honeycomb. A mustard-gold ribbed collar finishes the top, and a narrow mustard strap loops through a natural wooden ring for hanging. The look is warm, modern and a little Scandinavian.
This pattern uses US crochet terms. The finished holder measures about 6 in (15.2 cm) wide at its widest point and 11.5 in (29.2 cm) tall from the bottom edge to the top of the collar. These measurements do not include the strap and ring.
The holder is built in a few simple steps:
– Start at the bottom with a small ring of single crochet.
– Widen the body over joined rounds of puff stitches.
– Decrease toward the neck and finish with a single-crochet rim.
– Work the mustard collar directly onto that rim.
– Sew a separate strap to the wooden ring, then stitch it inside the back of the collar.
Finished Size and Construction
- Finished size: 6 in (15.2 cm) wide x 11.5 in (29.2 cm) tall, laid flat
- Hanging length with strap and ring: about 17.25 in (43.8 cm)
- Skill level: Easy-intermediate (puff stitches, front and back post stitches)
- Terminology: US crochet terms
- Yarn weight: #5 bulky
- Hook: 6.0 mm (US J-10)
- Number of pieces: 1 finished item made from 3 crocheted parts (body, collar worked onto the body, strap) plus 1 wooden ring
- Layout: Single item, worked in the round from the bottom up, with no motifs to join
- Body size: 6 in (15.2 cm) wide x 10 in (25.4 cm) tall
- Size before border (collar): 6 in (15.2 cm) x 10 in (25.4 cm); neck 4 in (10.2 cm) wide laid flat
- Border (collar) depth: 1.5 in (3.8 cm)
Materials
Choose a smooth, plied bulky yarn so the puffs look clean and rounded. Cotton blends hold their shape well. Acrylic or wool blends give a softer, loftier puff. Avoid fuzzy yarns and yarns that split easily, because pulling up several long loops through them is frustrating.
- Color A (cream): about 130 g / 180 m (197 yd) of bulky yarn
- Color B (mustard): about 30 g / 42 m (46 yd) of bulky yarn
These amounts include about 15 percent extra to cover your test rounds and normal differences in tension.
Tools:
- 6.0 mm (US J-10) crochet hook
- 1 wooden ring, 2.75 in (7.0 cm) outer diameter
- Stitch marker
- Tapestry needle
- Scissors
- Measuring tape
- A rolled towel or plastic bags to fill the holder while it dries
Abbreviations (US Terms)
- ch chain
- sl st slip stitch
- sc single crochet
- dc double crochet
- sp space
- st(s) stitch(es)
- FPdc front post double crochet
- BPdc back post double crochet
- yo yarn over
- rep repeat
Puff (puff stitch): (Yo, insert hook in the stitch or space given, yo, pull up a loop about 0.5 in / 1.3 cm tall) 3 times, then yo and draw through all 7 loops on hook.
Puff2tog (puff decrease): (Yo, insert hook in next ch-1 sp, yo, pull up a long loop) twice, (yo, insert hook in following ch-1 sp, yo, pull up a long loop) twice, then yo and draw through all 9 loops on hook.
Puff repeat: One puff (or puff2tog) plus the ch-1 that follows it. Each puff repeat counts as 2 sts.
Gauge and Checkpoints
- Single crochet: 12 sc and 13 rounds = 4 in (10.2 cm), or 3 sc per 1 in (2.5 cm)
- Puff pattern: 6 puff repeats (12 sts) = 4 in (10.2 cm) wide, and 5 rounds = 4 in (10.2 cm) tall, so each puff round is about 0.8 in (2.0 cm) tall
Both stitch patterns work out to 3 sts per inch. That is why the bottom ring, body, neck and collar flow into each other without ruffling.
Test first. Work Rounds 1 to 7 of the body, then measure before going on. This small cup is your real gauge swatch.
Checkpoints (measured laid flat):
- After Round 3: ring 3 in (7.6 cm) wide, 0.9 in (2.3 cm) tall
- After Round 7: 6 in (15.2 cm) wide, about 4.1 in (10.4 cm) tall
- After Round 11: still 6 in (15.2 cm) wide, about 7.3 in (18.5 cm) tall
- After Round 14: neck 4 in (10.2 cm) wide, about 9.7 in (24.6 cm) tall
- After Round 15: 10 in (25.4 cm) tall
- After the collar: 11.5 in (29.2 cm) tall
If your piece is too big, go down to a 5.5 mm hook or pull your puff loops a little shorter. If it is too small, go up to a 6.5 mm hook or make the loops slightly longer. Change hooks and restart rather than adding or skipping stitches, because the increase rounds depend on exact counts.
Body
Use Color A. Join each round with a slip stitch instead of working in a spiral. Place a marker in the first stitch of each round.
Bottom Ring
Ch 18 and sl st to the first ch to form a ring, taking care not to twist the chain.
Round 1: Ch 1 (does not count as a st, here and in every round), sc in each ch around, sl st to first sc. (18 sc)
Rounds 2 to 3: Ch 1, sc in each sc around, sl st to first sc. (18 sc)
Laid flat, the ring should measure 3 in (7.6 cm) wide, with an opening about 1.9 in (4.8 cm) across.
Increase Rounds
Round 4: Ch 1, puff in first sc, ch 1, skip next sc, *puff in next sc, ch 1, skip next sc; rep from * 7 more times, sl st to top of first puff. (9 puff repeats = 18 sts)
Round 5: Sl st into first ch-1 sp, ch 1. Treat the sp you slipped into as the first “next” sp. *(Puff, ch 1) twice in next ch-1 sp, (puff, ch 1) in each of next 2 ch-1 sps; rep from * 2 more times, sl st to top of first puff. (12 puff repeats = 24 sts)
Round 6: Sl st into first ch-1 sp, ch 1, *(puff, ch 1) twice in next ch-1 sp, (puff, ch 1) in each of next 3 ch-1 sps; rep from * 2 more times, sl st to top of first puff. (15 puff repeats = 30 sts)
Round 7: Sl st into first ch-1 sp, ch 1, *(puff, ch 1) twice in next ch-1 sp, (puff, ch 1) in each of next 4 ch-1 sps; rep from * 2 more times, sl st to top of first puff. (18 puff repeats = 36 sts)
Each new puff sits in a ch-1 sp between two puffs below, so the rows stagger naturally into the honeycomb texture.
Even Rounds
Rounds 8 to 11: Sl st into first ch-1 sp, ch 1, (puff, ch 1) in each ch-1 sp around, sl st to top of first puff. (18 puff repeats = 36 sts)
The body is now at its widest: 12 in (30.5 cm) around, or 6 in (15.2 cm) wide laid flat.
Decrease Rounds
Round 12: Sl st into first ch-1 sp, ch 1, *puff2tog over next 2 ch-1 sps, ch 1, (puff, ch 1) in each of next 4 ch-1 sps; rep from * 2 more times, sl st to top of first st. (15 puff repeats = 30 sts)
Round 13: Sl st into first ch-1 sp, ch 1, *puff2tog over next 2 ch-1 sps, ch 1, (puff, ch 1) in each of next 3 ch-1 sps; rep from * 2 more times, sl st to top of first st. (12 puff repeats = 24 sts)
Round 14: Sl st into first ch-1 sp, ch 1, (puff, ch 1) in each ch-1 sp around, sl st to top of first puff. (12 puff repeats = 24 sts)
Neck Rim
Round 15 (conversion round): Ch 1, sc in top of each puff and in each ch-1 sp around, sl st to first sc. (24 sc: 24 sts worked 1 per existing st, from 12 puffs + 12 ch-1 sps, + 0 added)
Fasten off Color A and weave in both tails. The body now measures 6 in (15.2 cm) wide x 10 in (25.4 cm) tall, with a neck 8 in (20.3 cm) around.
Hanging Strap
Use Color B.
Ch 5.
Row 1: Sc in 2nd ch from hook and in each ch across, turn. (4 sc)
Rows 2 to 21: Ch 1, sc in each sc across, turn. (4 sc)
Fasten off, leaving a 12 in (30.5 cm) tail for sewing. The strap measures 1.3 in (3.3 cm) wide x about 6.5 in (16.5 cm) long.
Attach the ring: Pass one short end of the strap through the wooden ring and fold about 1.5 in (3.8 cm) back against the strap. Whipstitch the short end and both long edges of the folded part to the strap, keeping the ring snug in the fold. Weave in the tail.
Border: Ribbed Collar
The collar is this piece’s border. Work it in Color B directly into the 24 sc of Round 15.
Border gauge: 12 sts = 4 in (10.2 cm) in collar pattern, and 5 collar rounds = 1.5 in (3.8 cm).
Lay the body flat with the round’s join at one side. Each flat side (front and back) holds 12 sts. The collar keeps 12 sts per side, or 24 sts around, in every round.
Collar Round 1: Join Color B with a sl st in the joining stitch of Round 15, ch 1, sc in each sc around, sl st to first sc. (24 sc; 12 per side)
Collar Round 2: Ch 2 (does not count), dc in each sc around, sl st to first dc. (24 dc; 12 per side)
Collar Round 3: Ch 2, *FPdc around next dc, BPdc around next dc; rep from * 11 more times, sl st to first FPdc. (24 sts: 12 FPdc + 12 BPdc; 12 per side)
Collar Round 4: Ch 2, *FPdc around next FPdc, BPdc around next BPdc; rep from * 11 more times, sl st to first FPdc. (24 sts; 12 per side)
Collar Round 5: Ch 1, sc in each st around, sl st to first sc. (24 sc; 12 per side)
Fasten off and weave in the tails.
Why the math works: The neck rim has 24 sts at 3 sts per inch. That makes it 8 in (20.3 cm) around, or 4 in (10.2 cm) wide laid flat. The collar keeps exactly 24 sts at the same gauge, so it sits flat against the neck without flaring or pulling in. The ribbing alternates 1 FPdc and 1 BPdc, so it needs an even count, and 24 makes 12 rib pairs. Five collar rounds add 1.5 in (3.8 cm), bringing the total height from 10 in (25.4 cm) to 11.5 in (29.2 cm).
Attach the strap: Choose the center back of the collar. The side opposite the round joins hides them best. Lay the free end of the strap against the inside of the collar, overlapping 1.5 in (3.8 cm) so it covers the full collar depth. Whipstitch all four edges of the overlap to the inside of the collar. Catch only the inner loops so the stitches don’t show on the front. About 3 in (7.6 cm) of strap stays visible between the collar top and the ring.
Final Blocking
- Lightly dampen the holder with a spray bottle, or hold a steam iron 1 in (2.5 cm) above the fabric. Never press the iron onto the puffs.
- Stuff the body firmly with a rolled towel or a bundle of plastic bags to round out the egg shape.
- Ease the widest rounds to 6 in (15.2 cm) across and the neck to 4 in (10.2 cm).
- Straighten the collar ribs so they run vertically, and smooth the top sc edge.
- Shape the bottom ring into a neat circle about 1.9 in (4.8 cm) across.
- Let it dry completely with the filling in place, then remove the filling.
Final Quality-Control Checklist
- The bottom ring has 18 sc and lies in a clean circle.
- Round 7 and Rounds 8 to 11 each have 18 puffs.
- The decreases are spaced evenly in 3 sections, so the shape is symmetrical.
- The neck rim has 24 sc.
- Every collar round has 24 sts, 12 per side.
- The collar ribs line up vertically, FPdc over FPdc.
- The strap is centered at the back and the ring is secure in its fold.
- The holder measures 6 in (15.2 cm) wide x 11.5 in (29.2 cm) tall.
- All tails are woven in and trimmed.
Troubleshooting
The body flares like a bowl. Your puffs are too loose or too tall. Shorten the loops and check for the 6 in (15.2 cm) width at Round 7.
The body looks narrow and stiff. Your puffs are too tight. Go up a hook size and keep every pulled-up loop the same height.
Puffs stack instead of staggering. Make sure every puff goes into a ch-1 sp, never into the top of a puff.
The collar ruffles. Count to confirm you have 24 sts. If the count is right, work the collar again with a hook one size smaller.
The strap twists or tilts. Unpick it and sew it again so the overlap sits straight and centered.
Bags slip out of the bottom. A firmer bottom ring holds bags better. Add one more round of sc, or work the ring with a smaller hook.
Care
Hand wash in cool water, roll in a towel to remove excess water, and dry it flat or with filling inside to keep the egg shape. Do not tumble dry, because the puffs can felt or fuzz.
Final Notes
Here is the measurement chain from bottom to top:
– An 18 sc ring 3 in (7.6 cm) wide.
– Growth to 18 puff repeats and 6 in (15.2 cm) wide by Round 7.
– Even rounds up to 7.3 in (18.5 cm) tall.
– Decreases to a 24 st neck 4 in (10.2 cm) wide, and a body 10 in (25.4 cm) tall.
– A 24 st collar that brings the holder to 11.5 in (29.2 cm).
If you hit each checkpoint, the finished shape will follow.
Happy crocheting!