
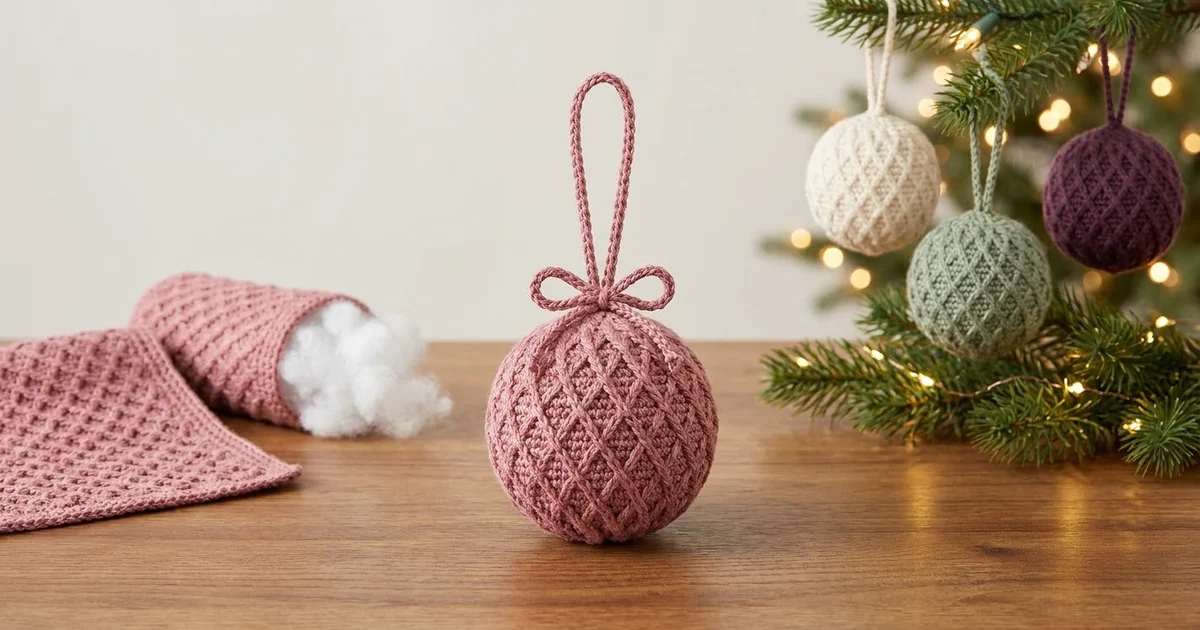
The Rosy Lattice Christmas Ball is a small stuffed ornament with a rich, knit-look texture. Crossed double crochet stitches lean against each other in offset rows. Together they form a diagonal lattice of tiny V shapes that wraps the whole ball.
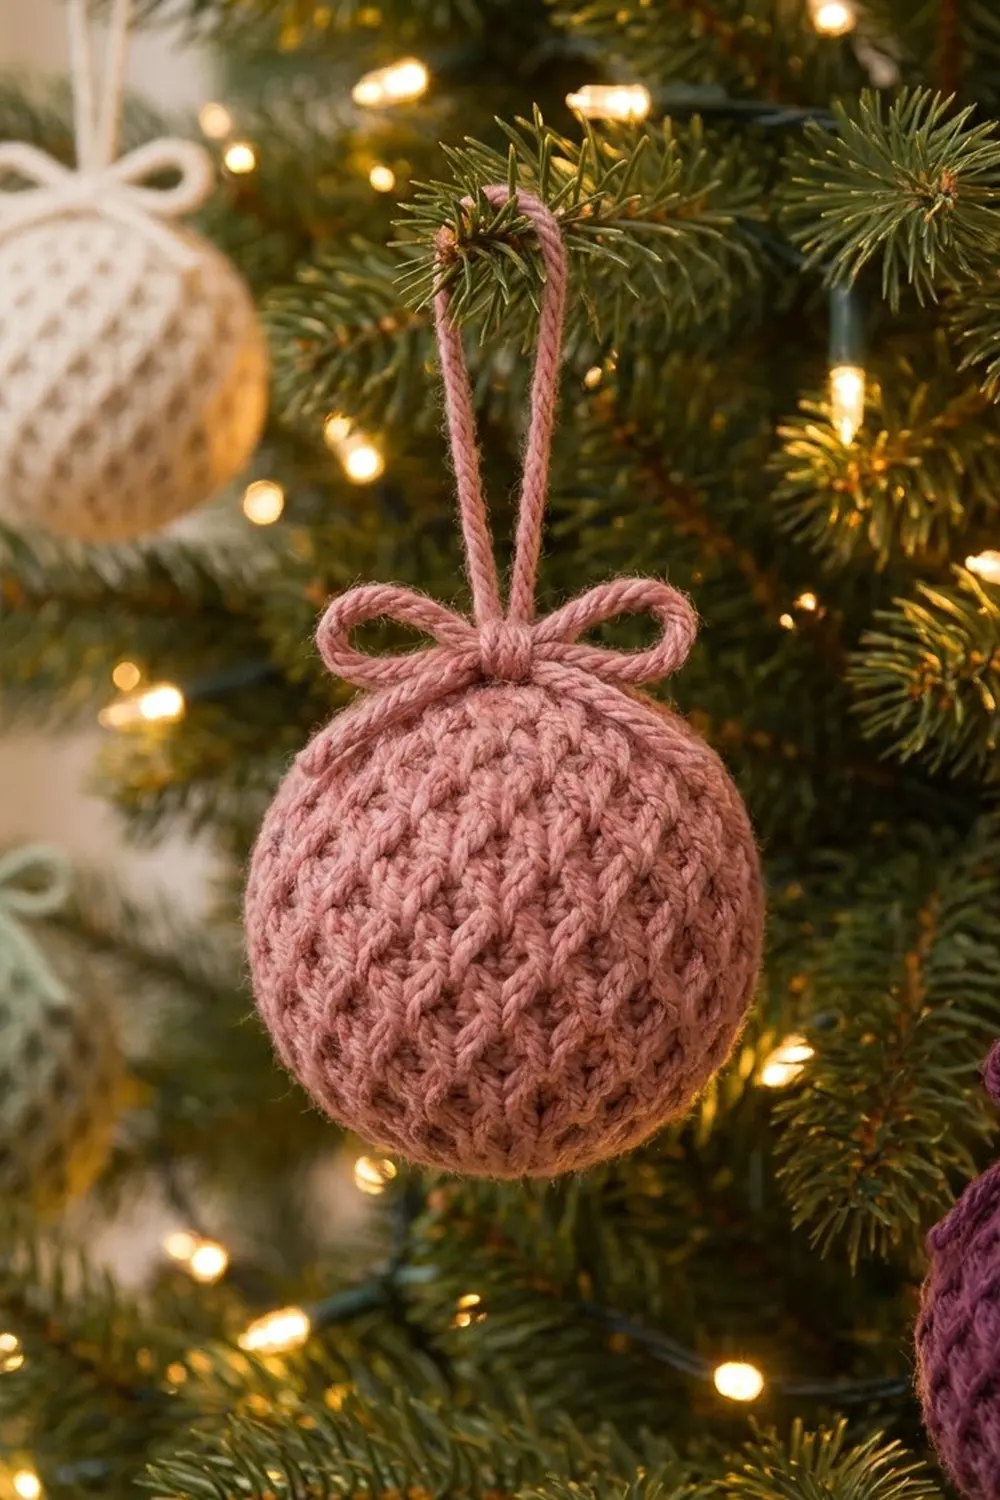
The sample is dusty rose with a matching hanging loop and a small bow. The same design also looks lovely in cream, sage green and deep plum, so you can make a coordinated set for your tree. This pattern uses US crochet terms.
The finished ornament measures about 3 in (7.6 cm) across and has a circumference of 9.5 in (24.1 cm). The hanging loop adds about 2.75 in (7.0 cm) above the top.
The construction is simple. You crochet one flat rectangle in rows, seam it into a tube, gather the bottom closed, stuff it, and gather the top. Then you add a chain loop and a tied bow. There is no working in the round and no shaping.
Finished Size and Construction
- Finished size: about 3 in (7.6 cm) diameter, 9.5 in (24.1 cm) circumference
- Skill level: Easy / advanced beginner
- Terminology: US crochet terms
- Yarn weight: Worsted (#4)
- Hook: 4.5 mm (US 7)
- Number of pieces: 1 body panel, plus 1 chain hanging loop and 1 chain bow cord
- Layout: one rectangle seamed into a tube and gathered at both ends
- Flat panel size: 9.5 in wide x 5.0 in tall (24.1 cm x 12.7 cm)
- Size before border: 9.5 in x 5.0 in (24.1 cm x 12.7 cm), the same as the panel
- Border depth: none added; the edges are gathered, which adds 0 in (0 cm)
Materials
Yarn: Use a smooth worsted-weight yarn, about 200 m per 100 g (219 yd per 3.5 oz). Wool, a wool blend or soft acrylic all work. A plied, matte yarn shows the crossed stitches best. Avoid fuzzy or very loosely spun yarns, because they hide the lattice.
- Dusty rose (main ornament): 20 g, about 40 m (44 yd)
- Optional colorways: cream, sage green or plum, 20 g / about 40 m (44 yd) each, one color per ornament
Each ornament uses about 15 g (30 m / 33 yd). The quantities above include a margin for the swatch, seaming, the gathering tails, the loop and the bow.
Tools:
– 4.5 mm (US 7) crochet hook
– Yarn needle
– Polyester fiberfill, about 10–12 g per ornament
– Scissors
– Measuring tape or ruler
– 2 locking stitch markers
– Spray bottle or steamer for blocking
Abbreviations (US Terms)
- ch – chain
- sc – single crochet
- dc – double crochet
- sk – skip
- sl st – slip stitch
- st(s) – stitch(es)
- RS – right side
- WS – wrong side
- Xdc – crossed double crochet (see below)
Special stitch – crossed double crochet (Xdc): Skip the next stitch and work 1 dc in the stitch after it. Then, working in front of the dc you just made, work 1 dc in the skipped stitch. One Xdc uses 2 stitches and makes 2 stitches.
The turning ch-3 counts as 1 dc throughout. The turning ch-1 on sc rows does not count as a stitch.
Gauge and Checkpoints
Gauge: 16 sts = 4 in (10.2 cm) in pattern. In height, Rows 1–9 = 2.6 in (6.6 cm). Each sc row is about 0.2 in (0.5 cm) tall and each Xdc row is about 0.4 in (1.0 cm) tall, so one pair of rows is 0.6 in (1.5 cm).
Test swatch: Make one swatch before you start the ornament.
Ch 17.
Row 1: Sc in 2nd ch from hook and in each ch across, turn. (16 sc)
Row 2: Ch 3 (counts as dc), 7 Xdc, dc in last st, turn. (1 + 14 + 1 = 16 sts)
Row 3: Ch 1, sc in each st across, turn. (16 sc)
Row 4: Ch 3, dc in next st, 6 Xdc, dc in last 2 sts, turn. (2 + 12 + 2 = 16 sts)
Row 5: Ch 1, sc in each st across, turn. (16 sc)
Rows 6–9: Repeat Rows 2–5.
The swatch should measure 4 in x 2.6 in (10.2 cm x 6.6 cm).
- Swatch too big? Go down to a 4.0 mm hook.
- Swatch too small? Go up to a 5.0 mm hook.
- Width correct but rows too tall? Pull the dc loops down more snugly. Hook size alone usually won’t fix row height.
Checkpoints for the ornament:
– After Row 1: 9.5 in (24.1 cm) wide
– After Row 9: 2.6 in (6.6 cm) tall
– After Row 17: 5.0 in (12.7 cm) tall, still 9.5 in (24.1 cm) wide
If the width drifts by more than 0.5 in (1.3 cm), count your stitches before you change hooks. A missed stitch at the end of a row is the most common cause.
Body Panel
Work flat in rows with dusty rose. Leave a 12 in (30.5 cm) starting tail. You’ll use it later to gather the bottom.
Foundation: Ch 39.
Row 1 (RS): Sc in 2nd ch from hook and in each ch across, turn. (38 sc)
Measure now: 9.5 in (24.1 cm).
Row 2 (Lattice Row A): Ch 3 (counts as dc), 18 Xdc, dc in last st, turn. (38 sts: 1 + 36 + 1)
Row 3: Ch 1, sc in each st across, turn. (38 sc)
Work the sc into the tops of the dc stitches, not into the gaps between them. Work the last sc into the top of the turning ch-3.
Row 4 (Lattice Row B): Ch 3 (counts as dc), dc in next st, 17 Xdc, dc in last 2 sts, turn. (38 sts: 2 + 34 + 2)
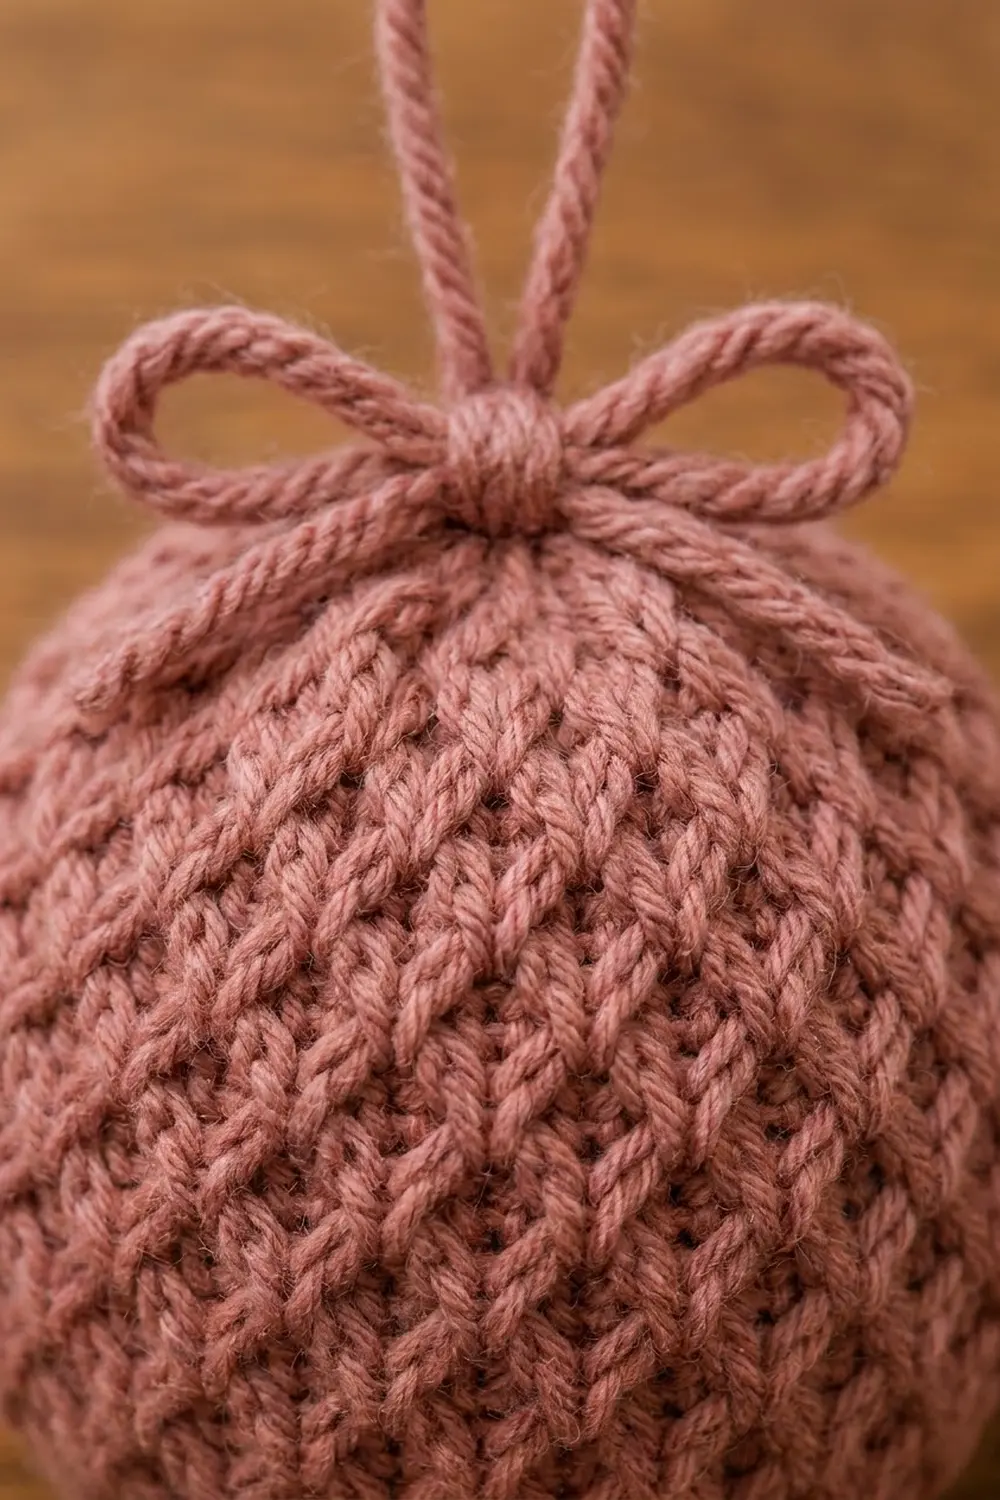
Row B starts with two straight stitches instead of one. This moves every cross over by one stitch compared with Row A. That one-stitch offset is what turns stacked crosses into a diagonal lattice.
Row 5: Ch 1, sc in each st across, turn. (38 sc)
Rows 6–9: Repeat Rows 2–5. (38 sts in every row)
Checkpoint: the panel is 2.6 in (6.6 cm) tall.
Rows 10–17: Repeat Rows 2–5 twice more. (38 sts in every row)
The last row, Row 17, is an sc row. Fasten off and leave a 12 in (30.5 cm) tail for gathering the top.
Panel summary: 17 rows in total: 1 starting sc row plus 4 repeats of Rows 2–5. That gives 8 lattice rows and 9 sc rows. In height, that is 9 x 0.2 in + 8 x 0.4 in = 1.8 in + 3.2 in = 5.0 in (12.7 cm).
Final panel: 9.5 in x 5.0 in (24.1 cm x 12.7 cm). The lattice runs evenly across the whole width, with a firm sc edge at the top and bottom.
Border and Finishing Edges
This ornament has no added border. The top and bottom sc edges are your finishing edges, and they get gathered closed. Treat them with the same care as a border.
Edge gauge: 4 sts per inch (2.54 cm) across, so each edge has 38 sts over 9.5 in (24.1 cm).
Bottom edge (Row 1 / foundation): 38 sts available for gathering, all worked into the unused foundation loops.
Top edge (Row 17): 38 sc available for gathering.
Side edges (row ends): 17 row ends on each side. These are seamed together, not bordered.
Why the math works: Each Xdc needs exactly 2 stitches, so the stitch count must allow full crosses in both lattice rows:
- Row A: 38 − 2 edge sts = 36, which is 18 crosses.
- Row B: 38 − 4 edge sts = 34, which is 17 crosses.
Both numbers divide evenly by 2, so no row ever ends with half a cross. The circumference of 9.5 in (24.1 cm) divided by π (3.1416) gives a diameter of about 3.0 in (7.6 cm). That is the ornament size.
The panel height of 5.0 in (12.7 cm) is slightly more than half the circumference, which is 4.75 in (12.1 cm). That extra 0.25 inch of height is taken up when the poles are gathered, so the ball comes out round rather than flattened.
Assembly
1. Seam the tube. Fold the panel in half with the RS facing out, so the two short side edges meet. Thread the bottom tail onto a yarn needle and whipstitch the side edges together, one row end to one row end, for all 17 rows. Keep the seam snug but flat.
You now have a tube 9.5 in (24.1 cm) around and 5.0 in (12.7 cm) tall. Laid flat, it measures about 4.75 in (12.1 cm) wide.
2. Gather the bottom. With the same tail, weave in and out through all 38 stitches along the foundation edge, about one stitch in from the edge. Pull firmly until the opening closes completely. Make 2–3 small stitches across the center to lock it, then push the needle into the tube.
3. Stuff. Add 10–12 g of fiberfill in small pieces. Push it into the bottom first, then build up the middle. Stop when the tube feels firm and round but the lattice still lies smooth, not stretched open.
4. Gather the top. Thread the top tail and weave through all 38 sts of Row 17 in the same way. Top up the stuffing just before you close it. Pull tight, secure with 2–3 stitches, and keep the tail for attaching the loop.
5. Hanging loop. Ch 22, which is about 5.5 in (14.0 cm). Fasten off and leave 6 in (15.2 cm) tails at both ends. Fold the chain in half and sew both ends to the center of the top gather. The finished loop stands 2.75 in (7.0 cm) tall.
6. Bow. Ch 48, which is about 12 in (30.5 cm). Fasten off. Wrap the cord once around the base of the hanging loop, right against the top of the ornament, and tie a small bow with two loops. Each bow loop should be about 1 in (2.5 cm) across. Sew through the knot once to hold it, then trim the tails to about 0.5 in (1.3 cm).
Final Blocking
- Before you seam, pin the flat panel to a blocking mat at 9.5 in x 5.0 in (24.1 cm x 12.7 cm).
- Mist it lightly with water, or hover steam over it without touching the yarn. Don’t press, because pressing flattens the crossed stitches.
- Let the panel dry completely, which usually takes 1–2 hours.
- After stuffing, roll the ornament gently between your palms for about 30 seconds to even out the shape.
- If one side looks flat, open a small gap at the top gather, add a little fiberfill, and close it again.
- Steam the bow loops lightly and shape them with your fingers so they stand out.
Final Quality-Control Checklist
- Every row has 38 stitches
- Lattice Rows A and B alternate, so the crosses sit offset in diagonals
- The panel measured 9.5 in x 5.0 in (24.1 cm x 12.7 cm) before seaming
- The side seam is flat and runs straight from top to bottom
- Both poles are fully closed with no visible stuffing
- The ornament measures about 3 in (7.6 cm) across in every direction
- The hanging loop is centered and stands 2.75 in (7.0 cm) tall
- The bow is tied snugly at the base of the loop
- All tails are woven in or buried inside the stuffing
Troubleshooting
The crosses stack in straight columns instead of diagonals.
You probably worked Row A twice in a row. Row B must start with dc in the first 2 stitches.
The lattice looks blurry.
Make sure the second dc of each cross goes in front of the first dc, not behind it. Also try a smoother yarn.
The panel slants or the edges wave.
Check that the turning ch-3 counts as a stitch and that you work the final sc into the top of it.
The ball looks egg-shaped.
The panel is too tall. Remove one lattice row and its sc row, which takes off 0.6 in (1.5 cm). Alternatively, add more stuffing at the middle.
The ball looks squat.
The panel is too short. Add one more pair of rows to make it 5.6 in (14.2 cm) tall.
There is a hole at a pole.
Weave a second pass through the edge stitches and pull tight.
The seam shows a ridge.
Whipstitch through matching row ends only, and don’t pull the stitches tighter than the fabric.
Care
Spot clean with a damp cloth and cool water, then let the ornament air dry in its round shape. Store it in a box away from crushing weight and direct sunlight.
Final Notes
Each measurement in this pattern depends on the one before it:
- The gauge of 16 sts = 4 in (10.2 cm) gives 38 stitches across 9.5 in (24.1 cm).
- Seven 2-row pattern repeats in the swatch stand in for the full panel: 17 rows reach 5.0 in (12.7 cm) tall.
- Seaming the panel makes a tube 9.5 in (24.1 cm) around.
- Gathering and stuffing the tube makes a ball about 3 in (7.6 cm) across.
- The 2.75 in (7.0 cm) hanging loop and the tied bow finish the ornament.
If your swatch matches the gauge, everything after it will fall into place. Make one in dusty rose, then try cream, sage and plum for a full set.
Happy crocheting!