
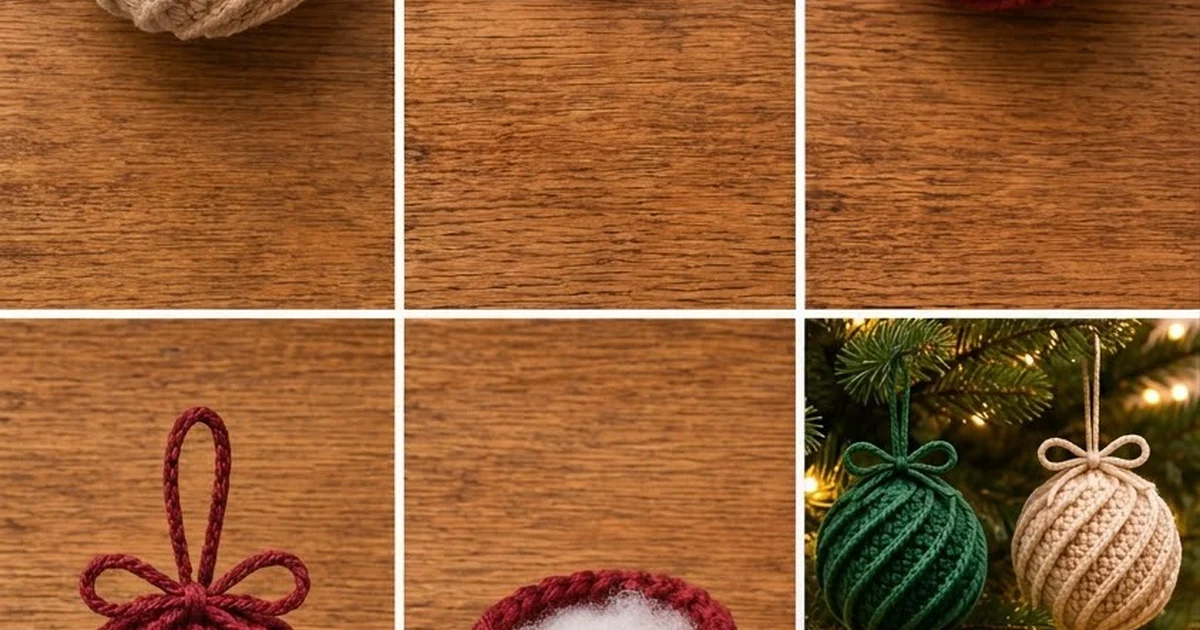
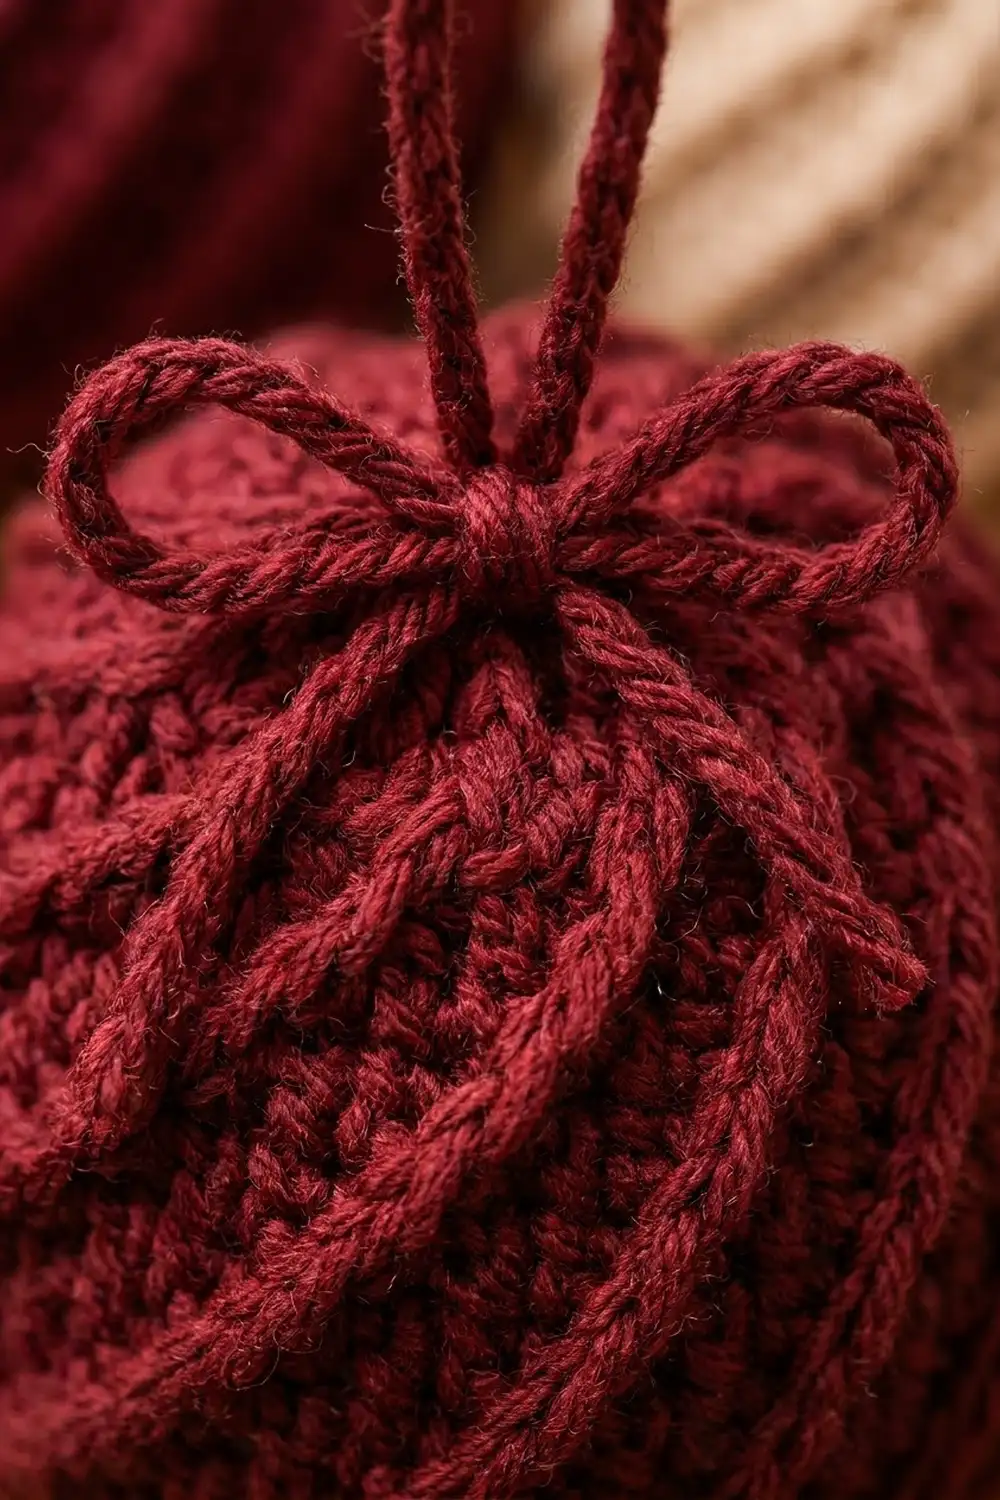
This Winter Swirl Bauble is a round, fully stuffed Christmas ornament with raised diagonal ridges. The ridges spiral around the lower half and middle of the ball, then run up and meet at the top. A slip-stitch cord forms the hanging loop, and a small tied bow sits at its base.
The sample is a deep burgundy, or wine red. The same pattern looks just as good in forest green, warm cream or navy blue, so you can make a matching set for the tree. Each bauble is a single color from start to finish, and there are no color changes.
The pattern uses US crochet terms. The finished ball measures about 3 in (7.6 cm) across, and about 5.5 in (14.0 cm) tall including the hanging loop.
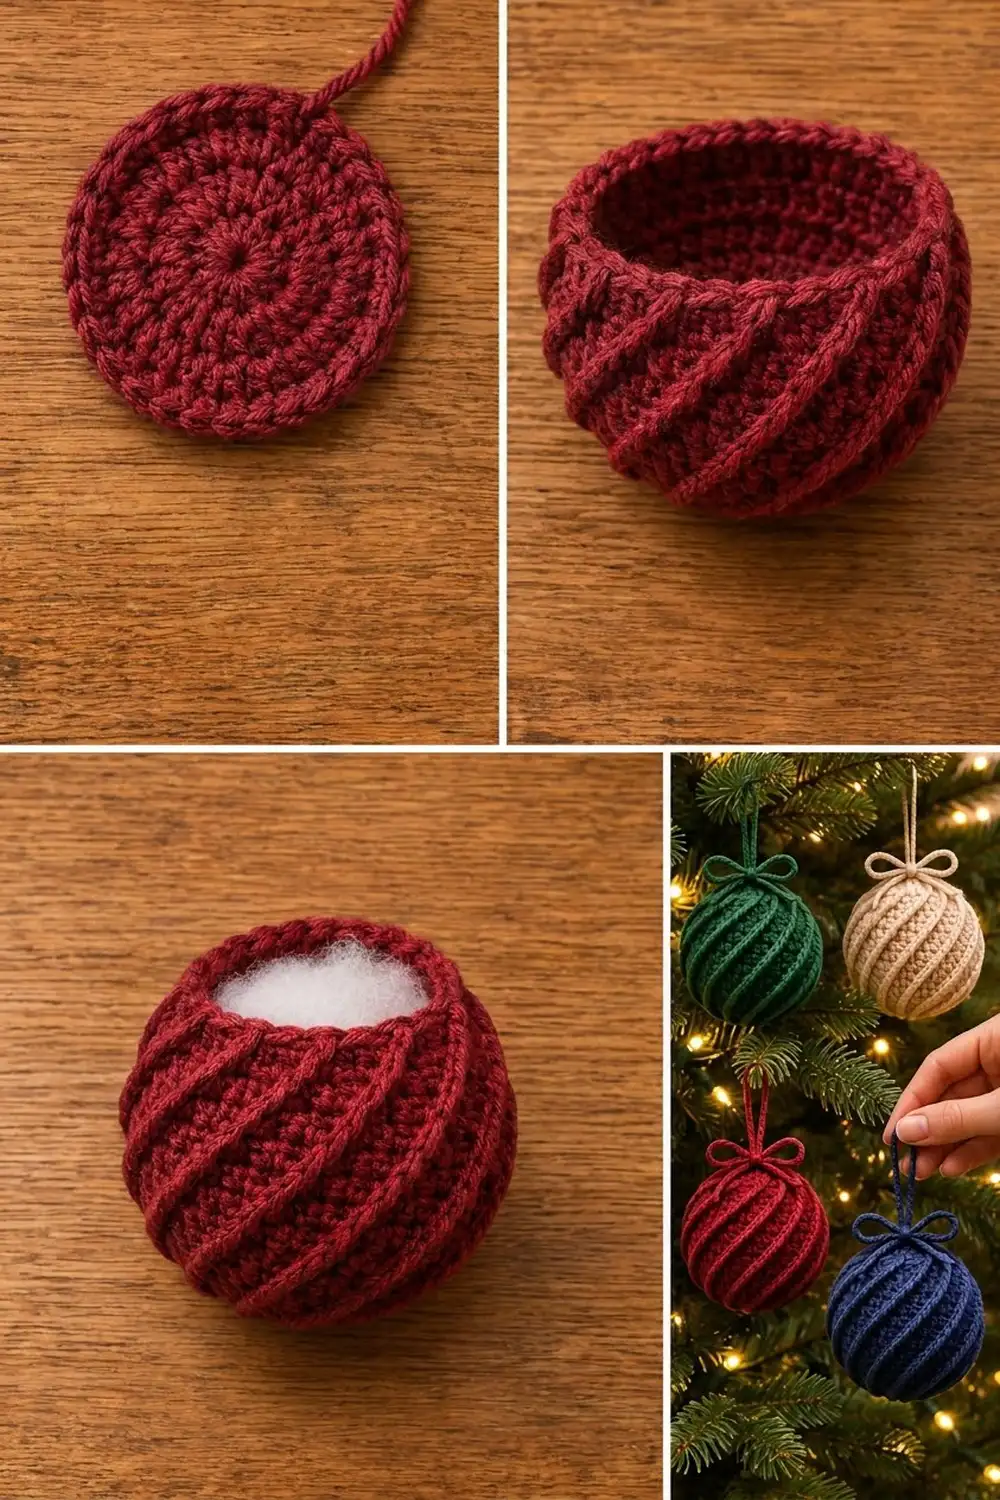
You work the ball in continuous rounds from the bottom. First you make a flat single-crochet disc. Front-post ridges start at the edge of the disc and move one stitch further along every round as the sides grow into a cup. Then you stuff the ball while you decrease, close the top, and finish with the cord loop and bow.
Finished Size and Construction
- Finished size: about 3 in (7.6 cm) in diameter; about 9.6 in (24.4 cm) around at the widest round
- Skill level: Easy-intermediate (front post stitches worked in the round)
- Terminology: US
- Yarn weight: Medium / worsted (#4)
- Hook: 3.5 mm (E-4)
- Number of pieces: 1 crocheted ball, plus 2 short slip-stitch cords (loop and bow)
- Layout: a single seamless sphere with 6 swirl ridges
- Piece size: 3 in (7.6 cm) diameter
- Size before border: a 3 in (7.6 cm) ball, closed and stuffed
- Border depth (hanging loop): about 2.5 in (6.4 cm) above the ball
Materials
Yarn advice: Choose a smooth worsted-weight acrylic or cotton blend with good stitch definition. Fuzzy or loosely spun yarns blur the ridges. Crochet tightly so the stuffing does not show through.
- Burgundy (main sample): 18 g, about 36 m (39 yd)
- Optional colorways: forest green, cream or navy blue, 18 g / 36 m (39 yd) per bauble
Tools and notions:
- 3.5 mm (E-4) crochet hook
- 1 locking stitch marker
- Polyester fiberfill, about 8 g
- Tapestry needle
- Scissors
All yarn quantities include a margin of about 20% for the gauge check and tails.
Abbreviations (US Terms)
- MR – magic ring
- ch – chain
- sl st – slip stitch
- sc – single crochet
- inc – 2 sc in the same stitch
- dec – invisible decrease: insert the hook in the front loop of each of the next 2 sts, yarn over, pull through both front loops, yarn over, pull through 2 loops
- FPdc – front post double crochet
- FLO – front loop only
- sk – skip
- st(s) – stitch(es)
- rnd – round
Special stitch – Ridge: Sc in the top of the next FPdc, then FPdc around the post of that same FPdc, then sk the next st (the new FPdc takes its place). A Ridge uses 2 sts and makes 2 sts, so it never changes the stitch count. The new FPdc sits one stitch to the left of the old one, which is what makes the ridge travel diagonally.
Gauge and Checkpoints
Gauge: 20 sc and 20 rnds = 4 in (10.2 cm) in tight continuous sc rounds. That works out to 5 sts and 5 rnds per 1 in (2.5 cm).
Use the ball itself as your test piece. The first 6 rounds only take a few minutes, and the disc tells you what you need to know.
Checkpoints:
- After Rnd 6 (36 sts): the flat disc measures about 2.4 in (6.1 cm) across.
- After Rnd 8 (48 sts): the edge starts to turn upward, and the opening measures about 9.6 in (24.4 cm) around.
- After Rnd 14 (48 sts): you have a cup about 1.75 in (4.4 cm) tall with 6 clear diagonal ridges.
- Finished: the stuffed ball measures about 3 in (7.6 cm) across.
If the disc is too big (over 2.6 in / 6.6 cm), switch to a 3.25 mm hook or crochet more tightly. If it is too small (under 2.2 in / 5.6 cm), switch to a 3.75 mm hook. A small size difference only changes the size of the ornament. Loose stitches let the stuffing show, though, so stay on the tight side.
Pattern: Ball
Work in continuous rounds without joining or turning. Put the marker in the first st of each round and move it up as you go. The marker only counts rounds. The ridges will travel past it, and that is expected.
When you work an FPdc, yarn over and insert the hook from front to back to front around the post of the stitch below. Then finish it like a normal double crochet. Keep the FPdc relaxed and the sc next to it snug, so the ridge stands up without opening gaps.
Base disc
Rnd 1: 6 sc in MR. Pull the ring fully closed. (6 sts)
Rnd 2: Inc in each st around. (12 sts)
Rnd 3: Sc in next st, inc in next st 6 times. (18 sts)
Rnd 4: Sc in next 2 sts, inc in next st 6 times. (24 sts)
Rnd 5: Sc in next 3 sts, inc in next st 6 times. (30 sts)
Rnd 6: Sc in next 4 sts, inc in next st 6 times. (36 sts)
Check the disc against Checkpoint 1. It should lie flat with no ruffling or cupping.
Ridge set-up and last increases
Rnd 7: FPdc around next st, sc in next 4 sts, inc in next st 6 times. (42 sts)
Each 7-st section is now an FPdc followed by 6 sc. These 6 FPdc are the bases of the 6 ridges.
Rnd 8: Ridge, sc in next 4 sts, inc in next st 6 times. (48 sts)
Each 8-st section is now 1 sc, an FPdc, then 6 sc. To check: the Ridge makes 2 sts, the 4 sc make 4 and the inc makes 2, for 8 sts per section and 48 in total.
Swirl rounds (no increases)
In each of these rounds the Ridge moves along by 1 st. The number of sc before it goes up by 1 and the number after it goes down by 1. Every section stays at 8 sts (sc before + 2 + sc after = 8).
Rnd 9: Sc in next st, Ridge, sc in next 5 sts 6 times. (48 sts)
Rnd 10: Sc in next 2 sts, Ridge, sc in next 4 sts 6 times. (48 sts)
Rnd 11: Sc in next 3 sts, Ridge, sc in next 3 sts 6 times. (48 sts)
Rnd 12: Sc in next 4 sts, Ridge, sc in next 2 sts 6 times. (48 sts)
Rnd 13: Sc in next 5 sts, Ridge, sc in next st 6 times. (48 sts)
Rnd 14: Sc in next 6 sts, Ridge 6 times. (48 sts)
Each section now ends with its FPdc: 7 sc, then the FPdc. Check against Checkpoint 3. The piece should look like a small bowl with 6 diagonal ridges climbing from the base.
Decrease rounds
From here the ridges run straight up toward the top. Each decrease sits just before a ridge, so all 6 ridges meet at the center.
Rnd 15: Sc in next 5 sts, dec, FPdc around next FPdc 6 times. (42 sts)
Rnd 16: Sc in next 4 sts, dec, FPdc around next FPdc 6 times. (36 sts)
Rnd 17: Sc in next 3 sts, dec, FPdc around next FPdc 6 times. (30 sts)
Rnd 18: Sc in next 2 sts, dec, FPdc around next FPdc 6 times. (24 sts)
Stuff the ball now. Push the fiberfill into the base first so the bottom is round and firm. The ball should hold its shape without stretching the stitches open.
Rnd 19: Sc in next st, dec, FPdc around next FPdc 6 times. (18 sts)
Rnd 20: Dec, FPdc around next FPdc 6 times. (12 sts)
Add more stuffing through the small opening.
Rnd 21: Dec 6 times. (6 sts)
Each dec in Rnd 21 is worked over the dec and the FPdc of one section, so each of the 6 final sts sits on top of a ridge.
Border: Top Closure, Hanging Loop and Bow
The ball has no sides or corners. Its “border” is the finish at the top, built on the 6 sts of Rnd 21.
Border gauge: a slip-stitch cord measures 5 sts per 1 in (2.5 cm).
Closure round: Fasten off, leaving a 12 in (30.5 cm) tail. Thread the tail through the FLO of all 6 sts (1 pass per ridge) and pull tight. Bring the needle out at the center top and keep this tail for attaching the loop.
Hanging loop: Ch 31. Sl st in the back bump of the 2nd ch from the hook and in each ch across. (30 sl sts, about 6 in / 15.2 cm.) Fasten off, leaving 6 in (15.2 cm) tails. Fold the cord in half to make a loop about 2.5 in (6.4 cm) tall. Use the closure tail to sew both cord ends firmly to the center top, stitching through all 6 closed sts.
Bow: Ch 46. Sl st in the back bump of the 2nd ch from the hook and in each ch across. (45 sl sts, about 9 in / 22.9 cm.) Tie the cord around the base of the loop in a bow about 2 in (5.1 cm) wide, with the tails resting on the ball. Make 2 small stitches through the knot so it cannot come loose.
Why the math works: Rnd 21 leaves 6 sts, and each one sits on a ridge. Pulling them together closes the top evenly, with all 6 ridges meeting under the loop. At 5 sts per 1 in (2.5 cm), 30 sl sts make 6 in (15.2 cm) of cord. Folded in half, that is 3 in (7.6 cm). About 0.5 in (1.3 cm) goes into the seam, which leaves a 2.5 in (6.4 cm) loop. The 45-st bow cord makes 9 in (22.9 cm), which is enough for a 2 in (5.1 cm) bow with short tails.
Final Blocking
- Roll the ball between your palms for 30 seconds to spread the stuffing evenly.
- Pinch each ridge lightly along its length so it stands up from the background.
- Mist the ball lightly with water. Do not soak it.
- Shape it into a round sphere with your hands, pressing any flat spots outward.
- Smooth the bow loops and tails, and press the knot flat.
- Hang the ornament by its loop until it is completely dry, away from heat. Never steam or iron acrylic yarn.
Final Quality-Control Checklist
- The Rnd 6 disc measured about 2.4 in (6.1 cm) and lay flat
- Every round from Rnd 8 to Rnd 14 had 48 sts
- All 6 ridges are visible, evenly spaced, and lean the same way
- No stuffing shows between the stitches
- The ball measures about 3 in (7.6 cm) across and is round, not egg-shaped
- The top closure is tight and centered, with all 6 ridges meeting there
- The loop is about 2.5 in (6.4 cm) tall and firmly attached
- The bow is about 2 in (5.1 cm) wide and its knot is secured
- All tails are woven in and hidden inside the ball
Troubleshooting
The ridges do not lean. You probably placed the new FPdc in the same spot as the old one. Always sc into the top of the old FPdc first, then work the new FPdc and skip 1 st.
The count is wrong after a swirl round. Count each section; it should have 8 sts. A Ridge counts as 2 sts, not 1.
The disc ruffles. Either your tension is too loose or you added extra increases. Count Rnds 1–6 again.
The ball looks flat or squat. Add more stuffing to the base, or use a smaller hook so the fabric holds its shape better.
There are gaps beside the FPdc. Pull the sc on each side of the FPdc a little tighter.
The FPdc ridges look flat. Keep each FPdc slightly loose so it sits on the surface instead of sinking between the sc.
The top is lumpy. Pull the closure tail tighter, and push the fiberfill away from the opening before you close it.
Care
Spot clean with mild soap and cool water, press out the water in a towel, and let it air dry. Store the ornament in a box with tissue paper so the ridges and bow keep their shape.
Final Notes
Here is the measurement chain to check against. The flat disc measures 2.4 in (6.1 cm) at Rnd 6. The widest round is 48 sts, about 9.6 in (24.4 cm) around. The cup at Rnd 14 is 1.75 in (4.4 cm) tall, and the finished ball is 3 in (7.6 cm) across. The 2.5 in (6.4 cm) loop brings the total height to about 5.5 in (14.0 cm). If every checkpoint matches, the finished ornament will match too.
Make one in each colorway and hang them together for a matching set on the tree.
Happy crocheting!