
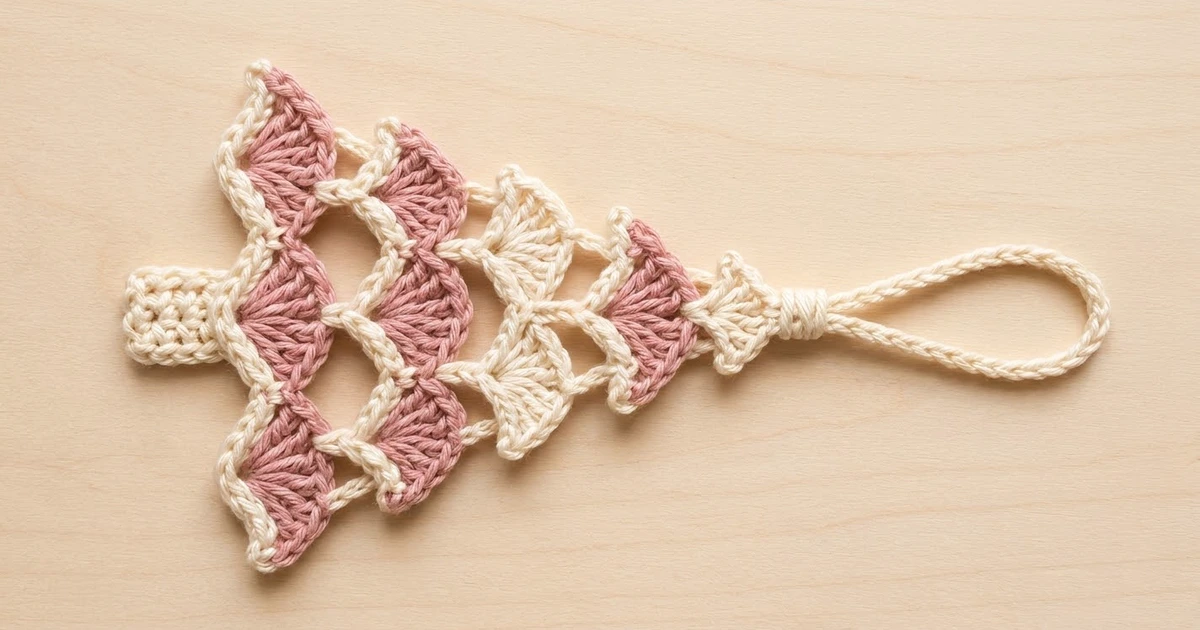
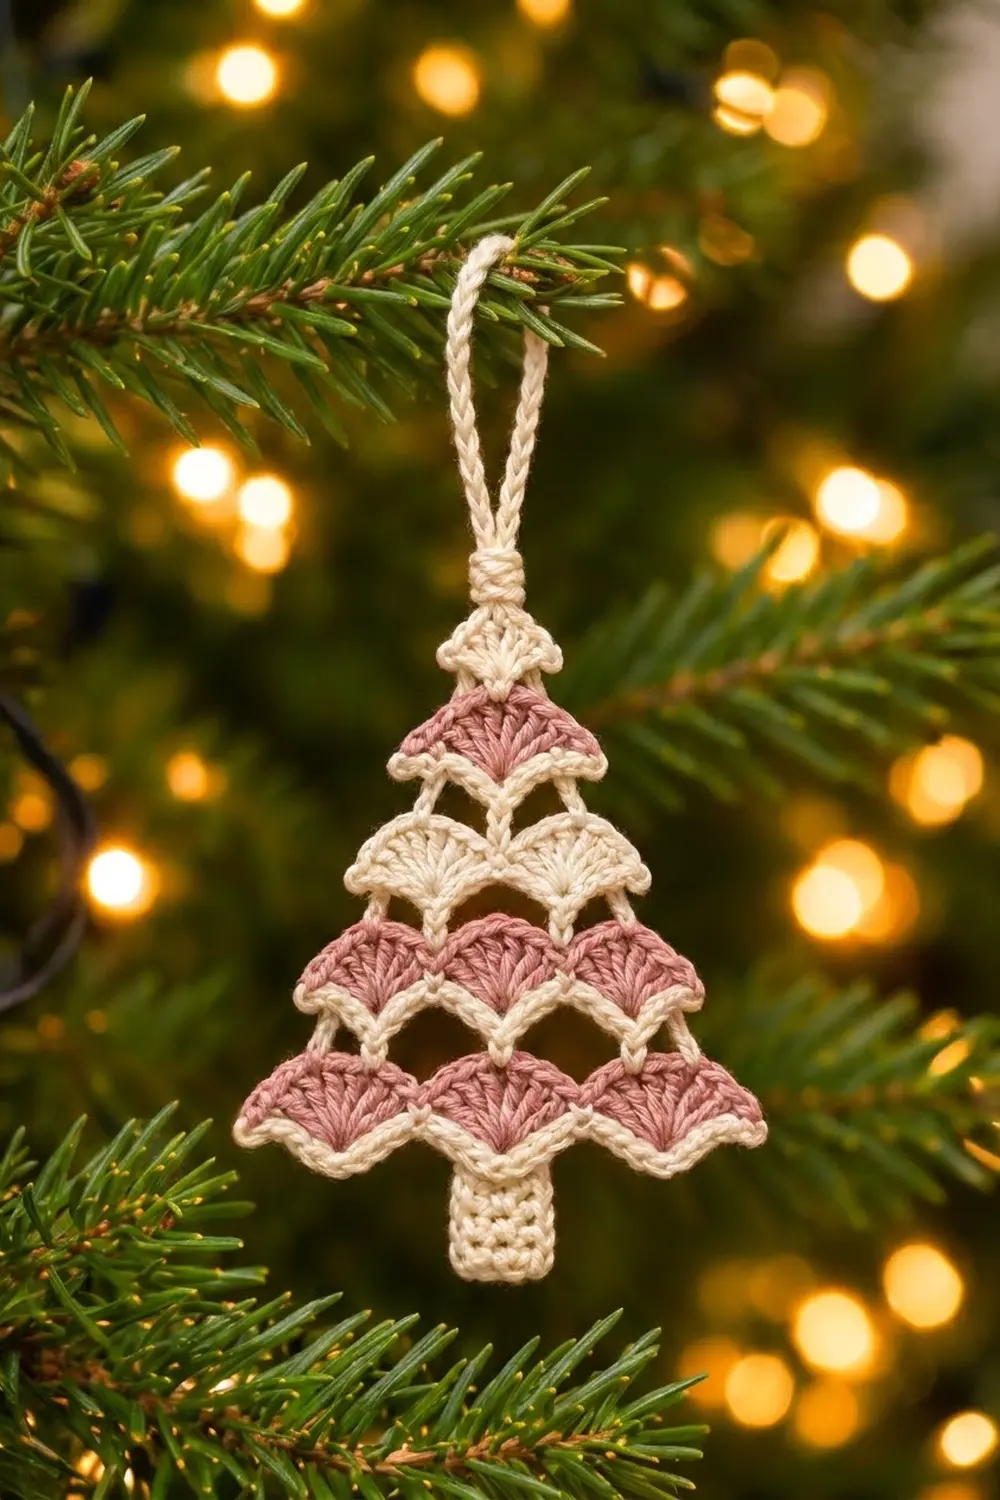
The Blush Scallop Tree is a small, flat Christmas ornament made from tiers of shell stitches. Each shell hangs down like a layered branch, and a thin cream outline follows every scalloped edge. The design ends in a neat cream trunk and a rope-like hanging loop.
The palette is soft and vintage: dusty blush pink and warm cream. The tip and the middle tier are cream, and the other three tiers are pink. Cotton yarn gives clear stitch definition, so each fan of stitches stands out.
This pattern uses US crochet terms. The finished tree measures about 4¾ in (12.1 cm) wide and 5 in (12.7 cm) tall including the trunk. With the loop it is about 7¼ in (18.4 cm) tall.
You work the tree top-down in one piece. Each tier has two rows: a shell row, then a cream single-crochet edging row. Cream is carried the whole way, so you only join pink three times. A one-row side border tidies the edges. Then you add the trunk and the hanging loop.
Finished Size and Construction
- Finished size: 4¾ in (12.1 cm) wide × 5 in (12.7 cm) tall, plus a 2¼ in (5.7 cm) loop
- Skill level: Easy to intermediate
- Terminology: US
- Yarn weight: DK (3), cotton or cotton blend
- Hook: 3.5 mm (E/4)
- Number of pieces: 1 (the trunk and loop are worked onto the tree)
- Layout: 5 shell tiers (1 tip fan, then 1, 2, 3, and 3 shells)
- Tree body before border: 4½ in (11.4 cm) wide × 3¾ in (9.5 cm) tall
- Border depth: about ⅛ in (0.3 cm) on each side and at the tip
Materials
Use a smooth DK cotton. Mercerized cotton shows the fan shapes best and holds its shape on the tree. Avoid fuzzy or very splitty yarn, because the shells will lose definition.
- Color A, Cream: 8 g, about 18 m
- Color B, Dusty Pink: 5 g, about 12 m
Tools:
– 3.5 mm (E/4) crochet hook
– Tapestry needle
– Scissors
– 2 stitch markers
– Blocking mat, rust-proof pins, and a spray bottle
– Optional: fabric stiffener
These quantities include a margin for tails, a gauge swatch, and small differences in tension.
Abbreviations (US Terms)
- ch – chain
- sl st – slip stitch
- sc – single crochet
- dc – double crochet
- sk – skip
- st(s) – stitch(es)
- [ ] – repeat the instructions in brackets as directed
Special stitches:
– 5-dc shell: Work 5 dc in the same stitch.
– 7-dc shell: Work 7 dc in the same stitch.
Gauge and Checkpoints
Gauge: 11 sc = 2 in (5.1 cm) along an edging row. One tier (1 shell row plus 1 sc row) is about ¾ in (1.9 cm) tall.
Because the ornament is small, the first tiers act as your gauge swatch. Check each checkpoint below. Measure the width straight across the cream edging row you just finished, with the piece lying flat and unstretched.
| After Row | Stitches | Width | Total Height |
|---|---|---|---|
| 2 | 5 sc | 1 in (2.5 cm) | ¾ in (1.9 cm) |
| 4 | 7 sc | 1¼ in (3.2 cm) | 1½ in (3.8 cm) |
| 6 | 13 sc | 2.4 in (6.1 cm) | 2¼ in (5.7 cm) |
| 8 | 19 sc | 3½ in (8.9 cm) | 3 in (7.6 cm) |
| 10 | 25 sc | 4½ in (11.4 cm) | 3¾ in (9.5 cm) |
Too big? Go down one hook size, to 3.25 mm (D/3). Shells that ruffle or curl also mean your gauge is loose.
Too small? Go up one hook size, to 3.75 mm (F/5). Shells that look cramped or cupped also mean your gauge is tight.
Small differences of about ⅛ in (0.3 cm) can be fixed when blocking.

Pattern
Tier 1: Cream Tip
Row 1 (Cream): Ch 4. Work 4 dc in the 4th ch from hook. The 3 skipped ch count as the first dc. (5 dc)
The stitches fan downward from the foundation chain. That foundation point becomes the top of the tree.
Row 2 (Cream): Ch 1, turn. Sc in each dc across, working the last sc into the top of the turning ch. (5 sc)
Don’t fasten off cream. Leave it waiting at the end of this row.
Tier 2: One Pink Shell
Row 3 (Pink): Turn. Join pink in the first sc with a pull-up loop, then ch 1. Sc in the same st, sk 1 sc, 5-dc shell in the next sc, sk 1 sc, sc in the last sc. (7 sts: 2 sc + 5 dc) Fasten off pink.
Row 4 (Cream): Do not turn. Go back to the start of Row 3, where the cream yarn is waiting. Insert your hook in the first sc of Row 3, pull up a cream loop, and ch 1. Sc in the same st, sc in each of the next 5 dc, then sc in the last sc. (7 sc)
Working Row 4 without turning keeps the cream ready at the right edge every time. The short carried strand will be hidden by the border.
Tier 3: Two Cream Shells
Row 5 (Cream): Ch 1, turn. Sc in the first sc, 5-dc shell in the next sc, sk 1 sc, sc in the next sc (the center st), sk 1 sc, 5-dc shell in the next sc, sc in the last sc. (13 sts: 3 sc + 10 dc)
Row 6 (Cream): Ch 1, turn. Sc in each st across. (13 sc)
Measure now: the piece should be about 2.4 in (6.1 cm) wide.
Tier 4: Three Pink Shells
Row 7 (Pink): Turn. Join pink in the first sc with a pull-up loop, then ch 1. Sc in the same st, [sk 1 sc, 5-dc shell in the next sc, sk 1 sc, sc in the next sc] 3 times. (19 sts: 4 sc + 15 dc) Fasten off pink.
Check: 1 starting st + 3 repeats × 4 sts = 13 sts used.
Row 8 (Cream): Do not turn. Pick up the waiting cream at the start of Row 7 and ch 1. Sc in each st across. (19 sc)
Tier 5: Three Wide Pink Shells
Row 9 (Pink): Turn. Join pink in the first sc with a pull-up loop, then ch 1. Sc in the same st, [sk 2 sc, 7-dc shell in the next sc, sk 2 sc, sc in the next sc] 3 times. (25 sts: 4 sc + 21 dc) Fasten off pink.
Check: 1 starting st + 3 repeats × 6 sts = 19 sts used. The bigger 7-dc shells make the bottom tier flare out wider than the tier above, like the lowest branches of a real tree.
Row 10 (Cream): Do not turn. Pick up the waiting cream at the start of Row 9 and ch 1. Sc in each st across. (25 sc)
Measure now: the piece should be about 4½ in (11.4 cm) wide and 3¾ in (9.5 cm) tall. Don’t fasten off. Go straight on to the border.
Border
The border is a single pass of cream sc up one side, around the tip, and down the other side. It doesn’t go along the bottom edge, which is already outlined by Row 10.
Border gauge: 4 sc for every 1 in (2.5 cm) of vertical height along the sides. That works out to 3 sc per ¾ in (1.9 cm) tier.
Border Row (Cream): Ch 1. Do not turn. Rotate the piece so you can work into the row ends.
- Side 1: Work 15 sc evenly up the row ends to the tip. Use 2 sc in each dc row end and 1 sc in each sc row end.
- Tip: Work 3 sc into the foundation point at the base of Row 1. Place a marker in the center sc of these 3.
- Side 2: Work 15 sc evenly down the row ends, again 2 sc per dc row end and 1 sc per sc row end.
Sl st into the first sc of Row 10. (33 sc total: 15 per side + 3 at the tip) Fasten off and weave in the end.
Each side count of 15 covers only the row ends. The 3 tip stitches are counted separately, so no stitch is counted twice.
Why the math works: Each tier has one dc row, about twice the height of an sc row, and one sc row. Matching 2 sc to each dc row end and 1 sc to each sc row end means 3 sc per tier. Over 5 tiers that gives 15 sc per side. This spacing lets the edge lie flat without rippling or pulling in. The 3 sc at the tip turn the point cleanly.
Trunk
Hold the tree with the bottom edge (Row 10) facing up.
Trunk Row 1 (Cream): Count to the 11th sc of Row 10 from either end. Join cream with a pull-up loop and ch 1. Sc in the same st and in each of the next 4 sc. (5 sc)
These are the 5 center stitches of the middle bottom shell, sts 11 to 15. The 25-stitch row is symmetrical, so you can count from either end.
Trunk Rows 2–5: Ch 1, turn, sc in each st across. (5 sc)
The trunk measures about 0.9 in (2.3 cm) wide × 1.1 in (2.8 cm) long. Fasten off and weave in the ends.
Hanging Loop
- Join cream in the marked center sc at the tip.
- Ch 32, then sl st in the same tip st to form a loop.
- Sl st in each of the 32 ch around the loop, then sl st into the tip st again. This makes a firm, rope-like cord.
- Fasten off, leaving a 12 in (30.5 cm) tail.
- Thread the tail onto a tapestry needle. Wrap it tightly 6 times around both legs of the loop just above the tip, covering about ¼ in (0.6 cm).
- Pass the needle under the wraps 2 or 3 times to lock them. Bury the tail inside the trunk side of the wraps.
The loop should extend about 2¼ in (5.7 cm) above the tip.
Final Blocking
- Weave in every remaining end through stitches of the same color.
- Lightly mist the ornament with cool water until it is damp but not soaked.
- Lay it face up on the blocking mat.
- Pin the bottom corners first so the bottom edge measures 4¾ in (12.1 cm) across.
- Pin the tip so the tree measures 3.9 in (9.9 cm) from the tip down to the bottom edge, not counting the trunk.
- Gently shape each shell into a smooth half circle with your fingertips. Pin the low point of each bottom scallop if it curls.
- Straighten the trunk and pin it square.
- Lay the loop flat and straight.
- Let it dry completely, usually 4 to 6 hours.
- If you want a crisper ornament, apply fabric stiffener while it is still pinned, then let it dry again.
Final Quality-Control Checklist
- Tier stitch counts were 5, 7, 13, 19, and 25.
- Shell sequence from the top: cream tip, 1 pink, 2 cream, 3 pink, 3 wide pink.
- Every shell has a continuous cream outline along its curved lower edge.
- The border has 15 sc on each side and 3 sc at the tip.
- The body measures 4¾ in (12.1 cm) wide × 3.9 in (9.9 cm) tall after blocking.
- The trunk is centered under the middle bottom shell.
- The loop is firm and the wraps at its neck are tight and secure.
- All ends are woven in and invisible from the front.
Troubleshooting
Shells ruffle or overlap. Your tension on the dc is loose. Go down a hook size, or make your shell stitches a little shorter.
The tree curls at the sides. The border is too tight. Check that you worked 2 sc in each dc row end, not 1.
The tree leans to one side. One shell row was probably started a stitch off. Count the skipped stitches in each repeat.
Pink edges show through the cream outline. Insert your hook under both loops of each dc top when working the cream edging row.
The trunk is off-center. Re-count to the 11th sc of Row 10 and check that the trunk uses sts 11 to 15.
The loop is floppy. Add a second round of sl st along the chain, or apply stiffener to the loop only.
Care
Hand wash in cool water with mild soap, press out the water in a towel, and dry flat, reshaping the shells. If you used stiffener, refresh it after washing.
Final Notes
The measurement chain is simple. Five tiers at about ¾ in (1.9 cm) each give a 3¾ in (9.5 cm) body. The edging rows grow from 5 to 7, 13, 19, and finally 25 sc, reaching 4½ in (11.4 cm) wide. The 33-stitch border adds about ⅛ in (0.3 cm) per edge, for a body of 4¾ in (12.1 cm) × 3.9 in (9.9 cm). The 1.1 in (2.8 cm) trunk brings the total height to 5 in (12.7 cm), and the loop adds 2¼ in (5.7 cm).
If you check your width at each cream row, the tree will block into a clean, even triangle every time. Make one in every color pair for a whole set of tree trimmings.
Happy crocheting!