

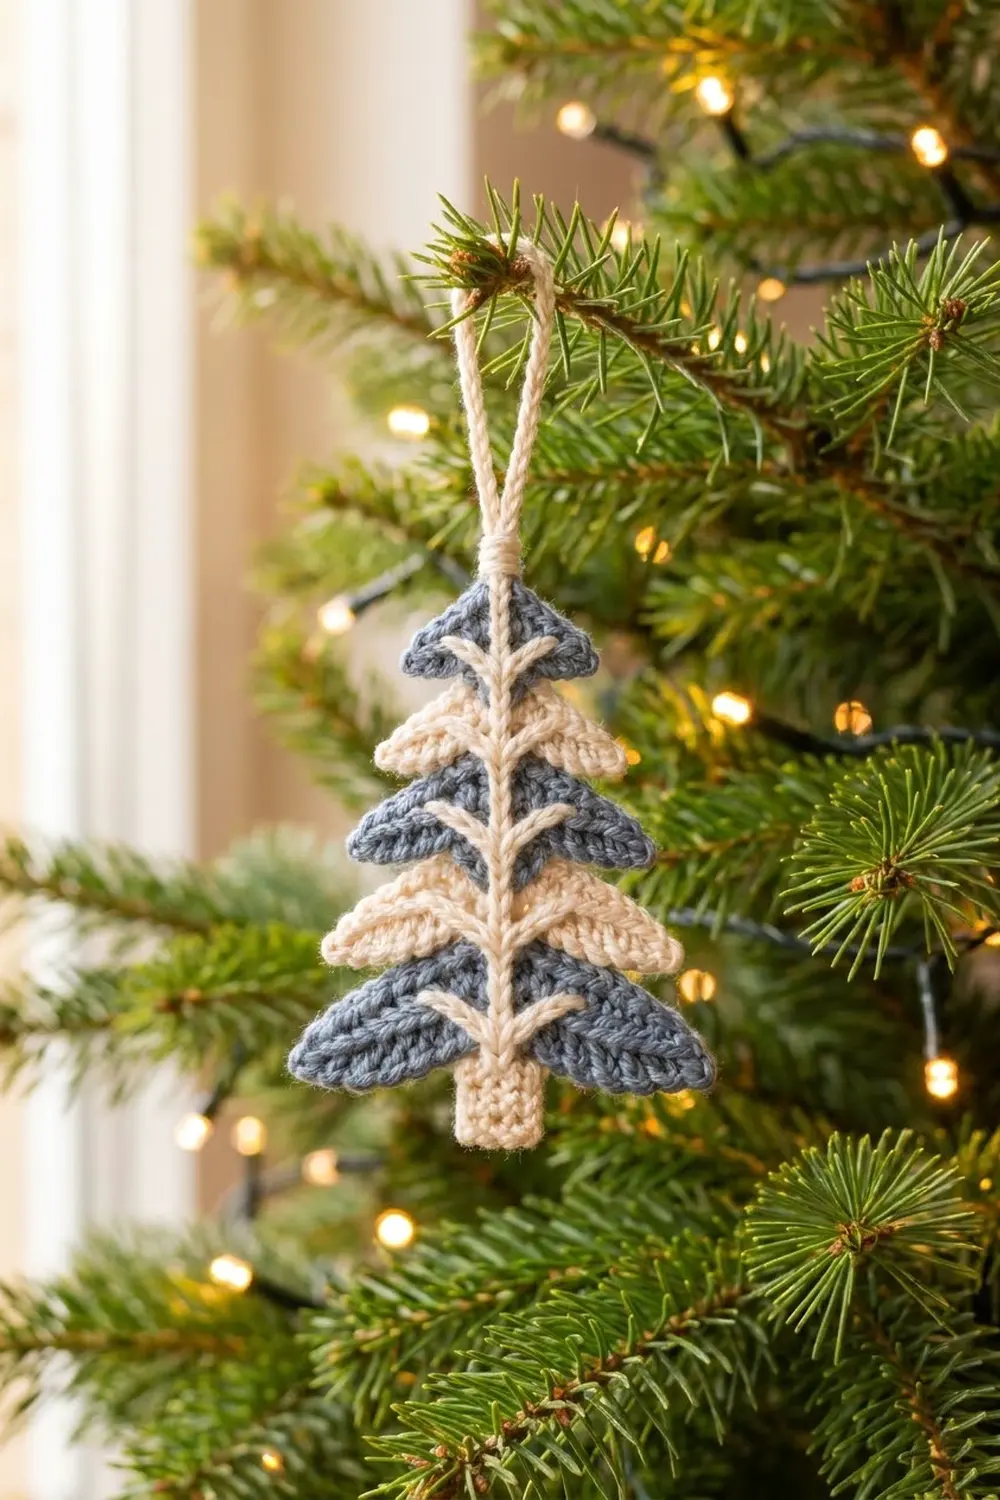
The Frosted Pine Tree Ornament is a small, layered Christmas tree that hangs flat and looks tidy from the front. Five chevron-shaped tiers stack from wide to narrow, with tips that droop gently like snow-heavy branches. A cream spine with V-shaped branches runs up the center and ties the layers together.
The palette is quiet and wintry: dusty blue-gray and soft cream, alternating tier by tier. The bottom, middle and top tiers are blue, the two in between are cream, and the trunk, spine, branches and hanging loop are all cream.
This pattern uses US crochet terms. The finished ornament measures 3.5 in (8.9 cm) wide and 5 in (12.7 cm) tall, or 7 in (17.8 cm) including the hanging loop.
Construction is simple. You crochet five tiers flat in rows of single crochet, with a 3-sc peak in the center of every row. You edge each tier, make a tiny trunk and a slip-stitch cord, then stack and sew everything together. Last, you add the spine and branches with surface slip stitch.
Finished Size and Construction
- Finished size: 3.5 in (8.9 cm) wide × 5 in (12.7 cm) tall; 7 in (17.8 cm) with loop
- Skill level: Easy+ (confident beginner)
- Terminology: US crochet terms
- Yarn weight: DK (light #3)
- Hook: 3.5 mm (US E-4)
- Number of pieces: 7 (5 tiers, 1 trunk, 1 hanging cord), joined into one ornament
- Layout: one vertical stack, widest tier at the bottom, each tier overlapping the top of the one below
- Bottom tier size: 3.5 in (8.9 cm) tip to tip after edging
- Bottom tier before edging: 3.3 in (8.4 cm) tip to tip
- Edging depth: 1 round of sc, about 0.1 in (0.3 cm) per side
Materials
Use a smooth DK yarn with good stitch definition. Cotton or a cotton blend gives the crispest tips, and soft acrylic works well too. Stay away from fuzzy or very loosely plied yarn, because the surface-stitched spine needs to show clearly.
- Color A, dusty blue-gray: 11 g / 25 m (27 yd)
- Color B, cream: 13 g / 30 m (33 yd)
These quantities include a margin of about 20% for your gauge swatch, sewing and weaving in ends.
Tools:
– 3.5 mm (US E-4) crochet hook
– Yarn needle
– Scissors
– Rust-proof pins and a foam blocking mat
– Ruler or tape measure
– Stitch marker
Abbreviations (US Terms)
- ch – chain
- sc – single crochet
- sc2tog – single crochet 2 together (insert in next st, pull up a loop, insert in following st, pull up a loop, yarn over, pull through all 3 loops)
- sc3tog – single crochet 3 together (same as sc2tog, but over 3 stitches; draw through 4 loops)
- sl st – slip stitch
- st(s) – stitch(es)
- RS – right side
Special stitch: surface slip stitch (surf sl st). Hold the yarn behind the work. Insert the hook from front to back between stitches, pull up a loop, then pull it through the loop on your hook. Each surface slip stitch forms one chain-like “V” on the front.
Gauge and Checkpoints
Gauge: 20 sc and 20 rows = 4 in (10.2 cm), worked firmly.
Use the Bottom Tier (Tier 1) as your gauge test. If it comes out right, every other piece will scale correctly.
Checkpoints:
– After Tier 1, Row 5: 3.3 in (8.4 cm) from tip to tip, measured straight across. The center depth from the notch to the peak is 1.0 in (2.5 cm).
– After Tier 1 edging: 3.5 in (8.9 cm) from tip to tip, with a center depth of 1.2 in (3.0 cm).
– Trunk: 1 in × 1 in (2.5 cm × 2.5 cm).
If Tier 1 is more than 0.2 in (0.5 cm) too wide, go down a hook size. If it is too narrow, go up a size. If the tips curl, your tension is too tight: loosen up a little rather than changing the stitch counts.
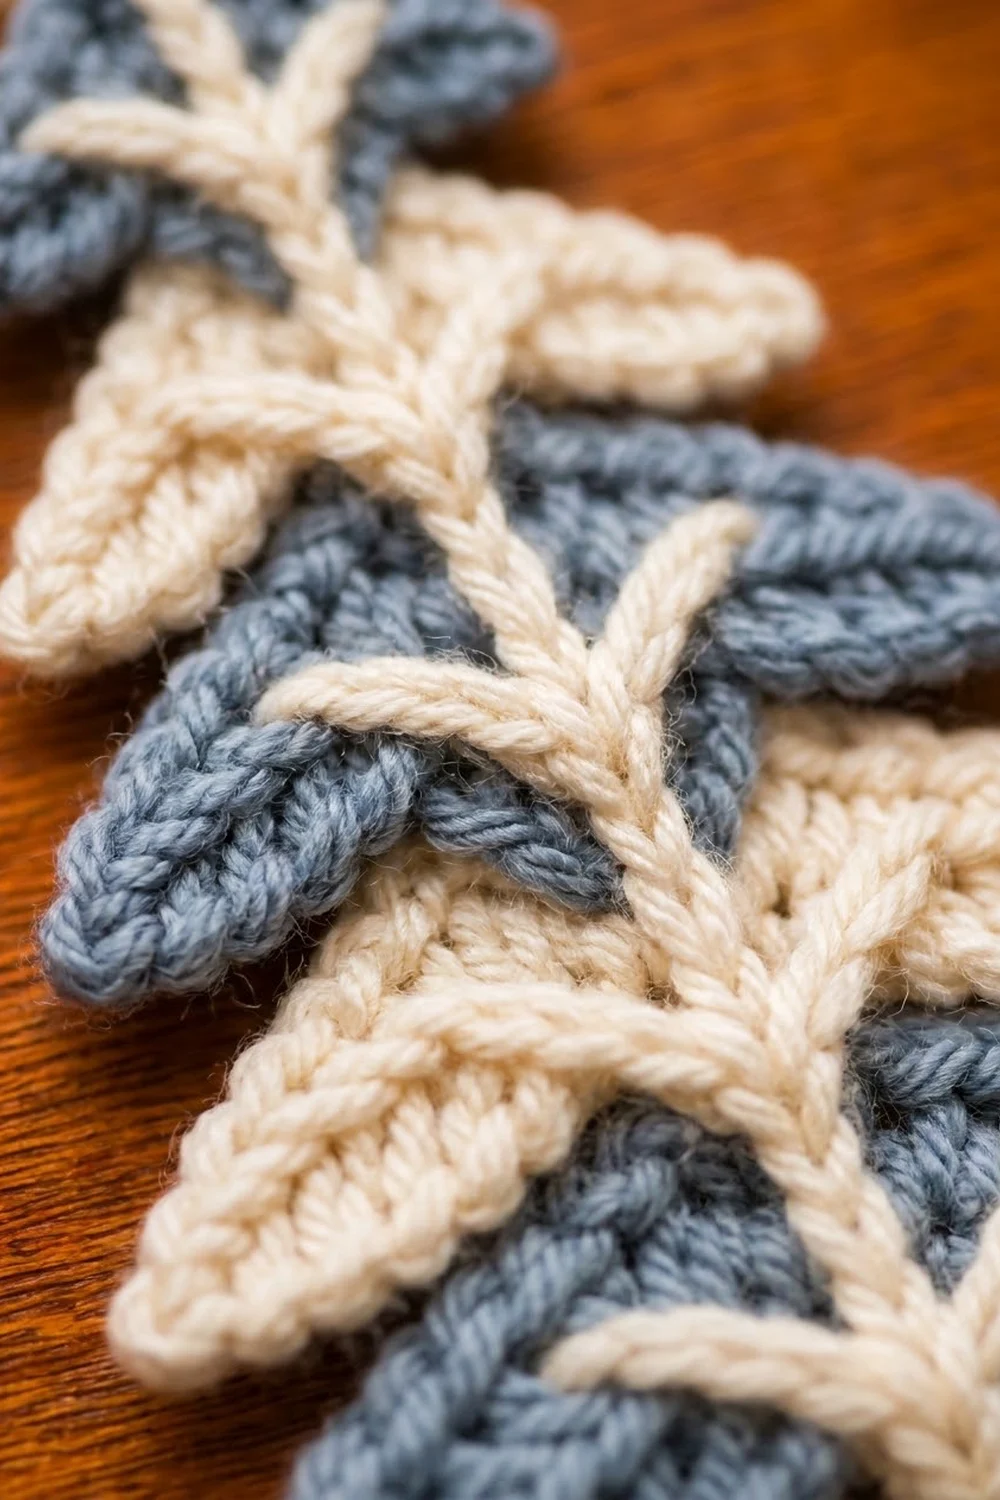
Tiers (Make 5)
All tiers use the same method. Turn at the end of every row, and the turning ch 1 never counts as a stitch. The 3-sc group in the center of each row creates the peak. The sc2tog at each end keeps the stitch count steady and makes the tips droop and point.
Tier 1 – Bottom (Color A)
Ch 22.
Row 1 (growth row): Sc in 2nd ch from hook and in next 9 ch, 3 sc in next ch (center), sc in last 10 ch. Turn. (23 sts)
Place a marker in the center st of the 3-sc group (st 12). Move it up to the new center st on every row.
Rows 2–5: Ch 1, sc2tog, sc in next 9 sts, 3 sc in marked center st, sc in next 9 sts, sc2tog. Turn. (23 sts per row)
Check: 1 + 9 + 3 + 9 + 1 = 23. Do not fasten off; go straight to the edging (see Border).
Tier 2 (Color B)
Ch 20.
Row 1: Sc in 2nd ch from hook and in next 8 ch, 3 sc in next ch, sc in last 9 ch. Turn. (21 sts)
Rows 2–5: Ch 1, sc2tog, sc in next 8 sts, 3 sc in center st, sc in next 8 sts, sc2tog. Turn. (21 sts per row)
Tier 3 (Color A)
Ch 18.
Row 1: Sc in 2nd ch from hook and in next 7 ch, 3 sc in next ch, sc in last 8 ch. Turn. (19 sts)
Rows 2–4: Ch 1, sc2tog, sc in next 7 sts, 3 sc in center st, sc in next 7 sts, sc2tog. Turn. (19 sts per row)
Tier 4 (Color B)
Ch 16.
Row 1: Sc in 2nd ch from hook and in next 6 ch, 3 sc in next ch, sc in last 7 ch. Turn. (17 sts)
Rows 2–4: Ch 1, sc2tog, sc in next 6 sts, 3 sc in center st, sc in next 6 sts, sc2tog. Turn. (17 sts per row)
Tier 5 – Top (Color A)
Ch 12.
Row 1: Sc in 2nd ch from hook and in next 4 ch, 3 sc in next ch, sc in last 5 ch. Turn. (13 sts)
Rows 2–4: Ch 1, sc2tog, sc in next 4 sts, 3 sc in center st, sc in next 4 sts, sc2tog. Turn. (13 sts per row)
Tier sizes before edging (tip to tip)
| Tier | Color | Sts/row | Rows | Width |
|---|---|---|---|---|
| 1 | A | 23 | 5 | 3.3 in (8.4 cm) |
| 2 | B | 21 | 5 | 2.9 in (7.4 cm) |
| 3 | A | 19 | 4 | 2.6 in (6.6 cm) |
| 4 | B | 17 | 4 | 2.2 in (5.6 cm) |
| 5 | A | 13 | 4 | 1.6 in (4.1 cm) |
Trunk (Color B)
Ch 6.
Row 1: Sc in 2nd ch from hook and in each ch across. Turn. (5 sts)
Rows 2–5: Ch 1, sc in each st across. Turn. (5 sts per row)
Fasten off, leaving a 10 in (25.4 cm) tail. The trunk should measure 1 in × 1 in (2.5 cm × 2.5 cm).
Hanging Cord (Color B)
Ch 41.
Row 1: Sl st in the back bump of 2nd ch from hook and in the back bump of each ch across. (40 sl sts)
Fasten off, leaving an 8 in (20.3 cm) tail. The cord should measure about 6 in (15.2 cm) long.
Make All Pieces
| Piece | Color | Quantity |
|---|---|---|
| Tiers 1, 3, 5 | A (blue-gray) | 3 |
| Tiers 2, 4 | B (cream) | 2 |
| Trunk | B | 1 |
| Hanging cord | B | 1 |
Layout (top to bottom, front view):
        [ loop ]
          wrap
      [ Tier 5 – A ]
    [  Tier 4 – B  ]
   [   Tier 3 – A   ]
  [    Tier 2 – B    ]
 [     Tier 1 – A     ]
        [trunk]
Each higher tier sits in front of the one below it.
Joining
Before you join anything, work the Tier Edging (see Border below) on all five tiers. Everything gets sewn after that.
Step 1 – Trunk. Lay Tier 1 RS down. Center the trunk behind the notch so its top 0.5 in (1.3 cm) is hidden behind the tier and 0.5 in (1.3 cm) hangs below the line between the two tips. Whipstitch the top edge and sides of the trunk to the back of Tier 1 with the trunk tail.
Step 2 – Stacking. Turn Tier 1 RS up. Place Tier 2 on top with its peak exactly 0.75 in (1.9 cm) above Tier 1’s peak. Line the centers up on one vertical line; a ruler helps. Tier 2’s notch will now cover Tier 1’s peak by about 0.45 in (1.1 cm). Repeat the same 0.75 in (1.9 cm) peak-to-peak spacing for Tiers 3, 4 and 5.
Step 3 – Sewing. Sew each upper tier down along its lower edge only, using that tier’s own color. Work one small whipstitch into the back loop of every edging stitch along the lower edge, catching only the surface of the tier below. That gives one stitch-to-stitch anchor per edging stitch, so the tension stays even. Keep the stitches snug but not tight: the fabric underneath should lie flat, not pucker. Leave the top edges and tips free so the layers stay dimensional.
Step 4 – Hanging cord. Fold the cord in half. Lay the two 1 in (2.5 cm) ends behind Tier 5’s peak so a 2 in (5.1 cm) loop stands above it. Sew the ends to the back of Tier 5. Wrap Color B tightly around both legs 6 times just above the peak, thread the end under the wraps and trim it.
Size checkpoint: The tree should measure 4.5 in (11.4 cm) from Tier 1’s tip line to Tier 5’s peak, and 5 in (12.7 cm) including the trunk. Width should be 3.5 in (8.9 cm).
Spine and Branches (Color B)
Spine. With the RS facing, start at the center of Tier 1’s notch. Work about 21 surf sl sts straight up the center line to Tier 5’s peak, roughly 5 sts per inch, over a distance of 4.2 in (10.7 cm). Go through every layer; this also locks the stack together. Fasten off on the back.
Branches. Each tier gets one V that opens upward. On each side, start 0.2 in (0.5 cm) above where the spine crosses the tier’s notch and work surf sl sts up and outward at about 45°:
– Tiers 1–2: 4 sts per arm, 0.8 in (2.0 cm)
– Tiers 3–4: 3 sts per arm, 0.6 in (1.5 cm)
– Tier 5: 2 sts per arm, 0.4 in (1.0 cm)
If you prefer, you can embroider the spine and branches in chain stitch with a yarn needle instead. The result looks the same.
Border: Tier Edging
This is one round of sc in the tier’s own color, worked on each tier before joining. Each tier is edged on its own, not as part of a joined block, so no seam stitches are involved. The edging is what creates the raised rim and the crisp tips.
Border gauge: The edging uses the same 20 sc = 4 in (10.2 cm) gauge. One sc row end equals one edging stitch.
Tier 1 edging. After Row 5, do not turn. Ch 1 and rotate the tier so you can work across the top of Row 5.
- Top edge: Sc in next 11 sts, 3 sc in center st, sc in next 11 sts. (25 sts)
- First end edge: Sc in each row end. (5 sts)
- Bottom edge (along the foundation chain): 2 sc in first ch (tip), sc in next 8 ch, sc3tog over next 3 ch (the center ch and one on each side; this keeps the notch), sc in next 8 ch, 2 sc in last ch (tip). (21 sts)
- Second end edge: Sc in each row end. (5 sts)
Sl st to the first sc to join and fasten off. Total: 56 sts.
Why the math works:
– Top edge: 23 sts worked one per stitch + 2 extra (the 3-sc peak) = 25.
– Bottom edge: 21 chains worked one per chain, +2 at the tips, −2 at the notch (sc3tog) = 21.
– End edges: one sc per row, so 5 each.
– Total: 25 + 5 + 21 + 5 = 56.
The peak and tips get extra stitches so they stay sharp. The notch loses 2 stitches so it pulls in and stays sharp too.
Other tiers. Same method. The top edge is (sts per row) + 2, with 3 sc in the center st. The bottom edge uses 2 sc at each tip and a center sc3tog.
| Tier | Top edge | End edge (×2) | Bottom edge (2 + sc + sc3tog + sc + 2) | Total |
|---|---|---|---|---|
| 1 | 11+3+11 = 25 | 5 | 2+8+1+8+2 = 21 | 56 |
| 2 | 10+3+10 = 23 | 5 | 2+7+1+7+2 = 19 | 52 |
| 3 | 9+3+9 = 21 | 4 | 2+6+1+6+2 = 17 | 46 |
| 4 | 8+3+8 = 19 | 4 | 2+5+1+5+2 = 15 | 42 |
| 5 | 6+3+6 = 15 | 4 | 2+3+1+3+2 = 11 | 34 |
Widths after edging (tip to tip):
– Tier 1: 3.5 in (8.9 cm)
– Tier 2: 3.1 in (7.9 cm)
– Tier 3: 2.8 in (7.1 cm)
– Tier 4: 2.4 in (6.1 cm)
– Tier 5: 1.8 in (4.6 cm)
Final Blocking
- Weave in all ends on the back, running each tail through stitches of its own color.
- Lay the ornament RS up on a blocking mat.
- Pin the tree to 3.5 in (8.9 cm) wide and 4.5 in (11.4 cm) tall from Tier 1’s tips to Tier 5’s peak.
- Pin each tip so it points slightly down and out, and pin each peak straight up.
- Hover a steam iron about 1 in (2.5 cm) above the piece. Never press it, or the layers will flatten and the spine will lose its texture. Cotton can be lightly misted with water instead.
- Let it dry completely, at least 2 hours, before unpinning.
- Straighten the hanging loop and roll the wrap between your fingers to firm it up.
Final Quality-Control Checklist
- Tiers alternate A, B, A, B, A from the bottom up.
- Each tier has a sharp peak, two pointed tips and a visible center notch.
- Edging totals match the table: 56, 52, 46, 42, 34.
- All five peaks sit on one vertical line, 0.75 in (1.9 cm) apart.
- The spine runs straight from Tier 1’s notch to Tier 5’s peak.
- Each tier has one V-shaped branch with matching arms.
- The trunk shows 0.5 in (1.3 cm) below the tip line and is centered.
- The loop stands 2 in (5.1 cm) tall and the wrap is tight.
- The finished size is 3.5 in × 5 in (8.9 cm × 12.7 cm).
- No ends show on the front.
Troubleshooting
- Tips curl up: Your tension is too tight. Block with more steam, and next time crochet the end sc2tog a little more loosely.
- Peak is rounded: Make sure the 3 sc go into the marked center st every row, and that the edging also puts 3 sc there.
- Stitch count drifts: Count after each row. Each row’s total must match Row 1’s.
- Tier is lopsided: The center marker has moved. Count the sts on each side of it; they should match.
- Tiers pucker after sewing: Unpick and resew with looser whipstitches, one per edging stitch.
- Spine wanders off-center: Mark the center line with a pin at each peak before you start.
- Loop flops over: Add 2 more wraps and sew through the cord once more behind Tier 5.
Care
Spot clean with cool water and mild soap, then lay flat to dry and reshape the tips. Store the ornament flat or hang it, never crushed in a box.
Final Notes
Everything starts with gauge: 20 sc and 20 rows = 4 in (10.2 cm). That gives Tier 1 a width of 3.3 in (8.4 cm) before edging and 3.5 in (8.9 cm) after. The four smaller tiers scale down from there to 1.8 in (4.6 cm). Stacked 0.75 in (1.9 cm) apart, the tiers give a tree 4.5 in (11.4 cm) tall. The trunk brings it to 5 in (12.7 cm), and the 2 in (5.1 cm) loop to 7 in (17.8 cm). If each checkpoint matches, the finished ornament will too.
Happy crocheting!