
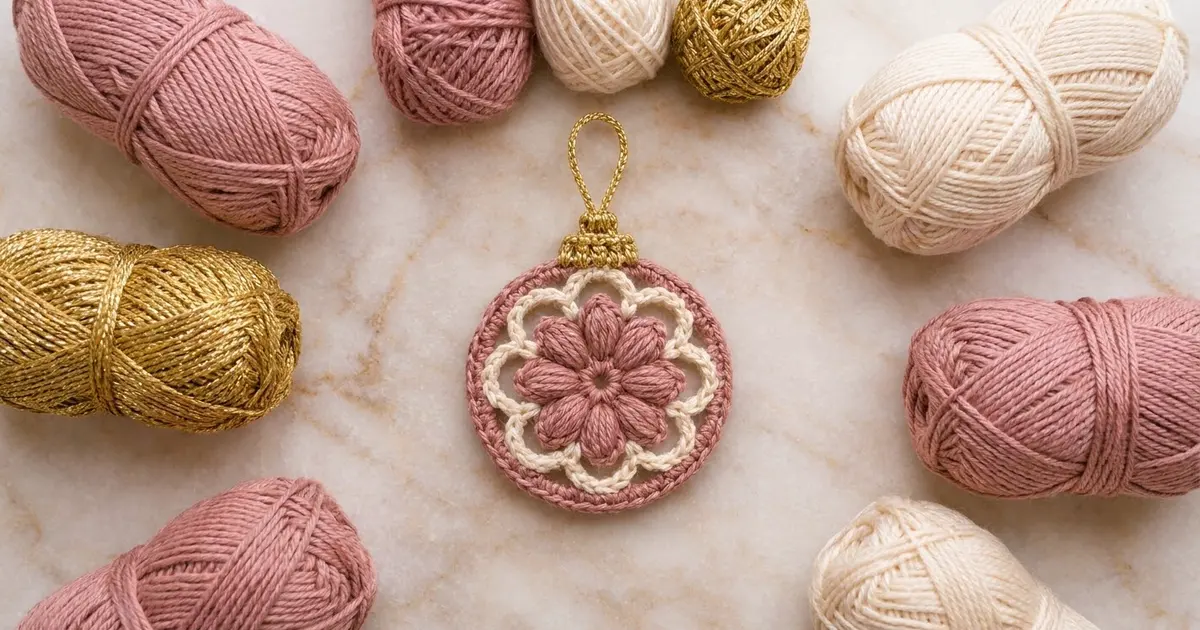
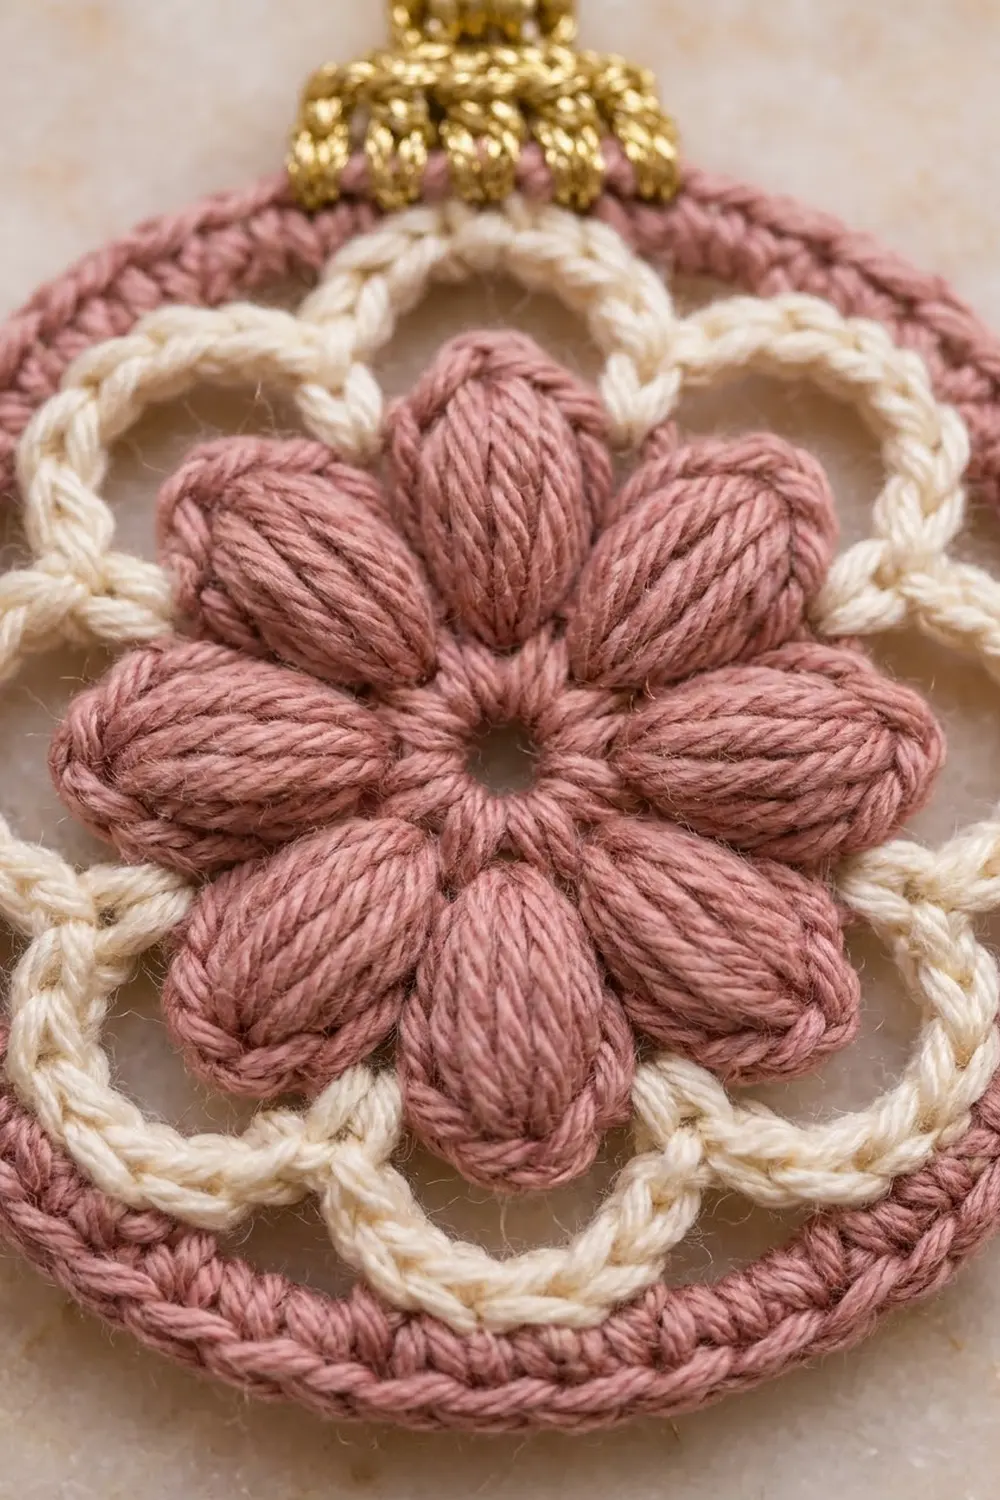
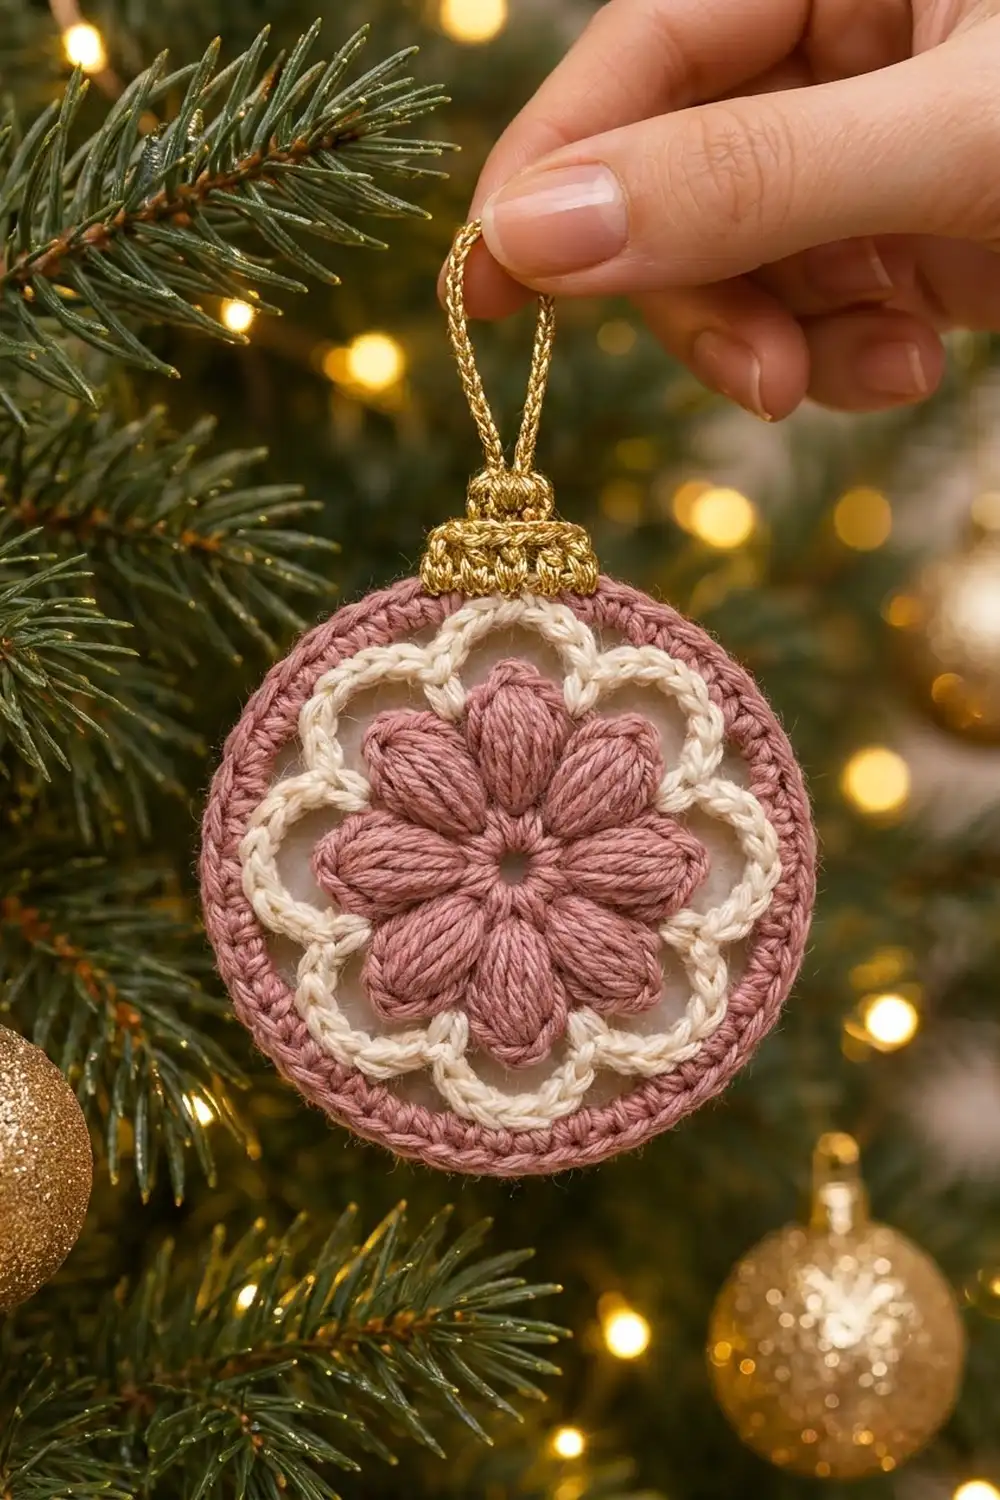
The Blush Bloom Bauble is a flat, round Christmas ornament with a soft, vintage look. In the center, eight plump puff-stitch petals in dusty rose form a flower. A cream scalloped frame circles the flower, and a solid rose ring holds everything inside a neat bauble outline. A small gold cap and a thin gold hanging loop finish it off.
The colors are dusty rose, creamy ivory and metallic gold. The result is a warm, slightly romantic ornament that suits a pastel or vintage tree. It also works well as a gift tag, a package topper or a hanging decoration on a door.
This pattern uses US crochet terms. The finished ornament is 3.5 in (8.9 cm) across the body and about 4 in (10.2 cm) tall including the cap. The hanging loop adds another 2 in (5.1 cm).
You work the ornament as one piece in the round, starting from the center. First comes a single crochet ring, then the puff petals. The cream scallops are added next, and the solid rose ring works as the border. Last, you work a few short rows of gold at the top for the cap and chain the hanging loop. There’s no sewing or joining of separate pieces.
Finished Size and Construction
- Finished size: 3.5 in (8.9 cm) body diameter; 4 in (10.2 cm) tall including the cap
- Skill level: Easy (advanced beginner)
- Terminology: US crochet terms
- Yarn weight: DK (light #3) cotton or cotton blend; DK-weight metallic for the gold
- Hook: 3.5 mm (E-4)
- Number of pieces: 1 (worked continuously, with color changes)
- Layout: Single round motif with a cap at the top
- Piece size before border: 2.75 in (7.0 cm) across after the cream scallops
- Border depth: about 0.375 in (1.0 cm) of dusty rose on each side
- Cap: 1.25 in (3.2 cm) wide × 0.5 in (1.3 cm) tall
Materials
Yarn: Use a smooth, tightly plied DK cotton or cotton blend. Cotton makes the puff petals look crisp and helps the ornament stay flat. Fuzzy acrylic will blur the petal shapes. For the gold, choose a DK-weight metallic yarn. If yours is thinner, hold two strands together.
- Color A, dusty rose: 10 g, about 24 m (26 yd)
- Color B, creamy ivory: 4 g, about 10 m (11 yd)
- Color C, metallic gold: 3 g, about 7 m (8 yd)
These amounts include a margin of about 25% for a gauge swatch and weaving in ends.
Tools:
– 3.5 mm (E-4) crochet hook
– Tapestry needle
– Scissors
– 1 stitch marker
– Rust-proof pins and a foam blocking mat
– Spray bottle with water
– Ruler or a 3.5 in (8.9 cm) circle template drawn on paper
Abbreviations (US Terms)
- ch – chain
- sl st – slip stitch
- sc – single crochet
- sc2tog – single crochet 2 together
- sk – skip
- sp – space
- st(s) – stitch(es)
- MR – magic ring
- Rnd – round
Special stitch – Puff stitch (puff): Yarn over, insert hook in the indicated stitch, yarn over and pull up a loop to about 0.5 in (1.3 cm) tall. Repeat from * to * 4 more times, for 11 loops on the hook. Yarn over and pull through all 11 loops, then ch 1 to lock the puff. The locking ch 1 does not count as a stitch.
Gauge and Checkpoints
Gauge isn’t critical for an ornament, but it does control whether the rose ring lies flat. Make one ornament as your test piece before starting a batch.
Checkpoints:
– After Rnd 1: the sc ring measures 0.75 in (1.9 cm) across.
– After Rnd 2: the puff flower measures 2 in (5.1 cm) across, tip to tip.
– After Rnd 4: the cream scallops measure 2.75 in (7.0 cm) across, peak to peak.
– After Rnd 7: the body measures 3.5 in (8.9 cm) across, which works out to 64 sc around a circumference of about 11 in (27.9 cm).
If your piece is too big: go down to a 3.25 mm (D-3) hook, and pull your puff loops up a little shorter.
If your piece is too small: go up to a 3.75 mm (F-5) hook.
If the puffs look flat: make the loops taller and even, all to the same 0.5 in (1.3 cm) height.
Pattern
Center Flower (Color A, dusty rose)
Rnd 1: Make a MR. Ch 1 (does not count as a st), then work 16 sc into the ring. Pull the ring closed, leaving a small center hole about 0.25 in (0.6 cm) across. Sl st to the first sc to join. (16 sc)
Checkpoint: 0.75 in (1.9 cm) across.
Rnd 2: Ch 1. Work a puff in the next st, ch 2, sk next st. Repeat from * to * 7 more times. Sl st to the top of the first puff to join. (8 puffs, 8 ch-2 sps)
Stitch check: each repeat uses 2 sts of Rnd 1, and 8 repeats × 2 sts = 16 sts. The ch-2 spaces let the puffs sit side by side as separate oval petals without crowding.
Checkpoint: 2 in (5.1 cm) across. Fasten off Color A and leave a 6 in (15.2 cm) tail.
Cream Scallops (Color B, ivory)
Rnd 3: Join Color B with a sc in any ch-2 sp. Ch 7, sc in the next ch-2 sp. Repeat from * to * 6 more times. Ch 7, then sl st to the first sc to join. (8 sc, 8 ch-7 loops)
Each ch-7 loop arches over one puff petal. The sc anchors sit in the gaps between petals, and those anchors become the dips of the scallops.
Rnd 4: Sl st into the first ch-7 loop. Ch 1, then work 9 sc into the same loop. Work 9 sc into the next ch-7 loop. Repeat from * to * 6 more times. Sl st to the first sc to join. (72 sc: 9 sc in each of 8 arches)
Skip the Rnd 3 anchor sc completely, which keeps the dip between scallops sharp. Each arch now has its sc numbered 1 to 9, and the 5th sc is the peak.
Checkpoint: 2.75 in (7.0 cm) across, peak to peak. Fasten off Color B.
Border: Dusty Rose Ring (Color A)
The dusty rose ring is the border. It touches the cream scallops only at their peaks and bridges each dip with a chain, which creates the small open windows you see in the photo.
Border gauge: about 5.8 sc per inch (2.3 sc per cm) around the outside edge. That’s 64 sc over 11 in (27.9 cm).
Rnd 5: Join Color A with a sc in the 4th sc of any arch. Sc in the 5th sc, sc in the 6th sc, ch 4, sk the next 6 sc (sts 7–9 of this arch and sts 1–3 of the next arch), sc in the 4th sc of the next arch. Repeat from * to * 6 more times. On the last repeat, end with sc in the 5th sc, sc in the 6th sc, ch 4, and sl st to the first sc to join. (24 sc + 8 ch-4 sps)
Stitch check: each repeat uses 3 sc and skips 6 sc, so 9 sts × 8 = 72 sts, which matches Rnd 4. The ch-4 lies straight across each dip and leaves a small triangular window.
Rnd 6 (conversion round): Ch 1. Sc in each of the next 3 sc, work 4 sc in the ch-4 sp. Repeat from * to * 7 more times. Sl st to the first sc to join. (24 sc worked 1 per existing sc + 32 sc worked into ch-4 sps = 56 sc; 7 sc per repeat)
Rnd 7 (trim round): Ch 1. Sc in each of the next 6 sts, 2 sc in the next st. Repeat from * to * 7 more times. Sl st to the first sc to join. (56 sc worked 1 per existing st + 8 increases = 64 sc)
Checkpoint: 3.5 in (8.9 cm) across. Fasten off and leave a 6 in (15.2 cm) tail.
Why the math works: The ring grows from about 3.2 in (8.1 cm) across at Rnd 6 to 3.5 in (8.9 cm) at Rnd 7. That adds roughly 1 in (2.5 cm) of circumference. At 5.8 sc per inch, that’s about 6 extra sts. Using 8 increases, one per repeat, keeps the ring flat and the increases evenly spaced. The edge stays round instead of turning octagonal, because the increases fall at a different spot in each repeat from the ch-4 bridges below.
Gold Cap (Color C)
Lay the ornament flat with one cream scallop peak pointing straight up. On Rnd 7, find the 8 sc that sit centered above that peak, and put a marker in the first of them, at the right edge of the group.
Row 1 (RS): Join Color C with a sc in the marked st, then sc in the next 7 sts. (8 sc)
Row 2: Ch 1, turn. Sc in each st across. (8 sc)
Row 3: Ch 1, turn. Sc2tog, sc in the next 4 sts, sc2tog. (6 sc)
Row 4: Ch 1, turn. Sc in each st across. (6 sc)
Checkpoint: the cap is 1.25 in (3.2 cm) wide at the base and 0.5 in (1.3 cm) tall. The sc2tog decreases at both edges give it the slight bauble-cap taper.
Hanging Loop
Without fastening off, sl st in the next 2 sts, so you are at the 3rd of 6 sts. Ch 22, then sl st in the 4th st of Row 4 so the loop is centered. Check that it measures 2 in (5.1 cm) tall. Fasten off and weave the tail back through the chain to firm up the loop.
Final Blocking
- Weave in all ends on the wrong side. Hide Color A tails inside the puffs and Color B tails along the backs of the arches.
- Lay the ornament right side up on a blocking mat over your 3.5 in (8.9 cm) circle template.
- Spray it until damp, not soaked.
- Pin the rose ring to the circle at 8 points, placing each pin above a ch-4 bridge.
- With your fingertip, nudge each cream scallop peak out until it touches the rose ring. Open each window evenly.
- Pinch each puff petal into a smooth oval, pointing out toward its arch.
- Pin the cap square to the edge and the hanging loop straight up.
- Let it dry completely, at least 4 hours.
- If you want it stiffer, use a light fabric stiffener spray before drying.
Final Quality-Control Checklist
- Body measures 3.5 in (8.9 cm) across in every direction.
- There are 8 puff petals, all about the same height and shape.
- The center hole is small and neat, about 0.25 in (0.6 cm) across.
- There are 8 cream arches with 9 sc each, and the dips are sharp.
- 8 even open windows sit between the cream and the rose ring.
- Rnd 7 has 64 sc, and the edge lies flat without ruffling or cupping.
- The gold cap is centered above a scallop peak and tapers from 8 sts to 6 sts.
- The hanging loop is centered and 2 in (5.1 cm) tall.
- All ends are woven in and invisible from the front.
Troubleshooting
The flower cups upward: Your puffs are too tall for the ch-2 spaces. Shorten the loops slightly, or work ch 3 between puffs.
The rose ring ruffles: Your tension is loose. Redo Rnd 7 with a hook 0.25 mm (one size) smaller.
The rose ring cups or pulls the scallops flat: Your tension is tight. Work the ch-4 bridges in Rnd 5 a little looser, or use ch 5 and work 5 sc into each space in Rnd 6. That makes 64 sc after Rnd 6; skip the Rnd 7 increases and work 1 sc in each st instead.
The scallops look lopsided: Count 9 sc in every arch, and check that the Rnd 3 anchor sc were skipped.
The cap is off-center: Count 4 sts on each side of the peak’s center line before joining the gold.
Metallic yarn splits: Use a hook with a rounded head, and work slowly.
Care
Spot clean with cool water and mild soap, then lay flat to dry. Store the ornament flat in tissue paper so the puffs keep their shape.
Final Notes
Here’s the measurement chain for the whole ornament. Rnd 1 is 0.75 in (1.9 cm), and the puff flower reaches 2 in (5.1 cm). The cream scallops reach 2.75 in (7.0 cm), and the 64-stitch rose ring brings the body to 3.5 in (8.9 cm). The 0.5 in (1.3 cm) gold cap makes the total height 4 in (10.2 cm), plus a 2 in (5.1 cm) hanging loop. If each checkpoint matches, the next round will lie flat. Once your first bauble blocks well, make a whole set in different petal colors for a matching tree.
Happy crocheting!