
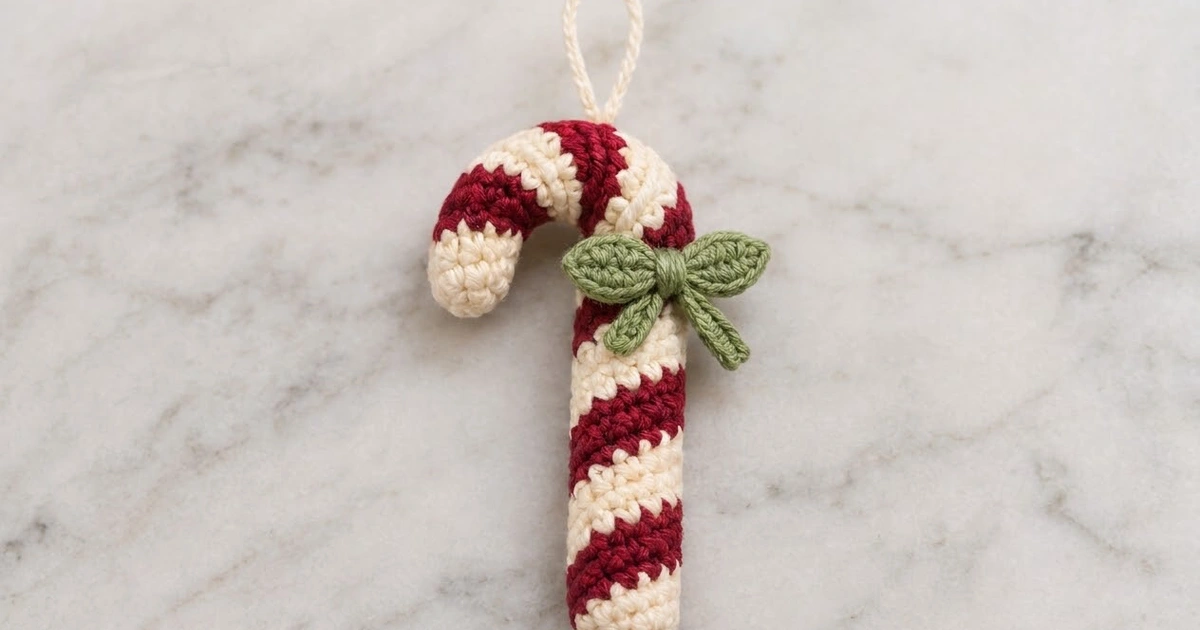
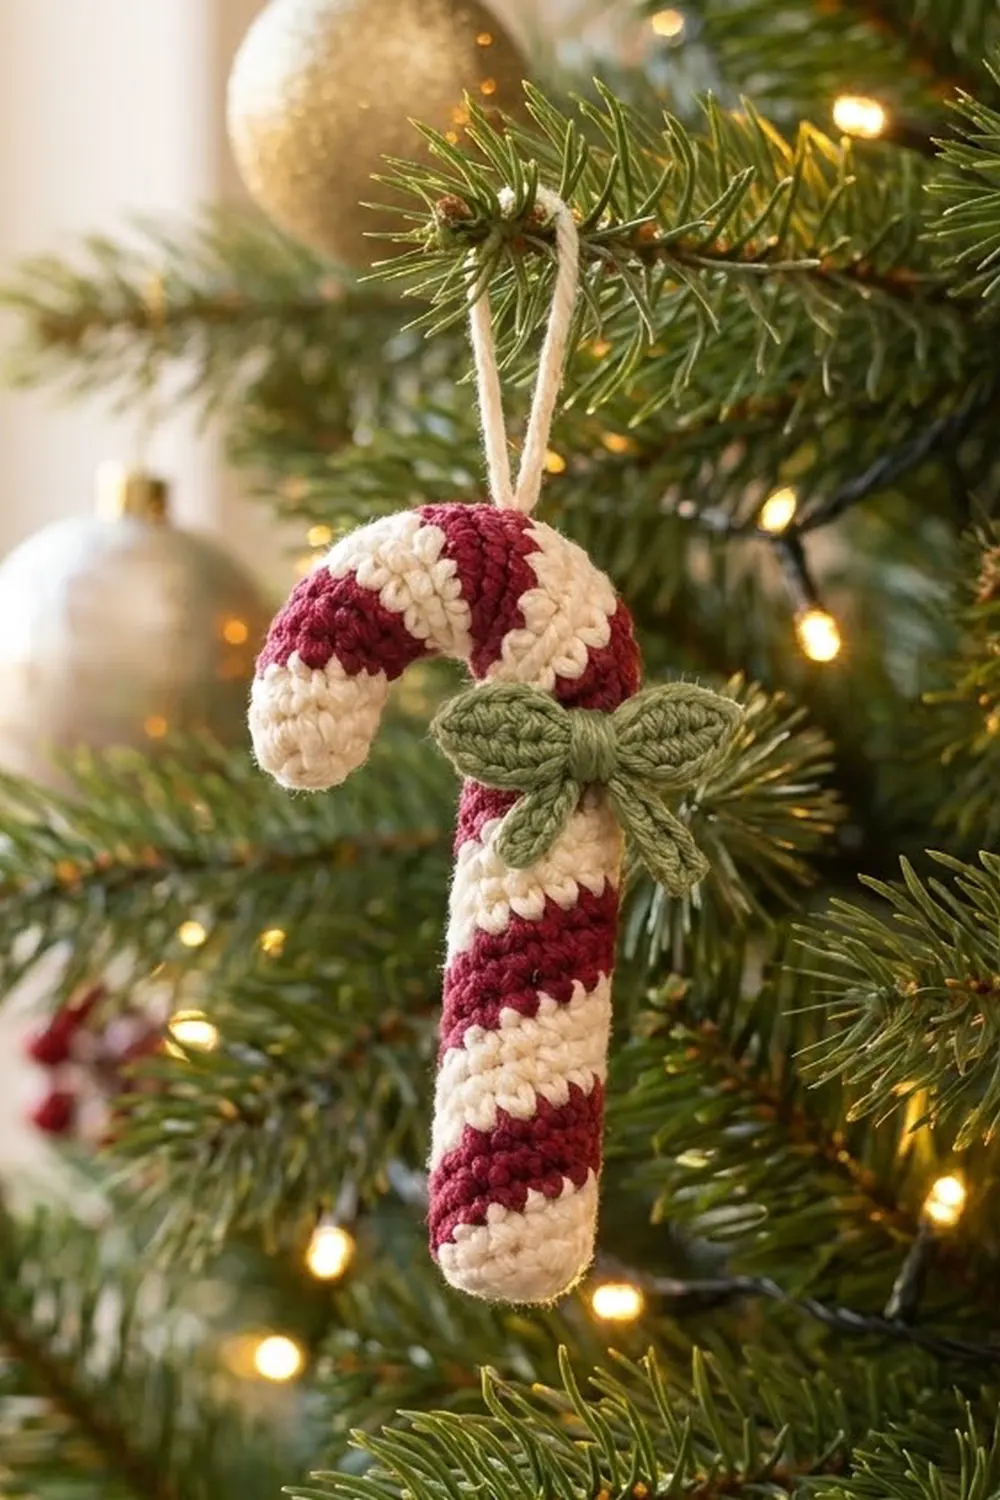
This little candy cane is a plump, stuffed ornament with classic red-and-cream stripes that spiral up the stem and around the crook. A sage green bow made of pointed leaf shapes adds a fresh holiday touch, and a slim cream loop lets it hang from a tree branch, gift tag, or door knob.
The palette is deep cranberry red, soft cream, and muted sage green. The look is cozy and traditional, and the tight stitches give it a clean, finished feel. The pattern uses US crochet terms throughout.
The finished ornament is about 5.5 in (14.0 cm) tall, 2.5 in (6.4 cm) across the crook, and 1 in (2.5 cm) thick.
You make the cane as one long tube in a continuous spiral of single crochet. It starts at the bottom of the stem and ends at the tip of the crook. The diagonal stripes come from a simple counting trick, so you never have to plan stripes round by round. A doubled chenille stem inside the tube holds the crook’s curve. The bow is made of four small leaf pieces and a center strip, sewn on at the end.
Finished Size and Construction
- Finished size: 5.5 in (14.0 cm) tall x 2.5 in (6.4 cm) wide across the crook
- Tube thickness: about 1 in (2.5 cm) stuffed; 3 in (7.6 cm) around
- Skill level: Easy to intermediate (working in the round and changing colors)
- Terminology: US
- Yarn weight: Worsted (#4)
- Hook: 3.5 mm (US E-4)
- Number of pieces: 1 cane, plus a bow (4 leaves + 1 center strip) and 1 hanging loop
- Layout: Single ornament; no joining of motifs
- Tube length before shaping: about 7.25 in (18.4 cm)
- Size before border: Not applicable; the cane has closed ends instead of a border
- Border depth: None (the ends close with 2 decrease rounds)
Materials
Use a smooth worsted-weight cotton or acrylic. Cotton shows the stripes most crisply; acrylic is softer and a little more forgiving. Avoid fuzzy yarns, because they blur the diagonal lines.
- Red: 10 g / about 18 m (20 yd)
- Cream: 12 g / about 22 m (24 yd), including the hanging loop
- Sage green: 3 g / about 5 m (6 yd)
Tools and notions:
- 3.5 mm (US E-4) crochet hook
- 1 locking stitch marker
- Tapestry needle
- About 10 g of polyester fiberfill
- One chenille stem (pipe cleaner), 12 in (30.5 cm) long
- Scissors
- A 1.5 in (3.8 cm) round object for shaping, such as a marker or a small jar lid
All quantities include about a 20% margin for swatching and color-change tails.
Abbreviations (US Terms)
- ch – chain
- sl st – slip stitch
- sc – single crochet
- hdc – half double crochet
- dc – double crochet
- inc – 2 sc in the same stitch
- sc2tog – single crochet 2 together (insert hook in the next st, pull up a loop, insert in the following st, pull up a loop, yarn over, pull through all 3 loops)
- MR – magic ring
- st(s) – stitch(es)
- Rnd – round
Special technique: clean color change. Work the last sc of the old color until 2 loops are on the hook. Drop the old color, yarn over with the new color, and pull through. Carry the unused color loosely along the inside of the tube; the stuffing hides it.
Gauge and Checkpoints
Gauge: 5 sc and 6 rnds = 1 in (2.5 cm), worked tightly in a continuous spiral.
Test the start of the tube first. Work Rnds 1–10, then measure. The finished size depends on this gauge.
- After Rnd 3: the flat circle measures 1 in (2.5 cm) across.
- After Rnd 10: the tube flattens to 1.5 in (3.8 cm) wide and measures about 1.75 in (4.4 cm) long.
- After Rnd 20: the tube is about 3.25 in (8.3 cm) long.
- After Rnd 42: the tube is about 7 in (17.8 cm) long.
If the tube is too wide or you can see stuffing through the stitches, go down to a 3.25 mm or 3 mm hook. If it is too narrow or stiff to work, go up to a 3.75 mm hook. Don’t change the stitch count, because the stripe trick depends on exactly 15 sts per round.
Candy Cane Tube
Work in a continuous spiral; don’t join rounds. Place the marker in the first st of each round and move it up as you go.
With cream:
Rnd 1: 5 sc in MR. (5 sts)
Rnd 2: Inc in each st around. (10 sts)
Rnd 3: [Sc in next st, inc in next st] 5 times. (15 sts)
This flat cream circle is the bottom end of the stem. Check that it measures 1 in (2.5 cm) across.
The Stripe Sequence
From Rnd 4 on, you’ll work the colors in one continuous repeat of 18 sts: 9 sts red, then 9 sts cream. Ignore the round marker when counting colors. The marker only tracks rounds; the color count runs on its own.
Each round has 15 sts but the color repeat is 18 sts, so every stripe starts 3 sts further along than it did in the round below. That steady 3-st shift is what turns flat bands into a diagonal spiral. The stripe goes all the way around the tube once every 5 rounds, which gives bands about 0.5 in (1.3 cm) wide.
Rnd 4: Join red with the first st. Sc 9 in red, then change to cream and sc 6 in cream. (15 sts: 9 red, 6 cream)
Rnd 5: Sc 3 in cream (finishing the 9-st cream stripe), sc 9 in red, then sc 3 in cream. (15 sts)
Rnd 6: Sc 6 in cream, sc 9 in red. (15 sts)
Rnds 7–42: Sc in each st around, 15 sts per round, keeping the 9-red/9-cream sequence going without a break. (15 sts each round)
Check the math: Rnds 4–42 are 39 rounds x 15 sts = 585 sts. 585 = 32 full repeats of 18 sts (576 sts) + 9 more sts. Those last 9 sts are red, so Rnd 42 ends exactly at the end of a red stripe. If your last red stitch doesn’t land on the last stitch of Rnd 42, you miscounted somewhere. Recount the last few stripes before you move on.
Cut red, leaving a 6 in (15.2 cm) tail, and weave it in on the inside. Continue in cream.
Stuffing and Inserting the Wire
Weave in all tails inside the tube now; you won’t be able to reach them later.
Fold the chenille stem in half to make a doubled 6 in (15.2 cm) rod, and bend each cut end back by 0.25 in (0.6 cm) so the tips can’t poke through. Stuff the bottom of the tube firmly and evenly. Slide the folded end of the stem down the center of the tube and leave about 0.5 in (1.3 cm) of space at the open top. Stuff firmly all around the wire.
Closing the Crook End
Rnd 43 (cream): [Sc in next st, sc2tog] 5 times. (5 sc worked into 5 sts + 5 sc2tog worked into 10 sts = 15 sts used; 10 sts)
Top up the stuffing around the wire tip.
Rnd 44 (cream): Sc2tog 5 times. (10 sts used; 5 sts)
Fasten off, leaving an 8 in (20.3 cm) tail. Thread it through the front loops of the last 5 sts, pull it tight to close, and weave it into the tube.
Checkpoint: The straight, stuffed tube measures about 7.25 in (18.4 cm) long and 1 in (2.5 cm) thick, with cream at both ends.
Shaping the Crook
Measure 3 in (7.6 cm) down from the closed top end, which is about the top 18 rounds. Bend that section around your 1.5 in (3.8 cm) round form to make a smooth half-circle, then let the last 0.5 in (1.3 cm) hang straight down. The stem below the bend stays straight, about 4.25 in (10.8 cm) long.
Checkpoint: The cane stands about 5.5 in (14.0 cm) tall and measures about 2.5 in (6.4 cm) across the crook.
Bow
All bow pieces are worked in sage green. Leave a 6 in (15.2 cm) tail on each piece for sewing.
Upper Leaf Loops (make 2)
Ch 6.
Rnd 1: Working along one side of the chain: sc in 2nd ch from hook, hdc in next ch, dc in next ch, hdc in next ch, (sc, ch 1, sc) in last ch. Rotate and work along the opposite side of the foundation chain: hdc in next ch, dc in next ch, hdc in next ch, sc in next ch. Ch 1, then sl st in the first sc. (10 sts + 2 ch-1 points)
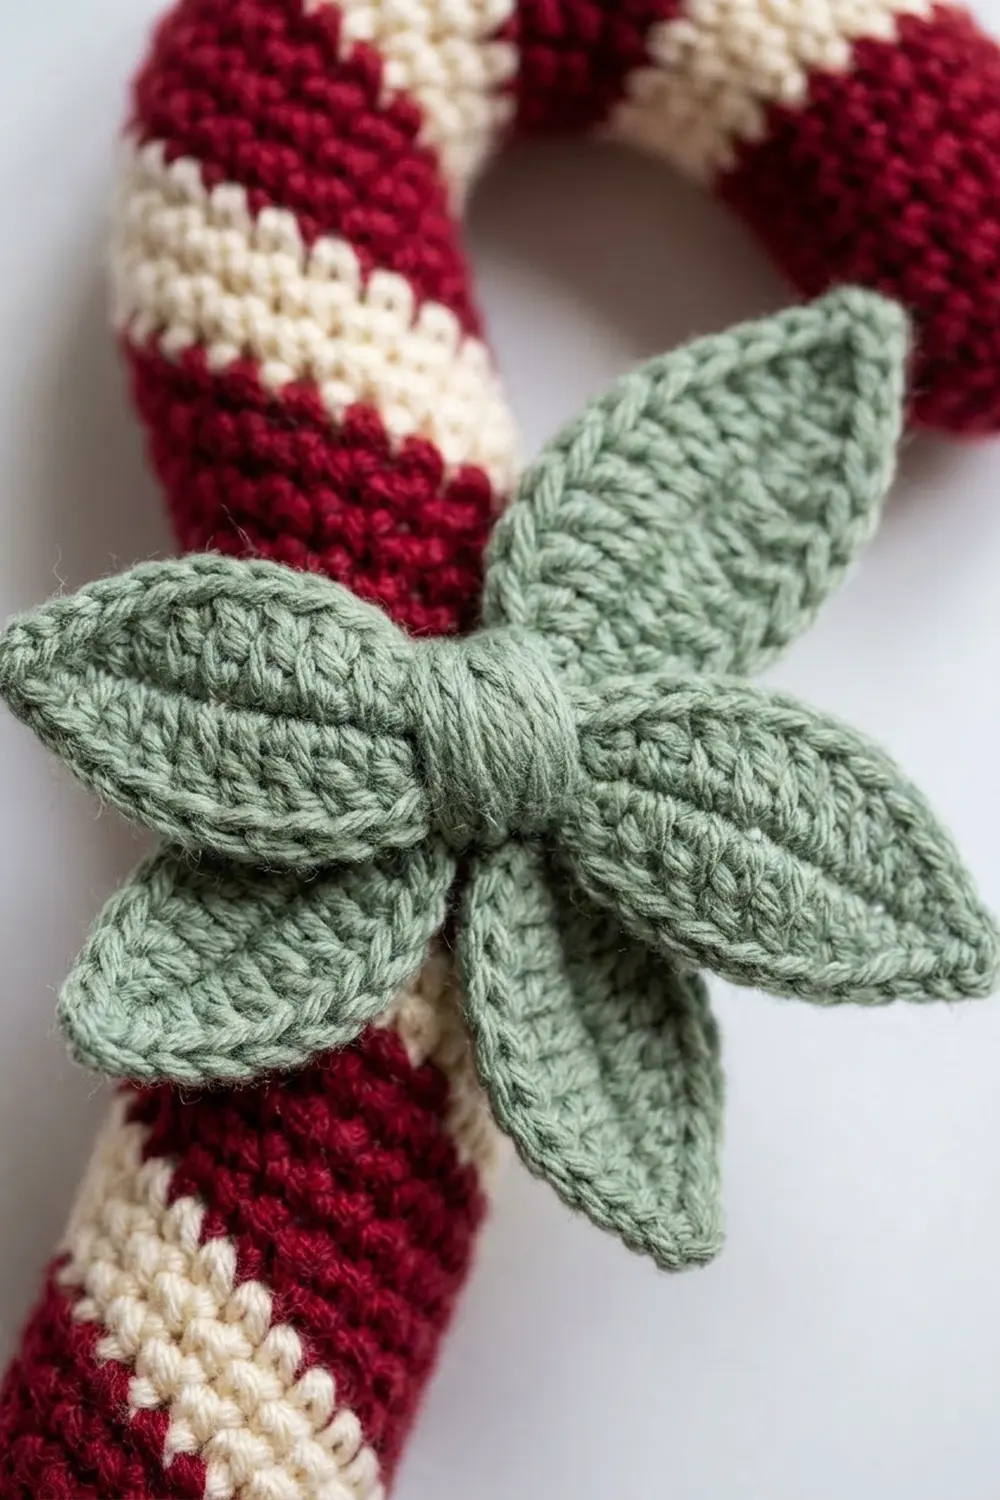
The short-tall-short stitch heights make a pointed leaf shape with a tip at each end. Each upper leaf measures about 1 in (2.5 cm) long. Fasten off.
Lower Leaf Tails (make 2)
Ch 5.
Rnd 1: Working along one side of the chain: sc in 2nd ch from hook, hdc in next 2 ch, (sc, ch 1, sc) in last ch. Rotate and work along the opposite side: hdc in next 2 ch, sc in next ch. Ch 1, then sl st in the first sc. (8 sts + 2 ch-1 points)
Each tail measures about 0.75 in (1.9 cm) long. Fasten off.
Center Knot Strip
Ch 5.
Row 1: Sc in 2nd ch from hook and in each remaining ch. (4 sts)
Fasten off.
Assembling the Bow
- Lay the two upper leaves point to point, overlapping one tip of each by 0.25 in (0.6 cm). Angle the free ends slightly upward.
- Place the two tails under that center so they angle down and out.
- Stitch through all four layers at the center a few times to hold them together.
- Wrap the center strip around the middle from front to back and sew its ends together on the back, pulling just enough to pinch the leaves into a bow.
The finished bow measures about 1.75 in (4.4 cm) wide.
Hanging Loop
With cream, ch 18.
Row 1: Sl st in 2nd ch from hook and in each remaining ch. (17 sl sts)
This makes a firm cord about 3.25 in (8.3 cm) long. Fold it in half and sew both ends to the top of the crook, at the highest point of the curve. The loop stands about 1.5 in (3.8 cm) tall.
Border
This ornament has no traditional border. Its edges are the two closed ends of the tube, and they do the job a border would do on a flat piece: they finish the edge neatly and set the final size.
- Bottom end (Rnds 1–3): 5 → 10 → 15 sts. Adding 5 sts per round keeps the circle flat. A flat circle 15 sts around is 3 in (7.6 cm) at 5 sts per inch, which matches the tube.
- Top end (Rnds 43–44): 15 → 10 → 5 sts. Removing 5 sts per round exactly mirrors the bottom, so the crook tip is as round as the base.
The math works because the tube is a constant 15 sts from Rnd 3 to Rnd 42. Nothing is gained or lost in the stripe section, and the two ends match each other stitch for stitch.
Final Blocking
- Reshape the crook around the round form. Gently roll the stem under your palm so the stuffing settles evenly.
- Mist the cane lightly with water; don’t soak it.
- Pin the bow flat on a foam board. Ease each leaf into a clean point and let it dry.
- Leave the cane resting on its side in the curved shape for 2–3 hours.
- Sew the bow to the front of the stem, just below where the crook starts and slightly to the right of center. Stitch through the center knot and the base of each upper leaf so the loops don’t flop forward.
- Check the height again: 5.5 in (14.0 cm).
Final Quality-Control Checklist
- 15 sts per round from Rnd 3 through Rnd 42
- Stripes spiral in one even diagonal, with no jogs or straight sections
- Rnd 42 ends on the last red stitch
- Both ends are cream, round, and fully closed
- The wire can’t be felt through the tips
- The stuffing is firm, with no flat spots along the stem
- The crook is a smooth half-circle, 2.5 in (6.4 cm) wide
- The bow is centered, both upper leaves are the same size, and the points are crisp
- The hanging loop is securely sewn and stands 1.5 in (3.8 cm) tall
- All tails are woven in inside the tube
Troubleshooting
Stripes look vertical instead of diagonal: You probably reset the color count at the marker. Count the 18-st repeat continuously and ignore round boundaries.
Stripes look uneven: One or more color changes were early or late. Count each 9-st stripe and fix any mistake as soon as you spot it.
The carried yarn shows through: Your floats are too tight, or the stitches are too loose. Leave slack in the carried strand, or go down a hook size.
The crook keeps straightening out: Add stuffing around the wire, or use 2 chenille stems held together.
Stuffing shows between stitches: Your gauge is too loose. Use a smaller hook and work through both loops of each stitch.
The bow droops: Add a few extra stitches through the base of each upper leaf to anchor it to the stem.
Care
Spot clean with a damp cloth and mild soap, and let it air dry in shape. Because of the wire inside, don’t machine wash or tumble dry it.
Final Notes
Here is the measurement chain: a 1 in (2.5 cm) starting circle of 15 sts becomes a 3 in (7.6 cm) round tube. Forty-four rounds at 6 rounds per inch make a 7.25 in (18.4 cm) tube. Bending the top 3 in (7.6 cm) around a 1.5 in (3.8 cm) form gives a 5.5 in (14.0 cm) tall cane that is 2.5 in (6.4 cm) across the crook. The 18-st color repeat over 15-st rounds creates the spiral, and Rnd 42 ending on the last red stitch confirms your count. Make a whole set for the tree, or tie one onto a gift.
Happy crocheting!