
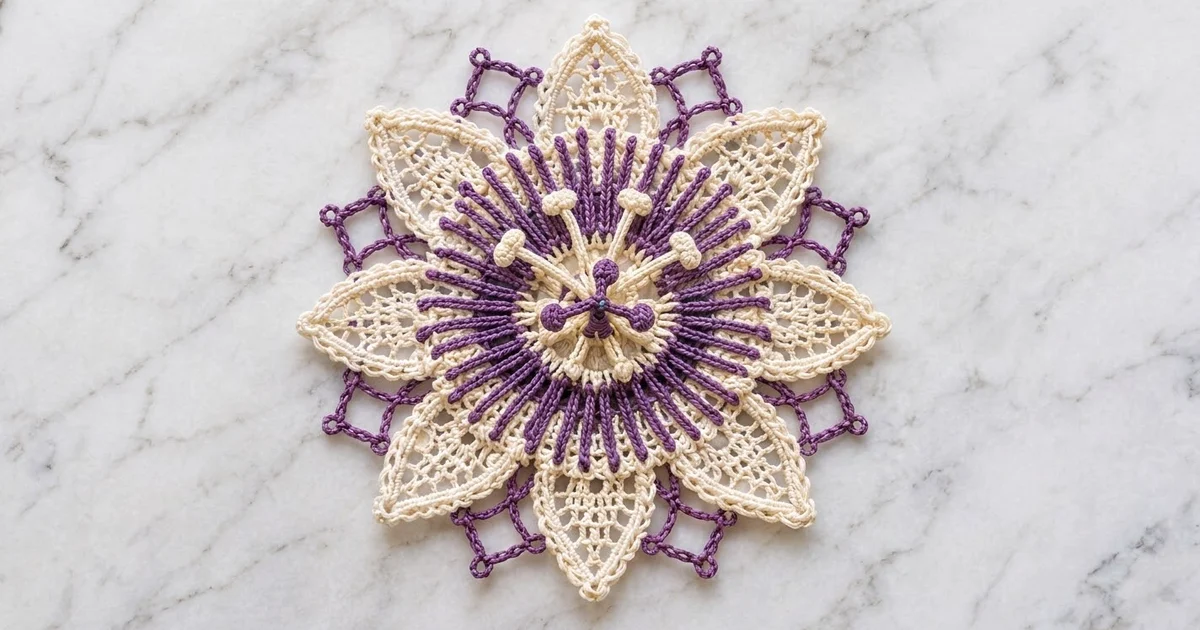
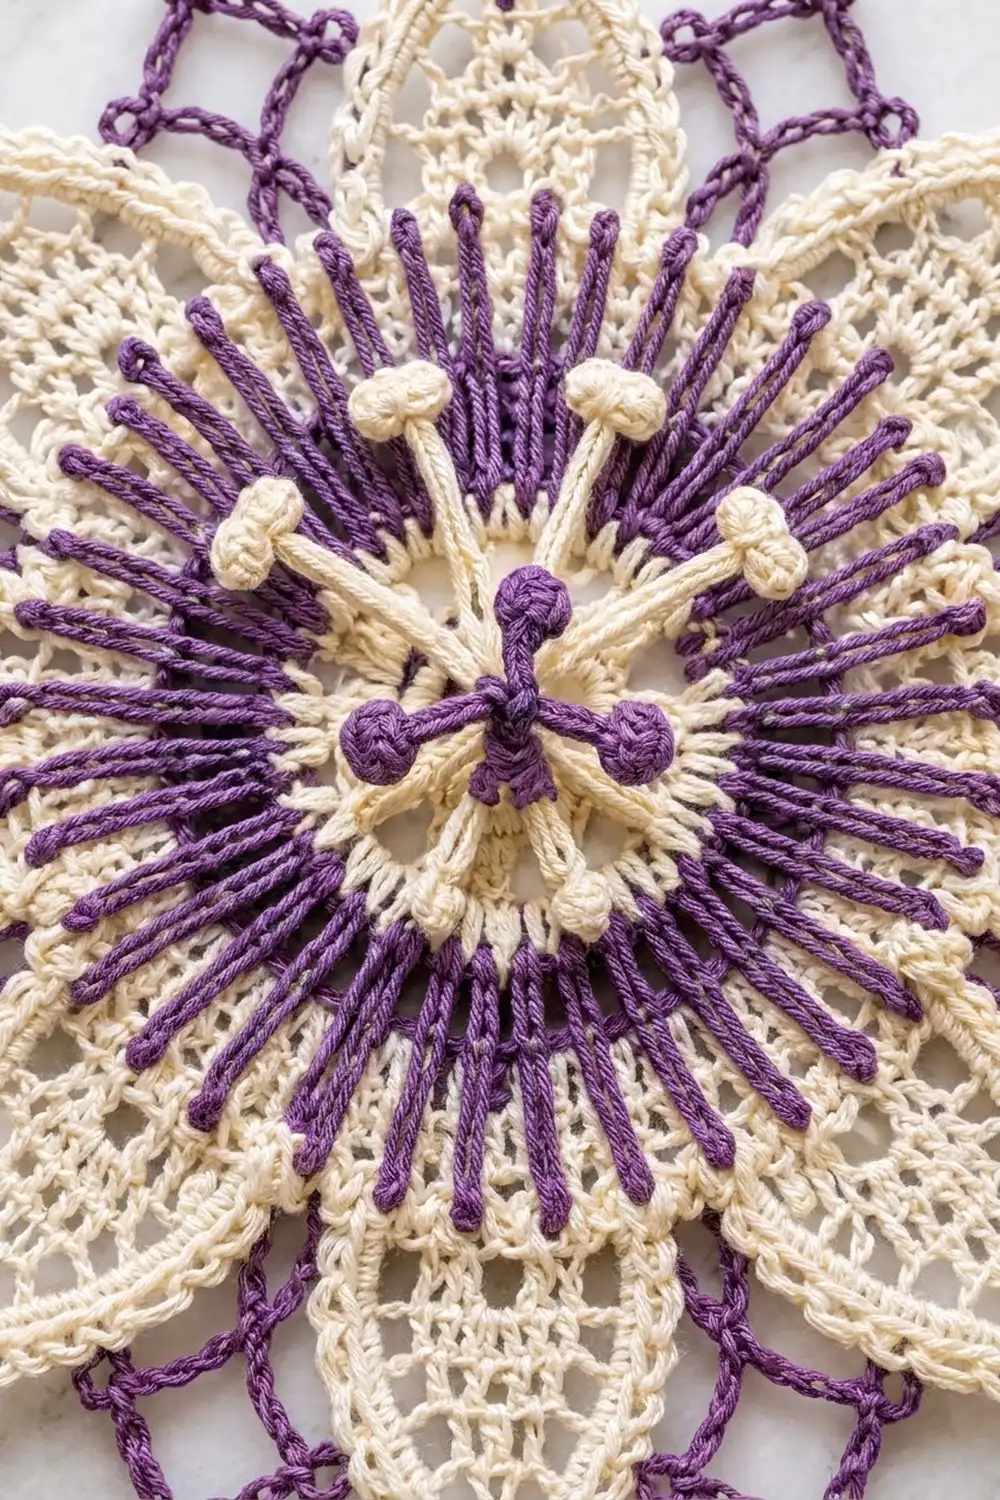
This motif is a passionflower worked in crochet thread. Eight pointed cream petals with an open mesh fill surround a dense ring of purple corona filaments. A cluster of cream stamens with knobbed tips sits in the middle, topped by a small purple stigma. Behind the petals, a purple chain lattice with picot nubs shows between the petal tips.
The palette is two colors, cream and grape purple. Together they give a vintage, botanical, Irish-lace feel. The cream carries the structure, and the purple adds depth and outline.
The pattern uses US crochet terms. The finished motif measures 7.2 in (18.3 cm) from petal tip to opposite petal tip after blocking.
Construction overview: you work a small cream center in rounds and split it into front and back loop layers. Eight petals are worked in short rows on the top layer. Purple filaments go into a front-loop layer, and a purple chain frame goes into a back-loop layer behind everything. The stamen cluster and stigma are made separately and sewn over the center ring.
Finished Size and Construction
- Finished size: 7.2 in (18.3 cm) tip to tip
- Skill level: Intermediate
- Terminology: US crochet terms
- Yarn weight: size 3 crochet thread (light fingering, weight category 1)
- Hook: 2.75 mm (US C-2)
- Number of pieces: 1 motif, plus a small stamen cluster and stigma sewn on
- Layout: single radial flower with 8 petals
- Piece size: 7.2 in (18.3 cm) tip to tip
- Size before border: 7.0 in (17.8 cm) tip to tip (petals unedged)
- Border depth: about 0.1 in (0.3 cm) at each petal tip
Materials
Use a mercerized cotton crochet thread in size 3. The sheen shows the mesh well, and the thread holds a crisp point after blocking. Avoid splitty or very soft yarns, because the filaments and knobs need a firm twist to stand out.
- Color A, Cream: 14 g, about 35 m
- Color B, Grape Purple: 10 g, about 25 m
Tools:
- 2.75 mm (US C-2) crochet hook
- Tapestry needle
- Sharp scissors
- Stitch markers (2–3)
- Blocking board or foam mat, rustproof pins, and a spray bottle
- Ruler or tape measure
Quantities include a margin of roughly 20% for gauge swatching and weaving in ends.
Abbreviations (US Terms)
- ch – chain
- sl st – slip stitch
- sc – single crochet
- dc – double crochet
- tr – treble crochet
- sc2tog – single crochet 2 together
- sp – space
- st(s) – stitch(es)
- FLO / BLO – front loop only / back loop only
- rep – repeat
- RS / WS – right side / wrong side
Special stitches
- Picot: ch 3, sl st in 3rd ch from hook.
- Knob: (yo, insert hook in the indicated ch, yo, pull up a loop, yo, draw through 2 loops) 4 times, yo, draw through all 5 loops on hook, ch 1 to lock.
- Standing sc: with a slipknot on the hook, insert into the stitch and work a sc as usual.
Gauge and Checkpoints
Gauge is not critical for a single motif, but size control matters if you want the petals to sit flat. Work Rounds 1–2 and measure before going further.
- Gauge: Rounds 1–2 = 1.6 in (4.1 cm) across. 10 ch = 1.4 in (3.6 cm).
Checkpoints (unblocked, lightly pressed flat):
- After Round 1: 0.9 in (2.3 cm) across, center hole about 0.4 in (1.0 cm)
- After Round 2: 1.6 in (4.1 cm)
- After Round 3: 1.9 in (4.8 cm)
- After Round 4: 2.2 in (5.6 cm)
- Each petal before edging: 2.4 in (6.1 cm) long, about 1.5 in (3.8 cm) at its widest
- Motif before border: 7.0 in (17.8 cm) tip to tip
- Finished: 7.2 in (18.3 cm) tip to tip
If Round 2 is larger than 1.7 in (4.3 cm), go down one hook size. If it is smaller than 1.5 in (3.8 cm), go up one size. If Round 2 is right but the petals ruffle, your dc are too tall: shorten them by pulling the first loop up less.
Pattern
Center (Color A)
Round 1: With A, ch 8, sl st to first ch to form a ring. Ch 1, work 24 sc into the ring, sl st to first sc. (24 sc)
Round 2: Ch 3 (counts as dc), dc in next st, 2 dc in next st, dc in each of next 2 sts, 2 dc in next st; rep from * 6 more times, sl st to top of ch-3. (32 dc)*
Each “dc, dc, 2 dc” group spans 3 sts of Round 1 and makes 4 dc. That gives 8 groups of 4, and each group will sit under one petal.
Round 3 (FLO): Working in the front loops only of Round 2, ch 1, sc in each of next 3 sts, 2 sc in next st; rep from * 7 more times, sl st to first sc. (40 sc)*
The 32 back loops of Round 2 stay free for the purple frame.
Round 4 (BLO): Working in the back loops only of Round 3, ch 1, sc in each st around, sl st to first sc. (40 sc)
The 40 front loops of Round 3 stay free for the corona. Round 4 is the base for the petals. Do not fasten off.
Petals (Color A)
Each petal uses 5 sts of Round 4: 40 sts ÷ 8 petals = 5 sts per petal. Place a marker in every 5th st to divide them before you start.
Row 1 (RS): Ch 1, sc in same st as joining and in next 4 sts, turn. (5 sc)
For Petals 2–8, join A with a standing sc in the first unused st of Round 4, sc in next 4 sts, turn.
Row 2: Ch 4 (counts as dc + ch 1), dc in same sc, ch 1, skip next sc, dc in next sc, ch 1, skip next sc, (dc, ch 1, dc) in last sc, turn. (5 dc, 4 ch-1 sps)
Row 3: Ch 4 (counts as dc + ch 1), dc in first dc, (ch 1, dc in next dc) 3 times, ch 1, (dc, ch 1, dc) in 3rd ch of turning ch, turn. (7 dc, 6 ch-1 sps)
Row 4: Ch 4 (counts as dc + ch 1), (dc in next dc, ch 1) 5 times, dc in 3rd ch of turning ch, turn. (7 dc, 6 ch-1 sps)
Row 5: Sl st in first ch-1 sp and in next dc, ch 4 (counts as dc + ch 1), (dc in next dc, ch 1) 3 times, dc in next dc, turn, leaving last sp and turning ch unworked. (5 dc, 4 ch-1 sps)
Row 6: Sl st in first ch-1 sp and in next dc, ch 4 (counts as dc + ch 1), dc in next dc, ch 1, dc in next dc, turn, leaving last sp and turning ch unworked. (3 dc, 2 ch-1 sps)
Row 7: Sl st in first ch-1 sp and in next (center) dc, ch 4 (counts as tr). Fasten off. (1 st, the petal tip)
The petal widens from 5 to 7 dc, holds for one row, then narrows 7 → 5 → 3 → 1. That gives the pointed oval with an open mesh center. Repeat for all 8 petals.
Checkpoint: each petal is 2.4 in (6.1 cm) from Round 4 to the tip, and the motif measures 7.0 in (17.8 cm) tip to tip.
Corona Filaments (Color B)
Work this round on the RS into the 40 free front loops of Round 3. The filaments lie on top of the petal bases.
Corona round: Join B with a sl st in any free front loop of Round 3. Ch 11, sl st in 2nd ch from hook and in each of next 9 ch, sl st in next free front loop; rep from * 39 more times, working the last sl st into the joining loop. Fasten off. (40 filaments)*
Each filament is 10 sl sts long, about 1.4 in (3.6 cm). The sl sts back along the chain make a firm, slightly beaded cord that radiates outward over the petals. Pull each filament straight as you finish it.
Stamen Cluster (Color A, make 1)
Make a magic ring with A. Ch 10, knob in 4th ch from hook, sl st in each of next 6 ch, sl st into ring; rep from * 4 more times. Pull the ring closed and leave a 10 in (25.4 cm) tail. (5 stamens)*
Chain check: 3 ch skipped + 1 ch for the knob + 6 sl st = 10 ch. Each stamen is about 1.1 in (2.8 cm) long with a rounded knob at its tip.
Stigma (Color B, make 1)
Make a magic ring with B. Ch 5, knob in 4th ch from hook, sl st in last ch, sl st into ring; rep from * 2 more times. Pull closed and leave an 8 in (20.3 cm) tail. (3 short knobbed arms)*
Assembly of Center
Center the stamen cluster over the hole in Round 1 with the knobs pointing outward onto the cream ring. Tack the ring of the cluster to Round 1 with 6–8 small stitches, then tack each stamen once near its middle so it stays in place. Sew the stigma to the center of the stamen cluster. Weave in all ends on the WS.
Border
The border has two parts: a cream outline around every petal (Color A) and a purple lattice frame behind the petals (Color B).
Border gauge: 2 sc per dc row-end and 10 ch = 1.4 in (3.6 cm).
Petal Edging (Color A)
Work 10 sc up each petal side: 2 sc into each row-end of Rows 2–6.
Edging round (RS): Join A with a sl st between Petal 8 and Petal 1. Ch 1. *Sc2tog (first leg in the Row 1 end of the petal just finished, second leg in the Row 1 end of the next petal), 10 sc evenly up the right side of the petal, (sc, ch 3, sc) in top of the ch-4 tip, 10 sc evenly down the left side; rep from * 7 more times, sl st to first sc2tog. Fasten off.
Per petal: 1 sc2tog + 10 sc + 2 sc + 10 sc = 23 sts and 1 ch-3 tip.
Round total: 23 × 8 = 184 sts and 8 ch-3 tips.
Why the math works: Rows 2–6 are 5 dc rows, and 2 sc per dc row-end gives 5 × 2 = 10 sc, which matches the side length without cupping or ruffling. The sc2tog makes a clean V in each valley, and the ch-3 adds about 0.1 in (0.3 cm) to each point. Before the border the motif measures 7.0 in (17.8 cm); with it, 7.2 in (18.3 cm).
Lattice Frame (Color B)
This is worked from the WS into the 32 free back loops of Round 2: 32 ÷ 8 = 4 loops per petal group.
Frame Round 1 (WS): Turn the motif to the WS. Join B with a sl st in the 2nd back loop of any 4-loop group (this loop sits under a petal’s center line). Ch 1, sc in same loop, ch 22, skip next 3 back loops, sc in next back loop; rep from * 6 more times, ch 22, skip last 3 back loops, sl st to first sc. (8 sc, 8 ch-22 loops)*
Each loop folds to about 1.5 in (3.8 cm) long and lies hidden behind a petal.
Frame Round 2: Sl st in each of first 11 ch of the next loop to reach the loop tip. Ch 1, sc in the tip ch (11th ch), picot, ch 10, picot, ch 10; rep from * 7 more times, working each sc into the 11th ch of the next loop, sl st to first sc. Fasten off. (8 sc, 16 picots, 16 ch-10 sections)*
Why the math works: the loop tips sit behind the petal centers. Each 20-ch arc between two tips is longer than the straight distance between them, so it bows outward across the valley between two petals. That puts the purple lattice cell and its picot nub in the open space between the petal tips. The frame spans about 6.5 in (16.5 cm) across the arc picots, inside the 7.2 in (18.3 cm) petal span.
Final Blocking
- Weave in all ends, keeping cream ends behind cream stitches and purple ends behind purple.
- Soak the motif in cool water for 10 minutes, then roll it in a towel to press out the excess.
- Lay it RS up on the blocking board. Pin the center ring flat first.
- Pin each petal tip so opposite tips measure 7.2 in (18.3 cm). Check each opposite pair with a ruler.
- Pin each frame arc at its middle picot so the lattice opens into the valleys, about 6.5 in (16.5 cm) across.
- Straighten each filament so it radiates evenly over the petal bases.
- Lightly spray the stamens and shape the knobs with your fingers.
- Leave pinned until completely dry, at least 12 hours.
Final Quality-Control Checklist
- Round 1: 24 sc; Round 2: 32 dc; Rounds 3 and 4: 40 sc each
- 8 petals, each built 5 sc / 5 dc / 7 dc / 7 dc / 5 dc / 3 dc / 1 tr
- Petal edging: 184 sts and 8 ch-3 tips
- 40 purple filaments, evenly spaced
- 8 frame loops and 16 picots
- 5 stamens and 3 stigma arms, firmly sewn
- Finished size 7.2 in (18.3 cm) tip to tip
- No visible tails on the RS
Troubleshooting
- Petals curl forward: the edging is too tight. Redo it with a looser tension or go up half a hook size for the edging only.
- Petals ruffle: the dc rows are too long. Work Rows 2–4 with a tighter yo, or use a hook 0.25 mm smaller.
- Filaments flop or twist: the sl sts are too loose. Work them firmly into the back bump of each ch.
- Frame hidden behind petals: the loops are too short or anchored off-center. Check that each sc sits under a petal center, and block the arcs outward.
- Center hole too large: pull the starting tail to snug Round 1 before sewing on the stamens.
- Knobs look flat: make sure all 4 partial dc go into the same ch before closing.
Care
Hand wash in cool water with mild soap, roll in a towel, and dry flat, re-pinning the petal tips if needed. Do not tumble dry.
Final Notes
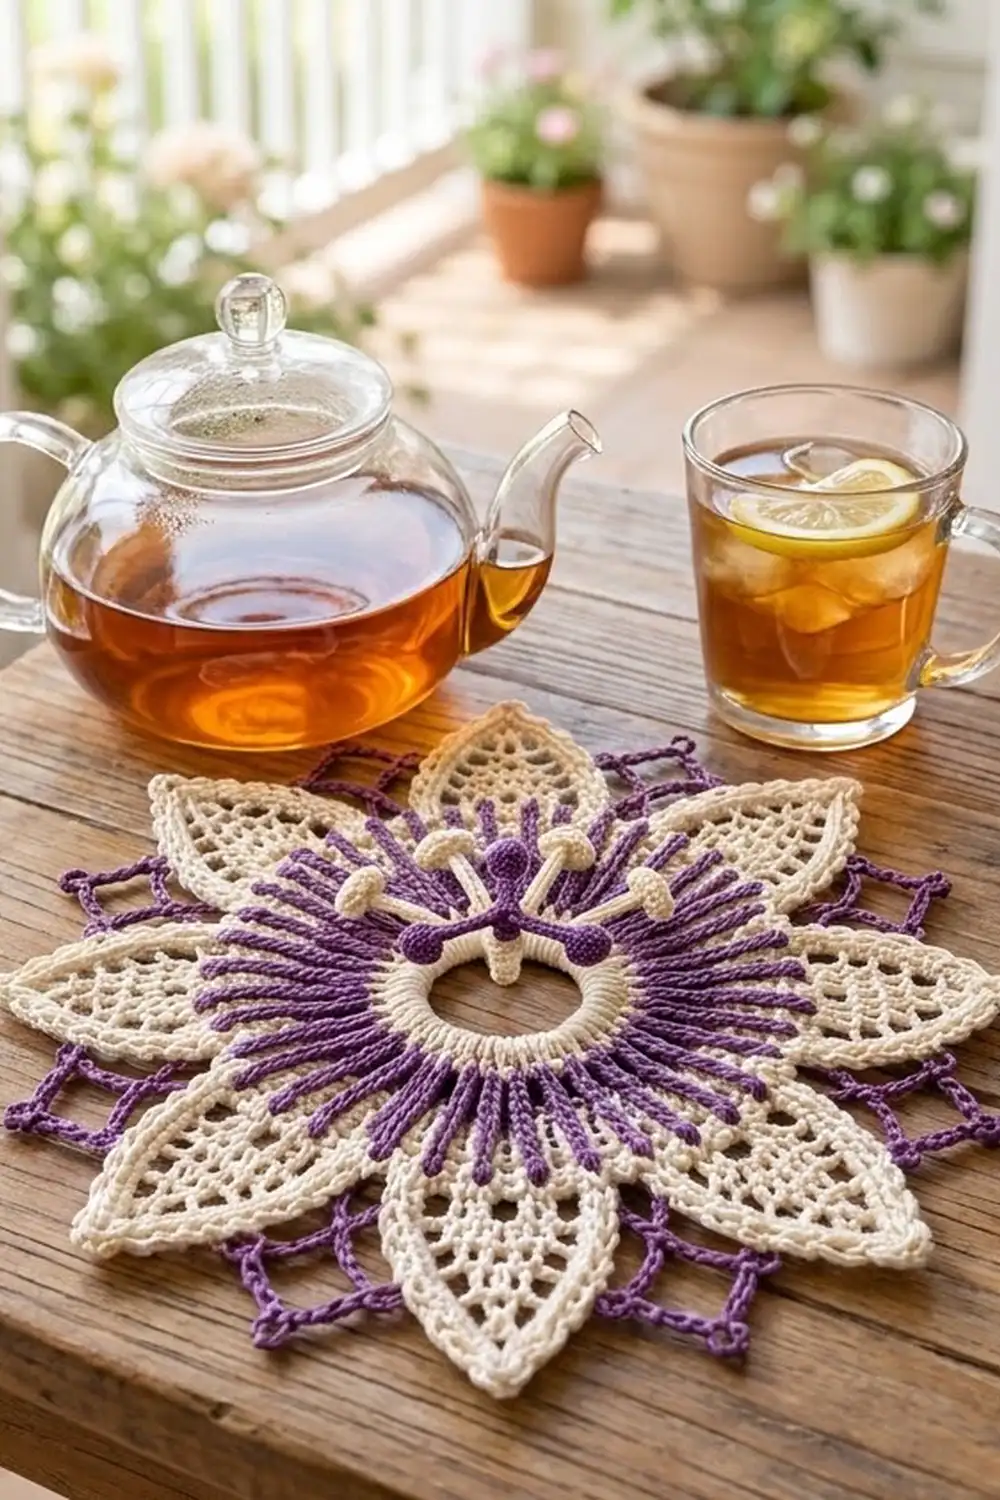
The measurement chain is simple to track. Round 2 measures 1.6 in (4.1 cm), Round 4 measures 2.2 in (5.6 cm), each petal adds 2.4 in (6.1 cm) for 7.0 in (17.8 cm) tip to tip, and the edging brings it to 7.2 in (18.3 cm). The counts move from 24 → 32 → 40 → 40 sts, 5 sts per petal, 23 edging sts per petal, and 4 back loops per frame loop. If each checkpoint matches, the finished flower will lie flat with crisp points, a full purple corona, and a lattice that frames every petal.
Happy crocheting!