
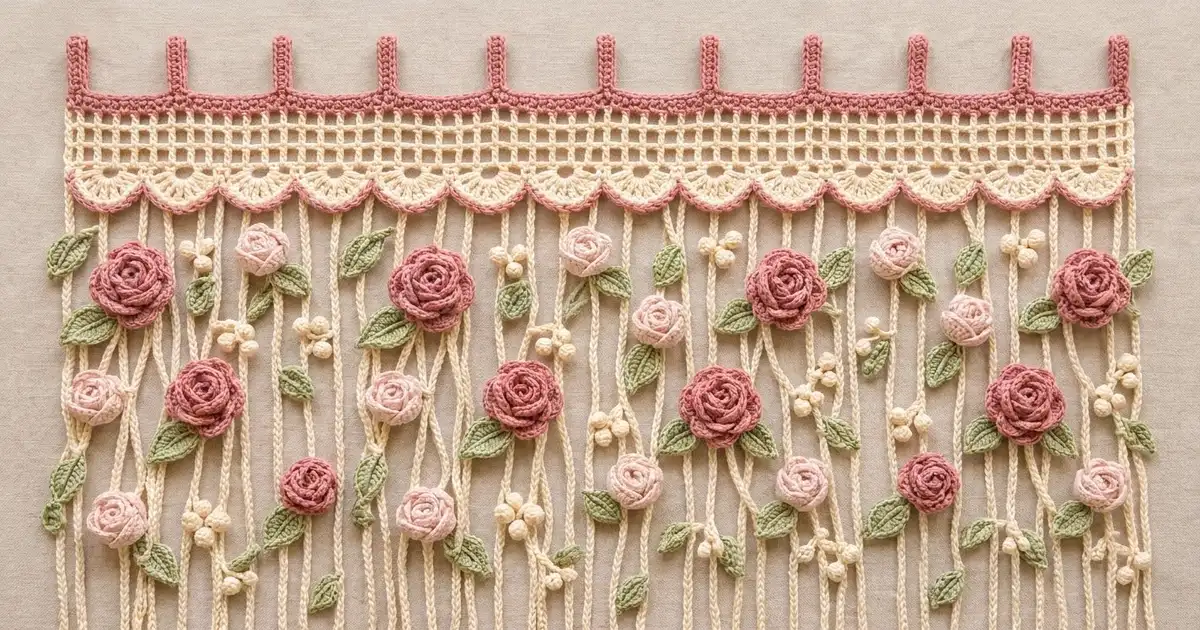
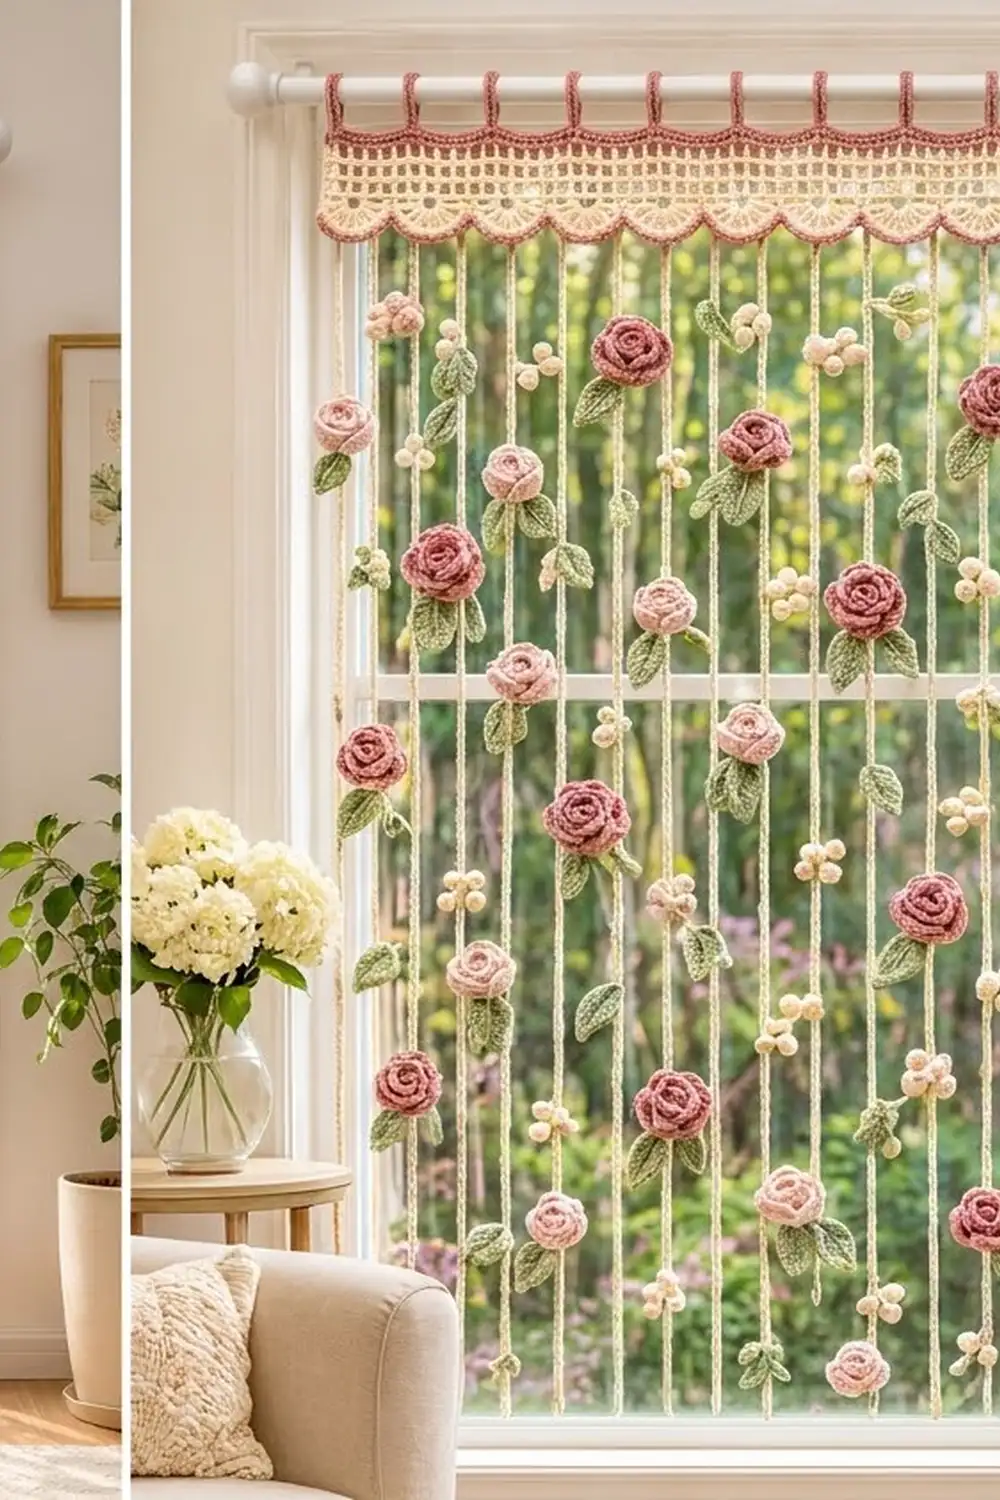
This string curtain is a cottage-style garden for a window. A neat header of cream filet mesh and fan scallops is framed in dusty rose. Below it, slender cream cords fall to the sill, dotted with rolled roses, sage leaves and little cream berry sprigs. Light passes between the strands, so the window still feels open.
The palette is soft and warm: cream, dusty rose, pale pink and sage green. The style is vintage but simple, and every motif uses basic stitches. The pattern uses US crochet terms throughout.
The finished curtain is 36 in (91.4 cm) wide and 44.5 in (113.0 cm) long from the top of the header to the cord ends. The hanging tabs add 2 in (5.1 cm) above that.
You work the header in rows from the top down. Next, a rose border round adds the scalloped edging and side edges, and the tabs go across the top. Then you chain 43 cords directly off the scallop edge. Last, you make the roses, leaves and berries and sew them onto the cords.
Finished Size and Construction
- Finished size: 36 in (91.4 cm) wide × 44.5 in (113.0 cm) long, plus 2 in (5.1 cm) tabs
- Skill level: Easy-intermediate
- Terminology: US crochet terms
- Yarn weight: Worsted (#4) cotton
- Hook: 5.0 mm (H-8)
- Number of pieces: 1 curtain (header with 43 attached cords), plus sewn-on appliqué motifs
- Layout: One horizontal header with vertical cords hanging below
- Header size before border: 36 in (91.4 cm) × 4.25 in (10.8 cm)
- Header size after border: 36 in (91.4 cm) × 4.5 in (11.4 cm)
- Border depth: 0.25 in (0.6 cm), one round of sc
- Cord length: 40 in (101.6 cm)
Materials
Choose a smooth worsted-weight cotton, either mercerized or matte. Cotton holds the mesh crisp and keeps the cords from stretching too much. Avoid fuzzy acrylic, because it blurs the filet squares.
- Cream: 330 g / 530 m (header body, cords, berry sprigs)
- Dusty rose: 100 g / 160 m (header band, border, tabs, large roses)
- Pale pink: 50 g / 80 m (small roses)
- Sage green: 70 g / 112 m (leaves)
Tools:
– 5.0 mm (H-8) crochet hook
– Tapestry needle
– Stitch markers
– Measuring tape
– Rust-proof pins and a blocking surface
– Spray bottle
All quantities include roughly a 10–15% margin.
Abbreviations (US Terms)
- ch: chain
- sl st: slip stitch
- sc: single crochet
- hdc: half double crochet
- dc: double crochet
- sk: skip
- sp: space
- st(s): stitch(es)
- V-st: (dc, ch 2, dc) in the same stitch
- Bobble: *yarn over, insert hook in the stitch, pull up a loop, yarn over, pull through 2 loops; repeat from * 4 more times in the same stitch (6 loops on hook), yarn over, pull through all 6 loops.
Gauge and Checkpoints
Gauge: 14 sts = 4 in (10.2 cm) in sc or dc. 16 sc rows = 4 in (10.2 cm). 8 dc rows = 4 in (10.2 cm). 12 ch = 4 in (10.2 cm).
Test piece first: Ch 26 and work Rows 1–11 of the header on these 25 stitches. This makes a mini header with 12 mesh squares and 4 scallops, about 7 in (17.8 cm) wide. Measure 14 sts across the middle; they should span 4 in (10.2 cm).
Checkpoints:
– After Row 1: 36 in (91.4 cm) wide
– After Row 4: 1 in (2.5 cm) tall
– After Row 8: 3 in (7.6 cm) tall
– After Row 11: 4.25 in (10.8 cm) tall
– After the border: 4.5 in (11.4 cm) tall
If your work is too big, go down one hook size (to 4.5 mm). If it is too small, go up one size (to 5.5 mm). Getting the width right matters most, because the cord spacing comes from it.
Header
The header is worked in turned rows. A ch 1 at the start of an sc row does not count as a stitch.
Row 1 (dusty rose): Ch 128, sc in 2nd ch from hook and in each ch across, turn. (127 sc)
Rows 2–3: Ch 1, sc in each st across, turn. (127 sc) Fasten off dusty rose.
Row 4 (cream): Join cream, ch 1, sc in each st across, turn. (127 sc)
Checkpoint: 1 in (2.5 cm) tall.
Row 5 (mesh): Ch 4 (counts as dc + ch 1), sk next st, dc in next st, *ch 1, sk next st, dc in next st; repeat from * across, turn. (64 dc, 63 ch-1 sps = 63 mesh squares)
Rows 6–8: Ch 4 (counts as dc + ch 1), dc in next dc, *ch 1, dc in next dc; repeat from * across, working the last dc in the 3rd ch of the turning ch-4, turn. (64 dc, 63 ch-1 sps)
Checkpoint: 3 in (7.6 cm) tall, with four rows of open squares.
Row 9: Ch 1, sc in first dc, *sc in next ch-1 sp, sc in next dc; repeat from * across, ending in the turning ch, turn. (64 sc worked into dc + 63 sc worked into spaces = 127 sc)
Row 10 (scallop base): Ch 1, sc in first st, *ch 3, sk next 5 sts, sc in next st; repeat from * 20 more times, turn. (22 sc, 21 ch-3 loops)
These ch-3 loops form the small holes at the base of each scallop.
Row 11 (fans): Ch 1, sc in first sc, *9 dc in next ch-3 sp, sc in next sc; repeat from * 20 more times. (22 sc + 189 dc = 211 sts; 21 scallops) Fasten off cream.
Checkpoint: 4.25 in (10.8 cm) tall and 36 in (91.4 cm) wide at the scallop valleys.
Border
Border gauge: 14 sc = 4 in (10.2 cm) along straight edges. On the sides, work 1 sc per sc row and 2 sc per dc row, which comes to 4 sc per inch.
Border Round (dusty rose): With the right side facing, join dusty rose in the first sc of Row 11 at the bottom right corner. Work around the header as follows.
- Bottom: Ch 1, sc in same sc, *sc in next 4 dc, 2 sc in next dc, sc in next 4 dc, sc in next sc; repeat from * 20 more times. (1 + 21 × 11 = 232 sc)
- Left side: Rotate and work up the side edge. Put 2 sc in the end of Row 11, 1 sc in Row 10, 1 sc in Row 9, 2 sc in each of Rows 8–5 (8 sc), and 1 sc in each of Rows 4–1 (4 sc). (16 sc)
- Top corner: Ch 1 (not counted).
- Top: Sc in the underside of each foundation ch across. (127 sc)
- Top corner: Ch 1 (not counted).
- Right side: Work the right side as a mirror of the left side, going down. (16 sc)
- Sl st to the first sc.
Round total: 232 + 16 + 127 + 16 = 391 sc, plus 2 corner ch-1s. The bottom corners are the end valley sc, so no extra corner stitches are added there.
Why the math works: Each 6-stitch scallop repeat gets 11 edging sc. The fan’s outer curve is longer than its base, and the 2-sc increase at the tip keeps each point crisp without ruffling. The sides match the row-height gauge of 4 sc per inch. The top takes exactly 1 sc per foundation chain, so the width stays at 36 in (91.4 cm).
Tabs (dusty rose, top edge only): Number the 127 top sc from right to left. Tabs go on sts 1, 10, 19, 28, 37, 46, 55, 64, 73, 82, 91, 100, 109, 118 and 127 (15 tabs, 9 sts apart, or 2.6 in / 6.5 cm apart).
- Join in st 1.
- *Ch 16, sl st in the same st to form a loop. Work 24 sc into the loop, then sl st in the same st again.
- Sl st in each of the next 9 sts to reach the next tab position.
- Repeat from * until all 15 tabs are made, then fasten off.
Each tab stands about 2 in (5.1 cm) tall and fits a rod up to 1.25 in (3.2 cm) across.
Cords
The cords hang from the bottom of the Border Round. There are two kinds of attachment points:
– the 22 valley sc (the sc worked into each Row 11 sc)
– the 21 scallop tips (the space between each pair of 2-sc)
That makes 43 cords, about 0.86 in (2.2 cm) apart.
Each cord (cream):
1. Join with a sl st at the attachment point.
2. Ch 121.
3. Sl st in the back bump of the 2nd ch from hook and in the back bump of each ch back up. (120 sl st)
4. Sl st in the attachment point again and fasten off.
This makes a firm twisted cord 40 in (101.6 cm) long. Lay the curtain flat every 10 cords and check that the cord ends line up.
Large Rose (dusty rose, make 16)
Row 1: Ch 31, V-st in 4th ch from hook, *sk 2 ch, V-st in next ch; repeat from * 8 more times, turn. (10 V-sts)
Row 2: Ch 1, *7 dc in next ch-2 sp, sl st between this V-st and the next; repeat from * 9 more times. Work the final sl st into the turning ch. (10 petals, 70 dc)
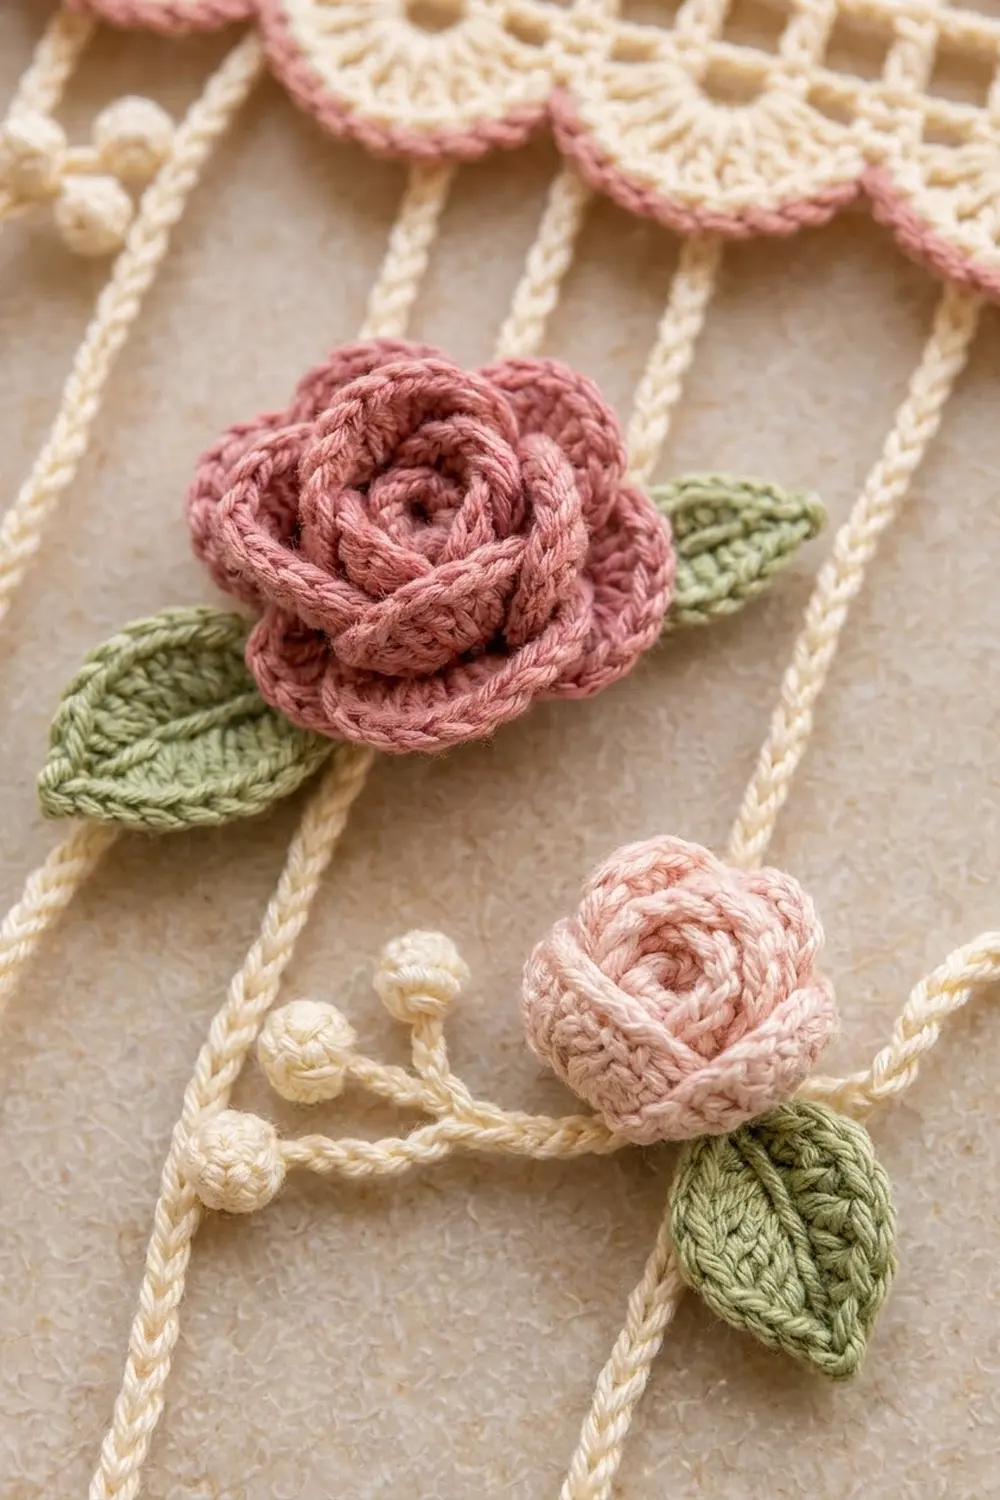
Leave a 12 in (30.5 cm) tail. Roll the strip into a spiral, starting from the end you finished on, so the petals stack in layers. Stitch through all layers at the base to hold the spiral. The rose measures about 2.5 in (6.4 cm) across.
Small Rose (pale pink, make 16)
Row 1: Ch 22, V-st in 4th ch from hook, *sk 2 ch, V-st in next ch; repeat from * 5 more times, turn. (7 V-sts)
Row 2: Ch 1, *5 dc in next ch-2 sp, sl st between V-sts; repeat from * 6 more times. (7 petals, 35 dc)
Roll this one tightly so it looks like a cupped bud, then sew the base. It measures about 1.75 in (4.4 cm) across.
Leaf (sage green, make 64)
Rnd 1: Ch 8.
– Along the first side: sc in 2nd ch from hook, hdc in next ch, dc in next 2 ch, hdc in next ch, sc in next ch (6 sts).
– At the tip: 3 sc in the last ch.
– Along the other side of the chain: sc in next ch, hdc in next ch, dc in next 2 ch, hdc in next ch, sc in next ch (6 sts).
– Sl st to the first sc. (15 sts)
Point: Ch 2, sl st in 2nd ch from hook.
Vein: Surface sl st along the center foundation line from the base to the tip, then fasten off. The leaf is about 1.75 in (4.4 cm) long.
Berry Sprig (cream, make 24)
- Ch 10. Work a bobble in the 4th ch from hook, ch 1 to close, then sl st in the next 2 ch.
- Ch 5, bobble in 4th ch from hook, ch 1, sl st in the remaining ch of this short stem. Sl st in the next 2 ch of the main stem.
- Repeat step 2 once more.
- Sl st in the last 2 ch. (3 berries)
The sprig is about 2 in (5.1 cm) long.
Attaching the Motifs
Sew 2 leaves behind each rose in a V shape, with the tips angled out. Then stitch each rose-and-leaf unit to a cord, sewing through the cord’s sl st ridge.
Place the roses in four bands, at about 6, 14, 22 and 30 in (15.2, 20.3… see note below) below the header. Each band has 4 large and 4 small roses, alternating colors and moved over a few cords from the band above. Use the remaining leaves singly on bare cords.
Sew the berry sprigs between the bands, at about 10, 18 and 26 in (25.4, 45.7 and 66.0 cm), with 8 sprigs per band.
No two neighboring cords should carry motifs at the same height. Keep the bottom 6 in (15.2 cm) of each cord mostly clear so the hem stays light.
Note on band heights: 6, 14, 22 and 30 in are 15.2, 35.6, 55.9 and 76.2 cm.
Final Blocking
- Lay the curtain flat on a large clean surface with the cords straight.
- Pin the header to 36 in × 4.5 in (91.4 × 11.4 cm), squaring the mesh and pinning each scallop tip.
- Pin each cord end at 40 in (101.6 cm) below the header.
- Mist the header and cords until damp, but not soaked.
- Gently cup the roses with your fingers and press the leaves flat.
- Let everything dry completely before unpinning.
- Hang the curtain for 24 hours. The cords may settle by up to 0.5 in (1.3 cm). Trim and re-secure any that hang uneven.
Final Quality-Control Checklist
- Header is 36 in (91.4 cm) wide and 4.5 in (11.4 cm) tall
- 63 mesh squares in each of 4 mesh rows
- 21 scallops with 232 rose edging sc
- 15 tabs, evenly spaced 9 sts apart
- 43 cords, each 40 in (101.6 cm) long
- 16 large roses, 16 small roses, 64 leaves and 24 berry sprigs, all sewn on securely
- All tails woven in and hidden behind the motifs
Troubleshooting
- Mesh squares lean to one side: Your ch-1 is too tight. Loosen it, or chain with a hook one size larger.
- Scallops ruffle: Use 8 dc per fan instead of 9, and adjust the edging to 10 sc per repeat (sk the 2-sc increase).
- Cords curl or twist: Wet-block them hanging straight with a light weight at the bottom.
- Roses unroll: Sew through every layer twice at the base.
- Header pulls narrower than the cords: Your border top is too tight. Redo it with a larger hook.
Care
Hand wash in cool water with mild soap and roll the curtain in a towel to remove water. Lay it flat or hang it to dry, and reshape the roses while damp.
Final Notes
The measurements build on each other in this order:
– 14 sts per 4 in (10.2 cm) gives a 127-stitch header that is 36 in (91.4 cm) wide.
– Four mesh rows plus the sc and fan rows bring the header to 4.25 in (10.8 cm).
– The one-round border finishes it at 4.5 in (11.4 cm).
– The 43 cords of 120 chains each fall 40 in (101.6 cm), for a total length of 44.5 in (113.0 cm).
Check each stage against these numbers, and the finished curtain will fit your window.
Happy crocheting!