

If you’re looking for a beautiful handmade project for the holiday season, this crochet snowflake ornament pattern is a wonderful choice. The finished snowflake has a delicate, lacy appearance with six elegant points, making it perfect for decorating a Christmas tree, adding to a holiday wreath, decorating gifts, or creating a festive winter garland.
This pattern is especially beautiful when made with white yarn. The open crochet stitches give the finished piece a light, snowy appearance, while the symmetrical six-point design makes it look like a traditional snowflake.
The project can also be customized with different yarn colors and sizes, making it easy to create a whole collection of handmade Christmas decorations.
Materials You’ll Need
Before starting your crochet snowflake, gather the following supplies:
- White crochet yarn
- Crochet hook suitable for your yarn
- Scissors
- Yarn needle
- Stitch marker, if desired
- Snowflake chart or visual reference
White yarn gives the most traditional winter look, but you can experiment with other colors. Light blue, silver, cream, pale gray, and even gold can create beautiful variations.
For a delicate snowflake, choose a finer yarn and a smaller hook. If you want a larger and more noticeable Christmas ornament, use thicker yarn with a corresponding hook size.
The finished size will depend on your yarn weight, crochet hook, and tension.
Understanding the Snowflake Design
This crochet snowflake is worked from the center outward.
The project begins with a small circular center. Additional rounds are then built around the center, gradually creating the six main branches of the snowflake.
The outer rounds add smaller branches, loops, open spaces, and pointed details. These decorative elements give the finished snowflake its delicate lace-like appearance.
The most important thing to remember is that the design is symmetrical. The snowflake has six repeating sections, so try to keep your stitch count and tension consistent throughout the project.
When you first begin, the crochet may simply look like a small circle. As you continue adding rounds, the characteristic snowflake shape will gradually appear.
How to Crochet the Snowflake
Step 1: Create the Center
Begin with your white yarn and make a small starting ring.
Work the first round of stitches into the center to create a compact circular motif.
The center of the snowflake is denser than the outer sections. This creates a strong foundation for the decorative branches that will be added later.
Keep your stitches even and avoid making them too tight. Consistent tension will make the following rounds easier to work and will help the finished snowflake remain symmetrical.
Once you complete the first round, join it neatly before continuing.
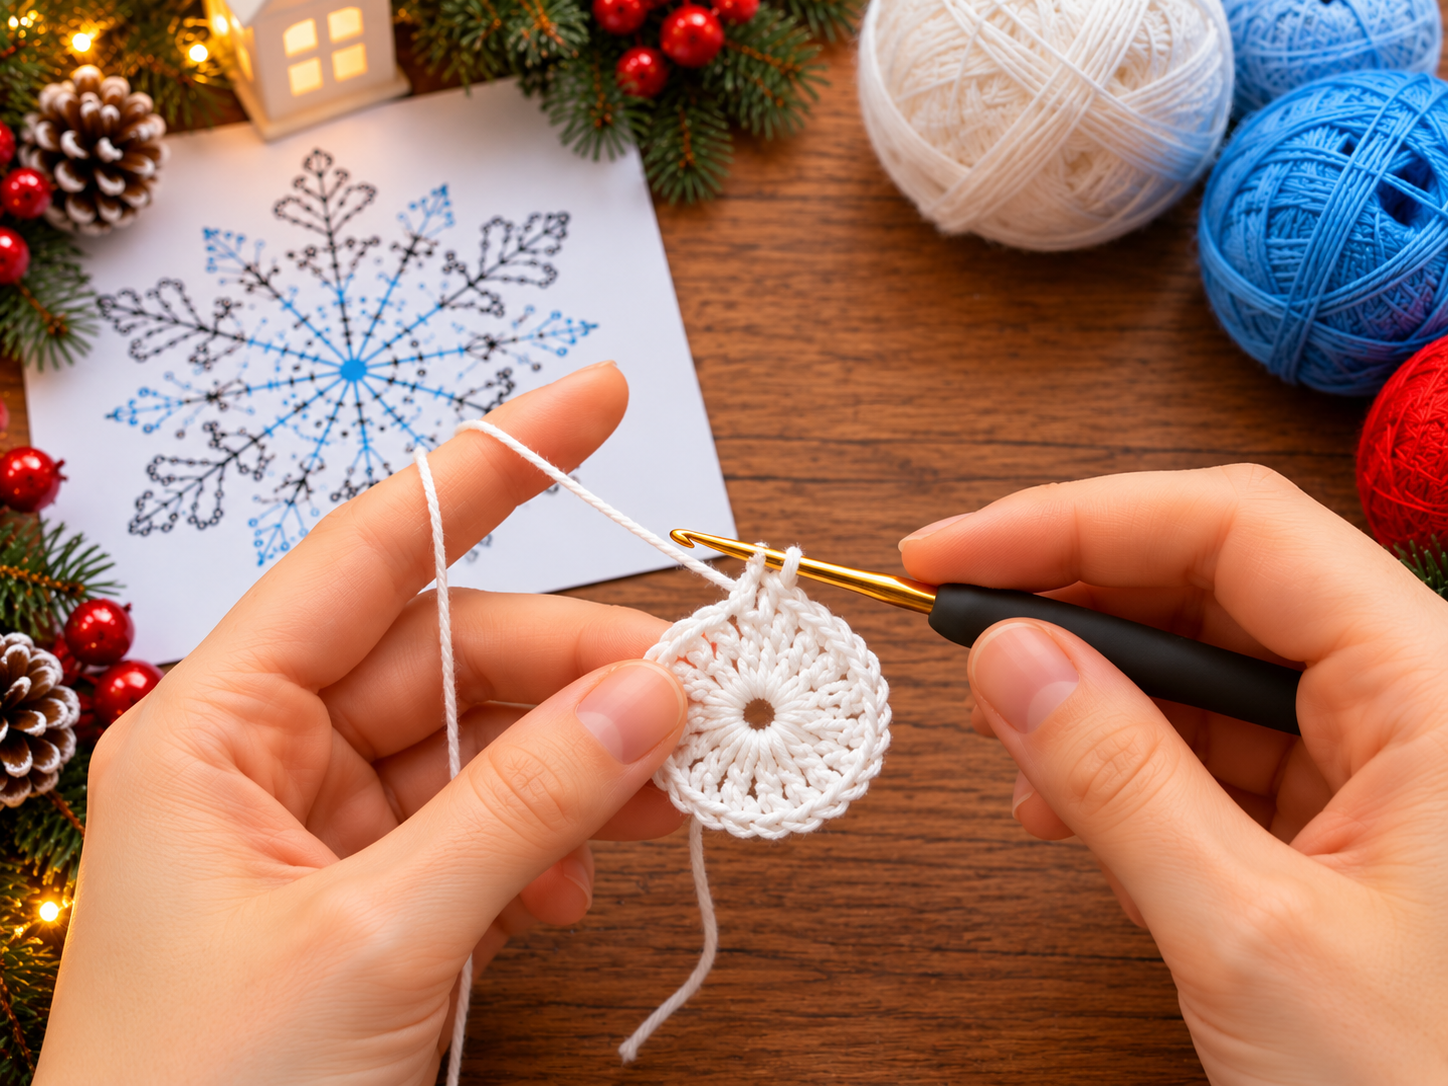
Step 2: Build the Circular Center
Continue crocheting around the center, adding stitches and small open spaces according to the design.
At this point, the snowflake should begin to develop a more decorative circular shape.
The small spaces between groups of stitches are important. They will eventually become part of the open lacework that gives the snowflake its delicate appearance.
Try not to pull your yarn too tightly. The stitches need enough room to open naturally.
If you’re following a visual chart, carefully check each section before moving on to the next round.
Step 3: Begin Creating the Six Snowflake Arms
As you continue crocheting, the six main branches of the snowflake begin to take shape.
The branches should be evenly distributed around the center.
Because the design repeats, you only need to understand the construction of one section before repeating it around the snowflake.
Each branch gradually extends outward from the center.
This creates the classic six-pointed snowflake silhouette.
Take your time during this stage. If one section becomes larger or smaller than another, the imbalance will become more noticeable as you continue.
Counting stitches can help keep the six sections evenly spaced.
Step 4: Add the Decorative Branches
The next stage adds much of the detail that makes this snowflake special.
Small chains, loops, and groups of stitches are worked along the main branches to create additional points and open spaces.
These details give the crochet a delicate, almost lace-like appearance.
Work slowly during this section, especially if you’re new to intricate crochet patterns.
It can be easy to accidentally skip a stitch or work into the wrong space when the design becomes more open.
A useful technique is to complete one branch completely and then use it as a visual reference for the remaining five branches.
Try to make each section look as similar as possible.
Creating the Snowflake Points
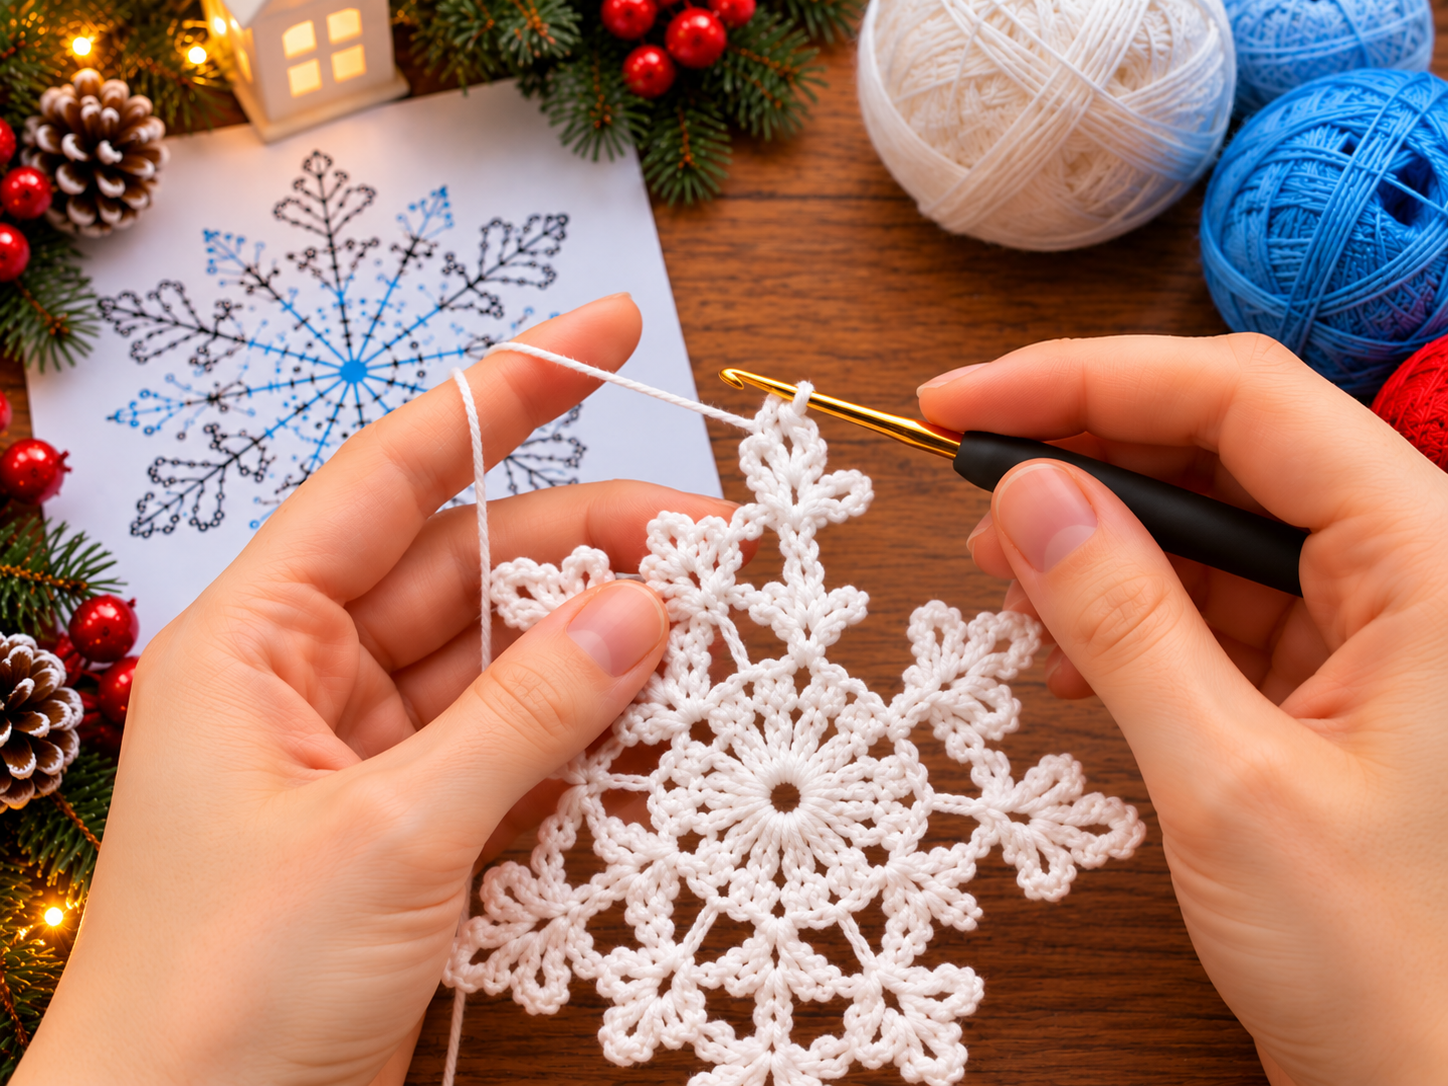
Step 5: Shape the Outer Edges
The outer round creates the distinctive pointed edges of the snowflake.
Work the required chain loops and stitches around each branch to create the small peaks and decorative openings.
The outer points should remain clearly defined while the spaces between the points stay open.
This combination of solid crochet stitches and open spaces creates the beautiful lace effect seen in the finished snowflake.
Don’t worry if the snowflake doesn’t lie perfectly flat at this stage.
Intricate crochet designs often curl or twist slightly before they are blocked.
The final shaping process will help reveal the complete snowflake design.
Step 6: Complete the Six Branches
Continue repeating the same decorative sequence around the snowflake.
When you reach the final branch, carefully connect it to the beginning of the round.
Before fastening off, inspect the entire snowflake.
You should now have:
- A circular center
- Six main branches
- Smaller decorative branches
- Open lace-like spaces
- Pointed outer edges
- A balanced six-sided shape
If one section looks different from the others, it’s usually easier to correct it now rather than after fastening off.
Once everything looks even, fasten off and leave a small yarn tail.
Weave the tail securely into the back of the crochet.
Adding the Hanging Loop
Step 7: Create the Ornament Loop
To turn the finished crochet snowflake into a Christmas ornament, add a small hanging loop.
Choose one of the upper points of the snowflake and attach your yarn.
Chain enough stitches to create a loop that can easily fit over a Christmas tree branch.
Join the chain securely back to the snowflake.
You can use a slip stitch or carefully sew the loop into place with a yarn needle.
Make sure the loop is firmly attached, especially if the ornament will be hung on a Christmas tree where it may be moved several times during the holiday season.
Once the loop is secure, weave in any remaining yarn ends.
Blocking Your Crochet Snowflake
Blocking is an important finishing step for this type of crochet project.
Because the snowflake contains many open spaces, loops, and pointed sections, the finished piece may not immediately look like a perfectly shaped snowflake.
Gently dampen the finished crochet and place it on a flat surface.
Carefully stretch the six main points outward.
Then shape the smaller decorative points and loops so they are evenly spaced.
Continue adjusting the snowflake until the six branches are symmetrical.
Allow it to dry completely before removing it from the blocking surface.
Blocking opens up the crochet stitches and makes the lacework much easier to see. It also gives the finished ornament a cleaner and more professional appearance.
If you make several snowflakes, blocking them all to approximately the same size will help create a coordinated set of decorations.
Different Ways to Use Your Crochet Snowflake
Once your snowflake is finished, there are many creative ways to use it during the holiday season.
Christmas Tree Ornament
The most obvious use is to hang the snowflake directly on your Christmas tree.
Make several snowflakes in white yarn and spread them throughout the tree for a snowy winter effect.
You can also combine different sizes to create more visual interest.
Christmas Garland
Make multiple snowflakes and connect them with yarn, ribbon, or a decorative cord.
A snowflake garland can be hung across a fireplace, doorway, staircase, window, or even around a Christmas tree.
For a beautiful winter theme, combine white snowflakes with silver or pale blue accents.
Gift Decoration
A handmade crochet snowflake makes a lovely addition to a Christmas present.
Instead of using a traditional bow, attach a small snowflake to the ribbon around the package.
The recipient can remove it after opening the gift and keep it as a reusable Christmas decoration.
Christmas Wreath
You can also incorporate crochet snowflakes into a holiday wreath.
Attach several snowflakes to a greenery wreath along with pinecones, berries, ribbon, and other Christmas decorations.
White crochet looks especially beautiful against dark green evergreen branches.
Table Decorations
Larger crochet snowflakes can be used as holiday table decorations.
Place one under a candle, vase, centerpiece, or small Christmas decoration.
Several snowflakes can also be arranged across a dining table to create a handmade winter-themed centerpiece.
Tips for Making a Beautiful Crochet Snowflake
Keep Your Tension Consistent
Consistent tension is especially important with symmetrical crochet designs.
If your stitches become much tighter or looser during one section, one branch may look different from the others.
Try to maintain the same tension throughout the entire project.
Count Your Sections
Remember that the snowflake is based on six repeating sections.
After completing each round, check that the branches are evenly distributed.
If you’re having difficulty keeping track, a stitch marker can help you identify the beginning of each round.
Work Slowly Around the Decorative Details
The smaller loops and branches are what give this snowflake its beautiful appearance, but they can also be the most difficult part to crochet.
Take your time and check your stitches frequently.
If something doesn’t look right, undoing a few stitches immediately is usually much easier than trying to correct a mistake several rounds later.
Don’t Skip Blocking
Blocking can make a significant difference to the final appearance of a crochet snowflake.
Even if your crochet looks slightly uneven when you finish, careful blocking can help straighten the points and open the lacework.
Try Different Yarn Colors
Although white is the classic choice, don’t be afraid to experiment.
Try making snowflakes in:
- Icy blue
- Silver
- Cream
- Gold
- Light gray
- Pale pink
- Deep red
You could even make a collection using several winter colors.
Make Different Sizes
Changing your yarn weight and hook size is an easy way to create different-sized snowflakes.
Use thin yarn for small delicate ornaments and thicker yarn for larger decorations.
A combination of large and small snowflakes can look beautiful on a Christmas tree or garland.
Make a Set of Crochet Snowflakes
One of the best things about this project is that you don’t have to stop after making one.
Once you understand the repeating structure, the second snowflake will usually be much easier and faster to complete.
Make a whole set of matching snowflakes for your Christmas decorations.
You could create six, eight, ten, or even more and use them throughout your home.
A set of handmade snowflakes can also make a thoughtful Christmas gift for someone who enjoys handmade decorations.
Package several together with ribbon and a small gift tag for a simple handmade holiday present.
A Beautiful Handmade Christmas Project
This crochet snowflake ornament pattern is a lovely project for the Christmas season. The combination of a detailed center, open crochet spaces, six symmetrical branches, and delicate outer points creates a decoration that looks intricate while remaining a satisfying project for crochet enthusiasts.
The finished snowflake can become much more than a simple ornament. Use it to decorate your Christmas tree, create a festive garland, embellish gifts, decorate a wreath, or add handmade details to your holiday table.
White yarn gives the snowflake a traditional snowy appearance, but experimenting with different colors and yarn weights allows you to create a completely personalized collection.
Whether you’re making one special ornament or an entire set for Christmas, this crochet snowflake is a beautiful way to add handmade charm to your holiday decorations.
Save this pattern, gather your white yarn and crochet hook, and start creating your own delicate crochet snowflakes for Christmas.