

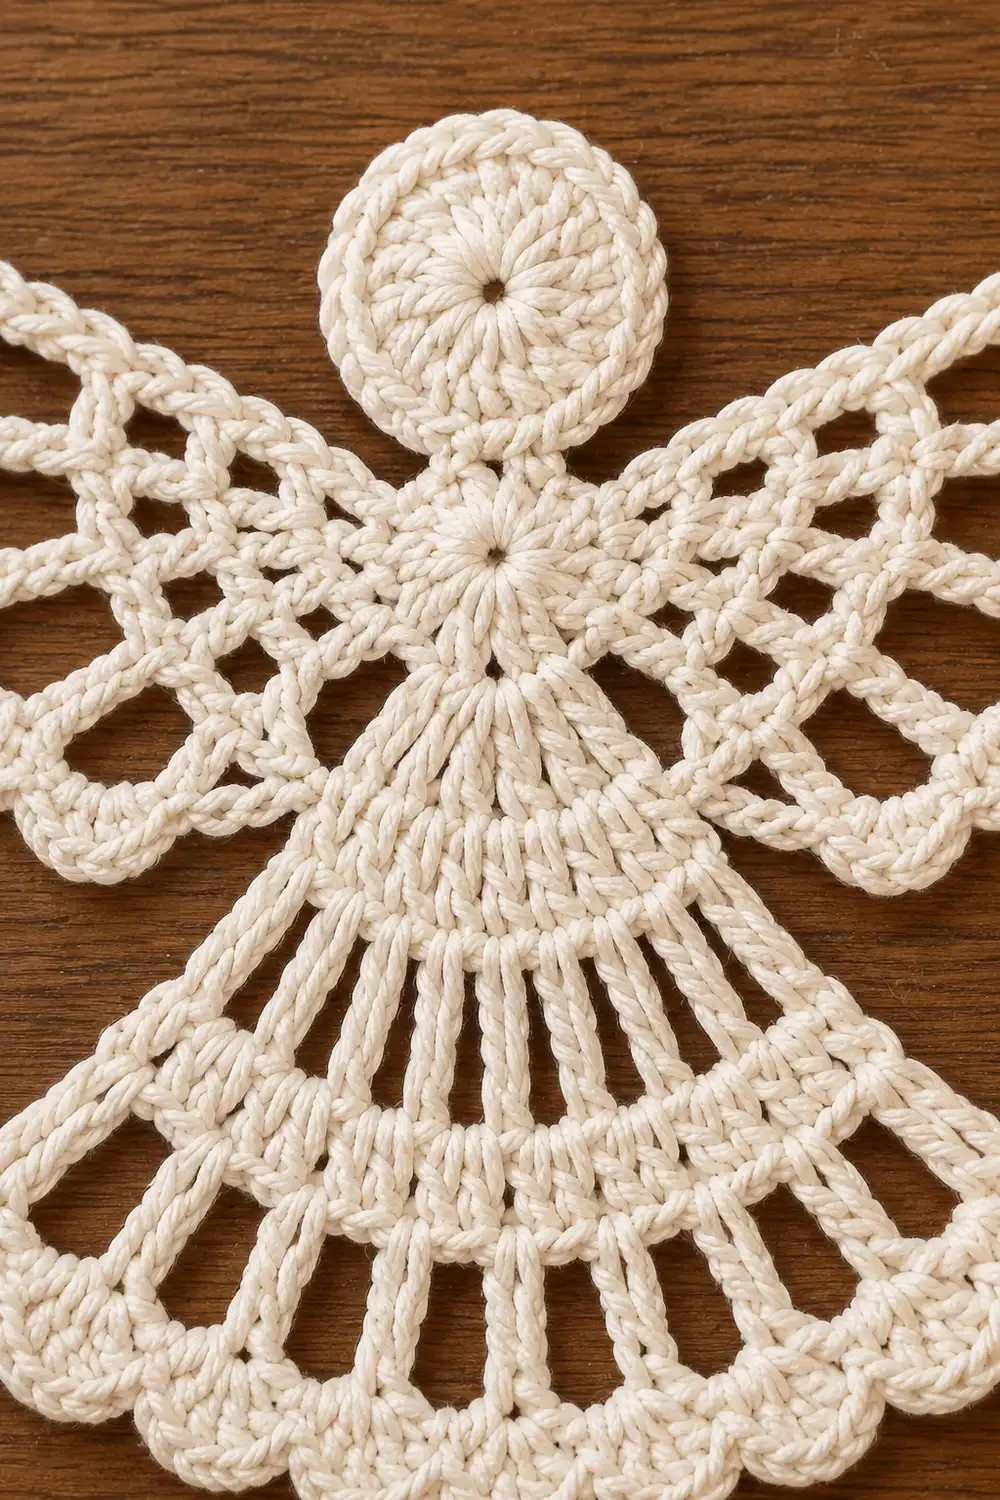
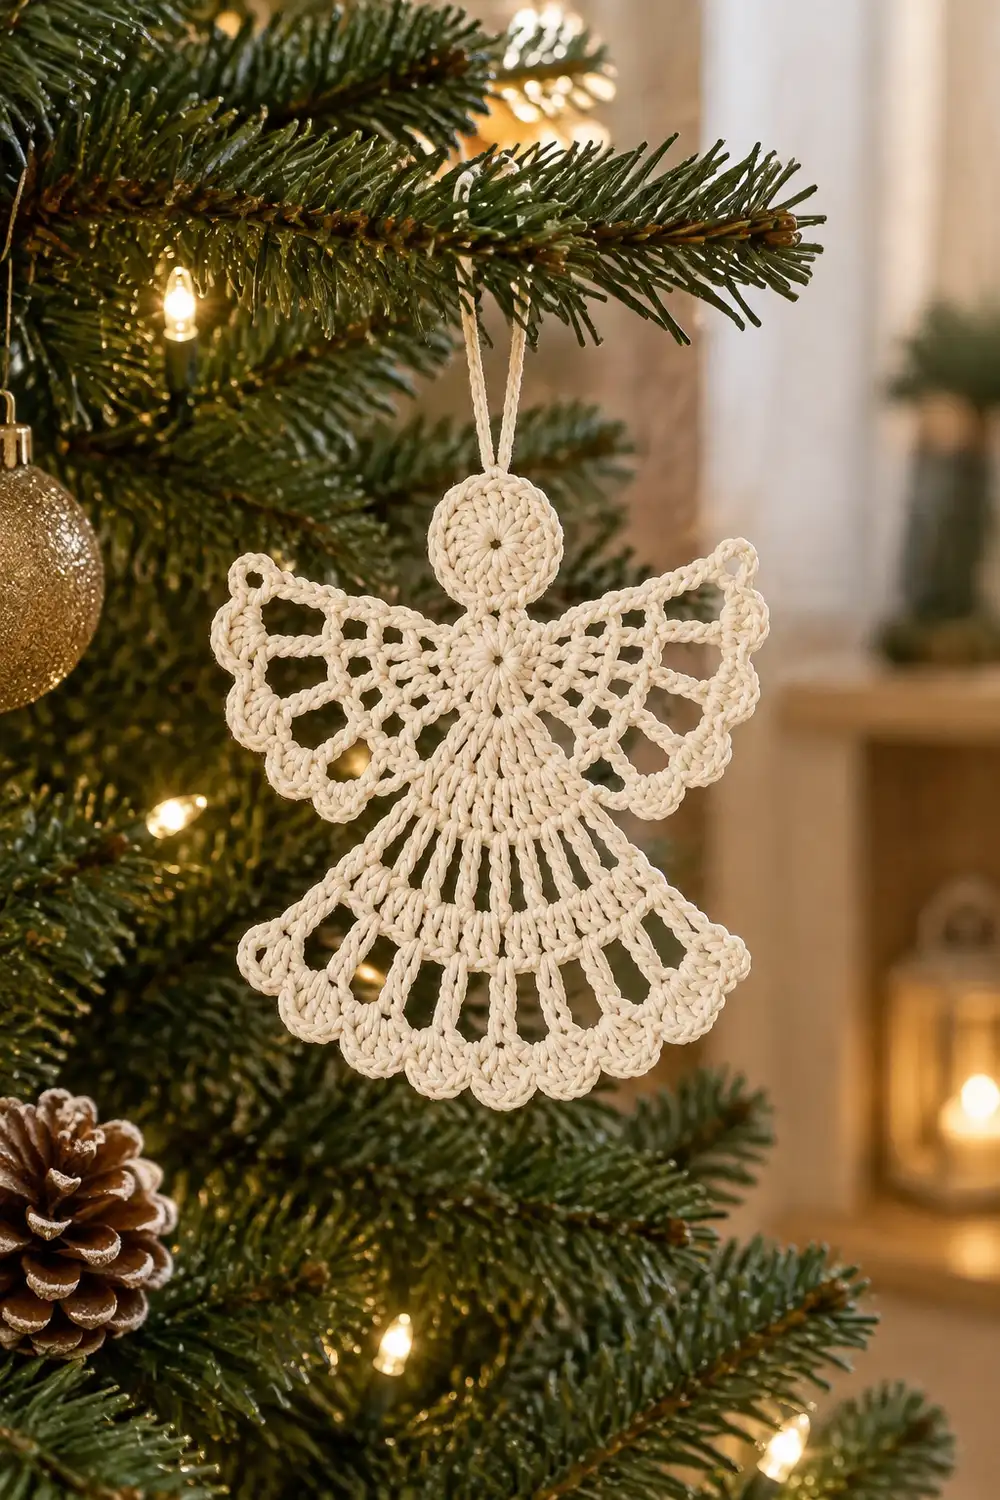
The Snowlace Angel is a small, airy crochet angel worked in cream cotton. It has a round textured head, a lacy dress of tall open columns that fans out toward the hem, and two symmetrical openwork wings. A soft scalloped shell edge finishes the skirt and wing perimeters.
The look is classic and lacy, like a vintage doily shaped into a figure. One neutral color keeps the focus on the stitch structure. The piece is perfect as a tree ornament, gift topper, or card embellishment.
This pattern uses US crochet terms. The finished angel measures 4.5 in (11.4 cm) tall and 5 in (12.7 cm) wide across the wings.
The angel is made as a single piece. You work the head in the round, chain a short neck, and then make a small yoke ring. The skirt grows downward from the lower part of the ring, and each wing grows sideways from the upper sides. Scalloped edging finishes each section, and a small hanging loop sits at each wing tip.
Finished Size and Construction
- Finished size: 4.5 in (11.4 cm) tall × 5 in (12.7 cm) wide
- Skill level: Easy-intermediate
- Terminology: US crochet terms
- Yarn weight: Sport weight (#2) cotton
- Hook: 3.25 mm (US D/3)
- Number of pieces: 1 (single motif)
- Layout: Head at top, yoke ring below, skirt fanning down, one wing on each side
- Piece size: 4.5 in × 5 in (11.4 cm × 12.7 cm)
- Size before border: 4.25 in (10.8 cm) tall × 4 in (10.2 cm) wide
- Border depth: 0.25 in (0.6 cm) on the skirt hem, 0.5 in (1.3 cm) on each wing
Materials
Yarn: Choose a smooth, tightly plied mercerized or matte cotton in sport weight. Cotton holds the lace shape well and takes starch nicely. Avoid fuzzy or very soft acrylics, because the open columns can sag.
- Cream / off-white: 10 g (approx. 31 m)
The quantity includes a comfortable margin for a gauge swatch and weaving in ends.
Tools:
– 3.25 mm (US D/3) crochet hook
– Tapestry needle
– Scissors
– Rust-proof pins
– Blocking board or foam mat
– Spray bottle
– Optional: fabric stiffener or spray starch
Abbreviations (US Terms)
- ch – chain
- sl st – slip stitch
- sc – single crochet
- hdc – half double crochet
- dc – double crochet
- tr – treble crochet
- BLO – back loop only
- sp(s) – space(s)
- st(s) – stitch(es)
- tch – turning chain
Special stitch – Scallop: Work (sc, hdc, dc, hdc, sc) all into the same ch-3 space. That makes 5 sts per scallop.
Gauge and Checkpoints
The whole project is one small piece, so the head acts as your gauge swatch. Make the head first and measure it before you continue.
Checkpoints:
– After Head Round 1: 0.75 in (1.9 cm) diameter
– After Head Round 2: 1.25 in (3.2 cm) diameter
– Yoke ring after its round: 1 in (2.5 cm) diameter
– Each wing after Row 4: extends 1.5 in (3.8 cm) from the yoke ring
– Skirt after Row 4: 1.75 in (4.4 cm) long from the ring, with a hem 4 in (10.2 cm) wide
– Before edging: 4.25 in (10.8 cm) tall × 4 in (10.2 cm) wide
– After edging and blocking: 4.5 in (11.4 cm) tall × 5 in (12.7 cm) wide
If your head is too big: Go down to a 3.0 mm hook, or pull the magic ring tighter and shorten your yarn-overs.
If your head is too small: Go up to a 3.5 mm hook.
Small differences of 0.125 in or so are normal and disappear in blocking. A difference of 0.25 in (0.6 cm) or more on the head will grow to roughly 1 in (2.5 cm) on the finished angel, so adjust before going further.
Head
The head is worked in joined rounds with the right side facing. Do not turn.
Round 1: Make a magic ring. Ch 3 (counts as dc), 11 dc in ring. Pull the ring tight. Sl st to the top of the beginning ch-3. (12 dc)
Round 2 (textured): Ch 2 (does not count as a st). Working in BLO, 2 hdc in each st around. Sl st to the first hdc. (24 hdc)
The back-loop stitches leave a ridge of front loops around the head. That ridge creates the textured ring visible at the top of the angel.
Check the diameter: 1.25 in (3.2 cm). Rotate the head so the join sits at the bottom. That point becomes the neck.
Neck and Yoke Ring
Do not fasten off.
Neck: Ch 3.
Ring: Ch 8, then sl st in the 8th ch from the hook to form a ring. The first 3 ch stay as a short neck, about 0.25 in (0.6 cm). The 8 ch form the yoke ring below it.
Yoke Round: Ch 3 (counts as dc), 15 dc into the ring. Sl st to the top of the beginning ch-3. (16 dc)
The yoke ring should measure 1 in (2.5 cm) across.
Stitch map: Number the yoke stitches from the beginning ch-3 (st 1), which sits at the top next to the neck. Then count around in your working direction:
- St 1 and st 16: left free at the neck
- Sts 2–4: Wing A base (3 sts)
- Sts 5–12: Skirt base (8 sts)
- Sts 13–15: Wing B base (3 sts)
Check: 1 + 3 + 8 + 3 + 1 = 16. Every yoke stitch is accounted for.
Wing A
Do not fasten off. Sl st into st 2. The wing is worked in turned rows.
Row 1: Ch 3 (counts as dc), dc in the same st (st 2). Work 2 dc in st 3 and 2 dc in st 4. Turn. (6 dc)
Row 2: Ch 4 (counts as dc + ch 1). Dc in next dc, ch 1; repeat from * 3 more times. Dc in the top of the tch. Turn. (6 dc, 5 ch-1 sps)
Row 3: Ch 5 (counts as dc + ch 2). Dc in next dc, ch 2; repeat from * 3 more times. Dc in the 3rd ch of the tch. Turn. (6 dc, 5 ch-2 sps)
Row 4: Ch 7 (counts as tr + ch 3). Tr in next dc, ch 3; repeat from * 3 more times. Tr in the 3rd ch of the tch. (6 tr, 5 ch-3 sps)
The stitch count stays at 6 columns from Row 1 onward. The wing fans because the chain spaces widen (1, then 2, then 3 ch) and the stitches get taller. This creates the radiating openwork look.
Row 4 ends at the upper wing tip. Do not fasten off; the edging begins here (see Border).
Wing B
Join the yarn with a sl st in st 15, the stitch nearest the neck on the other side. Starting at the neck side mirrors Wing A exactly.
Row 1: Ch 3 (counts as dc), dc in the same st (st 15). Work 2 dc in st 14 and 2 dc in st 13. Turn. (6 dc)
Rows 2–4: Work exactly as Wing A Rows 2–4. (Row 4: 6 tr, 5 ch-3 sps)
Row 4 ends at the upper tip. Do not fasten off.
Skirt
Join the yarn with a sl st in st 5 of the yoke.
Row 1: Ch 3 (counts as dc), dc in the same st. Work 2 dc in each of the next 7 sts (sts 6–12). Turn. (16 dc)
Row 2: Ch 4 (counts as dc + ch 1). Dc in next dc, ch 1; repeat from * 13 more times. Dc in the top of the tch. Turn. (16 dc, 15 ch-1 sps)
Row 3: Ch 5 (counts as dc + ch 2). Dc in next dc, ch 2; repeat from * 13 more times. Dc in the 3rd ch of the tch. Turn. (16 dc, 15 ch-2 sps)
Row 4: Ch 7 (counts as tr + ch 3). Tr in next dc, ch 3; repeat from * 13 more times. Tr in the 3rd ch of the tch. Turn. (16 tr, 15 ch-3 sps)
Each row has the same count: 1 tch column + 14 repeats + 1 final stitch = 16 columns, with 15 spaces between them. These vertical columns form the open dress. Widening spaces and taller stitches make it flare.
Check: the hem measures 4 in (10.2 cm). The total height from the top of the head to Row 4 is 4.25 in (10.8 cm).
Border
The border is a scallop edging worked directly into the last row of each section.
Border gauge: Each scallop sits in one ch-3 space. On the skirt, 15 scallops cover the 4 in (10.2 cm) hem. That works out to 3.75 scallops per inch (about 1.5 per cm), matching the Row 4 spacing exactly. You never add or skip a space, so the edging lies flat.
Wing Edging (work on each wing)
You are at the upper tip at the end of Row 4.
Hanging loop: Ch 6, then sl st in the top of the last tr made. This makes a loop about 0.5 in (1.3 cm) long.
Edging Row: Turn. Ch 1, sc in the same tr. Work a Scallop in each of the 5 ch-3 sps. Sc in the last tr at the lower tip. (1 sc + 5 scallops × 5 sts + 1 sc = 27 sts)
Lower wing edge: Rotate the work and continue along the row ends toward the yoke:
– 3 sc around the Row 4 tr post
– 2 sc around each of the Row 3, Row 2, and Row 1 dc posts
That adds 3 + 2 + 2 + 2 = 9 sc. Sl st at the base of Row 1 and fasten off. Total edging: 27 + 9 = 36 sts, plus the loop.
Why the math works: Each wing has exactly 5 ch-3 spaces, so it gets 5 scallops. The edging adds 0.5 in (1.3 cm) to each wing, so the wingspan grows from 1 + 1.5 + 1.5 = 4 in (10.2 cm) to 1 + 2 + 2 = 5 in (12.7 cm).
Skirt Hem Edging
You are at the end of Skirt Row 4, already turned.
Edging Row: Ch 1, sc in the first tr. Work a Scallop in each of the 15 ch-3 sps. Sc in the last tr. Fasten off. (1 sc + 15 scallops × 5 sts + 1 sc = 77 sts)
Why the math works: 15 ch-3 spaces give 15 scallops. The 8th scallop falls at the exact center below the head, so the hem is symmetrical. The edging adds 0.25 in (0.6 cm) of height, bringing the angel to 4.5 in (11.4 cm). It also adds a little width, so the hem measures about 4.5 in (11.4 cm).
Final Blocking
- Weave in all ends along the dc or tr columns, where they hide best. Trim the ends after blocking.
- Spray the angel until it is evenly damp, or dip it in diluted fabric stiffener and squeeze out the excess.
- Lay it flat on the blocking mat, right side up.
- Pin the head into a circle 1.25 in (3.2 cm) across.
- Pin the skirt hem to 4.5 in (11.4 cm) wide, with one pin at each scallop point. Check that the columns run straight and evenly fanned.
- Pin each wing tip so the total wingspan is 5 in (12.7 cm). Open each wing space into a clean wedge.
- Check the overall height: 4.5 in (11.4 cm).
- Let the angel dry completely before unpinning, usually 6–12 hours.
Final Quality-Control Checklist
- Head: 24 hdc with an even textured ridge, 1.25 in (3.2 cm) across
- Neck: 3 ch, not twisted
- Yoke: 16 dc, 1 in (2.5 cm) across, with sts 1 and 16 free
- Each wing: 6 tr and 5 ch-3 sps in Row 4, 5 scallops, a hanging loop at the tip
- Skirt: 16 tr and 15 ch-3 sps in Row 4, 15 scallops, centered 8th scallop
- Wings mirror each other in size and angle
- Finished size: 4.5 in × 5 in (11.4 cm × 12.7 cm)
- All ends secure and hidden
Troubleshooting
Head cups or ruffles: Your tension changed between rounds. Re-check that you have 24 hdc in Round 2 and that every stitch is in BLO.
Wings are uneven: Check that you joined Wing B at st 15, not st 13. Both wings must start at the neck side.
Skirt pulls in: Make sure the ch-3 spaces in Row 4 are full length and not pulled tight. Block it firmly.
Scallops curl or flute: Work exactly one scallop per space. Extra stitches cause ruffling.
Columns lean: Make sure each turning chain counts as a stitch and that the final stitch goes into the correct ch of the tch.
Angel is limp: Re-block with fabric stiffener or heavier starch.
Care
Hand wash gently in cool water and lay flat to dry. Re-starch and re-pin to restore the crisp lace shape.
Final Notes
The measurement chain is simple. The head checks your gauge at 1.25 in (3.2 cm). The yoke ring sets the center at 1 in (2.5 cm). The wings and skirt grow to 4.25 in (10.8 cm) tall × 4 in (10.2 cm) wide before edging. The scallops then finish the angel at 4.5 in (11.4 cm) tall × 5 in (12.7 cm) wide.
Optional: make several angels in white or metallic cotton to hang together on a tree.
Happy crocheting!