

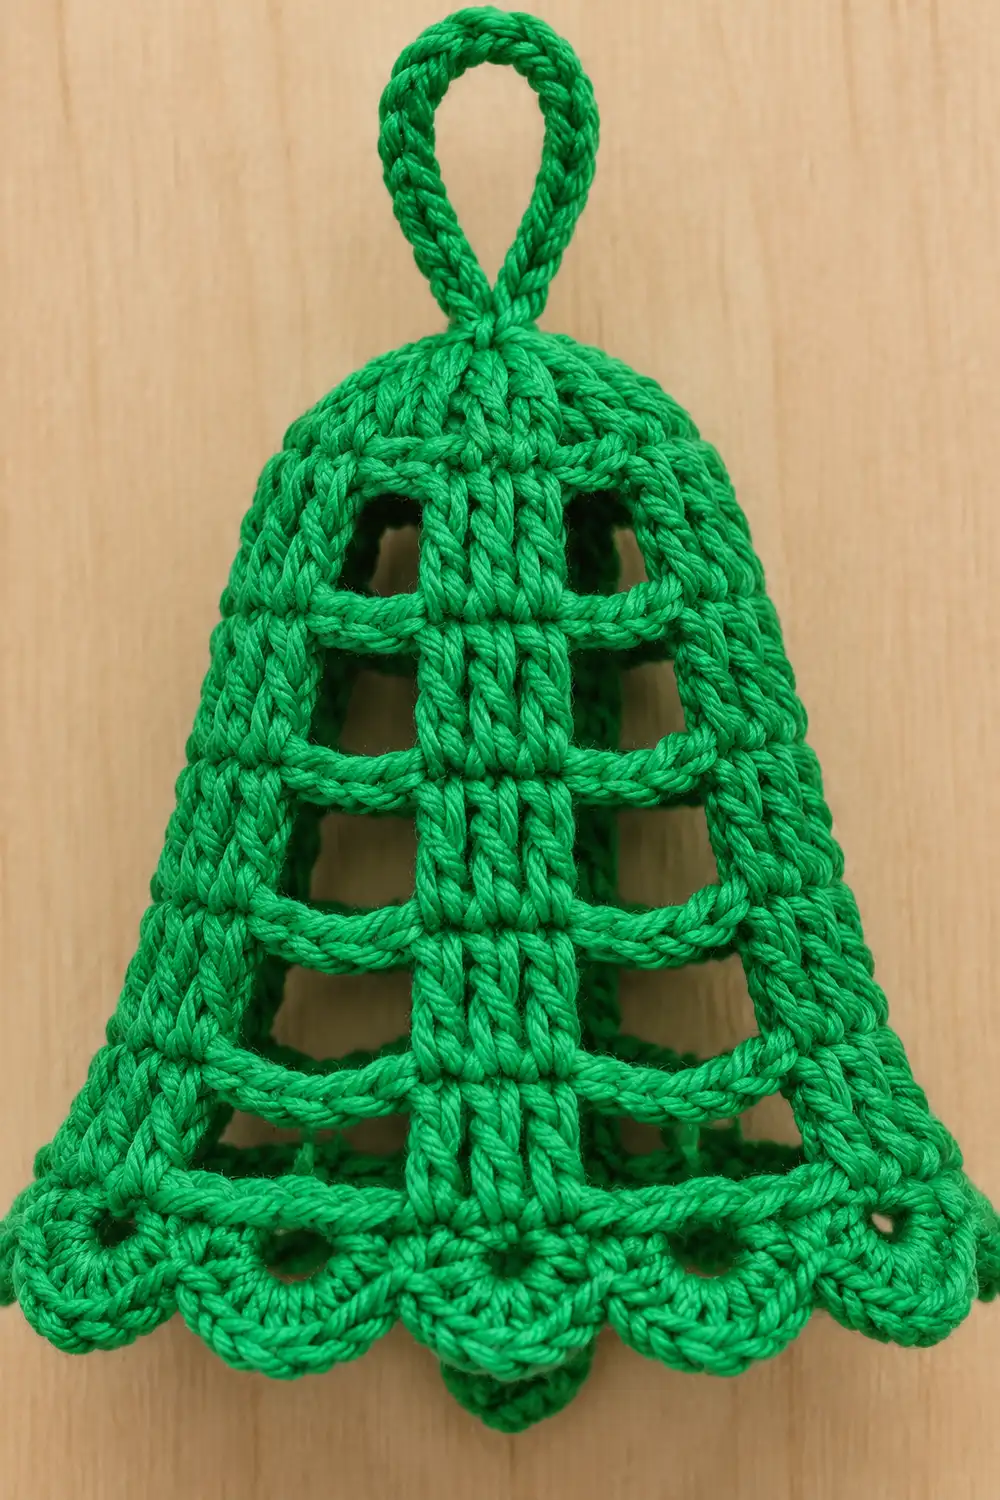
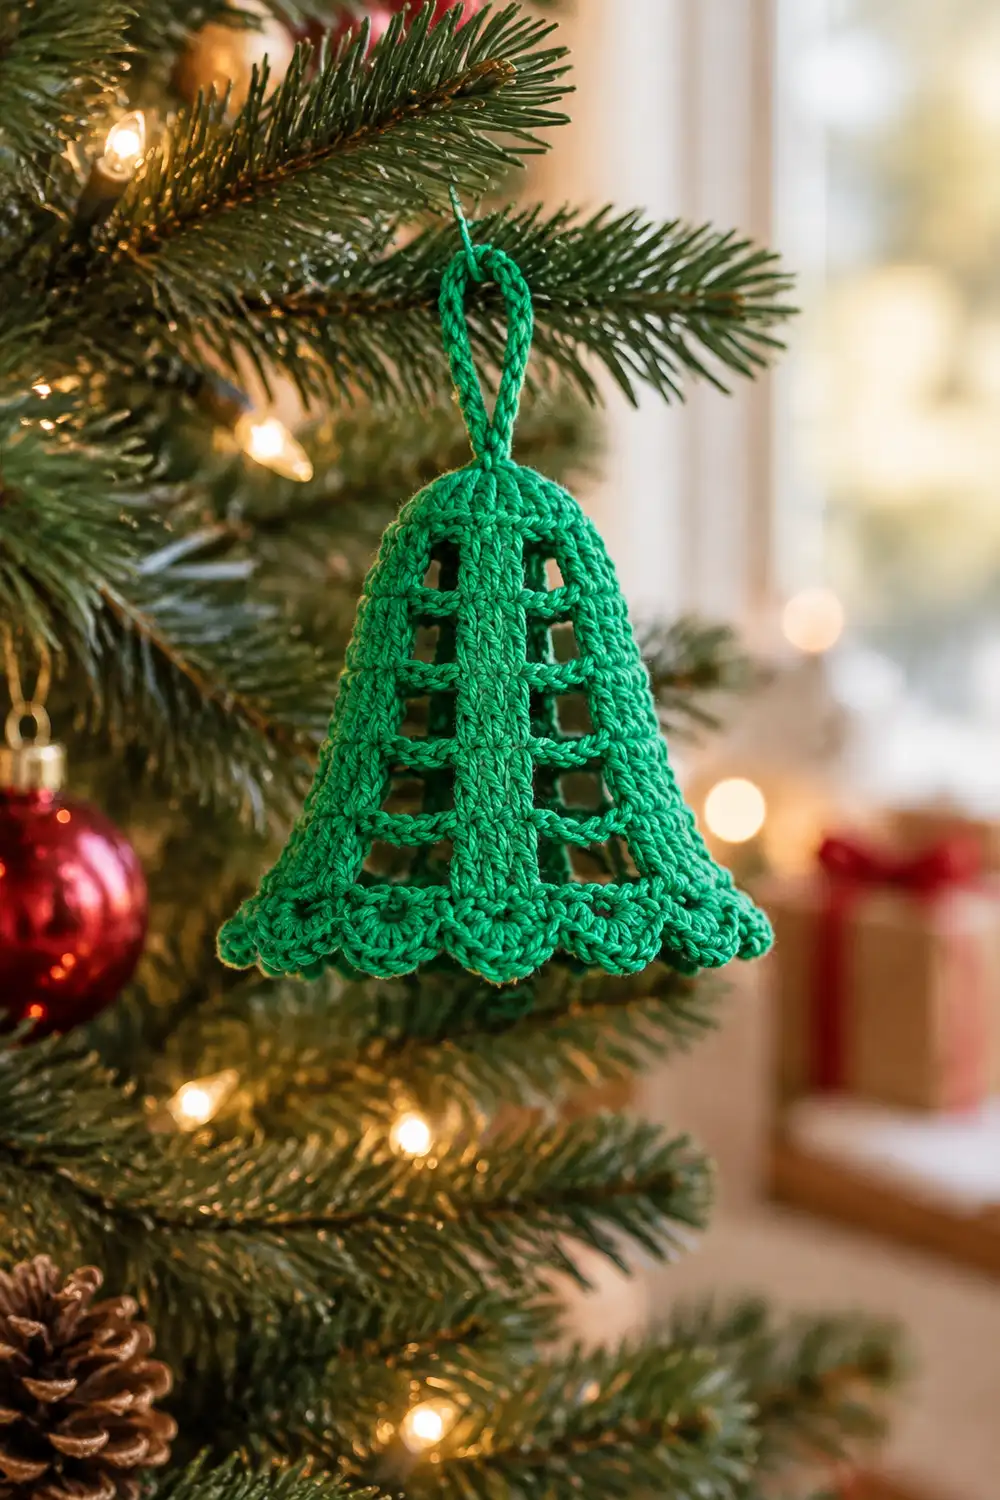
This little bell is a quick holiday make with a lot of charm. It has a rounded, dome-shaped crown, an open lattice body, and a scalloped hem of small picot shells. A thick crocheted loop at the top makes it ready to hang on the tree.
The sample is worked entirely in bright kelly green cotton. Solid vertical columns run down the center front and center back. Single-stitch columns run down each side. Horizontal chains connect the columns and form the open windows of the lattice.
This pattern uses US crochet terms. The finished bell measures 2.75 in (7.0 cm) tall and 2.75 in (7.0 cm) wide when flattened, not counting the loop. The loop adds about 0.75 in (1.9 cm).
The bell is one piece, worked top-down in joined rounds. You start with a magic ring and shape a rounded crown with sc increases and even rounds. Next come five dc lattice rounds with chain spaces that grow each round so the body flares. A solid sc round draws the hem in slightly, and a shell round adds the scalloped edge. The hanging loop is added last.
Finished Size and Construction
- Finished size: 2.75 in (7.0 cm) tall × 2.75 in (7.0 cm) wide, flattened, without the loop
- Height with loop: about 3.5 in (8.9 cm)
- Skill level: Easy to intermediate
- Terminology: US crochet terms
- Yarn weight: Sport (#2), cotton
- Hook: 2.25 mm (B-1)
- Number of pieces: 1
- Layout: Single three-dimensional bell, worked in the round
- Piece size: Same as the finished size
- Size before border: 2.25 in (5.7 cm) tall × 2.25 in (5.7 cm) wide, flattened (crown plus lattice body)
- Border depth: 0.5 in (1.3 cm), made up of the sc hem round and the shell round
Materials
Yarn: Use a smooth, mercerized sport-weight cotton. Cotton gives crisp stitch definition and holds the bell shape well after starching. Acrylic works too, but the lattice will be softer.
- Kelly green: 8 g, about 22 m (24 yd)
Tools:
- 2.25 mm (B-1) crochet hook
- Tapestry needle
- 1 stitch marker
- Scissors
- Spray starch or a fabric stiffener
- A ball of plastic wrap about 2 in (5.1 cm) across, or a small ball of similar size, to use as a blocking form
- Rust-proof pins
The yarn amount includes a margin. The bell itself uses about 5 g, and the extra covers a gauge swatch and weaving in ends.
Abbreviations (US Terms)
- ch – chain
- sl st – slip stitch
- sc – single crochet
- inc – 2 sc in the same stitch
- dc – double crochet
- sk – skip
- sp – space
- st(s) – stitch(es)
- rnd – round
- beg – beginning
Special stitches:
- Picot: Ch 3, sl st in the 3rd ch from the hook.
- Shell: (2 dc, picot, 2 dc) all in the same stitch.
Gauge and Checkpoints
Gauge: 7 sc and 8 sc rounds = 1 in (2.5 cm). Five dc rounds = 1.5 in (3.8 cm).
Small pieces are very sensitive to tension. Before using your good yarn, make one test crown (Rnds 1–6) and measure it.
Checkpoints:
- After Rnd 2: a flat circle about 0.6 in (1.5 cm) across.
- After Rnd 6: a small cup, 0.75 in (1.9 cm) tall and 1.7 in (4.3 cm) wide when flattened.
- After Rnd 11: the bell is 2.25 in (5.7 cm) tall and 2.25 in (5.7 cm) wide across the bottom when flattened.
- After Rnd 13: the bell is 2.75 in (7.0 cm) tall and 2.75 in (7.0 cm) wide at the shell tips.
If your bell is too big, go down to a 2.0 mm hook. If it is too small, go up to a 2.5 mm hook.
If only the lattice section is off, check your chain tension. Tight chains pull the body narrow and cup the hem inward. Loose chains make the windows sag.
Pattern
All rounds are joined with a sl st. For the sc rounds, the ch 1 at the start does not count as a stitch. For the dc rounds, the ch 3 at the start counts as the first dc. Place a marker in the first stitch of each round if that helps you keep track.
Crown (Rounded Dome)
The crown is shaped like an amigurumi dome. Increase rounds alternate with even rounds so the top curves down smoothly instead of lying flat.
Rnd 1: Make a magic ring. Ch 1, work 8 sc in the ring, and join to the first sc. Pull the ring closed. (8 sts)
Rnd 2: Ch 1, inc in each st around, join. (16 sts)
Rnd 3: Ch 1, sc in each st around, join. (16 sts)
This even round makes the flat circle begin to curve downward.
Rnd 4: Ch 1, sc in next st, inc in next st; repeat from * 8 times total, join. (24 sts)*
Rnd 5: Ch 1, sc in each st around, join. (24 sts)
Rnd 6: Ch 1, sc in each st around, join. (24 sts)
Checkpoint: The crown should be a rounded cup, 0.75 in (1.9 cm) tall and 1.7 in (4.3 cm) wide when flattened.
Lattice Body
This section sets up four vertical columns:
- a 3-dc column at center front
- a 1-dc column at one side
- a 3-dc column at center back
- a 1-dc column at the other side
From Rnd 8 on, work dc only into dc. Do not work into the chains. Each new chain lies above the previous one and forms a horizontal bar of the lattice. The chains get one stitch longer each round, which makes the bell flare.
Rnd 7: Ch 3 (counts as dc), then dc in the next 2 sts. This is the front column. Ch 4, sk 4 sts, dc in next st for the side column. Ch 4, sk 4 sts, dc in each of the next 3 sts for the back column. Ch 4, sk 4 sts, dc in next st for the other side column. Ch 4, sk 4 sts, and join to the top of the beg ch-3.
(8 dc and 4 ch-4 sps. This uses all 24 sts of Rnd 6: 3 + 4 + 1 + 4 + 3 + 4 + 1 + 4 = 24.)
Rnd 8: Ch 3 (counts as dc), dc in the next 2 dc. Ch 5, dc in the next dc. Ch 5, dc in the next 3 dc. Ch 5, dc in the next dc. Ch 5, join.
(8 dc and 4 ch-5 sps; 28 sts around)
Rnd 9: Work as Rnd 8, but ch 6 for each space.
(8 dc and 4 ch-6 sps; 32 sts around)
Rnd 10: Work as Rnd 8, but ch 7 for each space.
(8 dc and 4 ch-7 sps; 36 sts around)
Rnd 11: Work as Rnd 8, but ch 8 for each space.
(8 dc and 4 ch-8 sps; 40 sts around)
Checkpoint: The bell should now be 2.25 in (5.7 cm) tall and 2.25 in (5.7 cm) wide across the bottom when flattened. The columns should hang straight, and the windows should be clearly open.
Border
The border is the scalloped hem. It has two rounds and adds 0.5 in (1.3 cm) to the height.
Border gauge: 7 sc = 1 in (2.5 cm). This is the same gauge as the crown.
Rnd 12 (Solid Hem Band, Conversion Round)
This round turns the open lattice into a solid band. You work 1 sc into each dc, and 6 sc into each ch-8 space.
Because each 8-ch space gets only 6 sc, the hem gathers in slightly. This gives the bell its gentle taper at the bottom edge.
Rnd 12: Ch 1. Sc in the same st as the join and in the next 2 dc (3 sc). Work 6 sc in the ch-8 sp. Sc in the next dc. Work 6 sc in the next ch-8 sp. Sc in the next 3 dc. Work 6 sc in the next ch-8 sp. Sc in the next dc. Work 6 sc in the last ch-8 sp. Join.
Count: 8 sc (1 in each dc) + 24 sc (6 in each of the 4 spaces) = 32 sts
Per flattened side: 16 sc, which is half of 32.
On the front half, that is:
- 3 sc for the front column
- 6 sc for one space
- 1 sc for the side column
- 6 sc for the next space
Rnd 13 (Picot Shell Scallops)
The shells are placed so that a sc sits at the exact center front and center back.
To set this up, number the Rnd 12 stitches 1 to 32, starting with the first sc of the front column. Stitch 2 is the center front. Stitch 18 is the center back.
Rnd 13: Sl st in the next sc (st 2). Ch 1, sc in the same st. *Sk 1, shell in next st, sk 1, sc in next st; repeat from * 7 times total. Sk 1, shell in the next st, sk 1, and join to the first sc.
Count: 8 shells and 8 sc
Per flattened side: 4 shells
Position check:
- Sc stitches land on sts 2, 6, 10, 14, 18, 22, 26, and 30.
- Shells land on sts 4, 8, 12, 16, 20, 24, 28, and 32.
- The side columns (sts 10 and 26) sit at sc dips, so each side of the bell has a matching shape.
Fasten off.
Why the math works: The shell repeat is 4 stitches (sc, sk, shell, sk). Since 32 ÷ 4 = 8, the repeat fits exactly. Each flattened side has 16 sts, and 16 ÷ 4 = 4, so both halves get 4 shells. The center front (st 2) and center back (st 18) are 16 stitches apart. Sixteen is a multiple of 4, so both centers land on a sc.
Hanging Loop
- Use the magic-ring tail to close any gap at the top of the crown, then secure it on the inside.
- Join new yarn with a sl st through the center of Rnd 1.
- Ch 12, then sl st into the same spot to form a ring.
- Ch 1, work 16 sc into the ring, and sl st into the top of the crown.
- Fasten off and weave in all ends on the inside.
The loop stands about 0.75 in (1.9 cm) tall.
Final Blocking
- Lightly dampen the bell with cool water.
- Push the plastic-wrap ball up into the bell so it fills the crown. Shape the dome so it is evenly rounded.
- Straighten the vertical columns so the front and back columns are centered. Make the horizontal bars level.
- Set the bell on a flat surface, open end down. Pin each shell outward slightly so the scallops fan open evenly.
- Spray starch generously over the whole bell, especially the lattice and the hem.
- Shape the loop upright and starch it.
- Let the bell dry completely, which takes about 6–12 hours.
- Remove the pins and the form. Measure the bell: it should be 2.75 in (7.0 cm) tall and 2.75 in (7.0 cm) wide.
Final Quality-Control Checklist
- The crown is evenly rounded, with no flat or pointed top.
- There are 4 vertical columns: 3 dc at front and back, and 1 dc at each side.
- There are 5 levels of horizontal bars, and each one is level.
- Rnd 12 has 32 sc and lies smooth, with a slight draw-in.
- There are 8 even shells, 4 per side, each with a visible picot.
- A sc dip sits at the center front and center back.
- The loop is firm, centered, and upright.
- The bell measures 2.75 in (7.0 cm) × 2.75 in (7.0 cm), plus a 0.75 in (1.9 cm) loop.
- All ends are woven in on the inside.
Troubleshooting
The crown is flat like a coaster.
You may have added increases in Rnd 3, 5, or 6. Those rounds should have no increases. Redo them.
The crown is pointed.
Your tension is too tight in Rnds 1–2. Relax your hands, or go up 0.25 mm in hook size for the crown only.
The columns spiral around the bell.
Make sure each dc goes into a dc and not into a chain. Join to the top of the beg ch-3, not the stitch beside it.
The windows are closed or puckered.
Your chains are too tight. Chain more loosely, or make the chains with a hook 0.25 mm larger.
The hem flares like a skirt.
Check that you worked 6 sc per space in Rnd 12, not 8.
The hem curls under.
Block it again with more starch and pin the shells outward.
The shells are uneven.
Recount Rnd 12. It must be exactly 32 sts for the 4-stitch repeat to work.
The loop flops over.
Add more sc into the loop so it is packed tightly, then starch it again.
Care
Hand wash in cool water and reshape while damp. Starch again after washing if you want the bell to hold its crisp shape.
Final Notes
The measurement chain is simple:
- The crown (Rnds 1–6) is 0.75 in (1.9 cm) tall and 1.7 in (4.3 cm) wide.
- The five lattice rounds bring the bell to 2.25 in (5.7 cm) tall and 2.25 in (5.7 cm) wide.
- The two border rounds add 0.5 in (1.3 cm), for a finished size of 2.75 in (7.0 cm) × 2.75 in (7.0 cm).
- The loop adds 0.75 in (1.9 cm) above the crown.
If each checkpoint matches, the finished bell will too.
Optional: make several bells in different colors and string them together as a small cluster ornament.
Happy crocheting!