

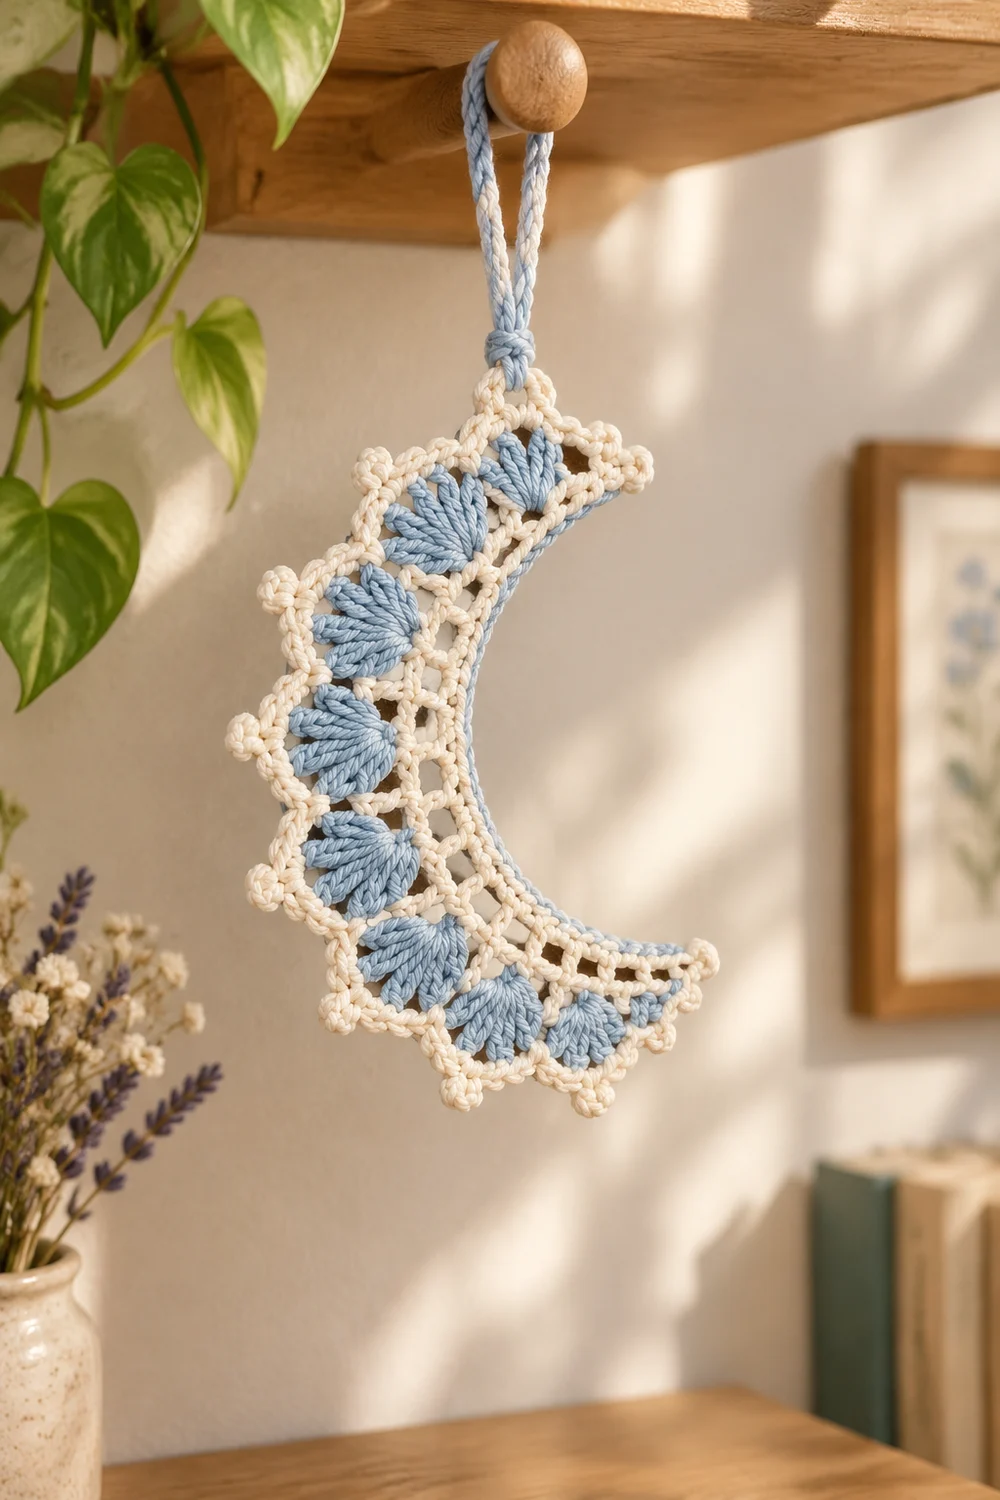
The Frosted Lullaby Crescent Moon is a small, lacy moon worked in two soft colors: cream and pale blue. It hangs vertically from a twisted blue-and-cream cord tied to its top point.
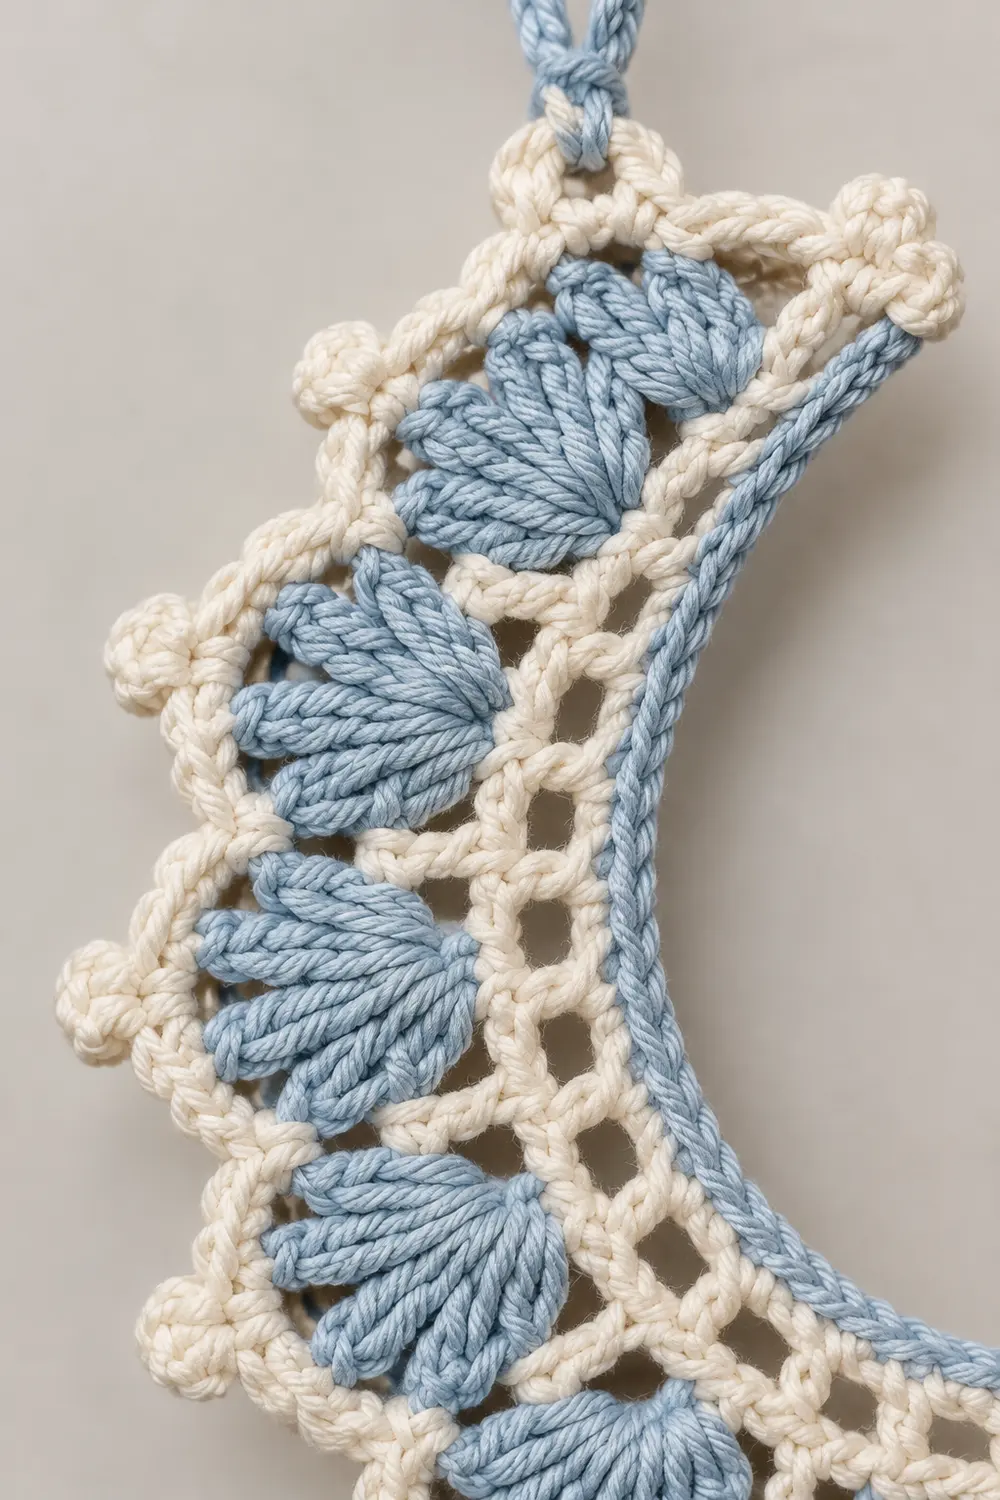
The interior is built from rows of fan stitches. Three blue fan rows run vertically down the center of the moon. Cream rows fill the sides and connect each fan row to the next. A cream round of small bobbles runs all the way around the perimeter, giving the edge a bumpy, dimensional look.
This pattern uses US crochet terms. The finished moon measures about 4.25 in (10.8 cm) tall from tip to tip and 2 in (5.1 cm) wide at its widest point, not counting the hanging cord.
The moon is a single piece. You start with a foundation chain along the inner curve and work six rows outward. The color changes on every row. The fans spread wider than the rows they sit on, which bends the strip into a crescent. One cream bobble border round, worked over a sc base round, finishes the edge. A twisted cord adds the hanger.
Finished Size and Construction
- Finished size: 4.25 in (10.8 cm) tall x 2 in (5.1 cm) wide
- Skill level: Advanced beginner to intermediate
- Terminology: US crochet terms
- Yarn weight: Fingering / #1 super fine, mercerized cotton
- Hook: 2.25 mm (US B-1)
- Number of pieces: 1
- Layout: Single crescent, hung vertically from the top point
- Piece size before border: 3.75 in (9.5 cm) tall x 1.5 in (3.8 cm) wide
- Border depth: 0.25 in (0.6 cm) on every edge
- Construction: Worked flat in rows from the inner curve outward, then bordered in the round
Materials
Yarn advice: Choose a smooth, mercerized cotton in fingering weight. Mercerized cotton gives crisp fans and firm bobbles, and it holds its shape well after blocking. Avoid fuzzy or very stretchy fibers, which blur the lace.
- Cream: 6 g (about 20 m). Used for Rows 1, 3, 5, the border, and half of the cord.
- Pale blue: 4 g (about 14 m). Used for Rows 2, 4, 6, and half of the cord.
Both quantities include a margin for a test row, joins, and the hanging cord.
Tools:
- 2.25 mm (US B-1) crochet hook
- Tapestry needle
- Scissors
- Rustproof pins and a blocking mat
- Spray bottle
- Optional: fabric stiffener or light spray starch
Abbreviations (US Terms)
- ch – chain
- sl st – slip stitch
- sc – single crochet
- sc2tog – single crochet 2 together
- hdc – half double crochet
- dc – double crochet
- sk – skip
- st(s) – stitch(es)
- RS – right side
Special stitch: Bobble. (Yarn over, insert hook in the indicated st, pull up a loop, yarn over, draw through 2 loops) 3 times in the same st. You now have 4 loops on the hook. Yarn over and draw through all 4 loops. The next sc locks the bobble in place. A bobble counts as 1 st.
Fan center: On a 3-st fan, the center is the 2nd st. On a 5-dc fan, it is the 3rd dc. On a 7-dc fan, it is the 4th dc.
Gauge and Checkpoints
Gauge: 15 sc = 2 in (5.1 cm) with a 2.25 mm hook. Exact row gauge is less important than stitch gauge.
Test first: Work the foundation chain and Row 1, then measure before you go on. Row 1 lies straight at this stage. It should measure 3.9 in (9.9 cm).
Checkpoints:
- After Row 1: a straight strip 3.9 in (9.9 cm) long.
- After Row 2: the strip begins to curve and is about 0.5 in (1.3 cm) wide.
- After Row 4: a clear crescent about 1 in (2.5 cm) wide at the center.
- After Row 6: 3.75 in (9.5 cm) tip to tip and 1.5 in (3.8 cm) wide.
- After the border: 4.25 in (10.8 cm) tall and 2 in (5.1 cm) wide.
If your piece is too big, change to a 2 mm hook. If it is too small, change to a 2.5 mm hook. Re-test Row 1 after any hook change. Keep the stitch counts exactly as written. The crescent shape depends on the counts, not the hook size.
Pattern: Crescent Body
Row-change method: Fasten off at the end of every row and leave a 4 in (10.2 cm) tail. Turn the piece. Join the new color in the first st of the new row, which is the last st of the row you just finished. Weave all tails in along the row ends before the border.
Foundation (cream): Ch 30.
Row 1 (cream): Sc in the 2nd ch from the hook and in each ch across. Fasten off.
Count: 29 sc.
This row is the inner curve of the moon.
Row 2 (blue, fan row 1): Join blue in the first sc. Ch 1, sc in the same sc, sk 1, 3 hdc in the next sc, sk 1, sc in the next sc. Sk 1, 5 dc in the next sc, sk 1, sc in the next sc. Repeat from * to * 4 more times (5 large fans total). Sk 1, 3 hdc in the next sc, sk 1, sc in the last sc. Fasten off.
Count: 39 sts (7 fans: two 3-hdc end fans and five 5-dc fans, plus 8 sc).
Check the math: the row uses 1 + 4 + (5 x 4) + 4 = 29 sts of Row 1. The small hdc fans at each end keep the tips narrow.
Row 3 (cream, connecting row): Join cream in the first sc. Ch 1, sc in the same sc. Ch 2, sc in the center st of the next fan, ch 2, sc in the next sc. Repeat from * to * 6 more times. Fasten off.
Count: 43 sts (15 sc and 14 ch-2 spaces).
Row 4 (blue, fan row 2): Join blue in the first sc. Ch 1, sc in the same sc, 3 hdc in the next sc (this sc sits above the first fan), sc in the next sc. 5 dc in the next sc, sc in the next sc. Repeat from * to * 4 more times. 3 hdc in the next sc, sc in the last sc. Fasten off.
Count: 39 sts (8 sc, two 3-hdc fans, five 5-dc fans).
Work only into the sc of Row 3. The ch-2 spaces are skipped and sit behind the fans.
Row 5 (cream, connecting row): Join cream in the first sc. Ch 1, sc in the same sc. Ch 3, sc in the center st of the next fan, ch 3, sc in the next sc. Repeat from * to * 6 more times. Fasten off.
Count: 57 sts (15 sc and 14 ch-3 spaces).
The longer ch-3 spaces lengthen the outer curve.
Row 6 (blue, fan row 3): Join blue in the first sc. Ch 1, sc in the same sc, 3 dc in the next sc, sc in the next sc. 7 dc in the next sc, sc in the next sc. Repeat from * to * 4 more times. 3 dc in the next sc, sc in the last sc. Fasten off.
Count: 49 sts (8 sc, two 3-dc end fans, five 7-dc fans).
You now have three blue fan rows running down the center of the moon, with cream rows on each side and between them. The piece should measure 3.75 in (9.5 cm) tip to tip and 1.5 in (3.8 cm) wide. Weave in all tails along the row ends now.
Border
The border is cream and worked in rounds with the RS facing. It uses the same hook and the same sc gauge as the body: 15 sc = 2 in (5.1 cm).
Corner labels:
- Corner A: the first sc of Row 6. This is the top tip.
- Corner B: the last sc of Row 6.
- Corner C: the foundation ch at the same tip as Corner B.
- Corner D: the foundation ch at the same tip as Corner A.
Round 1 (sc base)
Join cream in the first sc of Row 6.
Corner A: Ch 1, 3 sc in the same sc.
Outer edge: Work 1 sc in each of the next 47 sts of Row 6. Also work 1 extra sc in the center dc of each 3-dc end fan, for 2 extra sts total.
Corner B: 3 sc in the last sc of Row 6.
Side (tip): Work 5 sc evenly along the row ends of Rows 5 to 1.
Corner C: 3 sc in the foundation ch.
Inner edge: Work into the free loops of the foundation chain. Sc in the next 9 ch, sc2tog, sc in the next 5 ch, sc2tog, sc in the next 9 ch. This works 27 ch into 25 sts.
Corner D: 3 sc in the last foundation ch.
Side (tip): Work 5 sc evenly along the row ends of Rows 1 to 5.
Sl st to the first sc to close the round.
Round 1 total: 96 sc.
Here is how the count is built:
- Along Row 6: 49 sts worked 1 per st, plus 4 corner extras and 2 end-fan extras = 55.
- Along the row ends: 5 + 5 = 10.
- Along the inner edge: 25 sts after the decreases, plus 6 corner sts = 31.
- Total: 55 + 10 + 31 = 96.
Now count by segment. Each segment runs from the st after one corner center to the st before the next corner center. The four corner centers are counted separately.
| Segment | Count |
|---|---|
| Outer edge (A to B) | 1 + 49 + 1 = 51 |
| Tip side (B to C) | 1 + 5 + 1 = 7 |
| Inner edge (C to D) | 1 + 25 + 1 = 27 |
| Tip side (D to A) | 1 + 5 + 1 = 7 |
| Corner centers | 4 |
| Total | 96 |
The two sc2tog decreases keep the concave inner curve snug so it does not ruffle.
Round 2 (bobble round)
Sl st into the center sc of Corner A and into the next sc. Ch 1, sc in the same st as the last sl st, then sc in the next 2 sts. This completes the first group of 3 sc.
Outer edge: Bobble in the next st. Sc in the next 3 sts, bobble in the next st. Repeat from * to * 10 more times. Sc in the next 3 sts, then work a bobble in the center sc of Corner B.
Segment: 12 bobbles + 39 sc = 51 sts, plus the Corner B bobble.
Tip side: Sc in the next 3 sts, bobble, sc in the next 3 sts, bobble in the center sc of Corner C.
Segment: 7 sts, plus the Corner C bobble.
Inner edge: Sc in the next 3 sts, bobble in the next st. Repeat from * to * 5 more times. Sc in the next 3 sts, then work a bobble in the center sc of Corner D.
Segment: 6 bobbles + 21 sc = 27 sts, plus the Corner D bobble.
Tip side: Sc in the next 3 sts, bobble, sc in the next 3 sts, bobble in the center sc of Corner A.
Sl st to the first sc. Fasten off.
Round 2 total: 96 sts (24 bobbles and 72 sc).
Why the math works: Each segment length is a multiple of 4 plus 3: 51 = 4 x 12 + 3, 7 = 4 x 1 + 3, and 27 = 4 x 6 + 3. The repeat is (3 sc, bobble), so the final 3 sc of every segment always lead straight into a corner center. That means a bobble lands on all four tips. Across the whole round, 96 / 4 = 24 repeats, which gives 24 bobbles.
Twisted Hanging Cord
- Cut one 16 in (40.6 cm) strand of blue and one 16 in (40.6 cm) strand of cream.
- Hold the two strands together. Twist them firmly in one direction until they begin to kink.
- Fold the strands in half and let them twist around each other.
- Thread the folded end through the top of the Corner A bobble.
- Knot the cord ends together to form a loop about 1.5 in (3.8 cm) tall. Trim the ends and weave them into the border.
Final Blocking
- Lightly mist the moon until it is damp but not dripping.
- Lay it RS up on a blocking mat. Gently shape the inner and outer curves.
- Pin both tips first, measuring 4.25 in (10.8 cm) between them.
- Pin the widest point to 2 in (5.1 cm).
- Open each fan into a smooth arc. Pin the center of each blue fan.
- Pin each outer-edge bobble outward so it stands clear of the sc.
- Optional: spray lightly with starch or stiffener for a firmer ornament.
- Let the piece dry completely before you unpin it. Hang it from the cord.
Final Quality-Control Checklist
- Row 1 has 29 sc.
- Rows 2 and 4 have 39 sts, Row 3 has 43, Row 5 has 57, and Row 6 has 49.
- Each blue row has 7 fans, with small fans at both ends.
- Rounds 1 and 2 of the border each have 96 sts.
- There are 24 bobbles in Round 2, including one on each of the four tips.
- The moon measures 4.25 in (10.8 cm) tall and 2 in (5.1 cm) wide after blocking.
- All tails are woven in, and none show on the RS.
- The cord is secure at the top point. The loop is about 1.5 in (3.8 cm) tall.
Troubleshooting
The piece stays straight instead of curving. The fans are probably too tight. Make sure you work the full 5 or 7 dc into one st, and skip the correct sts in Row 2.
The inner edge ruffles. Check that you worked both sc2tog decreases in Round 1. If the edge still ruffles, work that section with a 2 mm hook.
The outer edge cups or pulls. Check that you worked the extra sc in each end-fan center. Also check that your Round 1 sts are not tighter than your Row 1 gauge.
The bobbles do not land on the corners. Recount Round 1 by segment: 51, 7, 27, and 7, plus 4 corner centers. Fix the count before you work Round 2.
The bobbles are flat. Pull the closing yarn-over snug. Make sure the following sc is firm, because it holds the bobble’s shape.
The fans lean to one side. Each fan must sit in the sc directly above the previous fan’s center. Recount the sc in Rows 3 and 5. There should be 15 in each row.
Care
Hand wash in cool water with mild soap and press out the water in a towel. Reshape and dry flat, re-blocking if needed.
Final Notes
The measurement chain for this moon is simple to follow:
- Row 1 sets the inner curve at 3.9 in (9.9 cm).
- Rows 2 to 6 grow the crescent to 3.75 in (9.5 cm) by 1.5 in (3.8 cm).
- The 96-st bobble border adds 0.25 in (0.6 cm) on every edge.
- The finished moon measures 4.25 in (10.8 cm) by 2 in (5.1 cm).
If each checkpoint matches, the finished moon will match too. Optional: make several moons in different blue shades to hang together.
Happy crocheting!