

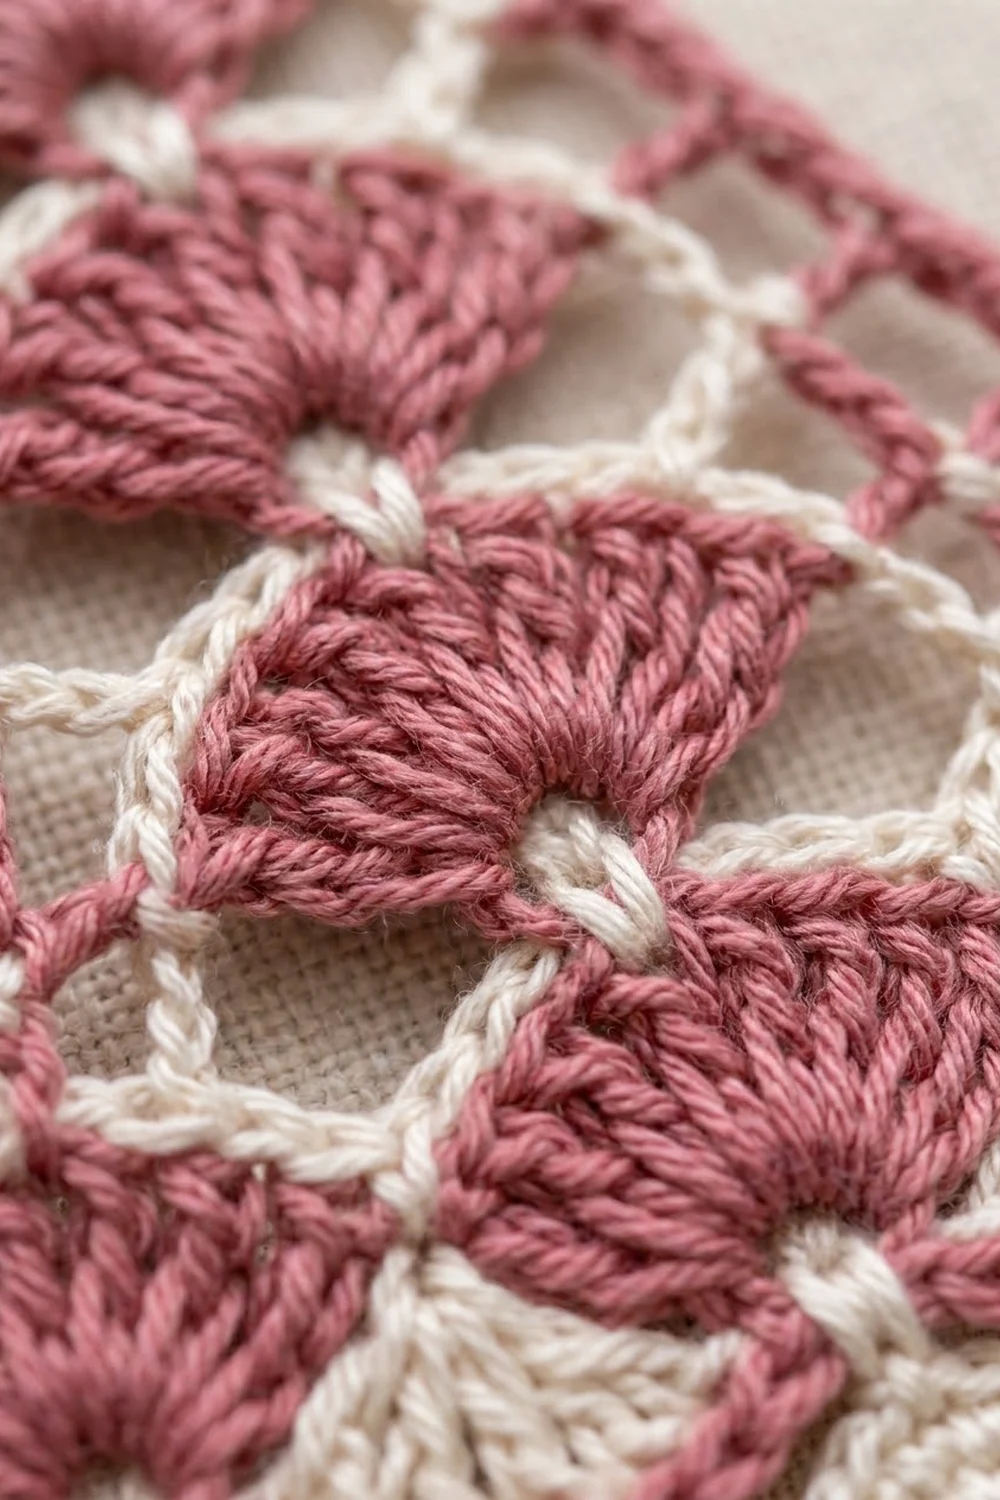
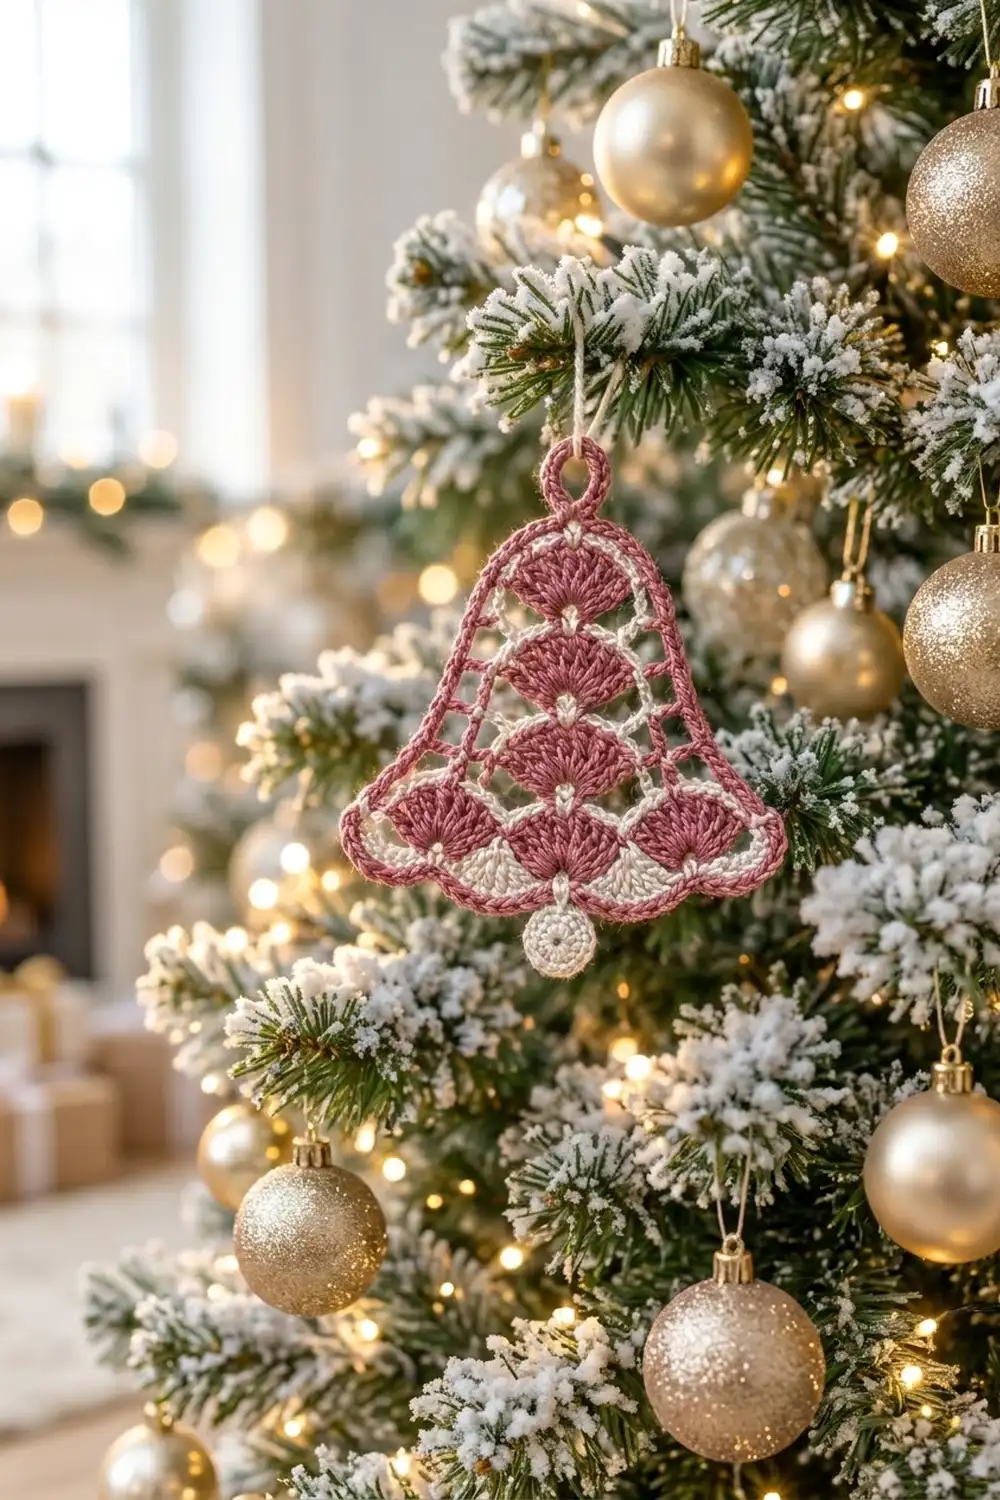
This lace bell ornament has a soft vintage-Christmas look. Solid dusty rose fans stack up the middle of the bell inside an open cream ladder mesh. A corded rose outline traces the whole silhouette, and a small cream clapper hangs at the bottom center.
The palette uses just two colors, dusty rose and cream. Rose is used for the fans, the outline and the hanging loop. Cream is used for the mesh, the scalloped hem wedges and the clapper. On a frosted tree next to gold baubles, the two colors look warm and quiet rather than loud.
The pattern uses US crochet terms. The finished bell is 4 3/8 in (11.1 cm) wide by 3 7/8 in (9.8 cm) tall. With the loop and clapper it is about 5 in (12.7 cm) from top to bottom.
You work the bell flat in rows from the bottom up. Cream rows build the mesh. Each rose fan is a short insert worked into a single base stitch. After the body, you work a cream scalloped hem along the foundation edge and a two-round rose border around the outline. The clapper is made separately and sewn on.
Finished Size and Construction
- Finished size: 4 3/8 in (11.1 cm) wide x 3 7/8 in (9.8 cm) tall; about 5 in (12.7 cm) with loop and clapper
- Skill level: Intermediate
- Terminology: US crochet terms
- Yarn weight: Size 3 crochet cotton (super fine, #1)
- Hook: 2.25 mm (B-1)
- Number of pieces: 1 bell ornament (bell body worked in one piece, plus a small clapper disc sewn on)
- Layout: single ornament with 4 fan tiers: 3 fans in the bottom tier, then 1 center fan in each of the 3 tiers above
- Bell body size (Rows 1–14): 4 1/8 in (10.5 cm) wide x 3 1/4 in (8.3 cm) tall
- Size before border (body + hem): 4 1/8 in (10.5 cm) x 3 5/8 in (9.2 cm)
- Border depth: 1/8 in (0.3 cm) on every edge
Materials
Choose a mercerized size 3 cotton thread. It makes crisp fans, holds its shape after blocking and has the slight sheen seen on this ornament. Avoid fuzzy or very soft yarns, because the mesh needs clear definition.
- Dusty rose: 8 g, about 22 m (fans, border, loop)
- Cream: 7 g, about 20 m (mesh, hem, clapper)
These quantities include a margin of about 25 percent for a gauge test and weaving in ends.
Tools:
- 2.25 mm (B-1) crochet hook
- Small tapestry needle
- 4 locking stitch markers
- Scissors
- Blocking mat and rustproof pins
- Spray starch or fabric stiffener (optional)
Abbreviations (US Terms)
- ch – chain
- sl st – slip stitch
- sc – single crochet
- sc2tog – single crochet 2 together
- dc – double crochet
- tr – treble crochet
- dtr – double treble crochet (yo 3 times)
- rev sc – reverse single crochet (crab stitch)
- st(s) – stitch(es)
- sp – space
- RS / WS – right side / wrong side
Standing tr: With a slipknot on the hook, yo twice, insert the hook in the stitch and complete a tr as usual. You don’t need a joining sl st or a starting chain.
Fan: Work a standing tr in the marked stitch, then 10 more tr in the same stitch (11 tr). The top fan uses 9 tr. Fasten off after each fan.
Rev sc: Work from left to right (if you’re right-handed). Insert the hook in the next stitch to the right, pull up a loop, yo and pull through both loops.
Gauge and Checkpoints
Gauge: 9 sc = 1 in (2.5 cm) in cream. One dtr is about 5/8 in (1.6 cm) tall. One 11-tr fan is about 1 1/4 in (3.2 cm) wide once the next cream row catches its top.
Work Rows 1–3 as a test before you continue. This first tier tells you almost everything about your gauge.
Checkpoints:
- After Row 1: the 37 sc measure 4 1/8 in (10.5 cm).
- After Row 3: the work is 3/4 in (1.9 cm) tall.
- After Row 6: 1 1/2 in (3.8 cm) tall.
- After Row 9: 2 1/4 in (5.7 cm) tall.
- After Row 12: 3 in (7.6 cm) tall.
- After Row 14: 3 1/4 in (8.3 cm) tall, with a top edge 1 in (2.5 cm) wide.
- After the hem: 3 5/8 in (9.2 cm) tall.
- After the border: 4 3/8 in (11.1 cm) x 3 7/8 in (9.8 cm).
If Row 1 is wider than 4 1/8 in (10.5 cm), go down to a 2.0 mm hook. If it is narrower, go up to a 2.5 mm hook. If the width is right but the tiers are taller than 3/4 in (1.9 cm), keep your dtr loops snug and pull each yarn-over all the way through before the next.
Bell Body
Don’t cut the cream thread while you work the body. Drop it at the end of each base row, make the rose fan or fans, then pick cream back up and turn.
Tier 1
Row 1 (cream, RS): Ch 38. Sc in 2nd ch from hook and in each ch across. Turn. (37 sc)
Place markers in sts 7, 19 and 31. Drop cream, but don’t cut it.
Row 2 (rose, fans): Work 1 Fan (11 tr) in each marked st, fastening off after each fan. (3 fans, 11 tr each)
Keep each fan upright so it spreads away from Row 1. Remove the markers.
Row 3 (cream): Pick up cream. Ch 5 (counts as dtr in first st). Working across the next fan, sc in the top of each of its 11 tr, then dtr in the next Row 1 st between fans (st 13, then st 25); repeat from * to * once more. Sc in the top of each of the 11 tr of the last fan, then dtr in st 37 of Row 1. Turn. (4 dtr + 33 sc = 37 sts)
The dtr posts make the cream verticals between and beside the fans. Each fan rises from its base st as a rose half-circle.
Tier 2
Row 4 (cream): Ch 1, sc2tog over first 2 sts, sc in each of next 33 sts, sc2tog over last dtr and top of turning ch. Turn. (35 sc)
Mark st 18 (the center st). Drop cream.
Row 5 (rose): Work 1 Fan (11 tr) in the marked st. Fasten off. (1 fan, 11 tr)
Row 6 (cream): Pick up cream. Ch 5 (counts as dtr in st 1), ch 2, skip 2 sts, dtr in st 4, ch 2, skip 2 sts, dtr in st 7, ch 1, sc in the top of each of the 11 fan tr, ch 1, skip Row 4 sts 8–28 (they’re hidden behind the fan), dtr in st 29, ch 2, skip 2 sts, dtr in st 32, ch 2, skip 2 sts, dtr in st 35. Turn. (6 dtr + 10 ch + 11 sc = 27 sts)
Tier 3
Row 7 (cream): Ch 1, sc2tog over first 2 sts, sc in each of next 23 sts (work into each ch, not around it), sc2tog over last 2 sts. Turn. (25 sc)
Mark st 13 (the center st). Drop cream.
Row 8 (rose): Work 1 Fan (11 tr) in the marked st. Fasten off. (1 fan, 11 tr)
Row 9 (cream): Ch 5 (counts as dtr in st 1), ch 2, skip 2 sts, dtr in st 4, ch 1, sc in the top of each of the 11 fan tr, ch 1, dtr in st 22, ch 2, skip 2 sts, dtr in st 25. Turn. (4 dtr + 6 ch + 11 sc = 21 sts)
Tier 4
Row 10 (cream): Ch 1, sc2tog, sc in each of next 17 sts, sc2tog. Turn. (19 sc)
Mark st 10 (the center st). Drop cream.
Row 11 (rose): Standing tr in the marked st, then 8 more tr in the same st. Fasten off. (1 small fan, 9 tr)
Row 12 (cream): Ch 5 (counts as dtr in st 1), ch 1, sc in the top of each of the 9 fan tr, ch 1, dtr in st 19. Turn. (2 dtr + 2 ch + 9 sc = 13 sts)
Top Shaping
Row 13 (cream): Ch 1, sc2tog, sc in each of next 9 sts, sc2tog. Turn. (11 sc)
Row 14 (cream): Ch 1, sc2tog, sc in each of next 7 sts, sc2tog. (9 sc) Fasten off cream.
The body now has six rose fans: three across the bottom and three more stacked up the center.
Hem Scallops
Turn the bell upside down so the foundation chain is at the top. You’ll work into the 37 free loops of the foundation chain, which sit directly under the Row 1 sc.
Hem (cream): Join cream in the first foundation loop. Ch 1, sc in the same loop, skip 5 loops, 9 dc in next loop, skip 5 loops, sc in next loop; repeat from * 2 more times. Fasten off. (4 sc + 27 dc = 31 sts)
The three shells land in loops 7, 19 and 31, directly below the three bottom fans. Each fan and the shell below it look like a rose fan over a cream wedge, which gives the bell its scalloped lower edge.
Clapper
Rnd 1 (cream): Magic ring, ch 3 (counts as dc), 11 dc in ring. Join with sl st to top of ch 3. (12 dc)
Rnd 2: Ch 1, 2 sc in next st, sc in next st; repeat from * 5 more times. Join. (18 sc)
Ch 4 for the hanger and fasten off, leaving a 6 in (15.2 cm) tail. The disc is 5/8 in (1.6 cm) across.
Border
Border gauge: 9 sc = 1 in (2.5 cm) along any edge.
A corner group is 3 sc worked into one stitch. The side counts below do not include the corner groups; they are counted separately.
Round 1 (rose): With RS facing, join rose in the first st of Row 14.
- Top corner: 3 sc in first st.
- Top edge: sc in each of next 7 sts. (7 sc)
- Top corner: 3 sc in last st.
- Side edge (Rows 13 down to 1): 1 sc in Row 13 end, 6 sc in Row 12 end, 1 sc in Row 10 end, 6 sc in Row 9 end, 1 sc in Row 7 end, 7 sc in Row 6 end, 1 sc in Row 4 end, 7 sc in Row 3 end, 1 sc in Row 1 end. (31 sc)
- Bottom corner: 3 sc in the end sc of the hem.
- Hem edge: sc in each of next 29 sts, working 2 sc in the 5th dc of each shell. (29 + 3 = 32 sc)
- Bottom corner: 3 sc in the other end sc of the hem.
- Second side (Rows 1 up to 13): work the row ends in the reverse order of the first side. (31 sc)
Join with sl st to the first sc. (7 + 31 + 32 + 31 = 101 edge sc + 12 corner sc = 113 sc)
Round 2 (rose): Ch 1, rev sc in each sc around. Join, but don’t fasten off yet. (113 rev sc)
Why the math works: Each sc row-end is about 1/8 in (0.3 cm) tall, so it gets 1 sc. Each dtr row-end is about 5/8 in (1.6 cm) tall, which is close to 6 sc at 9 sc per inch. Rows 3 and 6 get 7 sc because the bell flares most there, so those edges are longer on the slant. The side total is 5 + 6 + 6 + 7 + 7 = 31 sc, about 3 7/16 in (8.7 cm), which matches the length of the curved side. The hem gets 1 sc per stitch plus 1 extra at each shell tip, so the scallops stay round and don’t cup.
Hanging loop: Sl st along to the 4th of the 7 top-edge sts. Ch 12, twist the chain once and sl st into the same st. Work 18 sc into the loop, then sl st at its base. Fasten off. The loop stands 1/2 in (1.3 cm) above the bell.
Attach the clapper: Thread the clapper tail onto the needle. Sew the end of the ch-4 hanger to the back of the bell at the bottom center, between the 2 sc at the tip of the center shell. The clapper should hang just below the hem.
Final Blocking
- Weave in all ends. Run each fan’s two tails behind that fan’s own stitches, not across the mesh.
- Soak the ornament in cool water, then press it in a towel.
- Pin it flat on the mat at 4 3/8 in (11.1 cm) wide x 3 7/8 in (9.8 cm) tall.
- Pin each hem scallop tip, then each dtr post, so the ladders run straight.
- Gently open each fan into a smooth half-circle with your fingertips.
- Pin the hanging loop into a round shape.
- If you want a crisp hanging ornament, mist it with spray starch.
- Let it dry completely before you unpin it, at least 6 hours.
Final Quality-Control Checklist
- The bell measures 4 3/8 in (11.1 cm) x 3 7/8 in (9.8 cm).
- There are six rose fans: 3 in the bottom tier and 3 stacked up the center.
- Every fan is centered over its base st, and each fan top has 11 sc (9 on the top fan).
- The cream dtr posts are straight and evenly spaced.
- The three cream hem shells sit directly below the three bottom fans.
- Border Round 1 has 113 sc, and Round 2 has 113 rev sc.
- The rev sc edge looks corded, with no gaps at the corners.
- The loop is centered at the top and the clapper is centered at the bottom.
- No tails show through the open mesh.
Troubleshooting
Fans cup forward. Your tr are too short for the space. Loosen the first yarn-over of each tr, or work the fans with a 2.5 mm hook.
Fans look gathered or ruffled. The cream row is pulling them in. Make sure you work 1 sc into every fan tr without skipping any.
The bell leans to one side. A fan was worked off-center. Recount the base row and check where the marker is.
The side border ripples. Work 1 fewer sc in each dtr row-end.
The side border pulls in and curls. Work 1 more sc in each dtr row-end.
The hem scallops flip up. The hem dc are too tight. Work them with slightly larger loops, then block flat.
There are gaps at the fan bases. Pull the standing tr snug before you work the other tr, and weave the starting tail around the base.
Care
Hand wash in cool water with mild soap, press the water out in a towel and dry flat. If the ornament goes soft in storage, reshape it and starch it again.
Final Notes
The measurement chain is short and easy to follow. Row 1 sets the width at 37 sc, or 4 1/8 in (10.5 cm). Each of the four tiers adds 3/4 in (1.9 cm), so the body reaches 3 in (7.6 cm) after Row 12 and 3 1/4 in (8.3 cm) after Row 14. The hem brings the height to 3 5/8 in (9.2 cm). The 113-stitch border adds 1/8 in (0.3 cm) all around. That gives a finished bell of 4 3/8 in (11.1 cm) x 3 7/8 in (9.8 cm), or about 5 in (12.7 cm) with the loop and clapper.
Check Row 1 and Row 3 against those numbers and the rest of the bell will follow. After the first one, the next bells go quickly, and a set of them looks lovely across a tree.
Happy crocheting!