

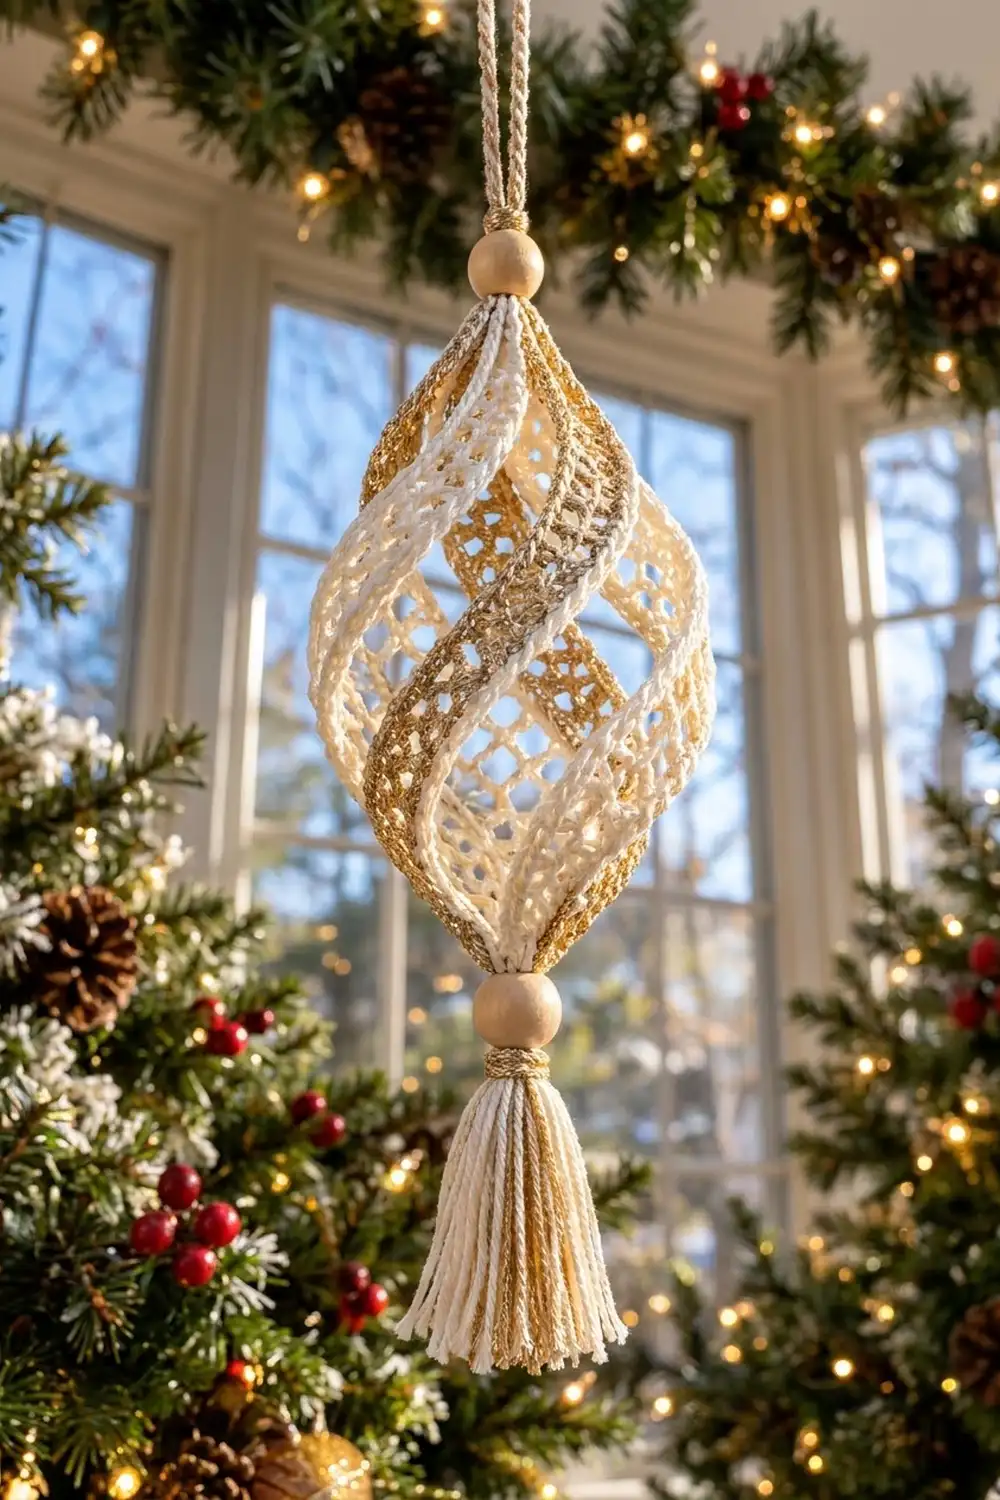
The Golden Spiral Lantern Ornament is a light, lacy Christmas decoration. Six narrow strips of cream mesh curve around a hollow center in a soft spiral, and the metallic-gold edge on every strip turns into a swirl of gold lines. Wooden beads at the top and bottom and a full tassel finish it like a small lantern.
The palette is warm cream and gold, with natural wood accents. It looks good on a tree, in a window, or hanging in a row from garland.
This pattern uses US crochet terms. The finished body measures 5.5 in (14.0 cm) tall and 3 in (7.6 cm) wide. With the loop, beads, and tassel, the full hanging length is about 11.75 in (29.8 cm).
Construction is simple. You crochet six flat mesh strips lengthwise, each with gold edges. Then you join the strip ends into a ring at the top, rotate the bottom ends half a turn to make the spiral, and join them into a second ring. Two decrease rounds close each end into a gold collar. After stiffening, you add the beads, cord, and tassel.
Finished Size and Construction
- Finished body size: 5.5 in (14.0 cm) tall × 3 in (7.6 cm) wide
- Total hanging length: about 11.75 in (29.8 cm)
- Skill level: Intermediate (simple stitches, careful assembly)
- Terminology: US crochet terms
- Yarn weight: Super fine / fingering (#1) cotton
- Hook: 2.5 mm (US B-1 or C-2)
- Number of pieces: 6 identical strips, plus 1 tassel
- Layout: 6 strips in a ring, each twisted a half turn from top to bottom
- Piece size: each strip 7.6 in (19.3 cm) long × 1.25 in (3.2 cm) wide
- Size before border: body 5 in (12.7 cm) tall × 3 in (7.6 cm) wide
- Border depth: 2 collar rounds, 0.25 in (0.6 cm) at each end
Materials
Yarn advice: Use a smooth, mercerized fingering-weight cotton for the mesh. It holds the open loops crisply and takes stiffener well. For the gold, pick a metallic fingering yarn or a cotton-metallic blend about the same thickness as the cream.
- Cream (Color A): 25 g, about 100 m
- Metallic gold (Color B): 15 g, about 60 m
These amounts include a margin for your gauge swatch, the tassel, and the cord.
Tools:
- 2.5 mm crochet hook
- 2 natural wooden beads, 16 mm (about 5/8 in, 1.6 cm), holes at least 4 mm wide
- Tapestry needle and a large-eye beading needle
- 6 locking stitch markers
- Stiff card 3 in (7.6 cm) tall, for the tassel
- Fabric stiffener or heavy starch
- One small balloon, inflated to 3 in (7.6 cm) wide
- Scissors, ruler, and rust-proof pins
Abbreviations (US Terms)
- ch – chain
- sc – single crochet
- dc – double crochet
- sl st – slip stitch
- sp – space
- sk – skip
- st(s) – stitch(es)
- RS – right side
- sc2tog – single crochet 2 together: (insert hook in next st, yarn over, pull up a loop) twice, yarn over, pull through all 3 loops.
- sc3tog – single crochet 3 together: (insert hook in next st, yarn over, pull up a loop) 3 times, yarn over, pull through all 4 loops.
Special stitch – ch-5 net loop: Ch 5, then sc in the next stitch or space given. These loops make the open, diamond-shaped mesh.
Gauge and Checkpoints
Gauge: 8 sc = 1 in (2.5 cm) in gold sc. A strip of mesh (Rows 1–5) is 1.25 in (3.2 cm) wide.
Make one full strip before anything else. It is your gauge swatch, and you can use it in the ornament if it measures right.
Checkpoints:
- After Row 1: 61 sc should measure 7.6 in (19.3 cm).
- After Row 5: strip width should be 1.25 in (3.2 cm), lightly stretched.
- After joining both rings: body is about 5 in (12.7 cm) tall and 3 in (7.6 cm) wide.
- After the collars: body is 5.5 in (14.0 cm) tall.
If your strip is too long (over 7.75 in / 19.7 cm), go down one hook size. If it is too short (under 7.5 in / 19.1 cm), go up one hook size. Keep the stitch count the same. The joining and collar math depends on it.
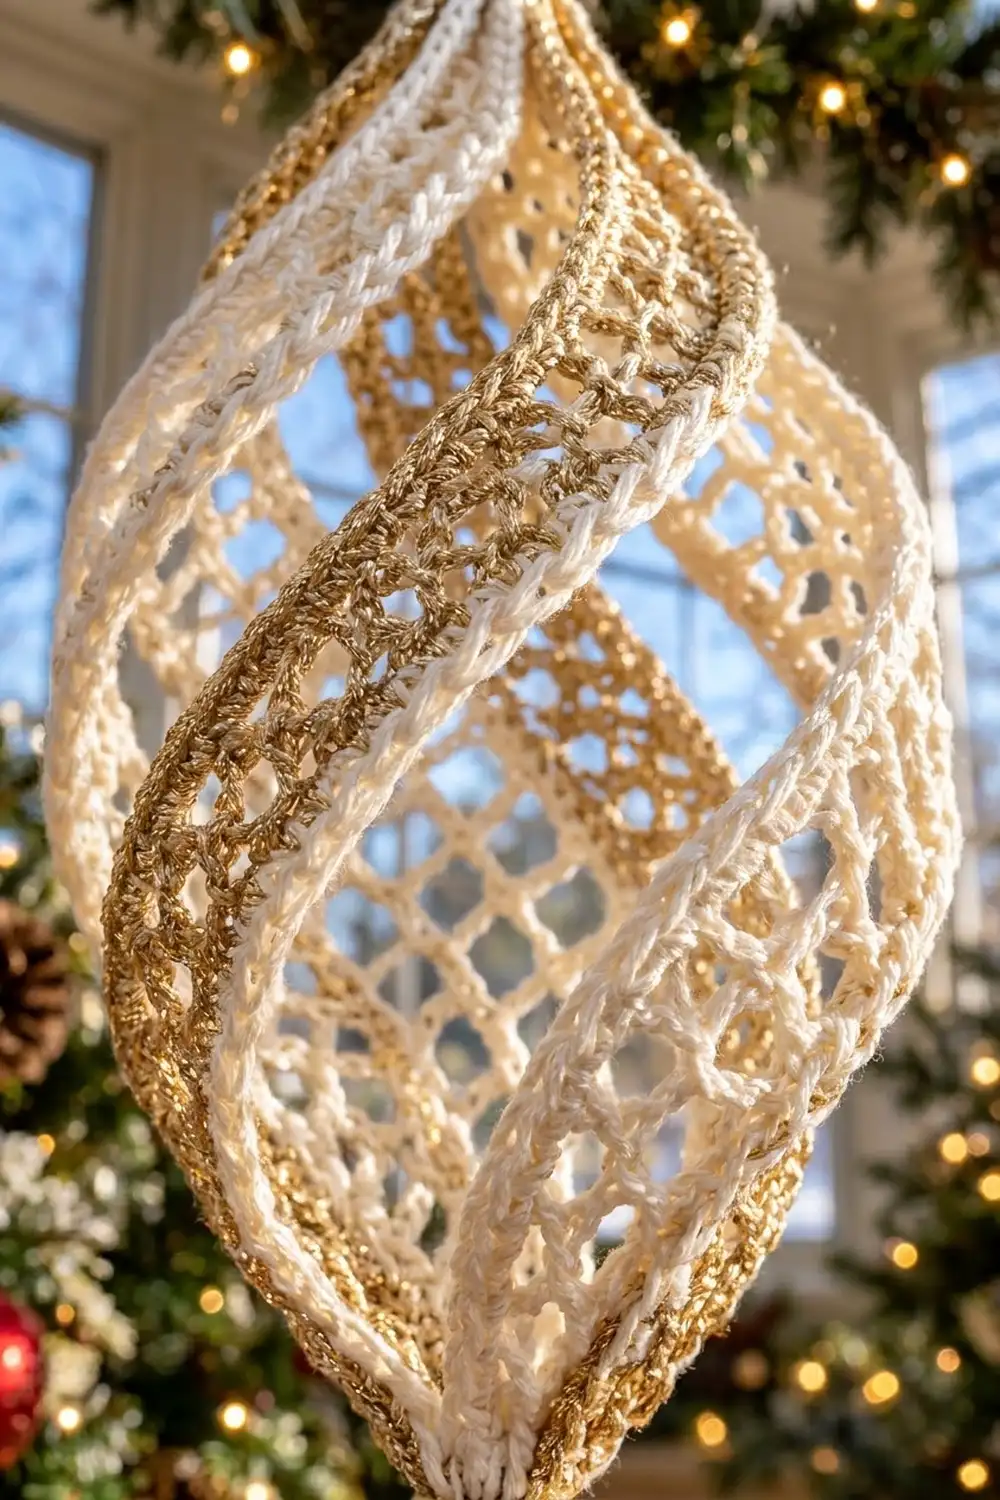
Main Pattern: Mesh Strip (Make 6)
Each strip is worked lengthwise in 5 rows. The gold edges are Rows 1 and 5, the cream mesh is Rows 2–4, and the short-end gold edging is added last.
Row 1 (Gold, RS): With B, ch 62. Sc in 2nd ch from hook and in each ch across, turn. (61 sc)
Fasten off B. Join A in the last sc.
Row 2 (Cream): Ch 1, sc in first sc, ch 5, sk 3 sc, sc in next sc; repeat from * 14 more times, turn. (15 ch-5 loops, 16 sc)
Check: 1 sc + (15 repeats × 4 sts) = 61 sts used. The last sc lands in the last stitch.
Row 3 (Cream): Ch 5 (counts as dc + ch 2), sc in first ch-5 sp, ch 5, sc in next ch-5 sp; repeat from * 13 more times, ch 2, dc in last sc, turn. (14 ch-5 loops, plus a ch-2 half loop at each end)
The half loops keep the edge straight so the gold row can sit flat.
Row 4 (Cream): Ch 1, sc in first dc, ch 5, sc in next ch-5 sp; repeat from * 13 more times, ch 5, sc in 3rd ch of turning ch-5, turn. (15 ch-5 loops, 16 sc)
Fasten off A. Join B in the last sc.
Row 5 (Gold): Ch 1, sc in first sc, 3 sc in next ch-5 sp, sc in next sc; repeat from * 14 more times. (61 sc: 1 + 15 × 4)
Row 5 matches Row 1 exactly, so both long gold edges are 61 sc and the strip lies flat with no rippling.
Short-end edging (Gold): Do not turn. Ch 1, rotate the strip, and work 6 sc evenly across the short end: 1 sc in the end of Row 5 area, 1 sc in Row 4, 2 sc around the dc post of Row 3, 1 sc in Row 2, and 1 sc in Row 1. Fasten off. (6 sc)
Join B at the opposite short end and work 6 sc evenly across it the same way. Fasten off. (6 sc)
Strip totals: 61 sc on each long edge, 6 sc on each short end. Weave in all ends.
Tassel
- Hold A and B together, 2 strands of A and 1 strand of B.
- Wrap this bundle around the 3 in (7.6 cm) card 12 times. That gives 24 wraps of A and 12 wraps of B.
- Slide a 10 in (25.4 cm) strand of B under the wraps at the top edge. Tie it tightly and leave both tails long. You will use them to attach the tassel.
- Cut the wraps along the bottom edge. Each strand is now 6 in (15.2 cm) long, folded to 3 in (7.6 cm).
- Wrap a separate strand of B around the tassel 0.5 in (1.3 cm) below the top, 6 times, and tie it off. Tuck the ends inside.
- Trim the bottom evenly to 3 in (7.6 cm).
Make All Pieces
- Strips: 6 total. Each one uses Color A for Rows 2–4 and Color B for Rows 1 and 5 and both short ends.
- Tassel: 1, in Colors A and B.
Number the strips S1–S6 with stitch markers. Place every strip RS up, with the Row 1 edge on the left.
Layout grid (positions around each ring, viewed from above):
TOP RING:     S1  S2  S3  S4  S5  S6
BOTTOM RING:  S4  S5  S6  S1  S2  S3   (positions under top ring)
The order around each ring is always S1 through S6. The bottom ring is rotated 3 positions, or half a turn, so S1’s bottom end sits under S4’s top end. That offset makes the spiral.
Joining
Method: Single crochet join in Color B, worked into the short-end stitches to form a ring.
Top ring:
- Hold S1 with its top short end facing you, RS out. Join B in the first of its 6 short-end sc.
- Ch 1. Sc in each of the 6 short-end sts of S1.
- With no chains in between, sc in each of the 6 short-end sts of S2. Continue the same way through S6.
- Sl st in the first sc to close the ring. (36 sc: 6 strips × 6 sts)
Do not fasten off. Leave the loop on a stitch marker and go straight to the top collar in the Border section.
Stitch-to-stitch logic: Every short-end sc gets exactly 1 joining sc, and no extra stitches are added between strips. That gives 6 sts per strip in a ring of 36.
Bottom ring:
- Let the strips hang from the top ring. Turn the bottom ends 180°, a half turn, in one direction, counterclockwise viewed from above.
- Check against the layout grid. S1’s bottom end should sit under S4’s top end. The RS should still face out, and the strips should not cross over each other.
- Join B in S1’s bottom short end and work the same way: 6 sc per strip, S1 to S6, then sl st to close. (36 sc)
Tension advice: Keep the joining stitches as firm as the strip edges. If they are loose, the ring opens up and the ornament looks floppy. If they are tight, the strips pucker at the ends.
Size checkpoint: With both rings joined, gently open the strips with your fingers. The body should measure about 5 in (12.7 cm) from ring to ring and 3 in (7.6 cm) across.
Border: Gold Collars
The border here is a small gold collar at the top and bottom. It gathers the 6 strip ends tightly so the beads sit snug.
Border gauge: One round of sc in B is about 0.125 in (0.3 cm) tall. Two rounds give a 0.25 in (0.6 cm) collar.
Work these rounds on each ring, continuing from the joining round.
Collar Rnd 1: Ch 1, sc2tog around, then sl st to the first st. (18 sts: 3 per strip)
Collar Rnd 2: Ch 1, sc3tog around, then sl st to the first st. (6 sts: 1 per strip)
Fasten off, leaving a 6 in (15.2 cm) tail. Thread the tail through the front loops of the 6 sts and pull it lightly to close. Leave a center hole about 0.125 in (0.3 cm) wide for the cord. Secure the tail and weave it in.
Why the math works: 36 is divisible by 2, so Rnd 1 has no leftover stitches and becomes 18. Then 18 is divisible by 3, so Rnd 2 becomes 6. Each round keeps an equal count per strip (6, then 3, then 1), so every strip gathers the same amount and the spiral stays even.
After both collars, the body is 5.5 in (14.0 cm) tall: 5 in (12.7 cm) of body plus 0.25 in (0.6 cm) at each end.
Final Blocking
- Mix fabric stiffener as the bottle directs, or use heavy starch.
- Soak the ornament fully, then gently squeeze out the extra liquid. Do not wring.
- Push the deflated balloon into the body through a gap between strips. Inflate it to 3 in (7.6 cm) wide and tie it off.
- Arrange the strips. Space the 6 gaps evenly, make each gold edge follow a smooth spiral, and open every mesh loop.
- Hang it upside down, or set it on a cup, and let it dry for 24 hours.
- Pop the balloon and pull it out through a gap.
- Hanging cord: Cut 2 strands of A, each 16 in (40.6 cm) long. Twist them tightly together, fold them in half, and let them twist back on themselves into a cord.
- Assembly: Thread the tassel’s tie tails through the bottom bead, up through the bottom collar hole, through the hollow center, and out the top collar. Thread them through the top bead, knot them to the cord ends, and form a 2 in (5.1 cm) hanging loop. Tighten until both beads sit firmly against the collars.
- Wrap B 6 times around the tassel tie just below the bottom bead to make the gold neck collar. Tie it off and hide the ends.
Final Quality-Control Checklist
- Each strip has 61 sc on both long edges and 6 sc on both short ends.
- All 6 strips are the same length, within 0.125 in (0.3 cm).
- The RS faces out on every strip, with no flipped strips.
- Each joining round has 36 sc, and the collars count 18, then 6.
- The spiral is exactly half a turn, with S1 under S4.
- The 6 gaps between strips are evenly spaced.
- Body is 5.5 in (14.0 cm) tall × 3 in (7.6 cm) wide.
- Beads sit snug, and the tassel hangs straight at 3 in (7.6 cm).
- The ornament hangs straight and doesn’t tilt.
Troubleshooting
Strip ripples along the gold edge: Row 5 has too many stitches, or your tension there is loose. Recount to 61 sc and work 3 sc in each loop, not 4.
Strip curls into a C-shape: Row 1 is tighter than Row 5. Remake Row 1 with a looser chain, or use a hook one size up for the chain only.
Mesh loops look uneven: Count each ch 5 exactly. Even one ch 4 or ch 6 pulls the diamonds out of shape.
Spiral looks lopsided: One strip probably landed in the wrong position on the bottom ring. Undo the bottom ring, check the layout grid, and rejoin.
Ornament collapses after drying: The stiffener was too weak. Dip it again in full-strength stiffener and dry it over the balloon again.
Bead slides over the collar: The center hole is too big. Pull the closing tail tighter, or add a third collar round of 6 sc.
Care
Dust gently with a soft brush, and store the ornament in a box so it doesn’t get crushed. If it gets dirty, hand-wash it in cool water, then stiffen and block it over a balloon again.
Final Notes
Everything in this ornament comes back to one measurement chain. 8 sc per 1 in (2.5 cm) gives 61-stitch strips 7.6 in (19.3 cm) long and 1.25 in (3.2 cm) wide. Six strips with 6 sts per short end make 36-stitch rings. Collars of 18 and then 6 stitches close each end evenly. With a half-turn twist, the result is a 5.5 in (14.0 cm) by 3 in (7.6 cm) spiral lantern body, about 11.75 in (29.8 cm) long with its loop, beads, and tassel.
Measure each strip, count each ring, and the spiral will form on its own. Make one for the tree, or a whole set to hang in the window.
Happy crocheting!