

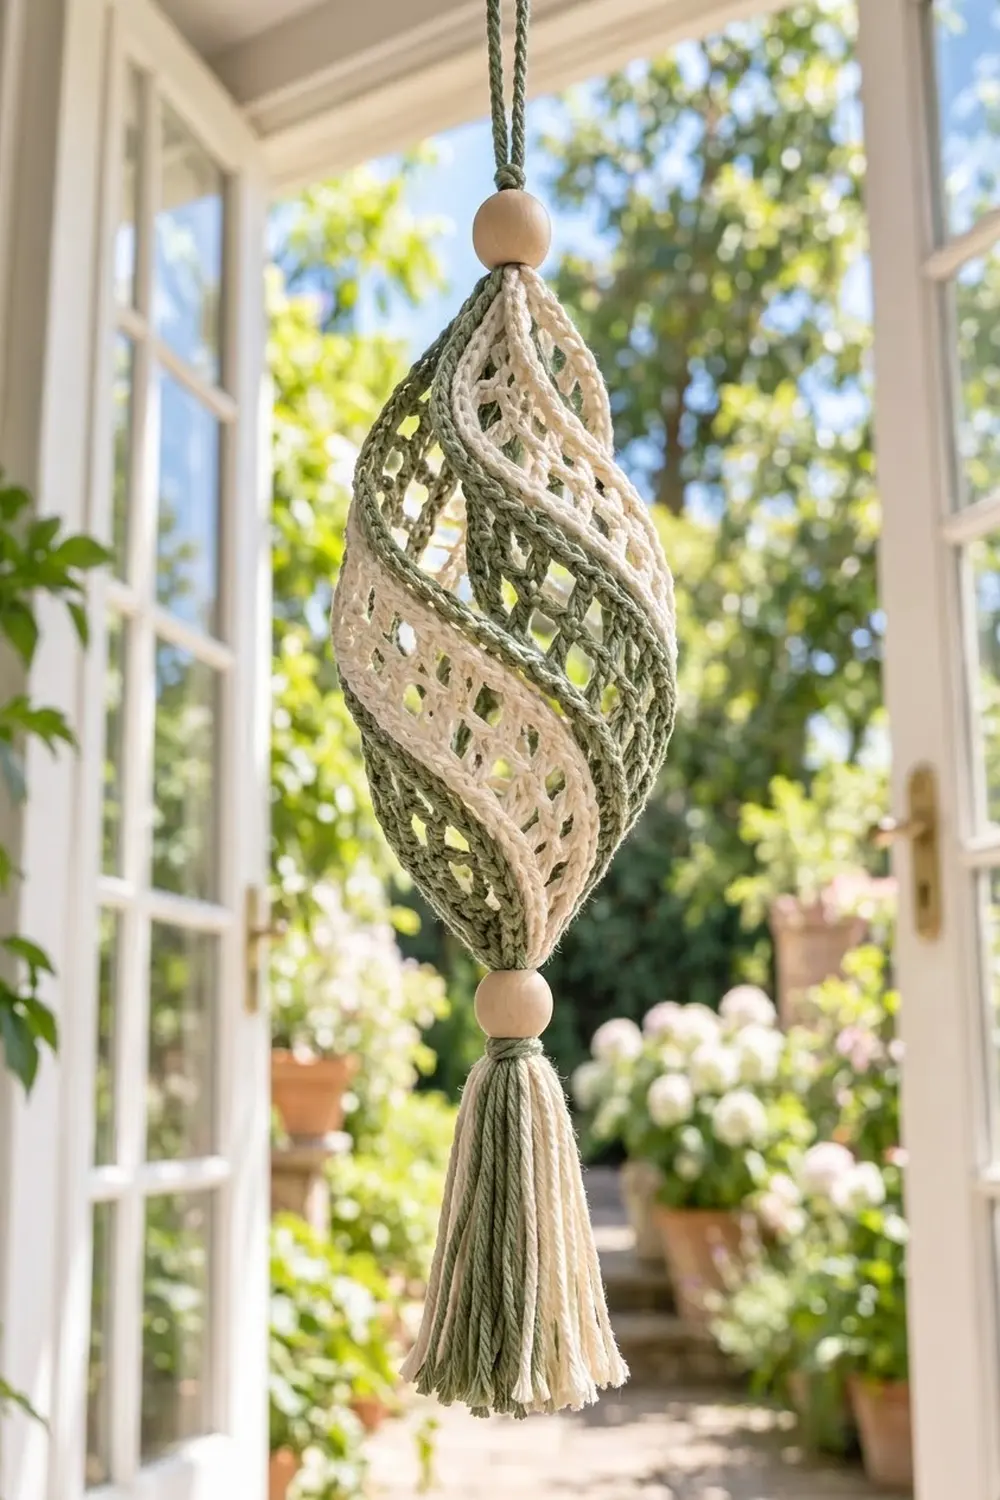
The Sage Swirl Spiral Ornament is a light, airy hanging decoration made from six narrow mesh strips. Sage green and cream strips alternate around the shape, and they twist half a turn from top to bottom. The result is a soft, swirling cage that moves gently in a breeze.
Two natural wooden beads finish the top and bottom. A chain cord forms the hanging loop, and a full two-color tassel hangs below. The look is calm, botanical, and a little boho. It suits a sunny window, a porch, or a plant corner.
This pattern uses US crochet terms. The ornament body is 7 in (17.8 cm) tall and 3.5 in (8.9 cm) wide at its widest. With the hanging loop, beads, and tassel, it measures about 16.5 in (41.9 cm) from top to bottom.
Construction is simple. You crochet six flat filet-mesh strips and add a single crochet edging along each long side. Then you gather all six strips at each end, run a core cord through the center, twist the ends half a turn, and finish with beads and a tassel.
Finished Size and Construction
- Finished size: body 7 in (17.8 cm) tall × 3.5 in (8.9 cm) wide; total hanging length 16.5 in (41.9 cm)
- Skill level: Easy / advanced beginner
- Terminology: US crochet terms
- Yarn weight: worsted (#4) cotton
- Hook: 4.5 mm (US 7)
- Number of pieces: 6 mesh strips (3 green, 3 cream), 1 chain cord, 1 tassel
- Layout: strips placed side by side in a ring, alternating colors, gathered at both ends
- Piece size: each strip is 2 in (5.1 cm) wide × 10 in (25.4 cm) long after edging
- Size before border: each strip is 1.75 in (4.4 cm) wide × 10 in (25.4 cm) long
- Border depth: 0.125 in (0.3 cm) on each long edge
Materials
Yarn: Use a smooth worsted-weight cotton or cotton blend, about 170 m per 100 g. Cotton holds the spiral’s shape better than acrylic, and the stitch definition shows clearly in the mesh.
- Sage green: 30 g / 51 m (strips, cord, gathering, tassel, tassel wrap)
- Cream: 25 g / 43 m (strips, tassel)
These amounts include a safety margin of roughly 30%.
Tools:
- 4.5 mm (US 7) crochet hook
- 2 natural wooden beads, 20 mm (0.75 in / 1.9 cm), with holes at least 8 mm wide
- Tapestry needle with a large eye
- Scissors
- Measuring tape
- Blocking mat and rust-proof pins
- Spray bottle with water
- Piece of cardboard 4.5 in (11.4 cm) tall, for the tassel
Abbreviations (US Terms)
- ch – chain
- sc – single crochet
- dc – double crochet
- sk – skip
- sp – space
- st(s) – stitch(es)
- tch – turning chain
- RS – right side
Special stitch – filet mesh: One mesh is 1 dc, ch 2, and then the next dc, with the 2 chains bridging the 2 skipped stitches or the ch-2 space below. Each mesh is 3 stitches wide (the shared dc counts once per mesh).
Gauge and Checkpoints
Gauge: 16 dc and 8 rows = 4 in (10.2 cm). That is 4 sts and 2 rows per 1 in (2.5 cm).
Sc gauge for the edging: 16 sc = 4 in (10.2 cm).
Test one strip first. Make one complete strip before you make the others. It is your gauge swatch.
Checkpoints:
- After Row 1: the strip is 1.75 in (4.4 cm) wide.
- After Row 4: the strip is 2 in (5.1 cm) long.
- After Row 20: the strip is 10 in (25.4 cm) long.
- After the edging: the strip is 2 in (5.1 cm) wide.
If the strip is too big, go down to a 4 mm (US G-6) hook. If it is too small, go up to a 5 mm (US H-8) hook. Length matters most. A strip that is too long will droop. A strip that is too short won’t bow outward enough to make a full spiral.
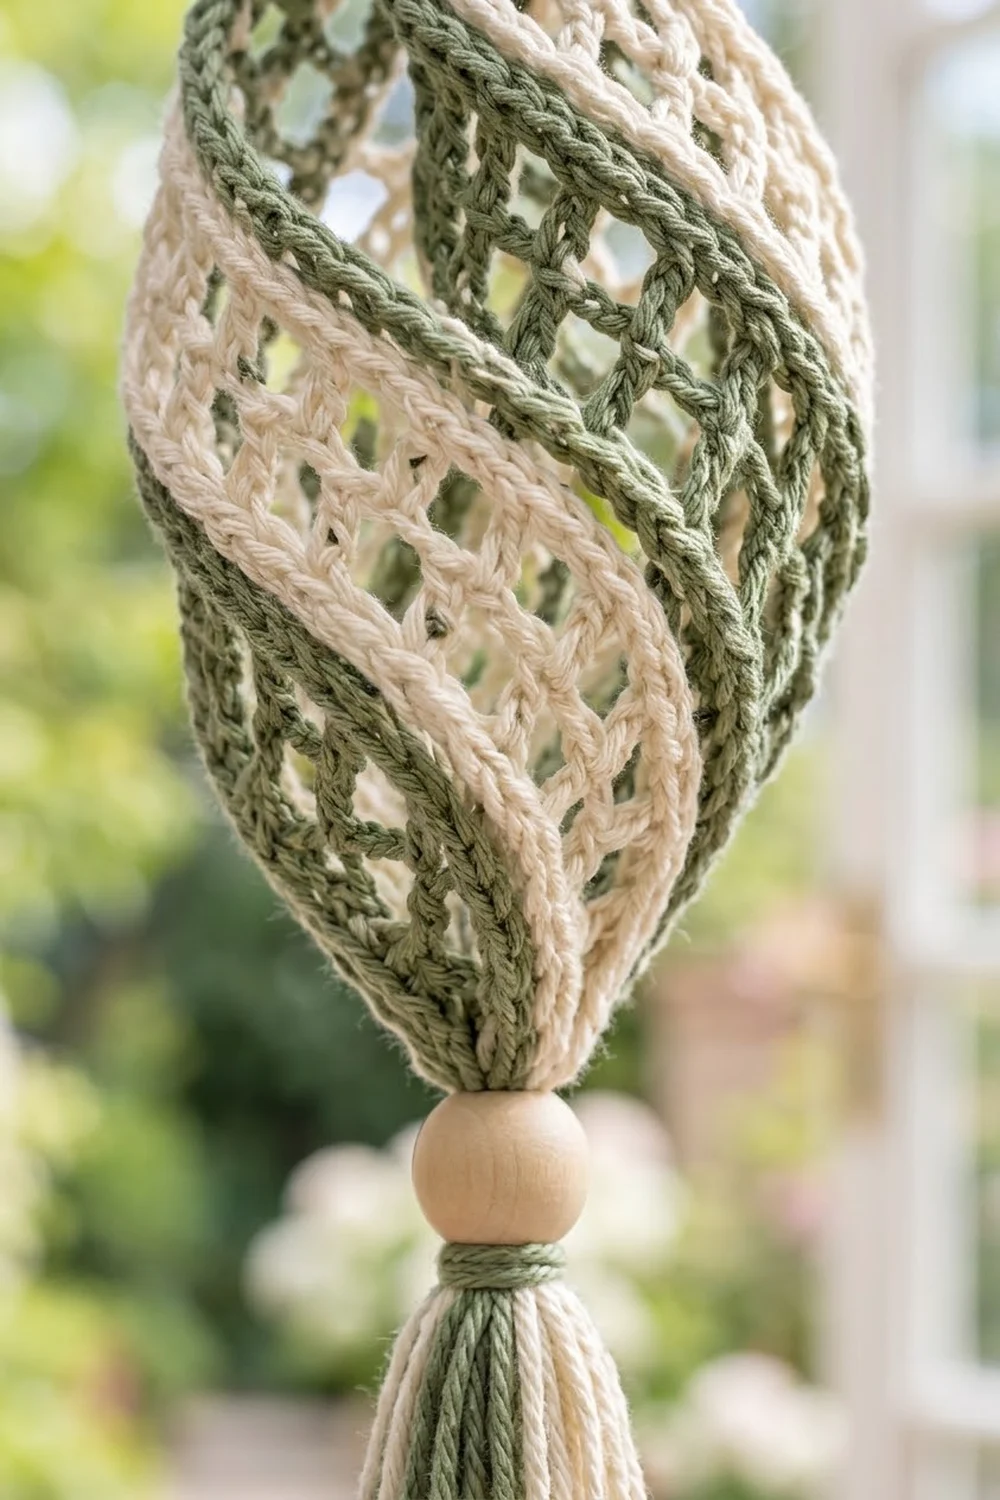
Mesh Strip (Make 6)
Make each strip in a single color. Leave a 6 in (15.2 cm) tail at the start and the end. You will weave these in later.
Row 1 (RS, solid row): Ch 9. Dc in 4th ch from hook (the skipped 3 ch count as the first dc) and in each of the next 5 ch. Turn. (7 sts)
Row 2 (first mesh row): Ch 3 (counts as dc), ch 2, sk next 2 dc, dc in next dc, ch 2, sk next 2 dc, dc in top of tch. Turn. (3 dc + 2 ch-2 sps = 7 sts; 2 meshes)
Rows 3–19 (mesh rows): Ch 5 (counts as dc + ch 2), sk ch-2 sp, dc in next dc, ch 2, sk next ch-2 sp, dc in 3rd ch of tch. Turn. (3 dc + 2 ch-2 sps = 7 sts per row; 2 meshes)
Rows 2–19 make 18 mesh rows. That gives 36 open squares per strip, arranged in 2 columns.
Row 20 (solid row): Ch 3 (counts as dc), 2 dc in next ch-2 sp, dc in next dc, 2 dc in next ch-2 sp, dc in 3rd ch of tch. (7 sts) Do not fasten off yet. Go straight on to the edging.
Strip check: 7 sts wide, 20 rows long, 1.75 in (4.4 cm) × 10 in (25.4 cm).
The solid Rows 1 and 20 give firm ends that gather neatly. The center dc in each mesh row lines up from row to row, so it forms the visible center rib of every strip.
Strip Edging (Border)
The edging firms up the long sides so each strip keeps a clean, defined edge as it twists. The edging is worked along the two long edges only. The short ends stay at 7 sts each because they get gathered, so the edging has no corners.
Border gauge: 2 sc in each dc row-end. At 2 rows per 1 in (2.5 cm), that gives 4 sc per 1 in (2.5 cm), which exactly matches the sc gauge of 16 sc = 4 in (10.2 cm).
Long edge 1: Continuing from Row 20, ch 1. Rotate the strip so you can work down the long side. Work 2 sc in each row-end, from Row 20 down to Row 1. Fasten off. (20 rows × 2 sc = 40 sc)
Long edge 2: With RS facing, join the same color at the Row 1 end of the opposite long side. Ch 1, then work 2 sc in each row-end up to Row 20. Fasten off. (40 sc)
Why the math works: 40 sc ÷ 4 sc per inch = 10 in (25.4 cm), which equals the strip’s length. The edging won’t ruffle or pull. Each side adds 0.125 in (0.3 cm), so the strip goes from 1.75 in (4.4 cm) to 2 in (5.1 cm) wide.
Pre-block each strip: Pin it flat to 2 in × 10 in (5.1 cm × 25.4 cm), mist it, and let it dry. The meshes should be square and open.
Make All Pieces
- Sage green strips: 3
- Cream strips: 3
- Chain cord: 1, in sage green (see Joining)
- Tassel: 1, in mixed sage and cream (see Finishing)
Ring layout, viewed from above (going clockwise):
AROUND: GREEN CREAM GREEN CREAM GREEN CREAM
Every strip sits between two strips of the other color, so the colors alternate in the spiral without any extra planning.
Joining
Method: You gather both ends of the strips with a running stitch, then hold their shape with a central core cord.
Step 1 – Top gather. Lay the six strips side by side in the ring order, with RS up and the Row 20 ends at the top. Cut a 20 in (50.8 cm) strand of sage. Use a tapestry needle to pass it through each of the 7 Row 20 sts of each strip in turn. That’s 6 strips × 7 sts = 42 sts on the strand.
Step 2 – Close the top ring. Bring the first and last strips together so the six strips form a tube. Pull the strand firmly until the 42 sts bunch into a tight ring about 0.5 in (1.3 cm) across. Tie a square knot and leave the tails.
Step 3 – Bottom gather. Repeat at the Row 1 ends: thread the strand through the 7 foundation sts of each strip (42 sts total). Before you pull it closed, turn the bottom ring half a turn (180°) relative to the top. Each strip now spirals from its top position to the opposite side of the ring. Pull tight and knot.
Stitch-to-stitch logic: The ring holds exactly 7 sts per strip on each end. As long as you work every strip from the same side (RS out), the strips will be spaced evenly and the colors will alternate cleanly.
Step 4 – Chain cord. With sage, ch 116, which should measure about 29 in (73.7 cm) at 4 ch per inch. Fasten off.
Step 5 – Thread the core. Fold the cord in half to form a 4 in (10.2 cm) hanging loop. Hold both legs together and thread them down through one wooden bead. Push them through the center of the top gather and straight down through the inside of the ornament. Then bring them out through the center of the bottom gather and through the second bead.
Step 6 – Set the height. Slide the gathers along the cord until the distance between the top gather and the bottom gather is 7 in (17.8 cm). The 10 in (25.4 cm) strips now bow outward into the spiral. Tie the gather tails around the cord legs above and below the body so nothing slides. Tie an overhand knot in the cord legs just under the bottom bead.
Tension advice: Pull the gathers firmly but don’t overtighten the cord. If the cord is pulled too short, the strips will crumple. If it is left too long, the spiral will flatten.
Size checkpoint: The body should be 7 in (17.8 cm) tall and about 3.5 in (8.9 cm) wide. In the spiral, the strips partly turn on edge, so the width is less than the 12 in (30.5 cm) of combined strip width divided around a circle.
Tassel
- Wrap 12 strands of sage and 12 strands of cream around the 4.5 in (11.4 cm) cardboard. Each strand is 9 in (22.9 cm) long.
- Cut the strands at one edge. Fold the bundle in half over the cord legs just below the knot.
- Wrap a 12 in (30.5 cm) strand of sage tightly around the bundle 0.5 in (1.3 cm) below the fold, about 6 times. Tie it off and hide the ends inside the tassel.
- Trim the tassel so it hangs 4 in (10.2 cm) below the wrap. Trim the cord legs so they are hidden inside the tassel.
Final Blocking
- Mist the whole ornament lightly until it is damp, not soaking.
- Hang it by the loop from a hook or hanger.
- Shape each strip with your fingers so it bows outward evenly and lies smoothly along its spiral path.
- Rotate the ornament and check that the six strips are spaced evenly around it.
- Comb the tassel straight with your fingers.
- Let it dry completely while hanging, about 6–12 hours.
- Check the measurements once more: body 7 in (17.8 cm) × 3.5 in (8.9 cm), total length 16.5 in (41.9 cm).
Final Quality-Control Checklist
- Each strip has 7 sts per row and 20 rows.
- Each strip has 36 open meshes in 2 straight columns.
- Each long edge has 40 sc.
- Each strip measures 2 in × 10 in (5.1 cm × 25.4 cm).
- Colors alternate all the way around: green, cream, green, cream, green, cream.
- Each gather holds 42 sts and is tightly knotted.
- The spiral turns half a turn from top to bottom.
- The body is 7 in (17.8 cm) tall.
- Both beads sit snugly against the gathers.
- The tassel is even, about 4 in (10.2 cm) long.
- All tails are woven in or hidden.
Troubleshooting
Strips curl lengthwise. Block them flat before assembly. If they still curl, your edging is too tight. Redo it with a slightly looser hand.
Edging ruffles. You worked more than 2 sc per row-end. Recount: there should be 40 sc per side.
Meshes look like rectangles, not squares. Your dc is too tall for your width. Pull up a little less on each dc, or go down a hook size.
Spiral looks flat or saggy. The core cord between the gathers is longer than 7 in (17.8 cm). Shorten it and retie.
Strips bunch or kink. The cord is pulled too short. Let it out to 7 in (17.8 cm).
Beads slide. Add an extra knot under the bottom bead, or wrap the gather tails around the cord above the top bead.
Gap in the color pattern. One strip was flipped or placed in the wrong order. Undo that gather and rethread it in the ring layout order.
Care
Hand wash in cool water, press out the water gently, and reshape. Dry hanging. If the ornament hangs outdoors, keep it out of heavy rain so the cotton and wooden beads last longer.
Final Notes
The measurement chain is short and reliable. Gauge is 4 sts and 2 rows per 1 in (2.5 cm), so a 7-st, 20-row strip measures 1.75 in × 10 in (4.4 cm × 25.4 cm). The 40-sc edging brings each strip to 2 in (5.1 cm) wide. Six strips gather into 42 sts at each end, and they spiral half a turn over a 7 in (17.8 cm) core. With the loop, beads, and tassel, the finished ornament hangs 16.5 in (41.9 cm) long.
Make one, or make a set in different color pairs for a window full of slowly turning swirls.
Happy crocheting!