

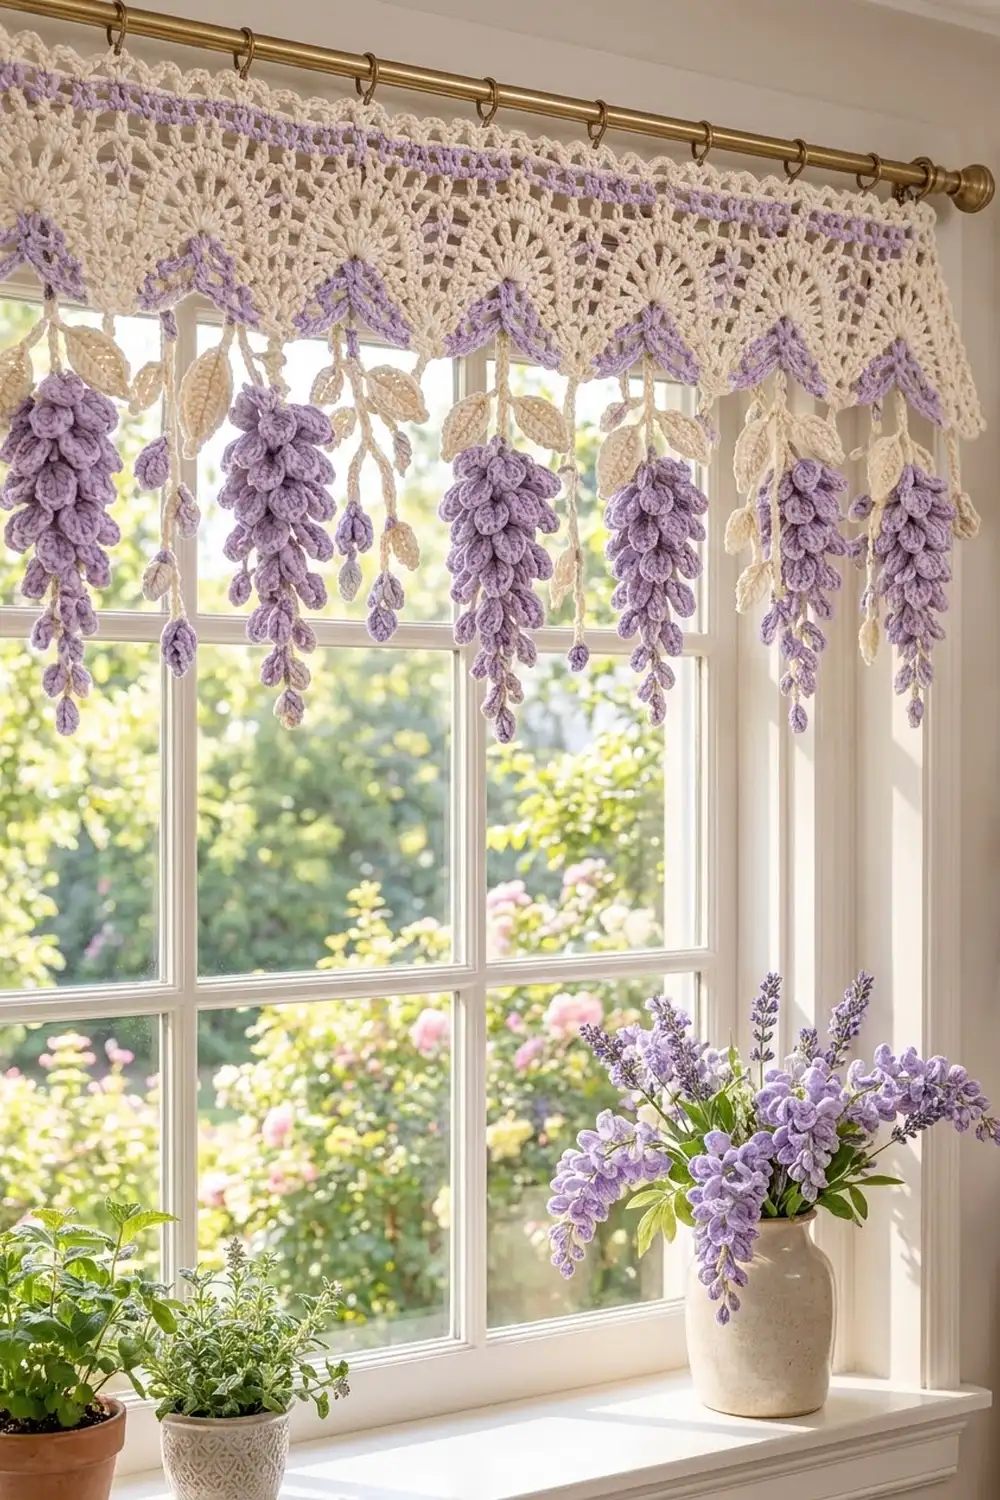
This valance is a soft, garden-inspired window topper. It has a cream lace header with spoked fan points and a crisp lavender chevron line along the bottom edge. Wisteria drops hang from the edge, alternating long flower clusters with short budding sprigs.
It uses two colors. Warm cream is for the lace, stems, and leaves. Soft lavender is for the flowers, a stripe near the top, and the outline along the points. The look is cottage-romantic, and the construction is carefully controlled.
All instructions use US crochet terms. The finished valance is 36¾ in (93.3 cm) wide. The header is 5½ in (14.0 cm) deep to the point tips, and the long drops reach 16¼ in (41.3 cm) below the top edge.
You crochet one header band in rows: first a straight section, then nine fan triangles. A lavender border goes around the whole header, and a cream picot row trims the points. Then you make the clusters, stems, and leaves separately and sew them on.
Finished Size and Construction
- Finished size: 36¾ in (93.3 cm) wide × 16¼ in (41.3 cm) tall, including drops
- Skill level: Intermediate
- Terminology: US crochet terms
- Yarn weight: DK / light (#3) cotton
- Hook: 4.0 mm (G-6)
- Number of pieces: 69 (1 header, 9 large clusters, 8 bud sprays, 17 stems, 34 leaves)
- Layout: 9 points with long drops alternating with 8 valleys with short drops
- Piece size: triangle base 3¾ in (9.5 cm), triangle depth 2¼ in (5.7 cm); long drop 10¾ in (27.3 cm); short drop 7 in (17.8 cm)
- Size before border: 36¼ × 4¾ in (92.1 × 12.1 cm)
- Border depth: ¼ in (0.6 cm) on the top and sides, ½ in (1.3 cm) along the points
Materials
Use a smooth, combed or mercerized DK cotton. Cotton keeps the fans crisp and helps the petals hold their cupped shape. The amounts below assume about 115 m per 50 g ball.
- Cream: 150 g, about 345 m (header, stems, leaves, picot trim)
- Lavender: 100 g, about 230 m (stripe, border, clusters, bud sprays)
These amounts include a margin of about 20 percent for swatching and tails.
Tools: 4.0 mm (G-6) hook, tapestry needle, scissors, 10 stitch markers, measuring tape, blocking mats, rust-proof pins, spray bottle, and 10 café clip rings for hanging.
Abbreviations (US Terms)
- ch – chain
- sl st – slip stitch
- sc – single crochet
- hdc – half double crochet
- dc – double crochet
- dc3tog / dc5tog – double crochet 3 (or 5) stitches together
- st(s) – stitch(es); sp – space; sk – skip; RS – right side
Special stitches:
- 2-dc cluster: (yarn over, insert hook, pull up a loop, yarn over, pull through 2 loops) twice in the same st, then yarn over and pull through all 3 loops.
- Small petal: (ch 2, 2-dc cluster, ch 2, sl st) in the same ch.
- Medium petal: (ch 2, 3 dc, ch 2, sl st) in the same ch.
- Large petal: (ch 2, 5 dc, ch 2, sl st) in the same ch.
- Picot: ch 3, sl st in the front loop and left leg of the last sc made.
Gauge and Checkpoints
Gauge: 18 dc and 10 dc rows = 4 in (10.2 cm) on a 4.0 mm hook.
Test one piece first. Make a swatch of 18 dc for 10 rows, then make one complete long drop: one cluster, one long stem, and two leaves.
Checkpoints:
- Swatch: 4 × 4 in (10.2 × 10.2 cm)
- Header Row 1: 163 sc = 36¼ in (92.1 cm)
- After Row 7: the straight section is 2½ in (6.4 cm) deep
- Each triangle: 3¾ in (9.5 cm) at the base, 2¼ in (5.7 cm) deep
- Header before border: 36¼ × 4¾ in (92.1 × 12.1 cm)
- Header after border: 36¾ × 5½ in (93.3 × 14.0 cm)
- Leaf: 1¾ in (4.4 cm) long, ¾ in (1.9 cm) wide
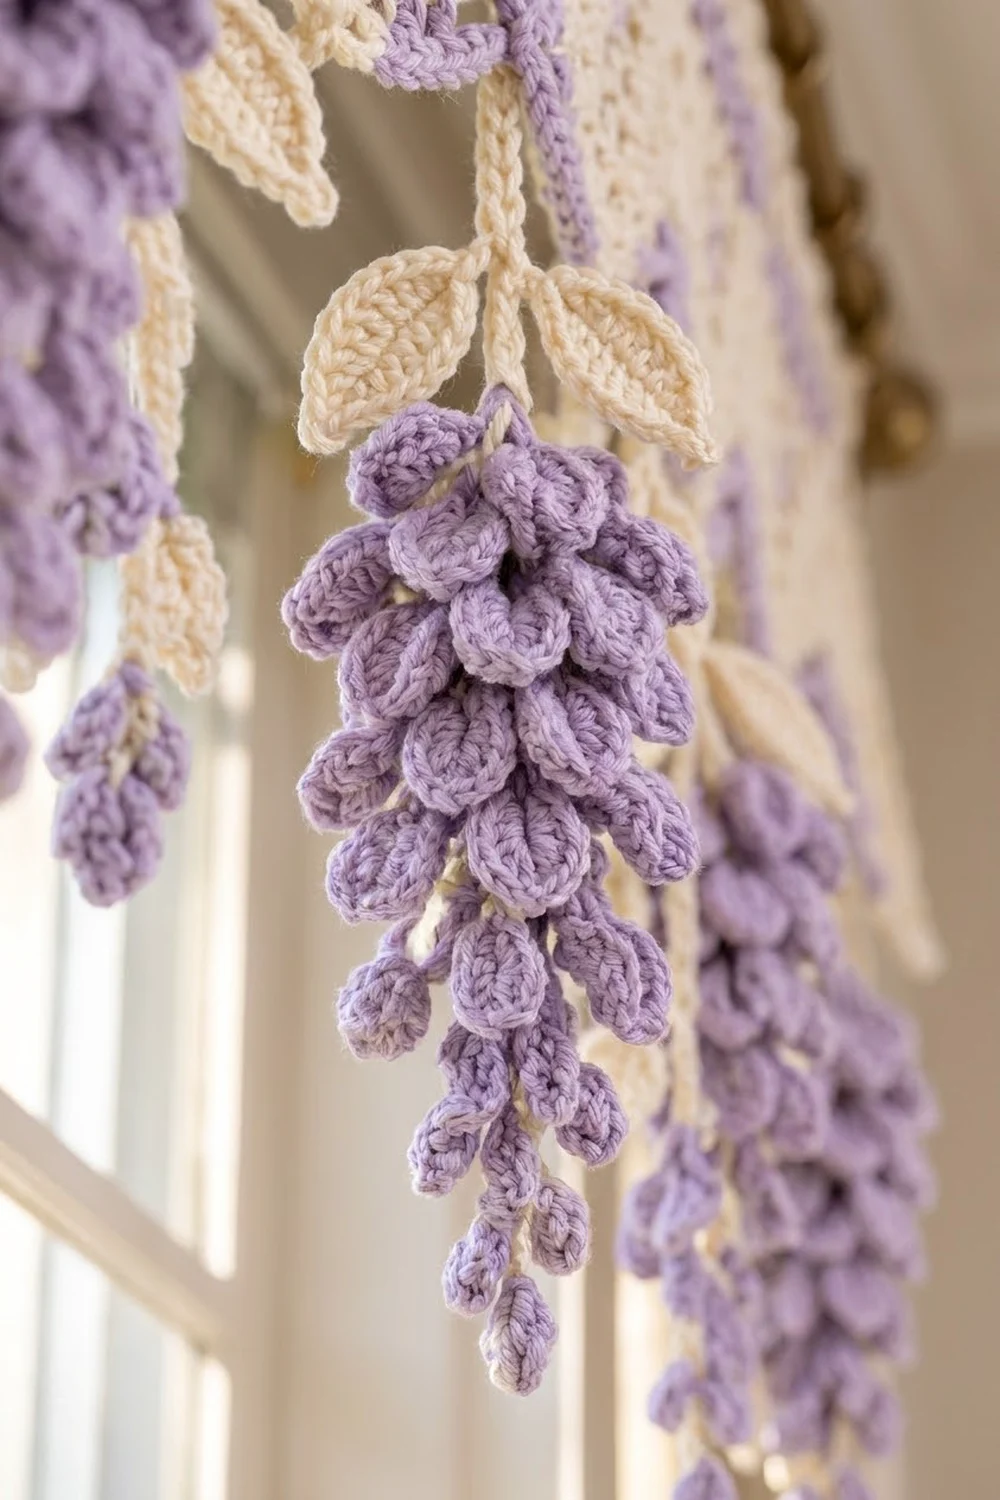
- Large cluster: 7 in (17.8 cm) long, about 2 in (5.1 cm) wide at the top
Too big? Use a hook 0.5 mm smaller. Too small? Use a hook 0.5 mm larger. Fix your gauge before you start the header. Being off by one stitch per 4 in (10.2 cm) changes the width by about 2 in (5.1 cm).
Header
Work the header flat in rows. Row 3 is lavender; every other row is cream. Fasten off at each color change, leaving 6 in (15.2 cm) tails.
Foundation: With cream, ch 164.
Row 1: Sc in 2nd ch from hook and in each ch across, turn. (163 sc)
Row 2: Ch 3 (counts as dc), dc in each st across, turn. (163 dc)
Row 3 (lavender): Ch 1, sc in each st across, turn. (163 sc)
Row 4 (cream): Ch 3 (counts as dc), dc in each st across, turn. (163 dc)
Row 5 (shell row): Ch 1, sc in first st, sk 2, 5 dc in next st, sk 2, sc in next st; rep from * 26 more times, turn. (27 shells and 28 sc: 27 × 5 + 28 = 163 sts)*
Row 6 (spoke row): Ch 5 (counts as dc + ch 2), sc in 3rd dc of next shell, ch 2, dc in next sc, ch 2; rep from * across, ending the last repeat at , turn. (28 dc, 27 sc, 54 ch-2 sps)*
Row 7 (conversion row): Ch 1, sc in first dc, 2 sc in next ch-2 sp, sc in next sc, 2 sc in next ch-2 sp, sc in next dc; rep from * 26 more times. (1 + 27 × 6 = 163 sc)* Fasten off.
Checkpoint: 36¼ × 2½ in (92.1 × 6.4 cm).
Fan Triangles
Row 7 divides as 1 end st + 9 × (17-st triangle + 1 valley st) = 163. The 9th “valley st” is the far end st. Place markers in st 1, sts 19, 37, 55, 73, 91, 109, 127, 145, and st 163. Leave these 10 marked sts unworked.
Each triangle is worked over the 17 sts between two markers. With RS facing, join cream in the first st after a marker.
Row T1 (fan): Ch 1, sc in same st, sk 7, in next st work (dc, ch 2) 6 times, then dc; sk 7, sc in next st, turn. (2 sc, 7 dc, 6 ch-2 sps)
Row T2: Sl st in first sc and first dc, ch 3 (counts as dc), dc in next ch-2 sp, dc in next dc; rep from * 5 more times, turn. Leave the end sc unworked. (13 dc)*
Row T3: Ch 2 (does not count), dc3tog over first 3 sts, dc in next 7 sts, dc3tog over last 3 sts, turn. (9 sts)
Row T4: Ch 2, dc3tog, dc in next 3 sts, dc3tog, turn. (5 sts)
Row T5: Ch 2, dc5tog. (1 st, the point) Fasten off.
Repeat for all 9 triangles. The spokes in Row T1 create the openwork fan, and Rows T3–T5 narrow the solid center to a sharp point. Checkpoint: 36¼ × 4¾ in (92.1 × 12.1 cm).
Drops
Leaf (make 34, cream)
Leave a 6 in (15.2 cm) starting tail; this end is the leaf base.
Ch 8. Sc in 2nd ch from hook, hdc in next ch, dc in next 3 ch, hdc in next ch, 3 sc in last ch (base). Rotate the leaf. Working in the other side of the chain: hdc in next ch, dc in next 3 ch, hdc in next ch, sc in next ch. Ch 2, sl st in first sc (tip). (15 sts + ch-2 tip) Fasten off.
Long Stem (make 9, cream)
Ch 18. Sl st in back bump of 2nd ch from hook and in each ch across. (17 sl st) Length: 3¾ in (9.5 cm).
Short Stem (make 8, cream)
Ch 22. Sl st in back bump of 2nd ch from hook and in each ch across. (21 sl st) Length: 4¾ in (12.1 cm).
Large Cluster (make 9, lavender)
Ch 31. The last ch you made is the tip; the first ch is the top.
Side A (tip to top, in back bumps): Sl st in 2nd ch from hook. Small petal in next ch, sl st in next ch; rep from * 3 more times (4 small). Medium petal in next ch, sl st in next ch; rep from * 4 more times (5 medium). Large petal in next ch, sl st in next ch; rep from * 4 more times (5 large)*. Work (sl st, ch 1, sl st) in the last ch (top).
Side B (top to tip, in free loops): Large petal in next ch, sl st in next ch; rep from * 4 more times (5 large)*. Work medium petals the same way 5 times, then small petals 4 times. Sl st in next ch, then work a small petal in the tip ch. Fasten off.
Total: 29 petals (10 large, 10 medium, 8 small, 1 tip bud). The Side B petals sit between the Side A petals, so they overlap and layer. The cluster measures 7 in (17.8 cm).
Bud Spray (make 8, lavender)
Ch 11. Small petal in 2nd ch from hook (tip bud), sl st in next ch, small petal in next ch; rep from * 3 more times, sl st in last ch. (5 small petals)* Fasten off. Length: 2¼ in (5.7 cm).
Make All Pieces
Cream: 1 header (with lavender Row 3), 9 long stems, 8 short stems, 34 leaves.
Lavender: 9 large clusters, 8 bud sprays.
Layout grid (left to right):
POSITION: P1   V1    P2   V2    P3   V3    P4   V4    P5   V5    P6   V6    P7   V7    P8   V8    P9
DROP:     LONG SHORT LONG SHORT LONG SHORT LONG SHORT LONG SHORT LONG SHORT LONG SHORT LONG SHORT LONG
P = point (long stem, 2 leaves, large cluster). V = valley (short stem, 2 leaves, bud spray). That gives 9 long drops and 8 short drops.
Border
The border uses the same gauge as the body, 18 sc = 4 in (10.2 cm), so it lies flat.
Round 1 (lavender, RS facing): Join in the first free loop of the foundation chain.
- Top: 3 sc in first loop, sc in next 161 loops, 3 sc in last loop. (163 + 4 = 167 sc)
- Side: Across the ends of Rows 1–7, work 1 sc in each sc row-end (Rows 1, 3, 7 = 3 sc) and 2 sc in each dc row-end (Rows 2, 4, 5, 6 = 8 sc). (11 sc)
- Bottom: 3 sc in the marked end st. 10 sc down the triangle’s first slant (2 sc per row-end of T1–T5), 3 sc in the point st, 10 sc up the second slant, sc in the marked valley st; rep from * 8 more times, ending the last repeat at . 3 sc in the marked end st on the far side. (3 + 9 × 23 + 8 + 3 = 221 sc)*
- Side: As the first side. (11 sc)
Sl st to first sc. Total: 167 + 11 + 221 + 11 = 410 sc. Fasten off. The 3-sc points and single-sc valleys form the sharp lavender chevron.
Row 2 (cream, bottom edge only): Join in the first sc of the bottom corner group. Sc in each of the 3 corner sc. [Sc in next 2 sts, picot] 5 times, sc in next st, sc in next st, picot, sc in next st, [sc in next 2 sts, picot] 5 times, sc in valley sc; rep from * 8 more times, ending the last repeat at . Sc in each of the last 3 corner sc. Fasten off. (221 sc + 99 picots, 11 per triangle)*
Why the math works: Each slant has 5 row-ends × 2 sc = 10 sc, which is exactly five 2-st picot repeats. The 3 point sc center a tip picot. The valley sc stays plain so a stem can attach there.
Joining
Sew with the cream tails and a tapestry needle, going through both loops of each stitch.
- Leaves to stems: On each long stem, sew 2 leaves by their bases 1 in (2.5 cm) below the top, one on each side. On each short stem, sew the leaves 1½ in (3.8 cm) and 3 in (7.6 cm) below the top, on alternating sides.
- Flowers to stems: Sew the top ch of each cluster to the bottom of a long stem with 3 small stitches. Attach each bud spray to the bottom of a short stem the same way.
- Drops to header: Sew each long stem to the center sc of a point’s 3-sc group from Round 1, just behind the tip picot. Sew each short stem to a valley sc. Follow the layout grid.
Stitch logic: Each drop attaches to one exact stitch. The points are 4 in (10.2 cm) apart, and the short drops fall exactly halfway between them.
Tension: Sew snugly but not tightly; if a point gets pulled downward, loosen the stitches. Give each cluster a half twist before sewing it on so the petals spiral.
Size checkpoint: Lay the valance flat. The long drop tips should sit 16¼ in (41.3 cm) below the top edge, and the short drop tips about 10¼ in (26.0 cm) below it.
Final Blocking
- Pin the header face down to 36¾ × 5½ in (93.3 × 14.0 cm).
- Pin each point sharp and spread each fan’s spokes evenly.
- Check that the points are 4 in (10.2 cm) apart and level.
- Spray until damp and let dry completely.
- Pin the leaves flat and mist them.
- Mist the clusters lightly and pinch each petal into a cup with your fingers. Don’t pin the clusters.
- Once everything is dry, clip on the 10 café rings evenly, about 4 in (10.2 cm) apart.
Final Quality-Control Checklist
- Row 1 has 163 sc and measures 36¼ in (92.1 cm).
- All 9 triangles end in a single st.
- Border Round 1 totals 410 sc.
- Row 2 has 99 picots.
- There are 9 long drops and 8 short drops, placed as in the grid.
- Each cluster has 29 petals.
- All 34 leaves are sewn on at the base.
- Finished size is 36¾ × 16¼ in (93.3 × 41.3 cm).
- All tails are woven in.
Troubleshooting
- Shell rows ruffle: Use a hook one size smaller for Rows 5–6 only.
- Fans cup: Block more firmly, or add 1 ch to each ch-2 sp in T1.
- Blunt points: Check that each point has 3 sc and a centered picot.
- Flat clusters: Make sure Side A uses the back bumps and Side B the free loops, then add a half twist.
- Tilted drops: Re-sew the stem centered on its stitch.
Care
Hand wash in cold water with mild soap and roll in a towel to remove water. Dry flat, reshaping the points and petals as it dries.
Final Notes
Here is how the measurements connect. A gauge of 18 sts = 4 in (10.2 cm) gives 163 sts = 36¼ in (92.1 cm). Those 163 sts split into 9 triangles of 17 sts plus 10 single valley and end sts. Each triangle gets 23 border sts, and the border adds ½ in (1.3 cm) to the width. That brings the header to 36¾ × 5½ in (93.3 × 14.0 cm). With the drops attached, the valance is 16¼ in (41.3 cm) tall.
If each checkpoint matches, the valance will hang straight, with the wisteria falling in an even rhythm.
Happy crocheting!