

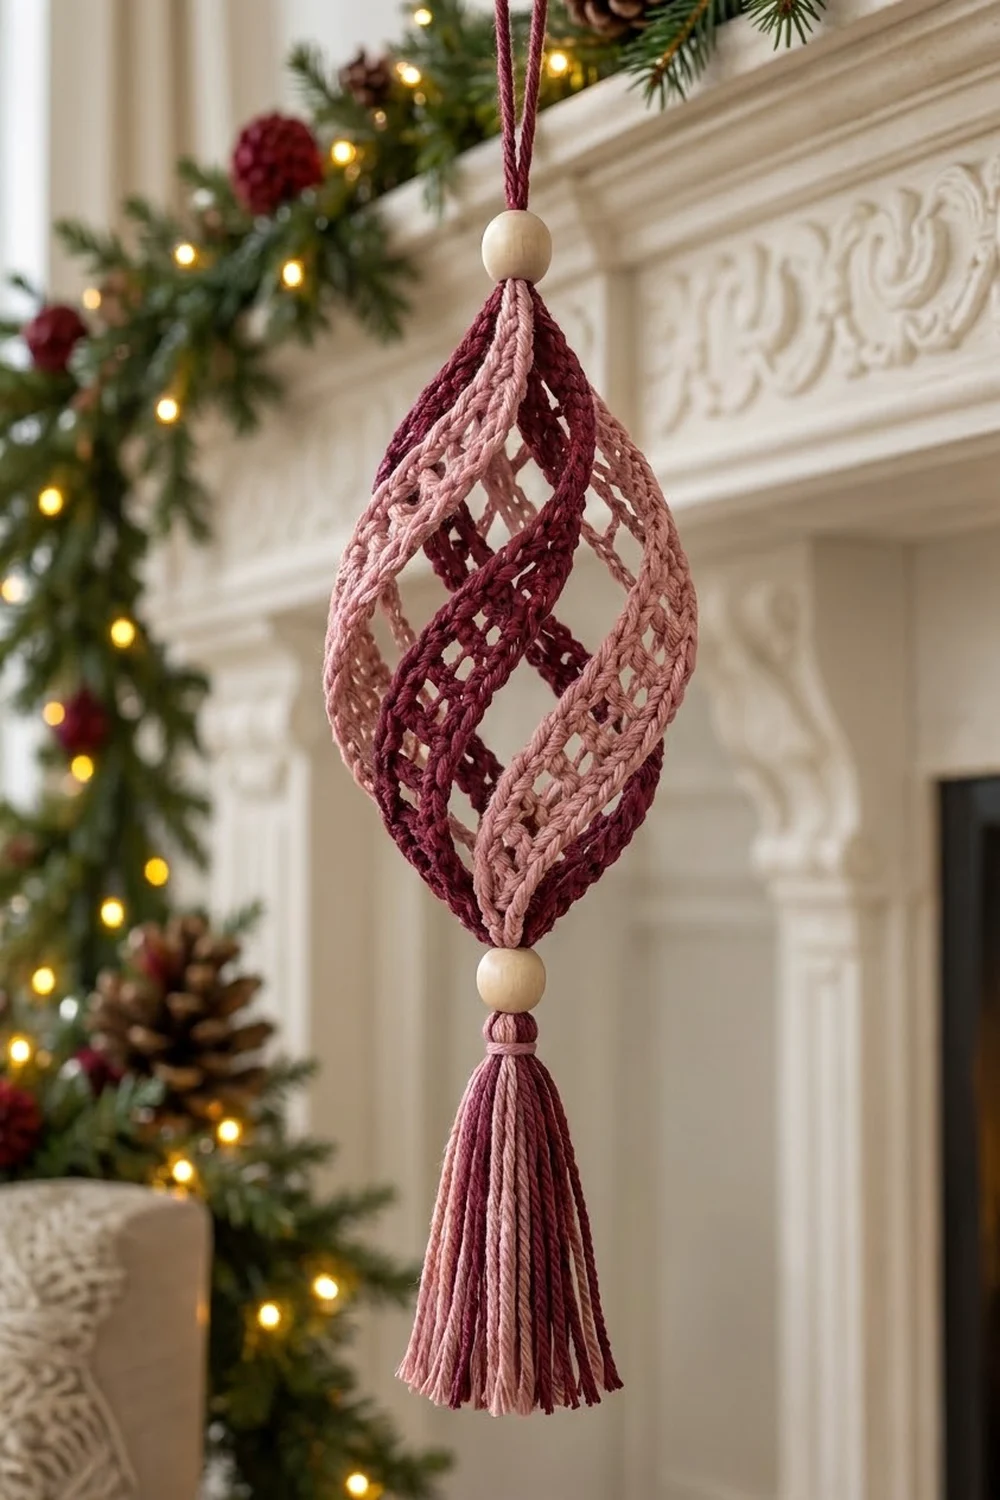
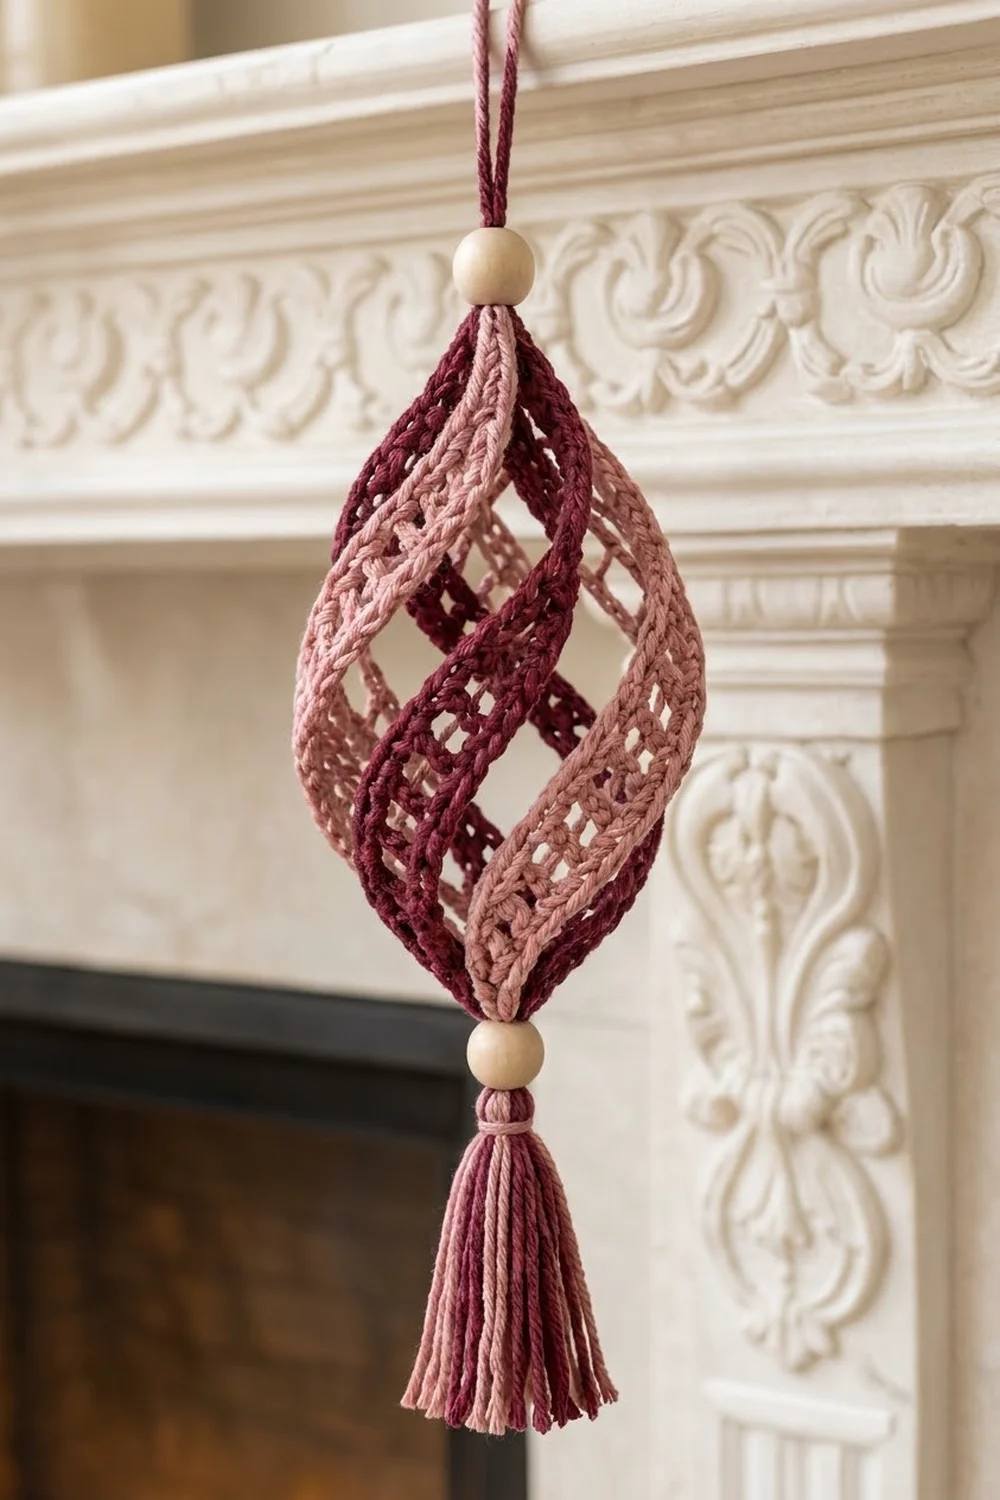
The Mulled Berry Spiral Ornament is a hanging holiday decoration made from six slim lace strips. The strips are gathered at the top and bottom, then twisted, so they curve around each other and form an open spiral teardrop. Light passes through the honeycomb mesh, and the solid single crochet edges give every strip a clean, rope-like outline.
The palette is two-tone: three strips in dusty rose and three in deep burgundy, set in alternating order. A natural wooden bead sits above and below the body. A two-color tassel hangs from the bottom and a doubled cord loop runs from the top. It looks soft and vintage, which suits a mantel, a tree, or a window.
The pattern uses US crochet terms. The ornament body measures 6.5 in (16.5 cm) tall and 3.5 in (8.9 cm) wide at its widest point. With beads and tassel, it hangs about 12 in (30.5 cm), not counting the 3 in (7.6 cm) hanging loop.
Construction is simple. You crochet six flat strips lengthwise, add a two-round border to each one, gather all six at the top, twist the bottom ends a half turn and gather them, then stiffen the ornament over a balloon. The beads, loop, and tassel go on last.
Finished Size and Construction
- Finished size: body 6.5 in (16.5 cm) tall × 3.5 in (8.9 cm) wide; about 12 in (30.5 cm) total hanging length, plus a 3 in (7.6 cm) loop
- Skill level: Intermediate (the stitches are easy; the shaping takes care)
- Terminology: US crochet terms
- Yarn weight: DK / light (#3) cotton
- Hook: 3.5 mm (E-4)
- Number of pieces: 6 strips (3 in Color A, 3 in Color B), plus a tassel and a hanging loop
- Layout: strips gathered in a ring, alternating A B A B A B, with a half-turn twist
- Piece size (bordered strip): 9.4 in × 1.4 in (23.9 cm × 3.6 cm)
- Size before border: 9 in × 1 in (22.9 cm × 2.5 cm)
- Border depth: about 0.2 in (0.5 cm) on each side
Materials
Pick a smooth, mercerized or combed cotton in DK weight. Cotton holds a crisp shape after stiffening and shows the mesh clearly. Acrylic also works but will droop unless you stiffen it well. Avoid fuzzy or brushed yarn, because the holes will fill in.
Yarn:
– Color A, dusty rose: 20 g, about 48 m (52 yd)
– Color B, deep burgundy: 20 g, about 48 m (52 yd)
These amounts cover three strips, half the tassel, and the gathering strands for each color, with the hanging loop worked in Color B. They include a margin of about 25% for gauge swatches and differences in tension.
Tools and notions:
– 3.5 mm (E-4) crochet hook
– Tapestry needle
– Scissors
– 1 wooden bead, 20 mm, with a hole big enough for four strands of yarn (top)
– 1 wooden bead, 16 mm, with a hole big enough for the tassel tie (bottom)
– Stiff card cut to 3.5 in (8.9 cm) wide, for the tassel
– Fabric stiffener, or white PVA glue mixed 1:1 with water
– A small round balloon
– Rust-proof pins, a blocking mat, and a measuring tape
Abbreviations (US Terms)
- ch – chain
- sc – single crochet
- sl st – slip stitch
- st(s) – stitch(es)
- sk – skip
- sp – space
- rep – repeat
- rnd – round
Special stitch – ch-3 mesh: Chain 3, skip the stitches or space given, then sc in the next stitch or space. Every ch-3 counts as 3 stitches when you count stitches in a row. That’s why each mesh row adds up to the same 45 as the solid rows.
Gauge and Checkpoints
Gauge: 20 sc = 4 in (10.2 cm) in sc worked in rows, which is 5 sc per inch (2.5 cm).
Make one complete strip before you make the other five. Check it at each stage:
- Checkpoint 1 (after Row 1): 45 sc measure 9 in (22.9 cm).
- Checkpoint 2 (after Row 5): the strip is 9 in × 1 in (22.9 cm × 2.5 cm).
- Checkpoint 3 (after the border): the strip is 9.4 in × 1.4 in (23.9 cm × 3.6 cm), lies flat, and has crisp corners.
If your strip is too long, go down to a 3.25 mm (D-3) hook. If it’s too short, go up to a 3.75 mm (F-5) hook. Being off by 0.25 in (0.6 cm) is fine, as long as all six strips match each other. Matching strips matter more than exact gauge, because uneven strips make a lopsided spiral.
Strip Pattern (Make 6)
Each strip is worked in rows along its length. Turn at the end of every row. The ch 1 at the start of a row never counts as a stitch.
Foundation: Ch 46.
Row 1 (solid edge): Sc in 2nd ch from hook and in each ch across, turn. (45 sc)
Row 2 (mesh): Ch 1, sc in first sc, ch 3, sk 3 sc, sc in next sc; rep from * 10 more times, turn. (12 sc + 11 ch-3 sps = 45 sts)*
Row 3 (offset mesh): Ch 1, sc in first sc, ch 1, sc in next ch-3 sp, ch 3, sc in next ch-3 sp; rep from * 9 more times, ch 1, sc in last sc, turn. (13 sc + 10 ch-3 sps + 2 ch-1 = 45 sts)*
Row 3 moves the holes half a repeat over, which gives you the honeycomb look. The two ch-1 sts make half-holes at each end of the strip.
Row 4 (mesh realigned): Ch 1, sc in first sc, ch 3, sc in first ch-3 sp, ch 3, sc in next ch-3 sp; rep from * 8 more times, ch 3, sc in last sc, turn. (12 sc + 11 ch-3 sps = 45 sts)*
Now the holes line up with Row 2 again, so you get two staggered rows of openings in all.
Row 5 (solid edge): Ch 1, sc in first sc, 3 sc in next ch-3 sp, sc in next sc; rep from * 10 more times. (1 + 44 = 45 sc)*
Don’t fasten off. Go straight on to the border (see the Border section) and finish each strip completely before you start the next one.
Checkpoint: 5 rows, 45 sts in every row, 9 in × 1 in (22.9 cm × 2.5 cm).
Make All Pieces
Make 6 strips in total, each with the border:
- Color A (dusty rose): 3 strips
- Color B (deep burgundy): 3 strips
Before joining, check that all six strips match within 0.25 in (0.6 cm) in length. Steam the strips flat now if they curl.
Text layout grid (the order around the ring, seen from above):
TOP RING:    A  B  A  B  A  B
BOTTOM RING: A  B  A  B  A  B   (rotated a half turn)
Strips of the same color never sit next to each other.
Joining
Method: gather each end with a running stitch.
Top gather: Cut an 18 in (45.7 cm) strand of Color B and thread it on a tapestry needle. Lay the strips side by side, right side up, in the order A B A B A B. Working along the short ends, pass the needle through each of the 5 short-end sc of the first strip, then through the 5 short-end sc of the next strip, and so on. When you’re done, you have gone through 6 × 5 = 30 sts.
Pull the strand until the ring closes to about 0.5 in (1.3 cm) across. Tie a firm square knot, but don’t cut the tails. You’ll use them for the top bead.
Stitch-to-stitch logic: Each short end contributes exactly the 5 border sc worked into its 5 row ends. Every strip carries the same weight in the gather, so the strips fan out evenly.
Shaping the body: Push a balloon up inside the strips and blow it up to about 3.5 in (8.9 cm) across. Then tie it off. Hold the bottom ends together and turn them a half turn (180°) clockwise. The strips will lean into a spiral.
Bottom gather: Using a second 18 in (45.7 cm) strand of Color B, gather the 30 bottom short-end sts in the same A B A B A B order, keeping the half-turn twist. Pull the strand closed to 0.5 in (1.3 cm) and knot it.
Tension advice: Pull both gathers equally tight. A loose gather lets the strips slide around and the spiral goes uneven.
Size checkpoint: From gather to gather, the body should be 6.5 in (16.5 cm) tall. If it’s taller, deflate the balloon slightly. If it’s shorter, inflate it more. The width should come to 3.5 in (8.9 cm).
Border
The border is worked on each strip right after Row 5, before you join anything. Without it, the strips would have loose row ends. It also gives every strip the same short-end count for the gathers.
Border gauge: 5 sts per inch (2.5 cm), matching the strip.
Corner rule: On each side, the first and last sc are that side’s corner stitches. The ch-1 at each corner is a turning space and isn’t counted as a stitch.
Rnd 1 (sc): Ch 1, do not turn.
– Long side 1: sc in each st of Row 5. (45 sc)
– Ch 1 for the corner.
– Short end 1: sc in the end of each row. (5 sc)
– Ch 1 for the corner.
– Long side 2: sc in each ch along the other side of the foundation ch. (45 sc)
– Ch 1 for the corner.
– Short end 2: sc in the end of each row. (5 sc)
– Ch 1, join with sl st to the first sc.
– Total: 100 sc + 4 corner ch-1.
Rnd 2 (sl st): Sl st in each sc around, and ch 1 over each corner ch-1 sp. (45 + 5 + 45 + 5 = 100 sl st + 4 corner ch-1). Fasten off and weave in the ends.
Why the math works: Each long side gets 1 sc per stitch. The 45 sc sit in exactly 9 in (22.9 cm) at 5 per inch, so the edge doesn’t ruffle or pull. On the short ends, 5 rows measure 1 in (2.5 cm), and 1 sc per row end at 5 per inch fits that exactly. The 45-stitch length works because 45 = (4 × 11) + 1, the multiple the ch-3 mesh needs. The slip stitch round adds firmness but no width, which helps the strips keep their curve after stiffening.
Final Blocking
- Make sure the balloon is still holding the body at 6.5 in × 3.5 in (16.5 cm × 8.9 cm).
- Adjust the strips so they’re evenly spaced. Each one should spiral the same amount.
- Thin fabric stiffener as the label directs, or mix PVA glue 1:1 with water.
- Brush or dab the stiffener onto every strip. Soak it into the solid edges and the gathers.
- Blot off any extra with a paper towel. Poke a pin through any mesh holes that have filmed over.
- Hang the ornament by the top tails and let it dry for 24 hours.
- Pop the balloon and pull it out between two strips.
Finish the top: Cut two 18 in (45.7 cm) strands of Color B. Fold them in half and knot the fold to the top gather. Thread all four strands up through the 20 mm bead, then knot them about 3 in (7.6 cm) above the bead to make the loop. Trim the ends to 0.5 in (1.3 cm).
Tassel: Wrap Color A and Color B together 20 times around the 3.5 in (8.9 cm) card. Slide an 8 in (20.3 cm) strand of Color B under the wraps at the top and tie it tight. Cut the wraps along the bottom edge. Wrap a 10 in (25.4 cm) strand of Color A around the tassel 0.5 in (1.3 cm) below the top and tie it off. Thread the top tie up through the 16 mm bead and knot it to the bottom gather. Trim the tassel evenly to 3.5 in (8.9 cm).
Final Quality-Control Checklist
- [ ] All six strips have 45 sts per long side and 5 sts per short end.
- [ ] Each strip measures 9.4 in × 1.4 in (23.9 cm × 3.6 cm) after the border.
- [ ] The colors alternate A B A B A B all the way around.
- [ ] Both gathers hold all 30 sts and close to 0.5 in (1.3 cm).
- [ ] The body is 6.5 in (16.5 cm) tall and 3.5 in (8.9 cm) wide.
- [ ] The spiral twists the same way and the same amount on every strip.
- [ ] No mesh holes are filled with dried stiffener.
- [ ] The loop is 3 in (7.6 cm) and the tassel is 3.5 in (8.9 cm).
- [ ] The ornament hangs straight without tilting.
Troubleshooting
The strips are different lengths. Your tension changed between strips. Remake any strip that’s off by more than 0.25 in (0.6 cm). Don’t try to stretch it.
The holes look closed or uneven. Make sure every ch-3 is a full 3 chains, and that you skip exactly 3 sc in Row 2.
The strip curls lengthwise. That’s normal for long, narrow pieces. Steam it flat before joining, and the stiffener will fix any curl that’s left.
The spiral is lopsided. Undo the bottom gather, space the strips out evenly, and check the half turn again before you redo it.
The ornament sags after drying. Put on a second coat of stiffener with a balloon inside.
The tassel is messy. Steam it, comb the strands straight, then trim again.
Care
Dust it gently with a soft brush and keep it somewhere dry. Don’t wash it, because water will soften the stiffener. If it loses its shape, stiffen it again over a balloon.
Final Notes
Here’s the measurement chain from start to finish: 20 sc = 4 in (10.2 cm) gives you a 45-sc foundation of 9 in (22.9 cm). Five rows make a 1 in (2.5 cm) wide strip. The border brings each strip to 9.4 in × 1.4 in (23.9 cm × 3.6 cm). Six strips gather to 30 sts at each end. With a half-turn twist, they shape into a 6.5 in × 3.5 in (16.5 cm × 8.9 cm) spiral body. With beads and tassel, the ornament hangs about 12 in (30.5 cm). If your strips match at the first checkpoint, the rest of the ornament will follow.
Make a few in both colorways and hang them at different heights for a full holiday display.
Happy crocheting!