

The Plum Tulip Cascade is a lacy door curtain made of ten hanging strands. Each strand repeats the same short sequence of motifs: a three-petal tulip bud, a small rosette, and an open chain diamond. A bulb-headed tassel finishes the bottom of each strand.
The whole curtain uses one rich plum yarn. Using a single color lets the shapes stand out: the vein texture of the petals, the airy chain diamonds, and the scalloped lace header with pointed triangles along its lower edge. The style is part boho and part cottage.
The pattern uses US crochet terms. The finished curtain measures 30.2 in (76.7 cm) wide and 52 in (132.1 cm) long, measured from the top of the header to the tassel tips.
You’ll make all the pieces separately. First you crochet the header band, then 40 tulips, 40 rosettes, 40 diamonds, and 10 tassels. Short chain connectors join each strand together and hang it from a header triangle. The last step is a top edging with 11 hanging tabs for curtain rings.
Finished Size and Construction
- Finished size: 30.2 in (76.7 cm) wide × 52 in (132.1 cm) long
- Skill level: Intermediate
- Terminology: US
- Yarn weight: DK (3), mercerized cotton
- Hook: 3.5 mm (E-4)
- Number of pieces: 131 (1 header, 40 tulips, 40 rosettes, 40 diamonds, 10 tassels)
- Layout: 10 strands, each with 4 repeat units plus a tassel
- Piece sizes: tulip 3.5 in (8.9 cm) wide × 5 in (12.7 cm) tall including loops; rosette 1.25 in (3.2 cm); diamond 1.75 in (4.4 cm) point to point; tassel 4 in (10.2 cm)
- Header before edging: 30.2 in (76.7 cm) wide × 3 in (7.6 cm) deep at the points
- Edging depth: 0.4 in (1.0 cm), plus 1 in (2.5 cm) hanging tabs
Materials
Yarn: Use a smooth mercerized DK cotton. It shows the stitch detail clearly, and its weight helps the strands hang straight. Avoid fuzzy yarns, because they blur the petal veins.
- Plum (one color only): 550 g / 1,265 m (1,383 yd). That’s about 11 balls of 50 g / 115 m.
The estimated breakdown is: header 45 g, tulips 200 g, diamonds 80 g, rosettes 40 g, tassels 40 g, and connectors 40 g. These quantities already include a margin of about 20%.
Tools:
– 3.5 mm (E-4) hook
– Tapestry needle
– Scissors
– Stitch markers
– 4.5 in (11.4 cm) cardboard for the tassels
– 10 wooden beads, 0.5 in (1.3 cm), for the tassel heads
– 11 curtain rings and a rod
– Rust-proof pins, a blocking mat, and a spray bottle
Abbreviations (US Terms)
- ch – chain
- sl st – slip stitch
- sc – single crochet
- hdc – half double crochet
- dc – double crochet
- tr – treble crochet
- sk – skip
- sp – space
- st(s) – stitch(es)
- RS – right side
Leaf petal (special stitch): Ch 11. Work along the chain, starting in the 2nd ch from the hook: sc, hdc, dc, dc, tr, tr, dc, dc, hdc, sc (10 sts). Sl st into the base point. Now rotate and work along the free loops of the same chs back toward the tip: hdc, dc, dc, tr, tr, dc, dc, hdc, sc (9 sts). Finish the tip in the skipped first ch as instructed (21 sts total, plus the tip loop). The two halves meet down the middle of the petal to form the raised center vein.
Gauge and Checkpoints
Gauge: 20 sc × 22 rows = 4 in (10.2 cm). In practice, 5 sc measure 1 in (2.5 cm), and 1 ch is about 0.2 in (0.5 cm).
Before you start the header, make one tulip, one rosette, and one diamond as a test.
Checkpoints:
– Tulip: 3.5 in (8.9 cm) across the side petals and 5 in (12.7 cm) tall, from the top of the top loop to the bottom of the lower stem loop.
– Rosette: 1.25 in (3.2 cm) across.
– Diamond: 1.75 in (4.4 cm) from the top point to the bottom point.
– Header after Row 3: 30.2 in (76.7 cm) wide and 0.8 in (2.0 cm) deep.
If your pieces are too big, go down 0.25 mm in hook size. If they’re too small, go up 0.25 mm. Every 0.25 in (0.6 cm) of extra length per unit adds 1 in (2.5 cm) to each strand, so check your gauge before mass-producing pieces.
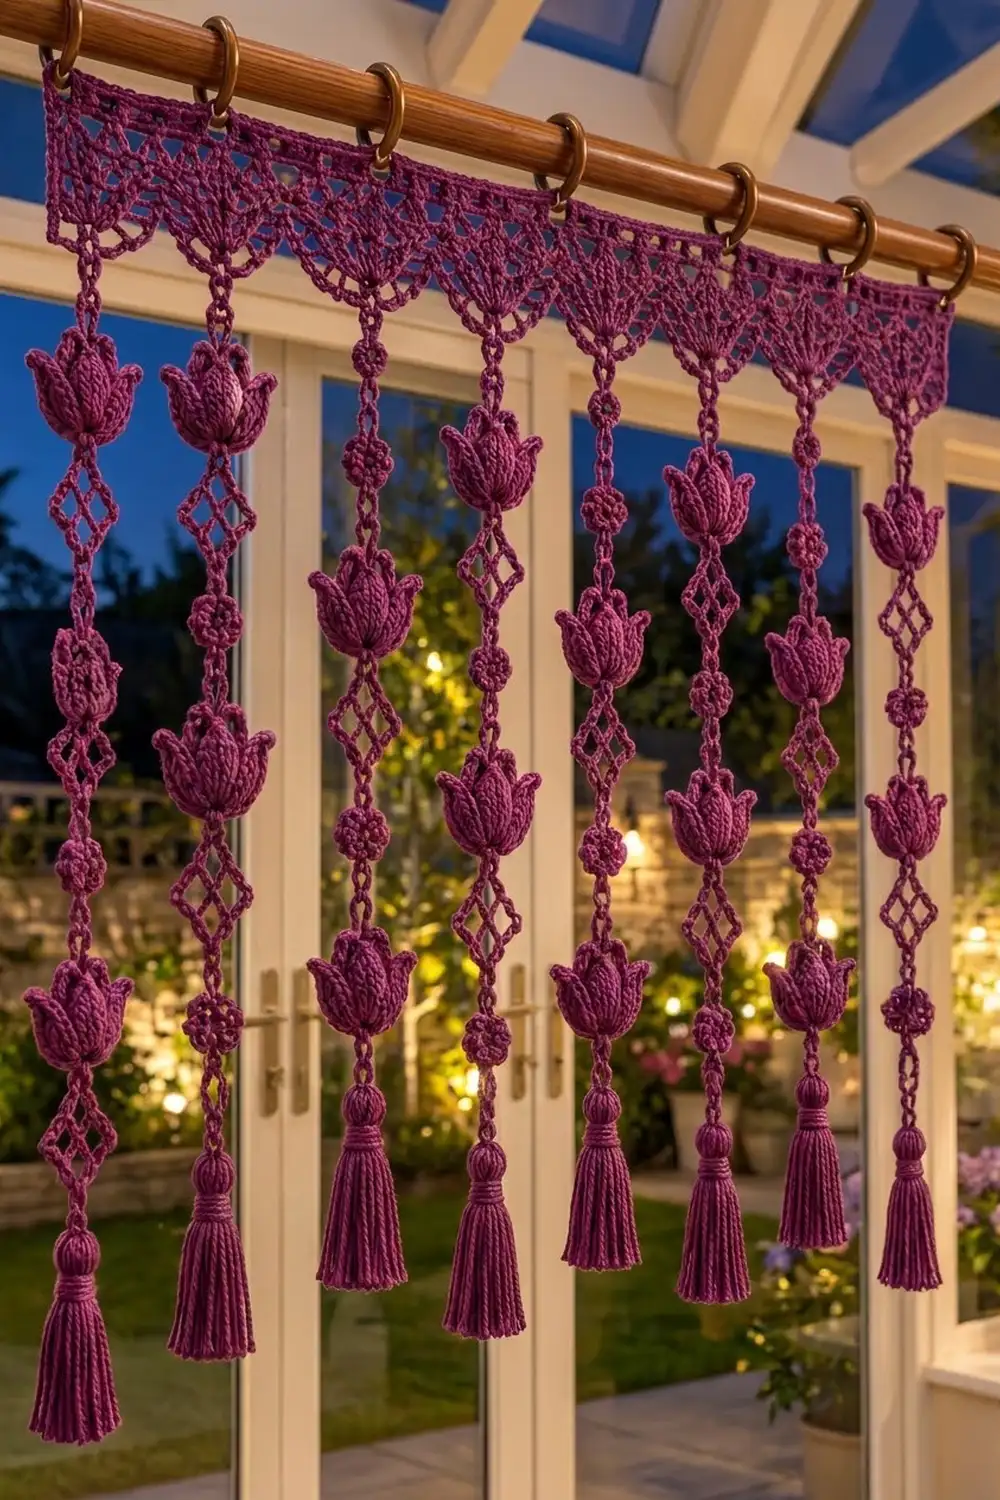
Header Band
Foundation: Ch 152.
Row 1: Sc in the 2nd ch from the hook and in each ch across. Turn. (151 sc)
Row 2: Ch 1, sc in each st across. Turn. (151 sc)
Row 3 (arch row): Ch 1, sc in the first st. Ch 3, sk 2, sc in next st; repeat from * 50 times. Turn. (51 sc and 50 ch-3 arches)
The 151 sts divide into 10 repeats of 15 sts, plus 1. Each repeat gives you 5 arches, which become the base of one triangle.
Checkpoint: The header measures 30.2 in (76.7 cm) wide and 0.8 in (2.0 cm) deep.
Triangles (make 10, worked over 5 arches each)
Row 4: Sl st in the next 2 ch to reach the center of the first arch. Ch 1, sc in the same arch. Ch 3, sc in the next arch; repeat from * 4 times. Turn. (4 arches)
Row 5: Sl st in the next 2 ch, ch 1, sc in the same arch. Ch 3, sc in the next arch; repeat from * 3 times. Turn. (3 arches)
Row 6: Work as for Row 5, but repeat from * 2 times. Turn. (2 arches)
Row 7: Work as for Row 5, but repeat from * 1 time. Turn. (1 arch)
Row 8 (tip): Sl st in the next 2 ch, ch 1. Work (2 sc, ch 4, 2 sc) in the arch. Fasten off. (4 sc and 1 ch-4 tip loop)
To start the next triangle, keep the same side facing and join the yarn in the center ch of the next unused Row 3 arch. Repeat Rows 4–8. Every triangle uses exactly 5 base arches, so the 10 triangles take up all 50 arches.
Checkpoint: The header is 3 in (7.6 cm) deep at the points, and the points are 3 in (7.6 cm) apart.
Tulip Motif (make 40)
Stem ring A: Ch 8, then sl st in the first ch to form a ring. The top of this ring is the junction point, J.
Left petal: Work a leaf petal from J. At the tip, work (sc, ch 3, sc) in the skipped ch. Ch 12, then sl st in J. Lay this outline chain along the outer edge of the petal.
Center petal: Work a leaf petal from J. At the tip, work (sc, ch 10, sc) in the skipped ch. The ch-10 forms the top hanging loop. Ch 12, then sl st in J. This chain wraps around the side of the center petal.
Right petal: Work as for the left petal.
Lower stem loop B: Sl st in the next 4 ch of ring A to reach its bottom. Ch 10, then sl st in the same ch. Fasten off.
Stitch count: 3 petals × 21 sts. There are 3 outline loops of ch-12 each, a ch-10 top loop, and two stem loops (ring A = ch-8, B = ch-10). Rings A and B together make the figure-eight below the bud.
Shaping: Fold each side petal forward about 45°. Tack it to the base of the center petal with one stitch. This creates the cupped bud that you see when the curtain hangs.
Rosette (make 40)
Rnd 1: Make a magic ring. Ch 1, then work 10 sc in the ring. Sl st to the first sc. (10 sc)
Rnd 2: Work (sc, hdc, dc, hdc, sc) in the next st, then sl st in the next st; repeat from * 5 times. (30 sts: 25 petal sts + 5 sl sts)
Fasten off. One petal’s dc is the top. The sl st between the 3rd and 4th petals, counting from the top, sits directly opposite it and is the bottom.
Diamond Link (make 40)
Rnd 1: Ch 20, then sl st in the first ch to form a ring. (20 ch)
Rnd 2: Ch 1. Work (sc, ch 2, sc) in the next ch, then sc in each of the next 4 ch; repeat from * 4 times. Sl st to the first sc. (24 sc and 4 ch-2 corners)
Each side has 6 sc: 4 side sc plus 1 sc from each corner. The four corners sit at chs 1, 6, 11, and 16.
Crossbar: Sl st across to the next ch-2 corner (the right corner). Ch 7, then sl st in the left ch-2 corner. Fasten off.
When the link hangs from its top corner, it sits as a diamond with a horizontal bar across the middle.
Tassels (make 10)
- Wrap the yarn 30 times around the 4.5 in (11.4 cm) card.
- Tie the top with a 10 in (25.4 cm) strand, and leave the ends long.
- Slip the bead in below the tie, centered inside the wraps.
- Wrap the yarn 6 times just below the bead to make the neck, and knot it.
- Cut the bottom loops and trim the tassel to 4 in (10.2 cm), including the head.
Make All Pieces
All pieces are plum.
| Piece | Per strand | Total |
|---|---|---|
| Header | — | 1 |
| Tulip | 4 | 40 |
| Rosette | 4 | 40 |
| Diamond | 4 | 40 |
| Tassel | 1 | 10 |
Strand layout (top to bottom):
Header tip (ch-4 loop)
   | connector
TULIP -> | -> ROSETTE -> | -> DIAMOND -> |   (unit 1)
TULIP -> | -> ROSETTE -> | -> DIAMOND -> |   (unit 2)
TULIP -> | -> ROSETTE -> | -> DIAMOND -> |   (unit 3)
TULIP -> | -> ROSETTE -> | -> DIAMOND -> |   (unit 4)
TASSEL
Header layout:
[ T1 ][ T2 ][ T3 ][ T4 ][ T5 ][ T6 ][ T7 ][ T8 ][ T9 ][ T10 ]
   |     |     |     |     |     |     |     |     |     |
  S1    S2    S3    S4    S5    S6    S7    S8    S9    S10
Joining
Method: Chain-5 connectors. Each connector is 1 in (2.5 cm) long. Join the yarn with a sl st into the lower piece’s top point, ch 5, then sl st into the upper piece’s bottom point. Fasten off and weave in the ends.
Point-to-point logic:
– Header ch-4 tip loop → tulip ch-10 top loop
– Tulip loop B → rosette top dc
– Rosette bottom sl st → diamond top ch-2 corner
– Diamond bottom ch-2 corner → next tulip top loop, or the tassel’s top tie on the last unit
Each strand uses 13 connectors: 1 at the top plus 3 per unit. The tassel’s top tie ends go through the last connector chain and are knotted.
Tension: Keep the connector chains firm and even. Loose chains stretch under the weight of the motifs, and the strands will end up different lengths.
Size checkpoint: One unit (tulip, rosette, and diamond plus 3 connectors) measures 5 + 1.25 + 1.75 + 3 = 11 in (27.9 cm). Four units measure 44 in (111.8 cm). Adding the 1 in (2.5 cm) top connector and the 4 in (10.2 cm) tassel gives a strand of 49 in (124.5 cm). The 3 in (7.6 cm) header brings the total to 52 in (132.1 cm).
Border: Top Edging and Hanging Tabs
Border gauge: 5 sc = 1 in (2.5 cm), the same as the header.
Row 1: With the RS facing, join the yarn at the top right corner. Ch 1, then sc in each free loop of the foundation chain. (151 sc)
Row 2: Ch 1. Work (sc, ch 6, sc) in the 1st st. Sc in each of the next 14 sts, then (sc, ch 6, sc) in the next st; repeat from * 10 times. (151 sc worked 1 per stitch + 11 extra sc = 162 sc, plus 11 ch-6 tabs)
Fasten off.
Why the math works: 151 = 10 × 15 + 1. With one tab every 15 sts, the tabs land on sts 1, 16, 31, and so on up to 151. That places one tab at each outer edge and one at every valley between triangles. The tabs are 3 in (7.6 cm) apart, and none of them sits over a strand. The edging adds no width, because Row 1 is worked 1-to-1 into the 151 foundation loops.
Final Blocking
- Pin the header flat to the mat at 30.2 in (76.7 cm) wide. Pin each triangle tip down to 3 in (7.6 cm) deep.
- Spray the header until it’s damp, and leave it to dry completely.
- Hang each strand and mist it lightly. Hang a small clip from each tassel neck so the weight straightens the strand.
- Pinch the tulip side petals forward while they’re still damp so they keep their cupped shape.
- Let everything dry for 24 hours before you hang the curtain on the rings.
Final Quality-Control Checklist
- The header is 30.2 in (76.7 cm) wide and has 10 even triangles.
- Row 2 of the edging has 162 sc and 11 tabs.
- Each strand has 4 tulips, 4 rosettes, 4 diamonds, 13 connectors, and 1 tassel.
- All strands measure 49 in (124.5 cm), within 0.5 in (1.3 cm) of each other.
- Every tulip is 3.5 in (8.9 cm) wide, and its side petals are tacked.
- Every diamond hangs from a corner, with its crossbar horizontal.
- All tails are woven in on the back.
Troubleshooting
- Petals curl sideways: Work the tr sts on both halves at the same tension, and block the petals flat before shaping.
- Triangles lean: Check that each one is worked over exactly 5 Row 3 arches.
- Strands are uneven: Recount the connector chains (each should have 5), then re-block with clip weights.
- Diamonds twist: Join the connectors only into the ch-2 corners, never into side sc.
- Rosette hangs crooked: Attach the connectors to the top dc and to the opposite sl st.
- Tassel head is loose: Tighten the neck wraps and add 2 more turns.
Care
Hand wash in cool water and roll in a towel to remove excess water. Re-block the curtain by hanging it with light tassel weights until it’s dry.
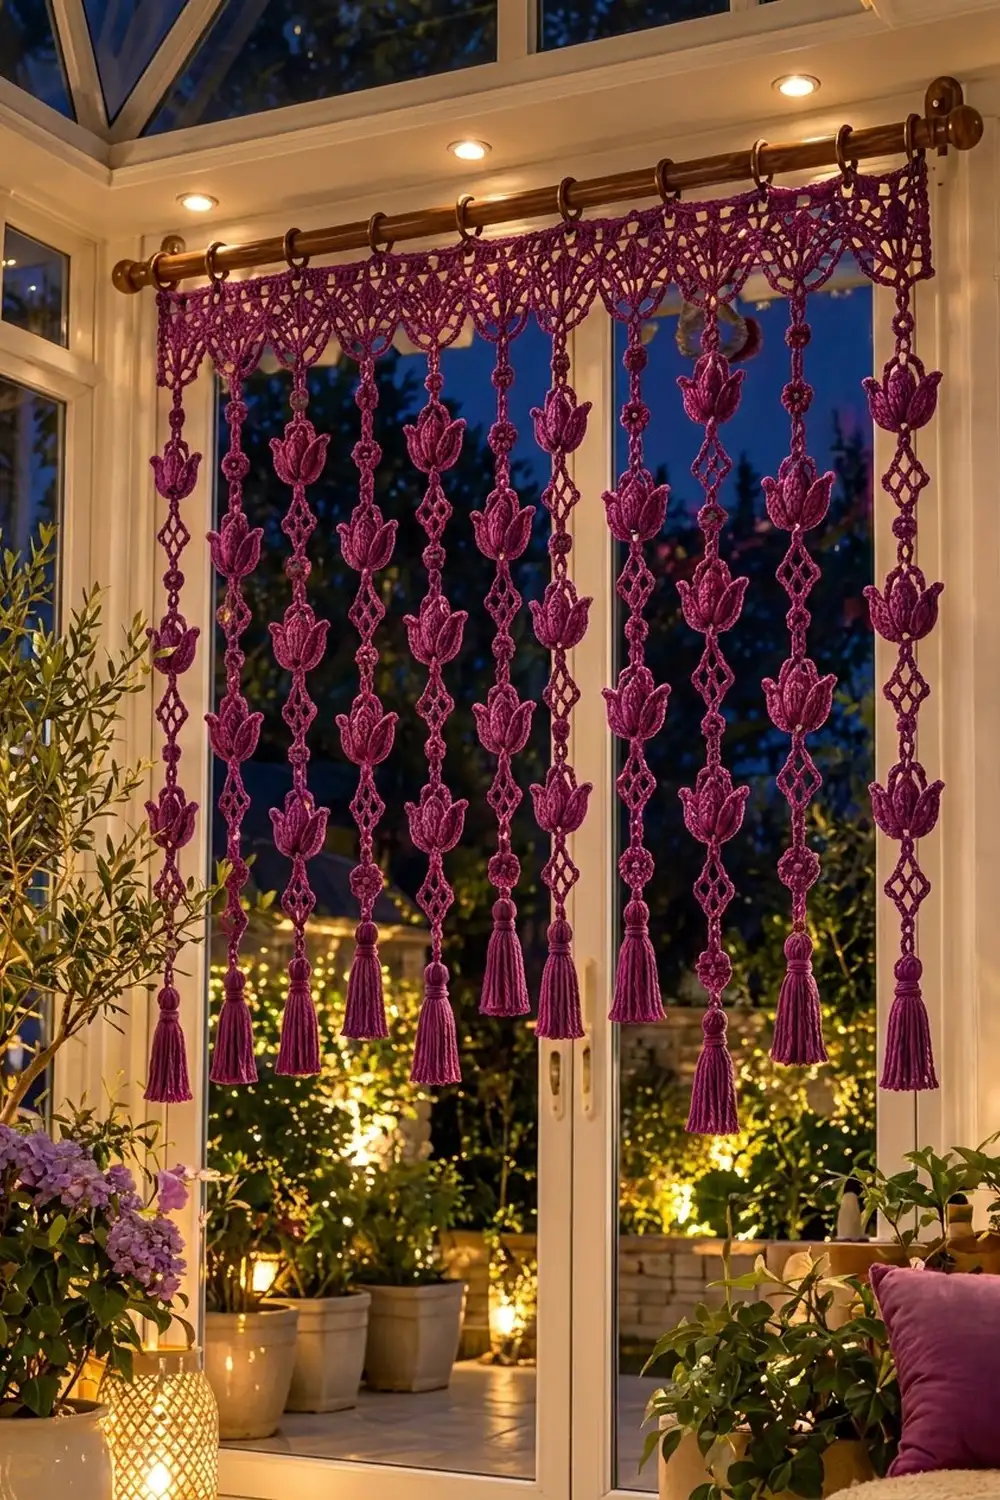
Final Notes
Everything in this curtain depends on a chain of measurements that starts with gauge. At 5 sc per 1 in (2.5 cm), the 151-stitch header measures 30.2 in (76.7 cm) wide, and 15-stitch repeats space the 10 triangles 3 in (7.6 cm) apart.
Each 11 in (27.9 cm) unit stacks four times. With the top connector and tassel, that gives a 49 in (124.5 cm) strand, and the header brings the curtain to 52 in (132.1 cm) overall. Check your first tulip, first unit, and first strand, and the rest will line up.
Happy crocheting!