

This curtain is a set of hanging columns of little crochet Christmas trees for a doorway. Each tree has a deep forest-green triangle with small open eyelets, a cream edging with round picots at the tip, the corners and along the sides, and a short ribbed cream trunk. Slim cream chain strands with small bobble “beads” link the trees and hang from a green valance with a picot edge.
The palette is just two colors: forest green and creamy ivory. With warm lights behind it, the eyelets and the pale edging catch the glow, and the curtain looks cozy and traditional.
This pattern uses US crochet terms. One finished tree is 4.75 in (12.1 cm) wide at the base, not counting picots, and 6 in (15.2 cm) tall including the trunk. The full curtain is 36 in (91.4 cm) wide and up to 62 in (157.5 cm) long.
Each tree body is worked flat in decreasing double crochet rows from the base up to the tip. You then edge it in cream and add the trunk. Finally, you crochet the valance and link the trees into seven staggered strands with beaded chains.
Finished Size and Construction
- Finished curtain: 36 in (91.4 cm) wide x 62 in (157.5 cm) at the longest strand
- Skill level: Intermediate
- Terminology: US
- Yarn weight: Worsted (#4)
- Hook: 4.5 mm (US 7)
- Number of pieces: 42 tree motifs, 1 valance, 7 linking strands
- Layout: 7 strands x 6 trees, with every other strand dropped half a step
- Piece size: 4.75 in (12.1 cm) wide x 6 in (15.2 cm) tall
- Tree body before border: 4.25 in (10.8 cm) wide x 4.5 in (11.4 cm) tall
- Border depth: 0.25 in (0.6 cm) per side, not counting picots
Materials
Worsted-weight cotton or a cotton blend works best. It keeps the eyelets crisp, gives sharp triangle edges, and does not sag when hung. Acrylic also works, but it may stretch a little under its own weight.
- Green (forest green): 250 g, approximately 450 m
- Cream (ivory): 200 g, approximately 360 m
Both quantities include a margin of about 15 percent for your test tree and for differences between yarn brands.
Tools:
– 4.5 mm (US 7) crochet hook
– Tapestry needle
– Scissors
– Stitch markers
– Rust-proof pins and a blocking board
– Tension rod or curtain rod up to 0.5 in (1.3 cm) in diameter
Abbreviations (US Terms)
- ch – chain
- sl st – slip stitch
- sc – single crochet
- dc – double crochet
- dc2tog – double crochet 2 together
- dc3tog – double crochet 3 together
- sk – skip
- st(s) – stitch(es)
- sp(s) – space(s)
- RS / WS – right side / wrong side
Special stitches
- Picot (p): ch 3, sl st in 3rd ch from hook.
- Bead: ch 3, then work a 4-dc bobble in the 3rd ch from hook. To make the bobble, repeat 4 times: yarn over, insert hook, pull up a loop, yarn over, pull through 2 loops. Then yarn over and pull through all 5 loops. Each bead adds about 0.5 in (1.3 cm) to a strand.
Gauge and Checkpoints
Gauge: 16 dc and 8 rows = 4 in (10.2 cm). Chain gauge: 4 ch = 1 in (2.5 cm).
Before making the rest, finish one whole tree, including the edging and trunk. Check it at these points:
- After Row 1: the 17 dc measure 4.25 in (10.8 cm).
- After Row 9: the body is 4.5 in (11.4 cm) tall from base to tip.
- After the border: the base edge measures 4.75 in (12.1 cm).
- After the trunk: the whole tree is 6 in (15.2 cm) tall.
If the tree is too big, go down one hook size. If it is too small, go up one size. Small errors add up here: being 0.25 in (0.6 cm) off per tree adds 1.5 in (3.8 cm) to each strand.
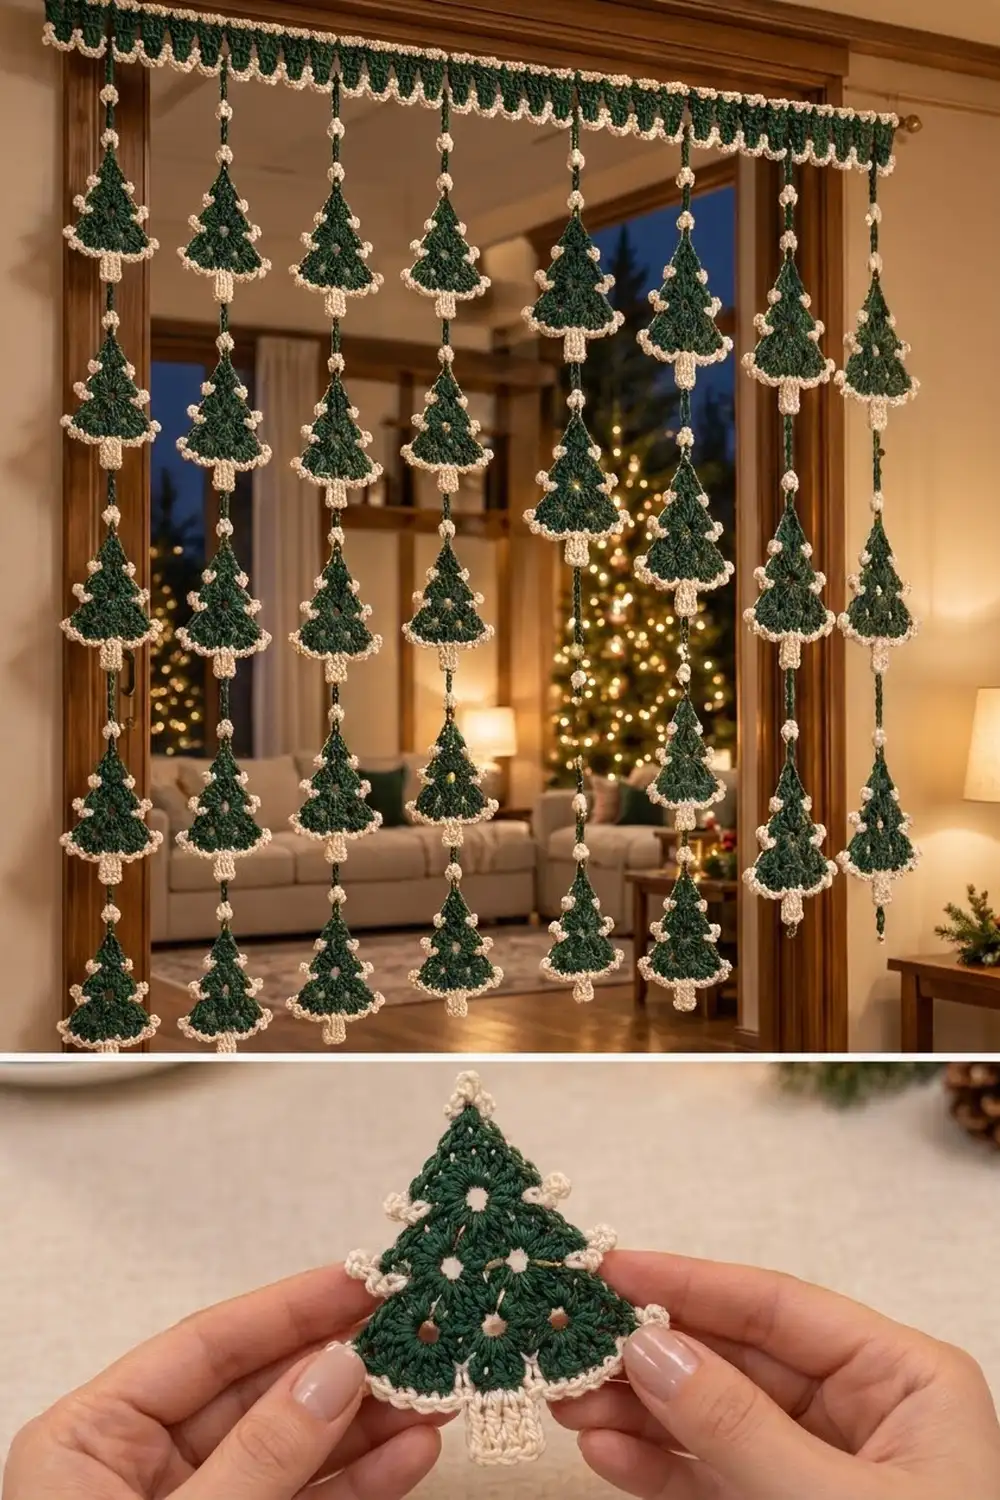
Tree Body (make 42, Green)
The ch 2 at the start of each row does not count as a stitch. Each eyelet’s ch-1 space counts as one stitch.
Row 1 (RS): Ch 19, dc in 3rd ch from hook and in each ch across. (17 dc)
Row 2: Ch 2, turn, dc2tog, dc in next 13, dc2tog. (15 sts)
Row 3 (eyelets): Ch 2, turn, dc2tog, dc in next 2, [ch 1, sk 1, dc in next 2] 3 times, dc2tog. (13 sts: 10 dc + 3 ch-1 sps)
Row 4: Ch 2, turn, dc2tog, dc in each st and ch-1 sp across to last 2 sts, dc2tog. (11 sts)
Row 5 (eyelets): Ch 2, turn, dc2tog, dc in next 2, ch 1, sk 1, dc in next st, ch 1, sk 1, dc in next 2, dc2tog. (9 sts: 7 dc + 2 ch-1 sps)
Row 6: Ch 2, turn, dc2tog, dc in next 5 sts and sps, dc2tog. (7 sts)
Row 7 (eyelet): Ch 2, turn, dc2tog, dc in next st, ch 1, sk 1, dc in next st, dc2tog. (5 sts: 4 dc + 1 ch-1 sp)
Row 8: Ch 2, turn, dc2tog, dc in next sp, dc2tog. (3 sts)
Row 9: Ch 2, turn, dc3tog. (1 st) Fasten off.
The eyelets are arranged 3, 2, 1 and follow the shape of the triangle. Each row loses one stitch at each end, so both sides slope evenly.
Batch tip: Make all 42 bodies first, then all the borders, then all the trunks. Working in batches keeps your tension steady. Lay each new tree on top of your checked first tree to compare.
Make All Pieces
- Green: 42 tree bodies and 1 valance
- Cream: 42 borders, 42 trunks, 1 valance edging, and 7 strands made of 49 link segments with 52 beads
Strand layout. A is a top link of 2 in (5.1 cm), B is a top link of 6.5 in (16.5 cm), and T is a tree.
Strand:  1   2   3   4   5   6   7
Top:     A   B   A   B   A   B   A
Tree 1   T   .   T   .   T   .   T
         .   T   .   T   .   T   .
Tree 2   T   .   T   .   T   .   T
         .   T   .   T   .   T   .
 ...  (repeat to 6 trees per strand)
Strands 2, 4 and 6 hang 4.5 in (11.4 cm) lower than the strands beside them. That is half of the 9 in (22.9 cm) repeat (one tree plus one link), so neighboring trees fit between each other instead of overlapping.
Valance (Green)
Row 1: Ch 146, dc in 3rd ch from hook and in each ch across. (144 dc)
Rows 2–6: Ch 2, turn, dc in each st across. (144 dc) Fasten off.
Checkpoint: 36 in (91.4 cm) wide x 3 in (7.6 cm) tall.
Rod channel: Fold Rows 5–6 to the WS. Whipstitch the top edge of Row 6 along the line between Rows 2 and 3. This leaves a 1 in (2.5 cm) channel, and 2 in (5.1 cm) of the valance shows on the front.
Border
Tree Edging (Cream)
Border gauge: 4 sc = 1 in (2.5 cm), which matches the dc gauge of 16 sts to 4 in.
– Sides: each dc row-end is 0.5 in (1.3 cm) tall, so 2 sc per row-end keeps the edge flat.
– Base: 1 sc per foundation ch keeps the edge flat.
Round 1: With RS facing, join cream in the top of Row 9.
– Top corner: ch 1, 3 sc in same st.
– First side: 2 sc in each row-end from Row 8 down to Row 1. (16 sc)
– Corner: 3 sc in first foundation ch.
– Base: sc in each of the next 15 foundation chs. (15 sc)
– Corner: 3 sc in last foundation ch.
– Second side: 2 sc in each row-end from Row 1 up to Row 8. (16 sc)
Sl st to first sc. (56 sc)
Per-side counts: The middle sc of each 3-sc group is the corner stitch. Counting both of its corners, each sloped side has 20 sts and the base has 19 sts. Each corner belongs to two sides, so 20 + 20 + 19 − 3 shared corners = 56.
Round 2:
– Top corner: ch 1, sc in first sc, (sc, p, sc) in corner sc, sc in next sc.
– First side: sc in next 4, (sc, p) in next, sc in next 5, (sc, p) in next, sc in next 5. (16 sc, 2 p)
– Corner: sc in next, (sc, p, sc) in corner sc, sc in next.
– Base: sc in next 15. (15 sc)
– Corner: sc in next, (sc, p, sc) in corner sc, sc in next.
– Second side: sc in next 5, (sc, p) in next, sc in next 5, (sc, p) in next, sc in next 4. (16 sc, 2 p)
Sl st to first sc. (59 sc = 56 worked one per stitch + 1 extra at each of 3 corners; 7 picots) Fasten off.
The side picots sit at Rows 6 and 3 and mirror each other on the two sides, marking the tree’s tiers.
Trunk (Cream)
Row 1: Turn the tree upside down with the RS facing. Join cream in the 6th of the 15 base sc. Ch 2, dc in same st and in next 4. (5 dc)
Row 2: Ch 2, turn, dc in each st. (5 dc) Fasten off.
Trunk size: 1.25 in (3.2 cm) wide x 1 in (2.5 cm) tall.
Valance Edging (Cream)
Row 1: Join cream in the first foundation ch on the bottom edge. Ch 1, sc in each ch. (144 sc)
Row 2: Ch 1, turn, [sc in next 3, (sc, p) in next] 36 times. (144 sc, 36 picots) Fasten off.
There is a picot every 1 in (2.5 cm). With the edging, 2.5 in (6.4 cm) of the valance shows.
Joining
How to work each link:
1. Join cream with a sl st.
2. Chain the link.
3. Sl st through the top picot of the tree below and the top-corner sc under it.
4. Fasten off.
Going through both layers keeps the picot from stretching.
Strand positions: Attach strands at the 3rd, 8th, 13th, 18th, 23rd, 28th and 33rd valance picots. That puts them 5 in (12.7 cm) apart, with 3 in (7.6 cm) left at each end.
- Top link A (strands 1, 3, 5, 7): ch 6, bead. Length 2 in (5.1 cm).
- Top link B (strands 2, 4, 6): ch 6, bead, ch 10, bead, ch 6. Length 6.5 in (16.5 cm).
- Tree-to-tree link: join in the center (3rd) dc of the trunk’s Row 2. Ch 5, bead, ch 5. Length 3 in (7.6 cm).
- Tail: from the last trunk, ch 6, bead. Length 2 in (5.1 cm). Fasten off.
Keep your chains relaxed and even, and don’t let them twist. Tight chains make the strand shorter and the trees hang crooked.
Size checkpoint:
– Strands 1, 3, 5 and 7: 2 + (6 x 6) + (5 x 3) + 2 = 55 in (139.7 cm)
– Strands 2, 4 and 6: 6.5 + 36 + 15 + 2 = 59.5 in (151.1 cm)
– Longest drop including the valance: 2.5 + 59.5 = 62 in (157.5 cm)
Final Blocking
- Weave all ends into the cream edging so they don’t show from either side.
- Spray each tree with water until it is damp but not soaked.
- Pin it to 4.75 in (12.1 cm) across the base and 6 in (15.2 cm) tall.
- Pin the three point picots, then the four side picots, so they sit round and flat.
- Pin the trunk straight and centered.
- Block the valance flat to 36 in (91.4 cm).
- Let everything dry completely, then hang the curtain and give it a day to settle.
Final Quality-Control Checklist
- Each body has 17 sts in Row 1 and 1 st in Row 9
- Each tree has 6 eyelets in a 3-2-1 arrangement
- Round 1 has 56 sc; Round 2 has 59 sc and 7 picots
- Each trunk is 5 dc wide and centered
- Each tree measures 4.75 x 6 in (12.1 x 15.2 cm)
- Every strand starts at the correct valance picot
- Strands 2, 4 and 6 are offset by 4.5 in (11.4 cm)
- No links are twisted and no ends are loose
Troubleshooting
- Sides ripple: too many sc on the row-ends. Work exactly 2 per row-end.
- Edges cup inward: the border is too tight. Use a hook one size larger for the border only.
- Eyelets close up: make sure you skip a stitch under every ch-1.
- Tree leans: the trunk is off-center. Recount to the 6th base sc.
- Top picot stretches: work the joining sl st through both the picot and the corner sc.
- Valance flares: count 144 dc in every row.
- Trees collide: the B links are too short. Check your chain gauge.
- Strands differ in length: your chain tension is changing. Remake those links to the measured lengths.
Care
Hand wash in cool water, press the water out in a towel, and dry flat, re-blocking if needed. Store the curtain rolled around a tube to keep the strands from tangling.
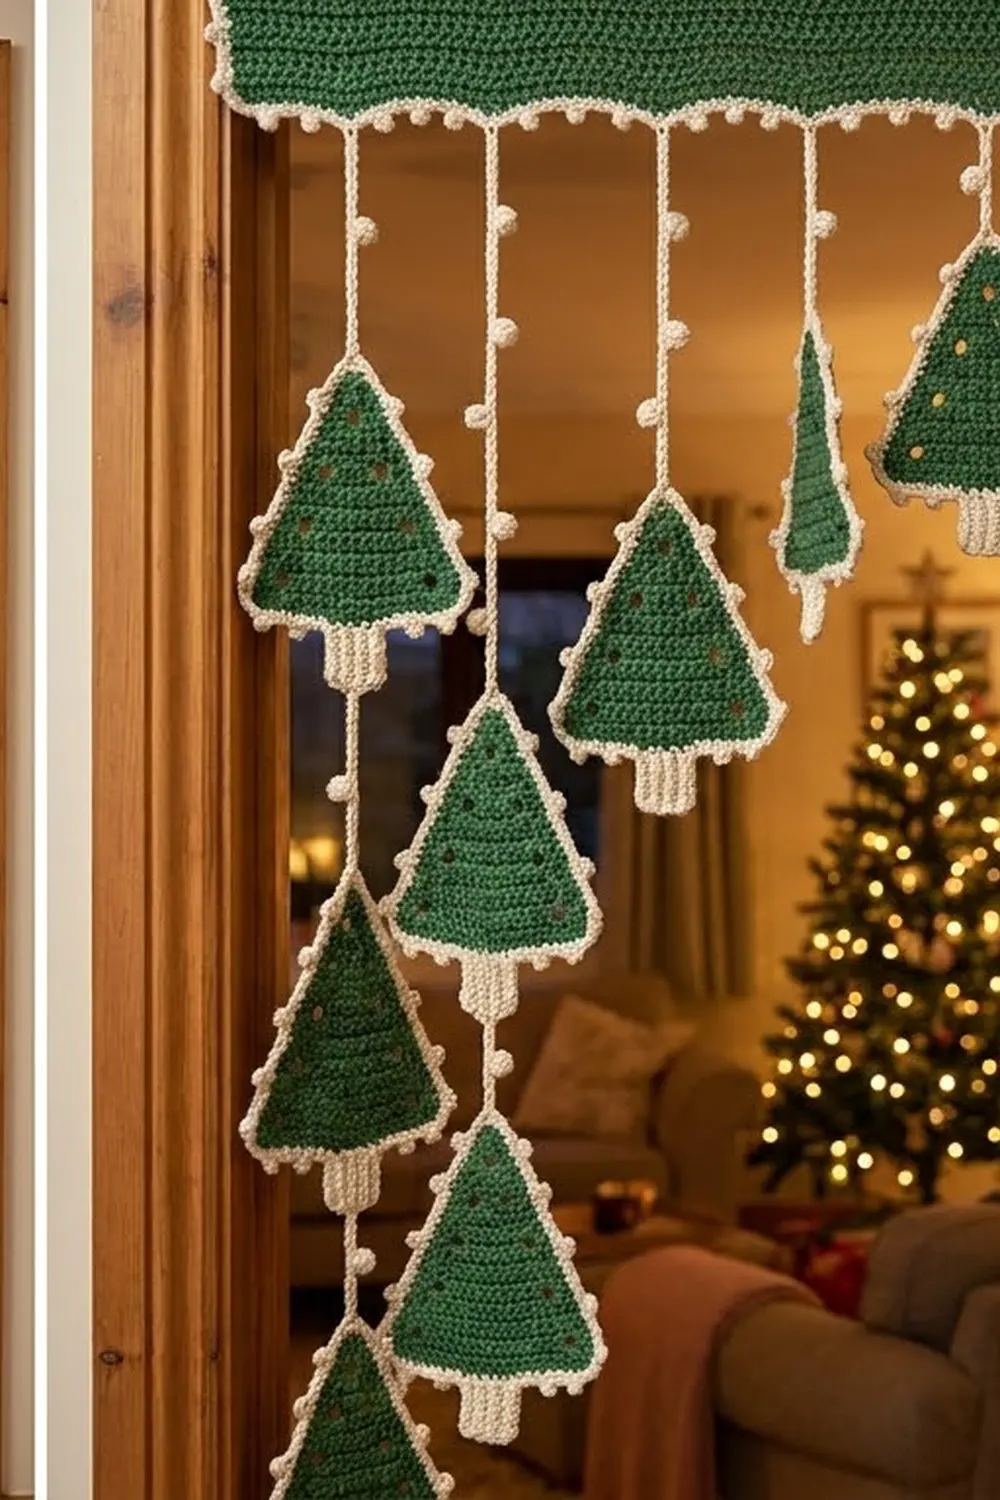
Final Notes
Every measurement follows from the one before it:
– A gauge of 16 dc to 4 in (10.2 cm) gives a 4.25 in (10.8 cm) body.
– The border brings the width to 4.75 in (12.1 cm), and the trunk brings the height to 6 in (15.2 cm).
– One tree plus a 3 in (7.6 cm) link makes a 9 in (22.9 cm) repeat.
– Six trees on each of 7 staggered strands fill a 36 in (91.4 cm) valance.
If your first tree passes every checkpoint, the other 41 will match it.
Happy crocheting!