

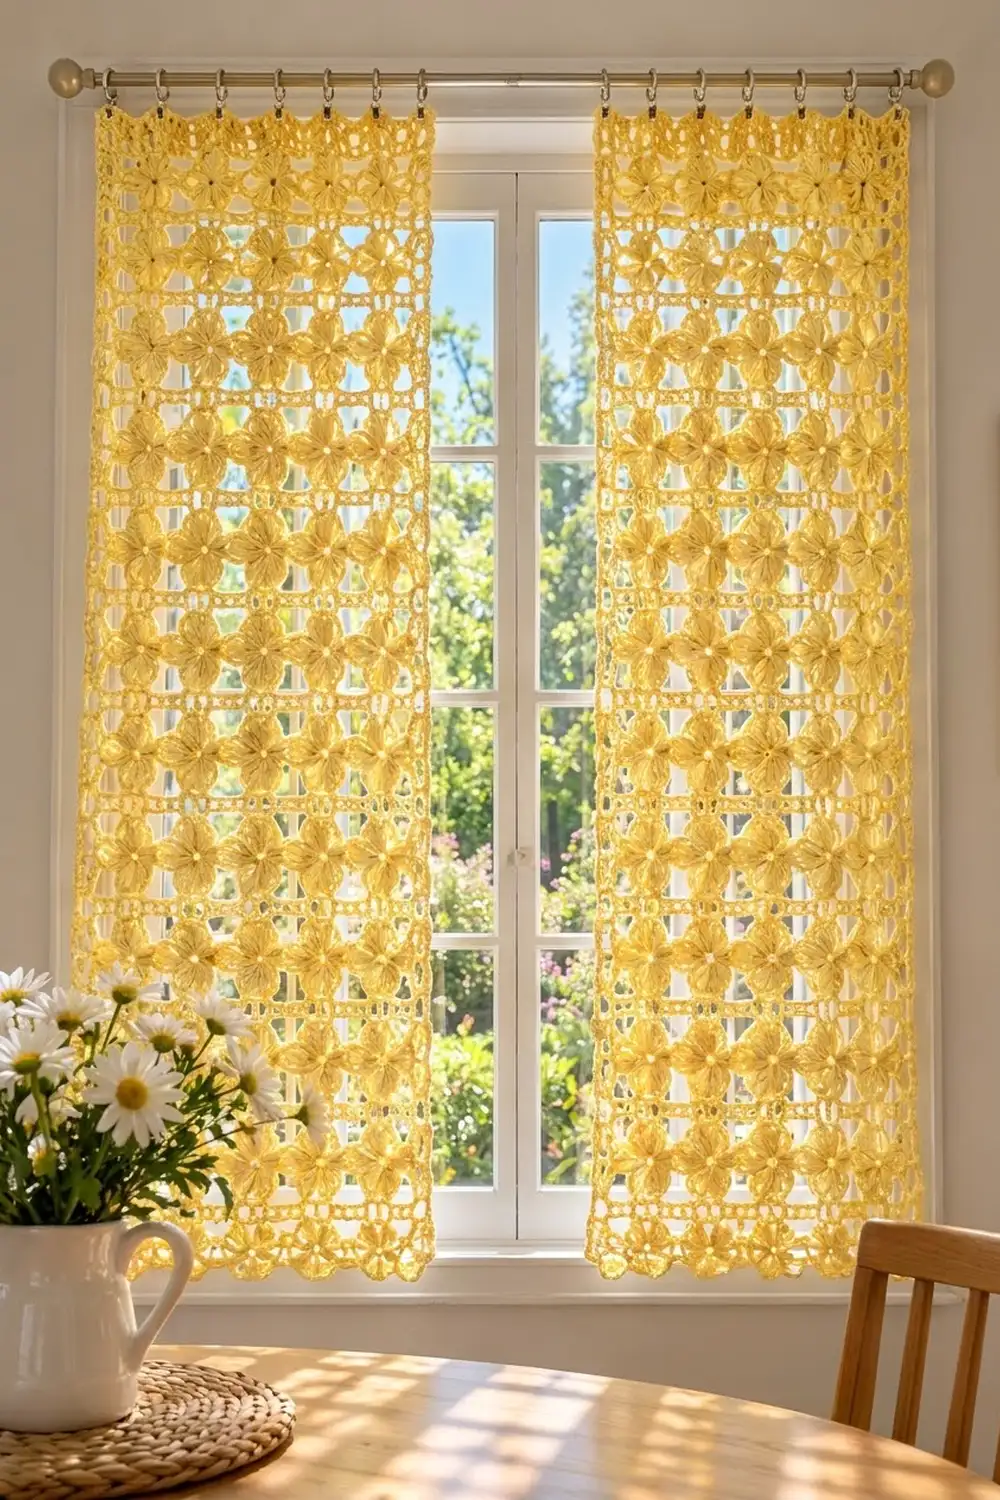
Soft yellow flowers across a sunny window make these curtain panels hard to beat. The Buttercup Lattice design uses square lace motifs. Each one has a four-petal flower with puffy pointed petals, and the open chain lattice between the flowers lets light and garden views through.
The project is worked in one color, a pale butter yellow, in worsted-weight cotton. The style is relaxed cottage lace: textured enough to look rich and open enough to filter light instead of blocking it. All instructions use US crochet terms.
You make two identical panels. Each finished panel measures 26 x 61 in (66.0 x 154.9 cm) after blocking and edging, which suits a standard window when the panels hang side by side.
For construction, you crochet 60 square motifs for each panel and join them in a grid 5 motifs wide and 12 motifs tall with a flat whipstitch. Then you add a two-round single-crochet border. Each panel hangs from clip rings, so there is no rod pocket to sew.
Finished Size and Construction
- Finished size (each panel): 26 x 61 in (66.0 x 154.9 cm)
- Number of panels: 2 (not joined to each other)
- Skill level: Intermediate
- Terminology: US crochet terms
- Yarn weight: Worsted (#4) cotton or cotton blend
- Hook: 5.5 mm (US I-9)
- Number of pieces: 60 motifs per panel, 120 in total
- Layout (each panel): 5 motifs wide x 12 motifs tall
- Motif size: 5 x 5 in (12.7 x 12.7 cm), blocked
- Panel size before border: 25 x 60 in (63.5 x 152.4 cm)
- Border depth: 0.5 in (1.3 cm) on every side
Materials
Yarn. Choose a smooth worsted-weight cotton or a cotton-acrylic blend. Cotton keeps the petals crisp and stands up to washing and sunlight. Pick a dye-fast pale yellow, and buy all of it from a single dye lot, because small shade differences show clearly against window light.
- Pale butter yellow: 1,000 g (about 1,700 m), or 10 balls of 100 g / 170 m. That is 500 g (about 850 m) per panel.
Tools:
- 5.5 mm (US I-9) crochet hook
- Tapestry needle
- Stitch markers
- Scissors
- Rustproof pins and a large blocking surface (foam mats or a carpeted floor covered with a towel)
- Measuring tape
- 12 curtain clip rings (6 per panel) and a curtain rod
These quantities include a margin of about 10–15% for gauge differences, swatching, and weaving in ends. One motif uses roughly 6.5 g of yarn.
Abbreviations (US Terms)
- ch – chain
- sl st – slip stitch
- sc – single crochet
- dc – double crochet
- tr – treble crochet
- sp(s) – space(s)
- st(s) – stitch(es)
- rep – repeat
- rnd(s) – round(s)
Special stitch – CL (4-treble cluster): *Yarn over twice, insert hook in the stitch indicated, yarn over and pull up a loop, (yarn over, draw through 2 loops) twice. Repeat from * 3 more times in the same stitch (5 loops on hook). Yarn over and draw through all 5 loops.
Gauge and Checkpoints
Make one complete motif before anything else. Block it, then measure.
- After Rnd 2: the flower measures about 4.5 in (11.4 cm) from one petal tip to the opposite petal tip.
- After Rnd 4, unblocked: the square measures about 4.75 in (12.1 cm) per side.
- After blocking: the square measures 5 in (12.7 cm) per side.
- Border gauge: 3 sc = 1 in (2.5 cm) when worked along the motif edges.
If your motif is too big, go down one hook size, to 5.0 mm. If it is too small, go up to 6.0 mm. A difference of 0.25 in (0.6 cm) per motif adds up to 1.25 in (3.2 cm) across the width of a panel and 3 in (7.6 cm) along its length, so make sure the motif measures correctly before you go on.
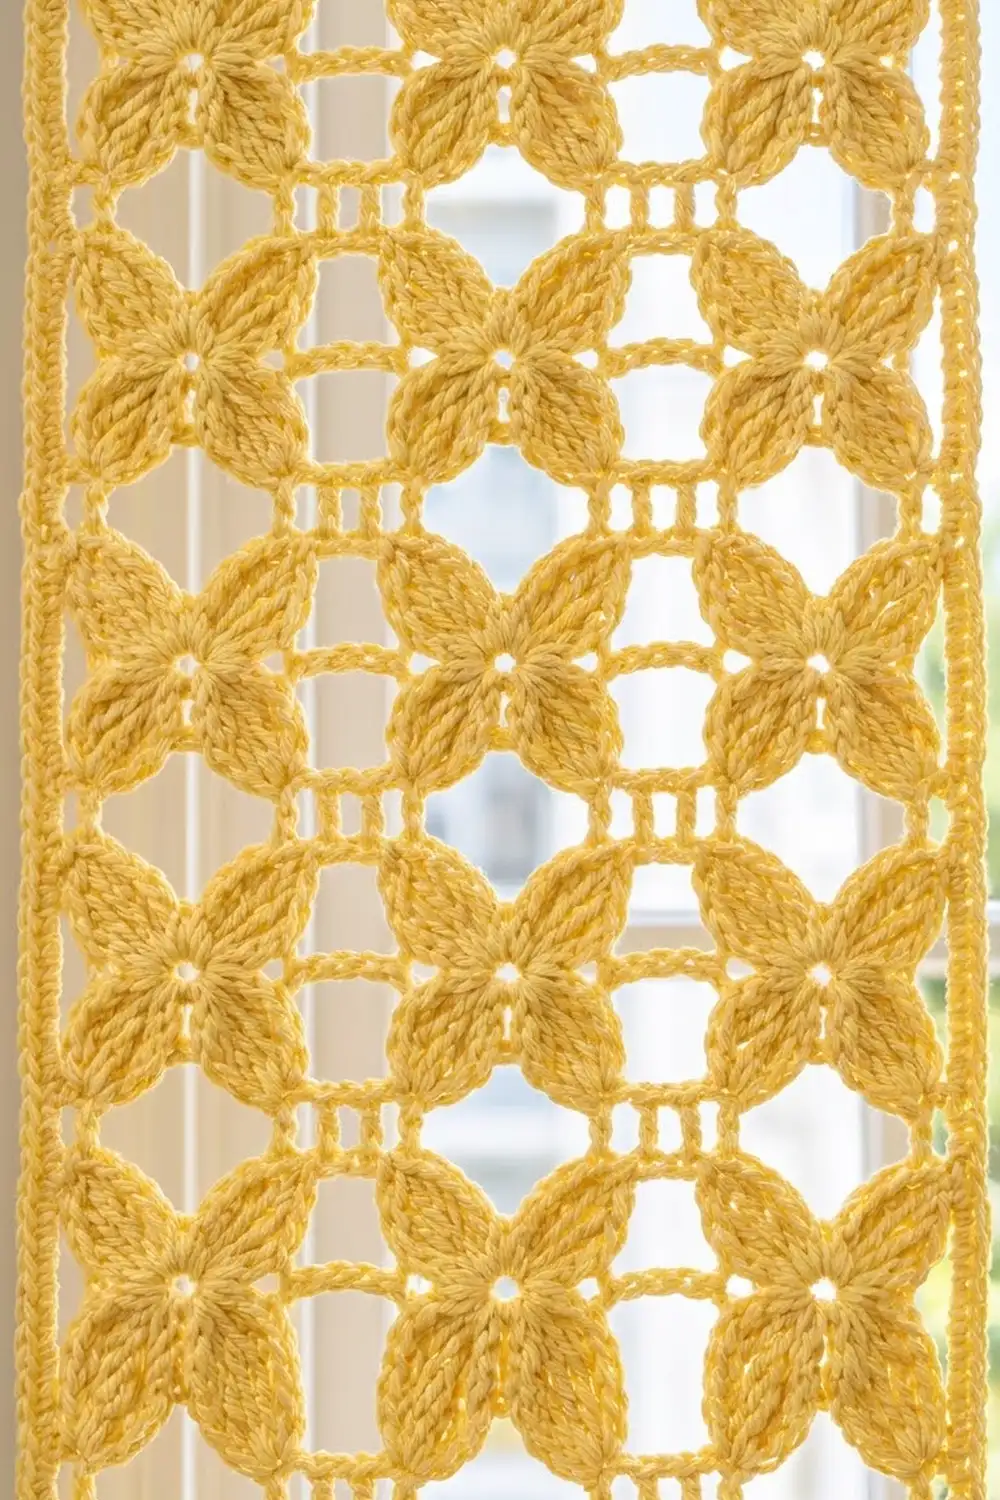
Square Flower Motif (Make 120)
Every motif is worked in the round with the right side facing you. Do not turn.
Rnd 1: Make a magic ring. Ch 1, then work 8 sc in the ring. Sl st to the first sc. Pull the ring snug, leaving a small center hole. (8 sc)
Rnd 2 (petals): Ch 1, sc in the same st as the join. [Ch 4, CL in next sc, ch 4, sc in next sc] 3 times. Ch 4, CL in next sc, ch 4, and sl st to the first sc. (4 CL, 4 sc, 8 ch-4 sps)
Each petal is a pointed leaf: the CL forms the full body, and the two ch-4 bars outline its sides. The 4 petals point diagonally and will become the corners of the square.
Rnd 3 (inner frame): Sl st in each of the next 4 ch and in the top of the next CL. Ch 1. (Sc, ch 3, sc) in the top of the CL, ch 4, 3 dc in the next sc, ch 4; rep from * 3 more times. Sl st to the first sc. (8 sc, 12 dc, 4 ch-3 corner sps, 8 ch-4 sps)*
The 3-dc groups sit in the middle of each side, between two petals. They make the first half of the post ladder.
Rnd 4 (outer frame): Sl st in the next ch-3 corner sp. Ch 1. *(Sc, ch 2, sc) in the corner sp, ch 5, skip the ch-4 sp, dc in each of the next 3 dc, ch 5, skip the ch-4 sp; rep from * 3 more times. Sl st to the first sc. Fasten off and weave in the ends.
(8 sc, 12 dc, 40 ch = 60 sts, plus 4 ch-2 corner sps)
Per-side count: 1 sc + 5 ch + 3 dc + 5 ch + 1 sc = 15 sts per side. This includes the 2 corner sc. The ch-2 corner spaces are not counted as stitches. Check: 4 sides x 15 sts = 60 sts, which matches the round total.
The ch-5 bars of Rnd 4 run parallel to the ch-4 bars of Rnd 3, and the stacked dc posts link them. That gives each side its double chain line with a ladder of 3 posts in the middle.
Make All Pieces
Make 120 motifs, all in pale butter yellow:
- Panel A: 60 motifs
- Panel B: 60 motifs
Block the motifs in batches to 5 x 5 in (12.7 x 12.7 cm) before joining. Joining blocked motifs keeps the seams straight.
Layout grid (each panel, 5 wide x 12 tall; M = motif):
Row 1  (top):  M  M  M  M  M
Row 2:         M  M  M  M  M
Row 3:         M  M  M  M  M
Row 4:         M  M  M  M  M
Row 5:         M  M  M  M  M
Row 6:         M  M  M  M  M
Row 7:         M  M  M  M  M
Row 8:         M  M  M  M  M
Row 9:         M  M  M  M  M
Row 10:        M  M  M  M  M
Row 11:        M  M  M  M  M
Row 12 (bottom): M  M  M  M  M
All motifs are identical and face right side up, so they can go in any position.
Joining
Method: Flat whipstitch through the outer loops, using a tapestry needle and matching yarn.
- Join the motifs into 12 horizontal strips of 5. Hold 2 motifs side by side with right sides facing up and their edges touching.
- Starting at a corner ch-2 sp, whipstitch through the outer loop of each matching stitch: sc to sc, each ch to the matching ch, and dc to dc. That is 15 stitch pairs per seam, ending in the next corner ch-2 sp.
- When all 12 strips are done, join the strips to each other the same way along their long edges. Each long seam is 5 x 15 = 75 stitch pairs.
- Where 4 corners meet, take one extra stitch through all 4 ch-2 corner spaces to close the gap.
Tension: Keep your stitches snug but not tight. The seam should lie completely flat and be the same length as an unjoined motif edge. If the seam puckers, loosen up. If gaps open between the posts, tighten.
Checkpoint: Lay the joined panel flat. It should measure 25 x 60 in (63.5 x 152.4 cm). Any posts that meet at a seam should line up into a neat 6-post ladder.
Border
Border gauge: 3 sc = 1 in (2.5 cm).
Each short edge has 5 motifs x 15 sts = 75 sts. Each long edge has 12 motifs x 15 sts = 180 sts. No stitches are added at the seams: skip the joined ch-2 corner spaces where two motifs meet.
Rnd 1: With the right side facing, join yarn in the first sc after the top right corner ch-2 sp. Ch 1. Work 1 sc in each st and each ch across the side, so there are 75 sc on each short side and 180 sc on each long side. At each of the 4 panel corners, ch 2 to turn the corner. Sl st to the first sc.
(Short sides: 75 sc each. Long sides: 180 sc each. Total: 510 sc + 4 ch-2 corner sps)
Rnd 2: Ch 1. Sc in each sc, and work (sc, ch 2, sc) in each corner ch-2 sp. Sl st to the first sc. Fasten off and weave in the ends.
(Short sides: 75 + 2 = 77 sc each. Long sides: 180 + 2 = 182 sc each. Total: 518 sc + 4 ch-2 corner sps)
Why the math works: 75 sc ÷ 25 in = 3 sc per inch, and 180 sc ÷ 60 in = 3 sc per inch. Both match the border gauge exactly, so the edge will neither ruffle nor pull in. The 2 rounds add 0.5 in (1.3 cm) on every side, which brings each panel to 25 + 1 = 26 in (66.0 cm) wide and 60 + 1 = 61 in (154.9 cm) long.
Repeat the joining and border for the second panel.
Final Blocking
- Soak each panel in cool water with a drop of wool wash or mild soap for 15 minutes.
- Press out the water gently; do not wring. Roll the panel in towels to remove more moisture.
- Lay it flat on the blocking surface right side up, and shape it to 26 x 61 in (66.0 x 154.9 cm).
- Pin the four corners first, then pin each edge at every motif seam, which is every 5 in (12.7 cm).
- Pin the petal tips outward so the leaves look pointed, and pull the post ladders straight.
- Let the panel dry completely, usually 24–48 hours.
- Clip the rings along the top edge at the 2 corners and at the 4 vertical seams, so they sit 5 in (12.7 cm) apart.
Final Quality-Control Checklist
- [ ] Every motif has 15 sts per side and 60 sts in total.
- [ ] All 4 petals of every motif point into the corners.
- [ ] Each panel measures 25 x 60 in (63.5 x 152.4 cm) before the border.
- [ ] Border Rnd 1 has 75 / 180 / 75 / 180 sc.
- [ ] Border Rnd 2 has 77 / 182 / 77 / 182 sc.
- [ ] Each panel measures 26 x 61 in (66.0 x 154.9 cm) after blocking.
- [ ] Both panels are the same size to within 0.25 in (0.6 cm).
- [ ] The seams lie flat with no gaps at the four-way corners.
- [ ] All ends are woven in securely, at least 2 in (5.1 cm) each.
Troubleshooting
The petals look flat or skinny. Pull up each loop of the CL to full treble height before closing it, and keep the ch-4 bars relaxed.
The motif cups or curls. Your Rnd 3 chains are too tight. Loosen them or go up a hook size for Rnds 3–4 only.
The motif sides bow inward. Make sure you skip the ch-4 sp in Rnd 4 and work into the dc, not into the space.
The border ruffles. You have added stitches at the seams. Recount to 75 and 180, and skip the joined corner spaces.
The border pulls in. Work the border more loosely, or use a 6.0 mm hook for the border only.
The two panels are different lengths. Re-block the shorter panel, pinning it to 61 in (154.9 cm).
Care
Hand wash cold or machine wash on a gentle cycle inside a mesh bag, then lay flat to dry and re-pin if needed. Long exposure to direct sun can fade the yellow over time, so rotate the panels occasionally.
Final Notes
The measurement chain is simple: each motif is 15 sts per side and 5 in (12.7 cm) square. A grid of 5 x 12 motifs gives a panel of 25 x 60 in (63.5 x 152.4 cm), and a two-round border at 3 sc per inch brings each panel to 26 x 61 in (66.0 x 154.9 cm). Check your first motif, keep your seams even, and you will have a pair of sunny flower-lattice curtains for your window.
Happy crocheting!