

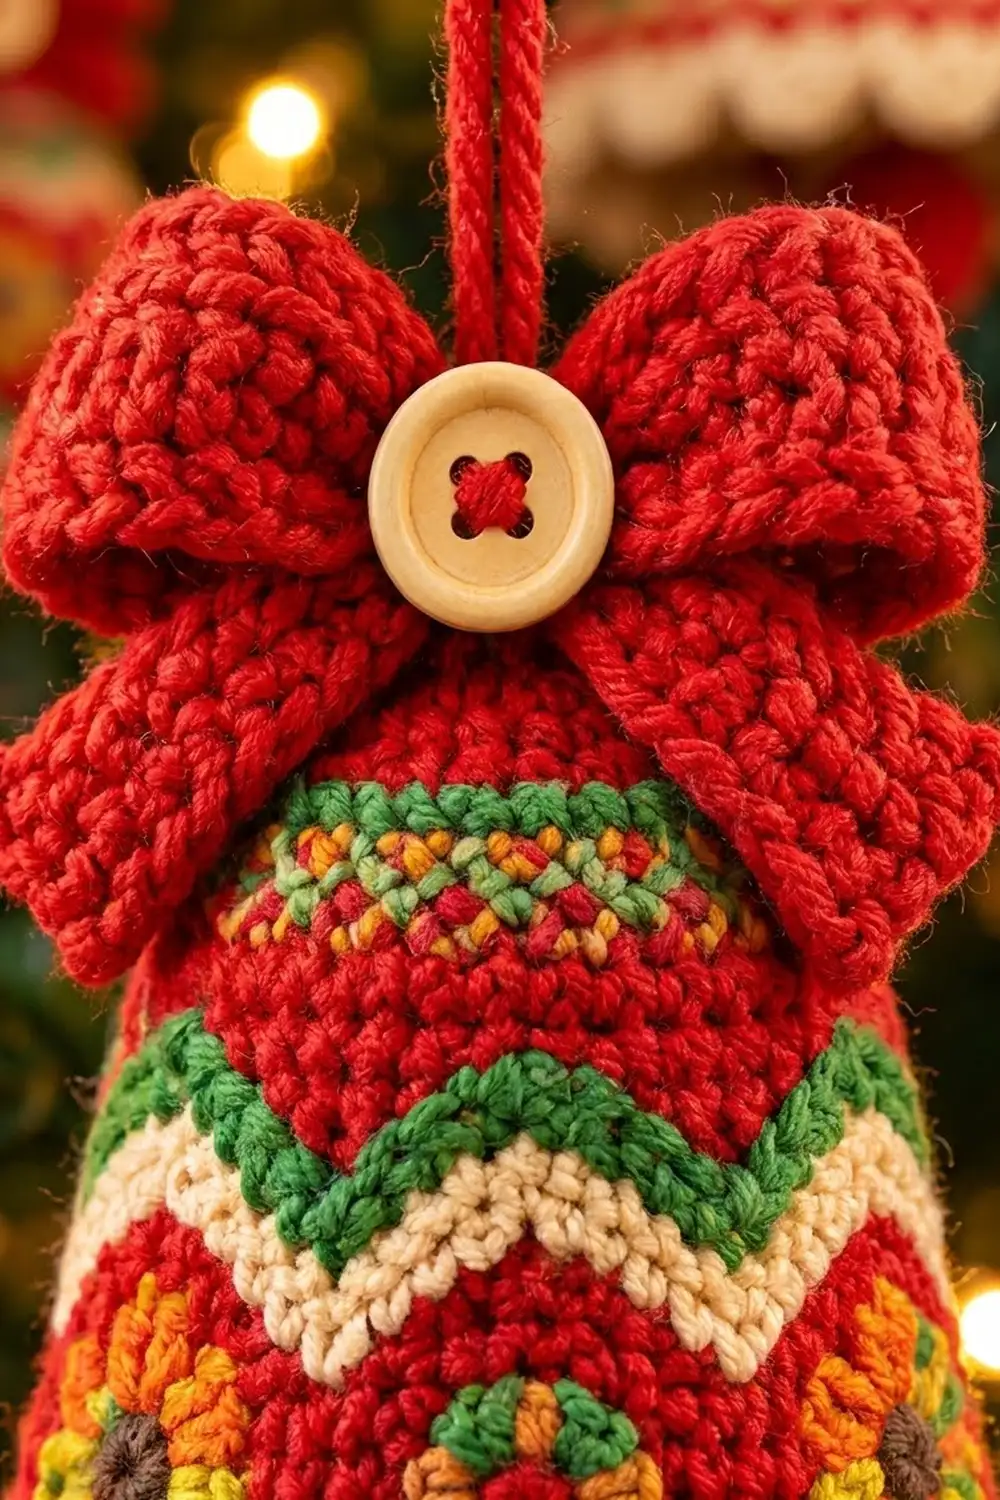
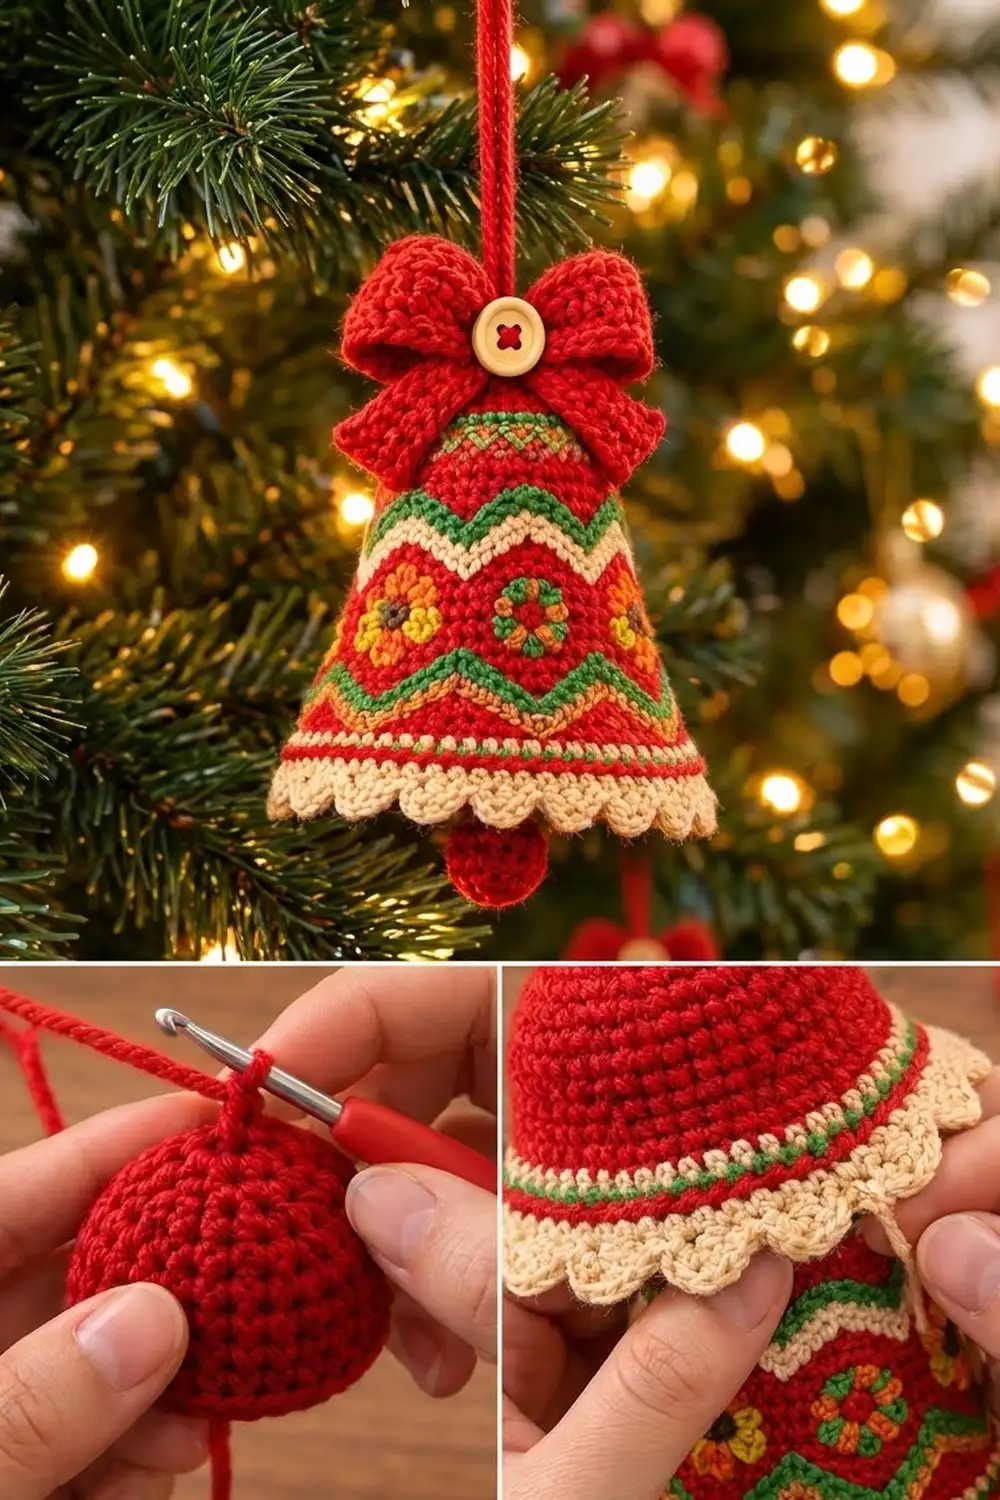
This little bell is a cheerful Christmas ornament with folk-style colorwork. The red body has a green-and-cream zigzag near the top, a ring of small flowers in the middle, a second green-and-gold zigzag below, and thin stripes above a cream scalloped rim. A puffy red bow with a wooden button sits on top, and a round red clapper peeks out under the scallops.
The colors are classic holiday: tomato red as the main color, with grass green, cream, golden yellow, orange and a touch of brown for the flower centers. It looks like a Nordic sweater, but it is all single crochet.
This pattern uses US crochet terms. The finished bell is about 5 in (12.7 cm) tall and 3.8 in (9.7 cm) across the rim, or about 4 in (10.2 cm) across the scallop tips. With the bow and clapper, the ornament is about 6 in (15.2 cm) tall, plus a 4.5 in (11.4 cm) hanging loop.
You work the bell from the top down in joined rounds of single crochet. It starts as a flat circle and widens gently toward the rim. The zigzags use tapestry crochet, which means carrying the unused colors inside your stitches. The flowers are made separately and sewn on, and a cream scalloped edge finishes the rim. The bow, clapper and cord are made last and attached.
Finished Size and Construction
- Finished size: bell about 5 in (12.7 cm) tall; rim 3.8 in (9.7 cm) across; 4 in (10.2 cm) across the scallop tips
- Skill level: Intermediate (colorwork in rounds)
- Terminology: US crochet terms
- Yarn weight: DK (light worsted, #3)
- Hook: 3.5 mm (E-4)
- Number of pieces: 1 finished ornament, built from 1 bell, 1 clapper, 3 bow parts, 6 flowers and 1 cord
- Layout: one hanging bell, bow at the top front, clapper centered underneath
- Piece size: flat top 1.5 in (3.8 cm) across; 60 stitches around the rim
- Size before border: 3.8 in (9.7 cm) across, 4.5 in (11.4 cm) down the side after Rnd 29
- Border depth: about 0.6 in (1.5 cm) for the 2 cream rounds
Materials
Choose a smooth cotton or cotton-blend DK yarn. Mercerized cotton shows each stitch clearly and helps the bell hold its shape. The amounts below assume about 230 m per 100 g.
- Red (R), main color: 25 g (58 m)
- Green (G): 6 g (14 m)
- Cream (C): 6 g (14 m)
- Yellow (Y): 3 g (7 m)
- Orange (O): 3 g (7 m)
- Brown (B): 1 g (2 m)
All amounts include a small safety margin.
Tools
- 3.5 mm (E-4) crochet hook
- Tapestry needle
- 1 wooden 4-hole button, 0.75 in (1.9 cm)
- A little polyester fiberfill for the clapper
- Stitch marker
- Scissors and rust-proof pins
- Optional: fabric stiffener or spray starch
Abbreviations (US Terms)
- ch – chain
- sc – single crochet
- hdc – half double crochet
- dc – double crochet
- sl st – slip stitch
- 2sc – 2 sc in the same stitch (increase)
- sc2tog – single crochet 2 together (decrease)
- BLO – back loop only
- MR – magic ring
- st(s) – stitch(es)
- rnd(s) – round(s)
Tapestry sc color change: finish the stitch before the change by pulling through the last loops with the new color. Lay the unused colors along the top of the round and crochet over them so they stay hidden inside the stitches. Only carry the colors used in the current band. Drop the others and pick them up again later.
Joined rounds: end every bell round with a sl st into the first sc, then ch 1 (the ch 1 does not count as a stitch). Keep the join at the center back.
Gauge and Checkpoints
Gauge: 20 sc and 22 rnds = 4 in (10.2 cm) in tapestry sc worked in rounds. That is 5 sts and 5.5 rnds per inch (2.5 cm).
Check your gauge on the bell itself by working Rnds 1–9 first. These rounds use every technique except the scallops.
- After Rnd 4: flat circle 1.5 in (3.8 cm) across
- After Rnd 9: 36 sts, opening 2.3 in (5.8 cm) across
- After Rnd 14: 1.8 in (4.6 cm) down the side from the top fold
- After Rnd 16: 48 sts, 3.1 in (7.9 cm) across
- After Rnd 20: 54 sts, 3.4 in (8.6 cm) across, 2.9 in (7.4 cm) down the side
- After Rnd 25: 3.8 in (9.7 cm) down the side
- After Rnd 29: 60 sts, 3.8 in (9.7 cm) across, 4.5 in (11.4 cm) down the side
If your top circle is bigger than 1.5 in (3.8 cm), switch to a 3.25 mm (D-3) hook. If it is smaller, switch to a 3.75 mm (F-5) hook. Colorwork often makes stitches tighter, so check again after Rnd 14.
Bell Body
Start with R. Join each round with a sl st, then ch 1.
Rnd 1: MR, 6 sc in ring. (6)
Rnd 2: 2sc in each st around. (12)
Rnd 3: (sc 1, 2sc) 6 times. (18)
Rnd 4: (sc 2, 2sc) 6 times. (24)
Checkpoint: the flat circle measures 1.5 in (3.8 cm).
Rnd 5: sc in the BLO of each st around. (24) The unworked front loops form a ridge and turn the work downward into the side of the bell.
Rnd 6: with G and Y, (1 G, 1 Y) 12 times. (24) Fasten off Y and G, leaving 4 in (10.2 cm) tails.
Rnd 7: with R, sc around. (24)
Rnd 8: (sc 3, 2sc) 6 times. (30)
Rnd 9: (sc 4, 2sc) 6 times. (36)
Chevron Band 1 (Rnds 10–14)
Use R as the background, G for Line 1 and C for Line 2. Each round repeats a 6-st sequence 6 times around the 36 sts. The count stays at 36 for every round.
Rnd 10: (1 G, 5 R) 6 times. (36)
Rnd 11: (1 C, 1 G, 3 R, 1 G) 6 times. (36)
Rnd 12: (1 R, 1 C, 1 G, 1 R, 1 G, 1 C) 6 times. (36)
Rnd 13: (2 R, 1 C, 1 G, 1 C, 1 R) 6 times. (36)
Rnd 14: (3 R, 1 C, 2 R) 6 times. (36)
Each round, the green line moves 1 st outward on both sides. It starts at a peak on stitch 1 of the repeat and ends at a low point on stitch 4. The cream line follows 1 round below it. This makes 6 peaks around the bell. Cut G and C.
Middle and Flower Band (Rnds 15–20)
Rnd 15: with R, (sc 5, 2sc) 6 times. (42)
Rnd 16: (sc 6, 2sc) 6 times. (48)
Rnd 17: sc around. (48)
Rnd 18: (sc 7, 2sc) 6 times. (54)
Rnds 19–20: sc around. (54)
Checkpoint: 54 sts, 3.4 in (8.6 cm) across.
Chevron Band 2 (Rnds 21–25)
This band uses the same sequence as Band 1, with G for Line 1 and Y for Line 2. Over 54 sts, the 6-st repeat is worked 9 times.
Rnd 21: (1 G, 5 R) 9 times. (54)
Rnd 22: (1 Y, 1 G, 3 R, 1 G) 9 times. (54)
Rnd 23: (1 R, 1 Y, 1 G, 1 R, 1 G, 1 Y) 9 times. (54)
Rnd 24: (2 R, 1 Y, 1 G, 1 Y, 1 R) 9 times. (54)
Rnd 25: (3 R, 1 Y, 2 R) 9 times. (54)
Cut Y.
Lower Stripes (Rnds 26–29)
Rnd 26: with R, (sc 8, 2sc) 6 times. (60)
Rnd 27: with G, sc around. (60) Cut G.
Rnd 28: with C and R, (1 C, 1 R) 30 times. (60) Cut C.
Rnd 29: with R, sc around. (60) Fasten off R.
Checkpoint: 3.8 in (9.7 cm) across and 4.5 in (11.4 cm) down the side.
Flowers (Make 6)
Flower A (make 3): brown center, orange ring, yellow petals.
Flower B (make 3): red center, orange ring, green petals.
Rnd 1: with the center color, MR, 6 sc. Join. (6)
Rnd 2: with O, 2sc in each st. Join. (12)
Rnd 3: with the petal color, (sl st in next st, [hdc, dc, hdc] in next st) 6 times. Join. (6 petals)
Each flower is about 1 in (2.5 cm) across. Leave a 10 in (25.4 cm) tail of the petal color for sewing.
Clapper
With R:
Rnd 1: MR, 6 sc. (6)
Rnd 2: 2sc in each st. (12)
Rnd 3: (sc 1, 2sc) 6 times. (18)
Rnds 4–6: sc around. (18)
Rnd 7: (sc 1, sc2tog) 6 times. (12) Stuff firmly.
Rnd 8: sc2tog 6 times. (6)
Close the hole and leave a 10 in (25.4 cm) tail. The ball is about 1.1 in (2.8 cm) across.
Bow
All bow parts use R and are worked in rows. At the end of each row, ch 1 and turn (the ch 1 does not count as a stitch).
Loops: ch 31. Row 1: sc in 2nd ch from hook and across. (30) Rows 2–10: sc across. (30) The strip measures 6 in (15.2 cm) by 1.8 in (4.6 cm). Sew the short ends together to make a ring, then flatten it with the seam at the center back. Flattened, it is 3 in (7.6 cm) wide.
Tails: ch 21. Row 1: sc in 2nd ch from hook and across. (20) Rows 2–6: sc across. (20) The strip measures 4 in (10.2 cm) by 1.1 in (2.8 cm). Fold it in the middle into an upside-down V.
Center band: ch 11. Row 1: sc in 2nd ch from hook and across. (10) Rows 2–4: sc across. (10) The band measures 2 in (5.1 cm) by 0.7 in (1.8 cm).
Lay the loops over the tails and pinch both at the center. Wrap the band around the pinch and sew its ends together at the back. Sew the button to the center with R, making an X through the 4 holes.
Hanging Cord
With R, chain until the chain measures 9 in (22.9 cm). Work a sl st into the back bump of each ch to make a sturdy cord. Fold it in half to make a 4.5 in (11.4 cm) loop.
Border: Cream Scalloped Rim
Border gauge: 5 sc per inch (2.5 cm), so 60 sts = 12 in (30.5 cm) around the rim.
Rnd 30: join C in any st at the center back, ch 1, sc around. Join. (60)
Rnd 31: ch 1, (sc in next st, skip 2 sts, 5 dc in next st, skip 2 sts) 10 times. Join to the first sc. (10 sc + 50 dc = 60 sts; 10 scallops)
Why the math works: each scallop uses exactly 6 sts of Rnd 30: 1 sc, 2 skipped, 1 shell stitch and 2 skipped. 60 ÷ 6 = 10 scallops with nothing left over. Each scallop covers 1.2 in (3.0 cm), and 10 × 1.2 in = 12 in (30.5 cm). The 5 dc fanned into one stitch flare the rim slightly, to about 4 in (10.2 cm) across.
Fasten off and weave in all ends on the inside.
Assembly
- Flowers: pin the 6 flowers around Rnd 18, alternating A and B. Center each one below a peak of Chevron Band 1, about 1.8 in (4.6 cm) apart. Sew around the petals with the tails.
- Clapper and cord: thread both ends of the cord down through the center of Rnd 1 and knot them inside. Tie the clapper tail to the knot so that about 0.5 in (1.3 cm) of the ball hangs below the scallop tips.
- Bow: sew the bow to the top front, over Rnds 1–5. Keep Rnd 6 visible below it, with the cord rising behind the button.
Final Blocking
- Lightly mist the bell with water, or use spray starch for a firmer bell.
- Fill the bell with plastic wrap or a small paper cup, shaping it to 3.8 in (9.7 cm) across the rim.
- Pin each scallop out evenly so the rim measures 4 in (10.2 cm) across the tips.
- Fluff the bow loops with your fingers and fill them lightly with tissue so they stay rounded.
- Let everything dry completely, then remove the filling.
Final Quality-Control Checklist
- The bell measures 5 in (12.7 cm) tall and 3.8 in (9.7 cm) across the rim
- There are 6 peaks in Band 1, 9 peaks in Band 2 and 10 scallops
- No carried strands show through the stitches
- All joins line up at the center back
- The flowers are evenly spaced, alternating A and B
- The clapper hangs centered, about 0.5 in (1.3 cm) below the scallops
- The bow sits straight, with a clean X on the button
- The cord knot is secure inside the top
Troubleshooting
- Zigzags lean sideways: the join has drifted. Always ch 1 after joining, then start the repeat in the first st.
- Carried colors peek through: the carried strand is too loose or too tight. Tug it gently every few stitches.
- Rim curls inward: your stitches are too tight. Use a larger hook for Rnds 26–31.
- Scallops ruffle: your dc are too tall. Work (2 hdc, 1 dc, 2 hdc) in each shell stitch instead.
- Clapper twists or slips: knot its tail twice around the cord knot.
Care
Spot clean with cool water and mild soap, then reshape and dry flat. Store the ornament wrapped in tissue so the bow and scallops keep their shape.
Final Notes
The measurements build on each other. The 1.5 in (3.8 cm) top grows to 36 sts at 2.3 in (5.8 cm), then 54 sts at 3.4 in (8.6 cm), then 60 sts at 3.8 in (9.7 cm). The 6-st repeats divide evenly into all 3 colorwork counts, and 60 ÷ 6 gives 10 even scallops on a 12 in (30.5 cm) rim. If your gauge matches at Rnd 4 and Rnd 9, the rest will fall into place.
Happy crocheting!