

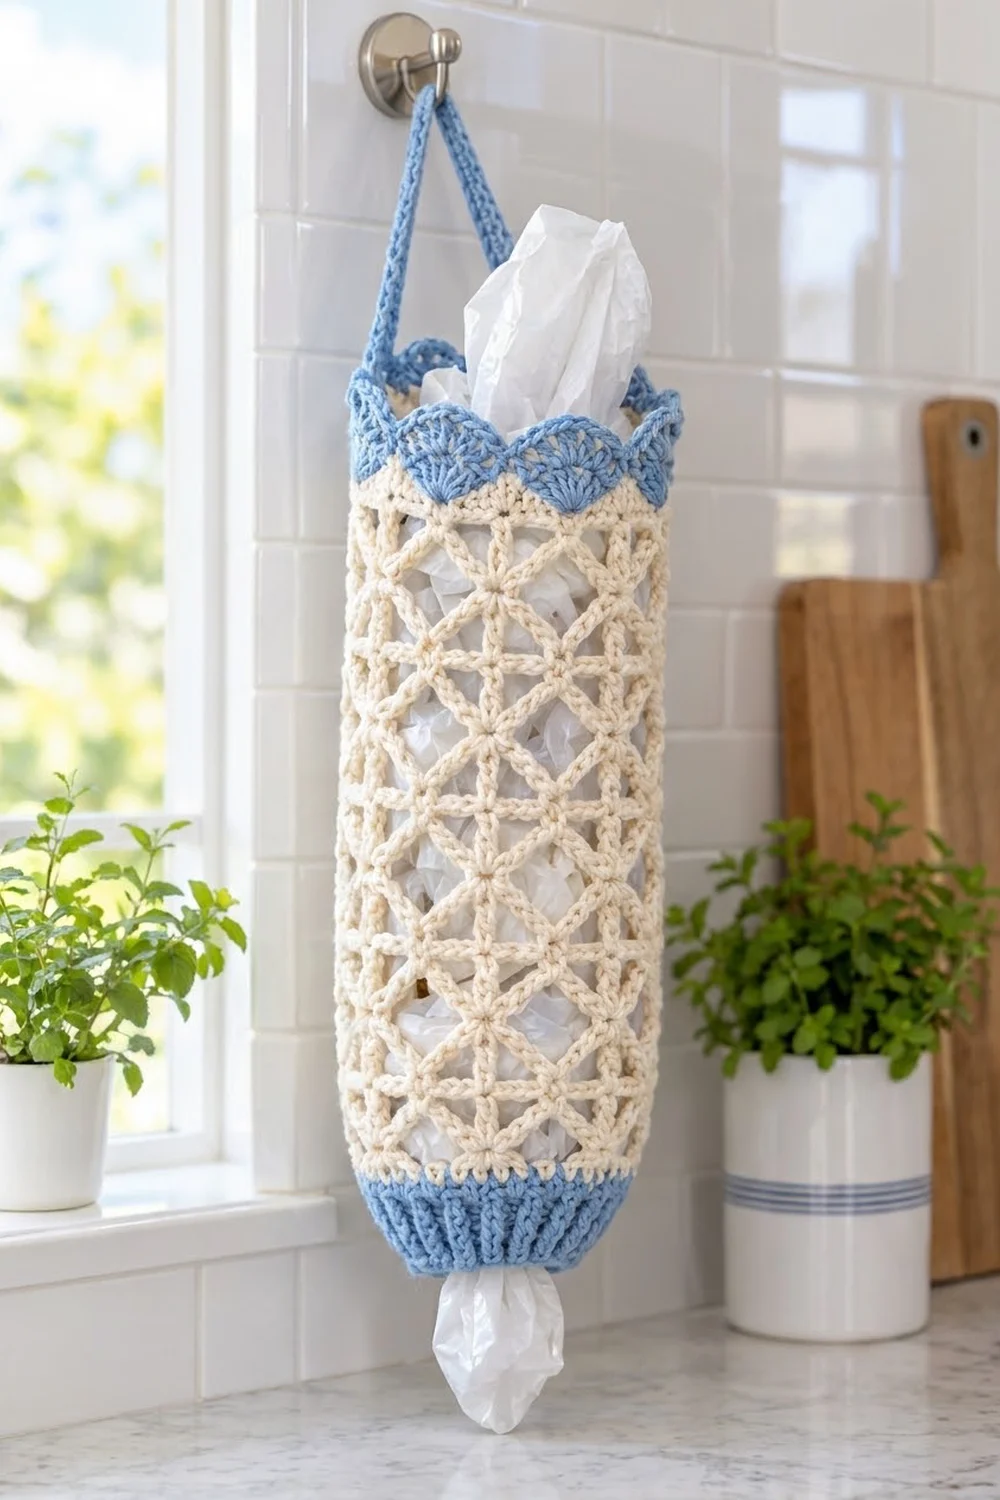
The Seaside Trellis Bag Holder is a tall, open-mesh tube that keeps plastic grocery bags tidy and easy to grab. A cream diamond lattice makes up the body, so you can see how many bags are left. A blue ribbed cuff closes in the bottom, and a band of blue fan shells finishes the top.
The colors are creamy natural and soft medium blue. Together they look like a coastal kitchen and go well with white tile, wooden boards, and potted herbs. The cotton yarn gives clean stitch definition and holds its shape well.
This pattern uses US crochet terms throughout. The finished holder is 6 in (15.2 cm) wide when flat and 15.5 in (39.4 cm) tall from the cuff edge to the scallop tips. The strap adds about 5 in (12.7 cm) above the rim.
Construction is simple and seamless. You start with a chain ring at the bottom and work the ribbed cuff, then switch to cream for the lattice body. Next comes the blue shell band at the top. The strap is worked directly onto the rim, so there is no sewing.
Finished Size and Construction
- Finished size: 6 in (15.2 cm) flat width × 15.5 in (39.4 cm) tall, plus a strap that rises 5 in (12.7 cm)
- Skill level: Easy-intermediate
- Terminology: US crochet terms
- Yarn weight: Worsted / Category 4 cotton
- Hook: 5 mm (H-8)
- Number of pieces: 1 (a seamless tube with an integrated strap)
- Layout: Worked bottom-up in joined rounds
- Piece size: 12 in (30.5 cm) circumference through the lattice body
- Size before border: 14.25 in (36.2 cm) tall (cuff, transition and lattice)
- Border depth: 1.25 in (3.2 cm) shell band at the top
Materials
Use a smooth worsted-weight cotton or cotton blend. Cotton is sturdy, holds the lattice open, and doesn’t stretch out under the weight of a full load of bags. Avoid fuzzy or very stretchy acrylics, because they blur the diamond pattern.
Yarn:
- Color A, Cream: 80 g, about 150 m (164 yd)
- Color B, Medium Blue: 50 g, about 90 m (98 yd)
These quantities include a margin of about 15% for your gauge swatch and weaving in ends.
Tools:
- 5 mm (H-8) crochet hook
- 1 locking stitch marker
- Tapestry needle
- Scissors
- Tape measure
- Spray bottle and a rolled towel (for blocking)
Abbreviations (US Terms)
- ch – chain
- sl st – slip stitch
- sc – single crochet
- dc – double crochet
- sk – skip
- sp – space
- st(s) – stitch(es)
- rnd(s) – round(s)
- FPdc – front post double crochet: yarn over, insert the hook from front to back to front around the post of the stitch, then complete a dc
- BPdc – back post double crochet: yarn over, insert the hook from back to front to back around the post of the stitch, then complete a dc
Special stitches:
- Shell: 7 dc in the same stitch.
- Picot point: (sc, ch 3, sc) in the same stitch.
Gauge and Checkpoints
Gauge:
- Dc: 14 dc and 8 rnds = 4 in (10.2 cm)
- Sc: 16 sc = 4 in (10.2 cm)
- Lattice: 4 ch-5 loops = 3 in (7.6 cm) wide, and 5 lattice rnds = 3 in (7.6 cm) tall, measured lightly stretched
Treat the cuff as your test piece. Work Rnds 1–4, then measure before you go on. Checking here is quicker than ripping back lattice later.
Checkpoint 1, after the cuff (Rnd 4): The cuff should be 2 in (5.1 cm) tall. Relaxed and flat, it should be about 4.5 in (11.4 cm) wide, which is a 9 in (22.9 cm) circumference.
Checkpoint 2, after Lattice Rnd 5: The work should be 6 in (15.2 cm) wide flat and lightly stretched. The lattice section should be 3 in (7.6 cm) tall.
Checkpoint 3, after Lattice Rnd 20: The lattice section should be 12 in (30.5 cm) tall, and the whole piece 14.25 in (36.2 cm).
Checkpoint 4, after the top band: The total height should be 15.5 in (39.4 cm).
If your piece is too big, go down a hook size to 4.5 mm (US 7). If it is too small, go up to 5.5 mm (I-9). A lattice that is a little loose is fine. A lattice that is too tight won’t stretch enough to hold a full load of bags.
Pattern
Bottom Cuff (Color B, Blue)
Foundation: Ch 40. Join with a sl st to the first ch to form a ring, taking care not to twist the chain.
Rnd 1: Ch 3 (counts as dc). Dc in each remaining ch around. Join with a sl st to the top of the beginning ch-3. (40 dc)
Rnd 2: Ch 2 (does not count as a st). FPdc around the next st, BPdc around the next st; repeat from * 20 times. Join with a sl st to the first FPdc. (40 sts: 20 FPdc, 20 BPdc)*
Rnds 3–4: Ch 2 (does not count). FPdc around the FPdc, BPdc around the BPdc; repeat from * 20 times. Join. (40 sts)*
The front and back posts stack up into vertical ribs. Ribbing pulls inward, so the cuff narrows into a soft, stretchy dispensing opening.
Fasten off Color B. Check Checkpoint 1.
Transition Round (Color A, Cream)
Rnd 5: Join Color A in any st. Ch 1, sc in each of the next 4 sts, 2 sc in the next st; repeat from * 8 times. Join with a sl st to the first sc. (40 sts worked 1-per-stitch + 8 increases = 48 sc)*
This round turns the 40 ribbing stitches into 48 sc, which is the base the lattice needs. 48 divides evenly into 16 groups of 3.
Lattice Body (Color A, Cream)
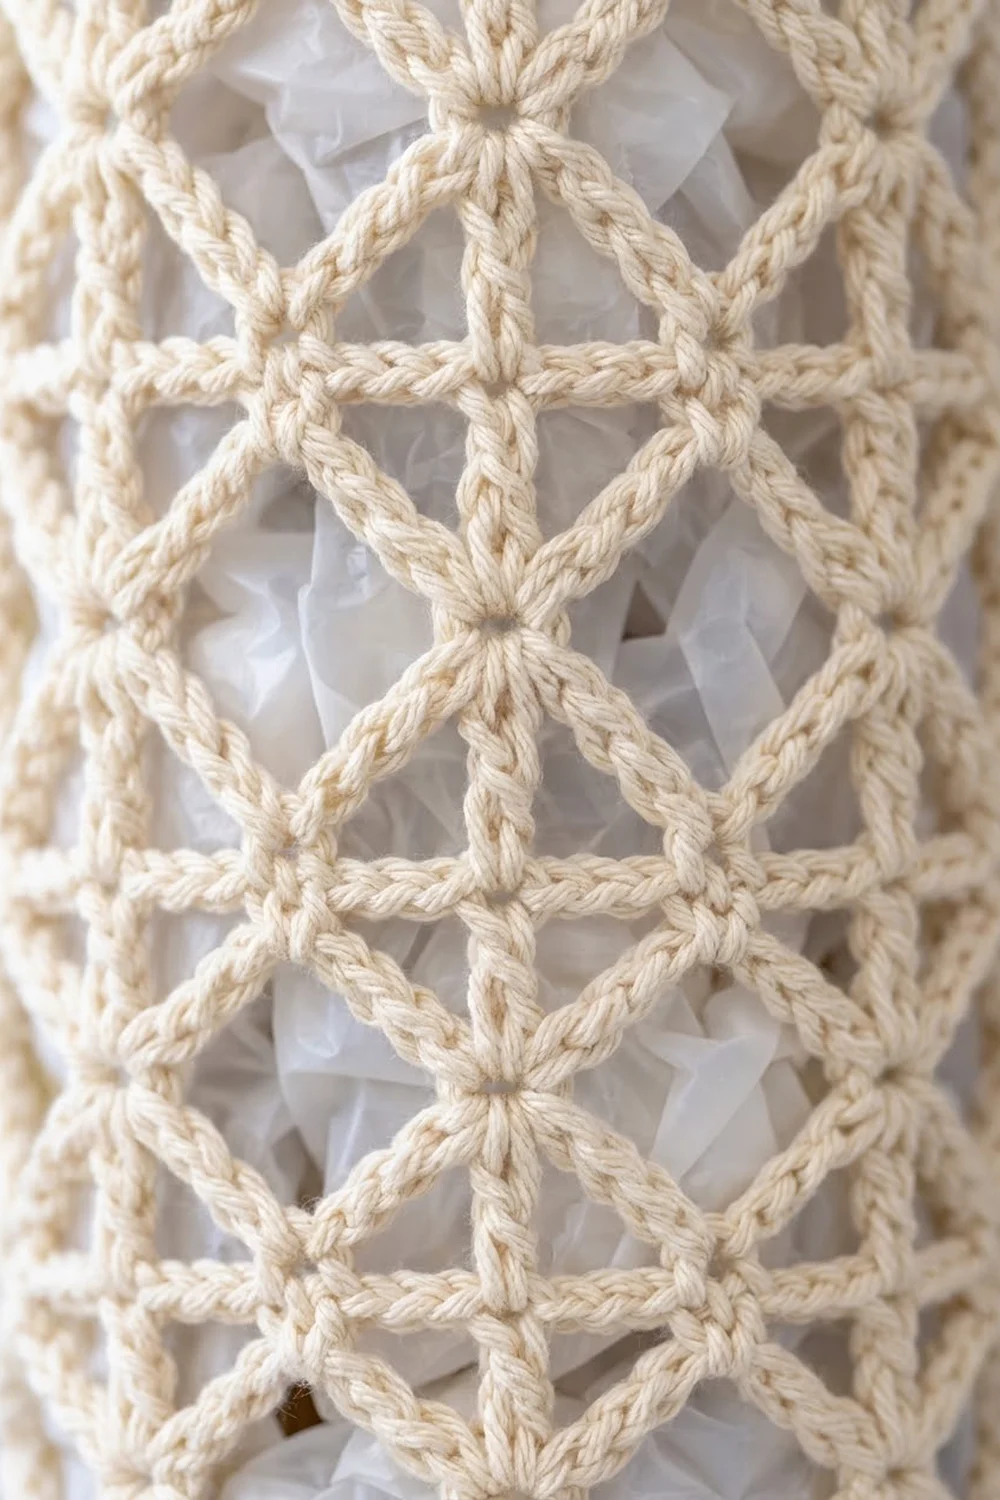
The body is a classic chain net. Each sc locks two chain bars together and forms a small knot where the diagonals cross. Stacking these rounds builds the diamond lattice.
Lattice Rnd 1: Ch 1, sc in the first sc. Ch 5, sk 2 sts, sc in the next st; repeat from * 15 times. Ch 2, then dc in the first sc to join. (16 sc and 16 loops: 15 ch-5 loops plus the closing ch-2 + dc loop)*
The closing ch 2 + dc measures the same as a ch-5 loop. It also leaves your hook at the center of the last loop, ready for the next round.
Lattice Rnd 2: Ch 1, sc around the post of the joining dc. Ch 5, sc in the next ch-5 loop; repeat from * 15 times. Ch 2, then dc in the first sc to join. (16 loops)*
Lattice Rnds 3–20: Repeat Lattice Rnd 2. (16 loops in each rnd)
Each sc lands in the center of a loop from the round below. This offsets the rounds and turns the chains into diamonds.
Place your stitch marker in the first sc of each round so you can count rounds easily. Check Checkpoint 2 after Rnd 5 and Checkpoint 3 after Rnd 20.
Fasten off Color A.
Border: Top Shell Band and Strap (Color B, Blue)
Border gauge: 1 shell repeat = 1.5 in (3.8 cm) wide. The 3 band rounds measure 1.25 in (3.2 cm) tall.
The holder is a tube, so the band is one continuous round with no sides or corners to count. The counts below are per round, plus a count per repeat.
Band Rnd 1: Join Color B in any ch-5 loop. Ch 1, work 3 sc in each loop around (including the closing loop). Join with a sl st to the first sc. (16 loops × 3 sc = 48 sc)
Band Rnd 2: Ch 1, sc in the first sc. Sk 2 sts, Shell in the next st, sk 2 sts, sc in the next st; repeat from * 7 more times, but on the last repeat leave out the final sc. Join with a sl st to the first sc. (8 shells + 8 sc = 64 sts, 8 per repeat)*
Band Rnd 3: Ch 1. Sk the sc, sc in each of the next 3 dc, Picot point in the 4th (center) dc, sc in each of the next 3 dc; repeat from * 8 times. Join with a sl st to the first sc. (56 sts worked 1-per-stitch + 8 extra sc = 64 sc, plus 8 ch-3 picots)*
Skipping the sc between shells creates a valley. The extra sc and ch-3 at each center dc form a pointed tip. Together they make the scalloped, picot-tipped rim.
Why the math works: There are 16 lattice loops, and 3 sc per loop gives 48 sc. A shell repeat uses 6 stitches (1 sc + 2 skipped + 1 shell stitch + 2 skipped), and 48 ÷ 6 = 8 shells. In Band Rnd 3, each repeat works 7 dc with 1 doubled (8 sc) and skips 1 sc, so 8 repeats × 8 sc = 64 sc. Every round closes evenly with no leftover stitches.
Integrated Strap
Don’t fasten off after Band Rnd 3. Your hook is at the valley between Shell 8 and Shell 1.
Strap Row 1: Ch 46. Count 4 scallops around the rim and sl st into the first sc of Repeat 5, directly opposite your start. Make sure the chain isn’t twisted. Sl st in the next sc on the rim.
Strap Row 2: Turn. Sc in each ch across. Sl st into the last sc of Repeat 8, next to the starting point. Sl st in the next sc on the rim. (46 sc)
Strap Row 3: Turn. Ch 1, sc in each sc across. Sl st into the rim next to the Row 1 anchor. (46 sc)
Fasten off and weave in all ends. At the sc gauge, 46 sc = 11.5 in (29.2 cm). The strap arcs about 5 in (12.7 cm) above the rim when it hangs.
Final Blocking
- Weave in all ends securely, especially at the color changes and the strap anchors.
- Roll a bath towel into a firm cylinder about 6 in (15.2 cm) wide when flattened. A 12 in (30.5 cm) circumference matches the lattice.
- Slide the holder over the towel and line up the knot columns so the diamonds sit straight and even.
- Mist the holder lightly with water until it is damp but not soaked.
- Ease each shell into a rounded fan and pinch each picot tip to a point.
- Let the ribbed cuff relax on its own. Don’t stretch it, so it keeps its grip.
- Lay the strap flat and straight.
- Let it dry completely, usually 12–24 hours.
- Measure again: 6 in (15.2 cm) wide and 15.5 in (39.4 cm) tall.
Final Quality-Control Checklist
- Cuff has 40 sts with clear, unbroken vertical ribs.
- Transition round has exactly 48 sc.
- Every lattice round has 16 loops.
- 20 lattice rounds, measuring 12 in (30.5 cm).
- Band Rnd 1 has 48 sc, and Band Rnd 2 has 8 complete shells.
- Band Rnd 3 has 8 picot points that line up with the shell centers.
- Strap is anchored at exactly opposite points, 4 scallops apart.
- Strap isn’t twisted and measures 11.5 in (29.2 cm).
- No visible joining seam lines or jogs in the lattice.
- All ends are woven in and trimmed.
Troubleshooting
Lattice spirals or leans. You may be working the sc into a chain instead of around the loop. Always work around the whole ch-5 space.
Diamonds look squashed. Your chains are too tight. Chain loosely, or go up a hook size for the lattice only.
Cuff is too loose to hold bags. Rework the cuff with a 4.5 mm (US 7) hook, or work Rnd 1 with 36 dc. If you use 36 dc, do Rnd 5 as sc in 3, 2 sc in next 9 times to reach 48 sc.
Loop count drifts to 15 or 17. Count the loops after every round. Use the stitch marker, and check that the closing ch 2 + dc counts as one loop.
Shells ruffle. Your tension is too loose on the dc. Make 6 dc shells instead, using the same skips.
Strap twists. Before working Row 2, lay the ch-46 flat across the opening.
Holder sags when full. Fill it with fewer bags, or block it again with firmer drying.
Care
Hand wash or machine wash cool on a gentle cycle, then reshape and dry flat over a rolled towel. Cotton may shrink a little at first, and blocking it again restores the size.
Final Notes
Your measurement chain is: a 40-st ribbed cuff, 2 in (5.1 cm), converted to 48 sc. That base becomes 16 lattice loops through 20 rounds, 12 in (30.5 cm). The loops become 48 sc again for 8 shells, and then 64 sc with 8 picot points for the scalloped rim, 1.25 in (3.2 cm). Finally, a 46-st strap, 11.5 in (29.2 cm), links opposite sides. If each checkpoint matches, the finished holder will be 6 in (15.2 cm) by 15.5 in (39.4 cm), ready to hang on any hook.
Happy crocheting!