

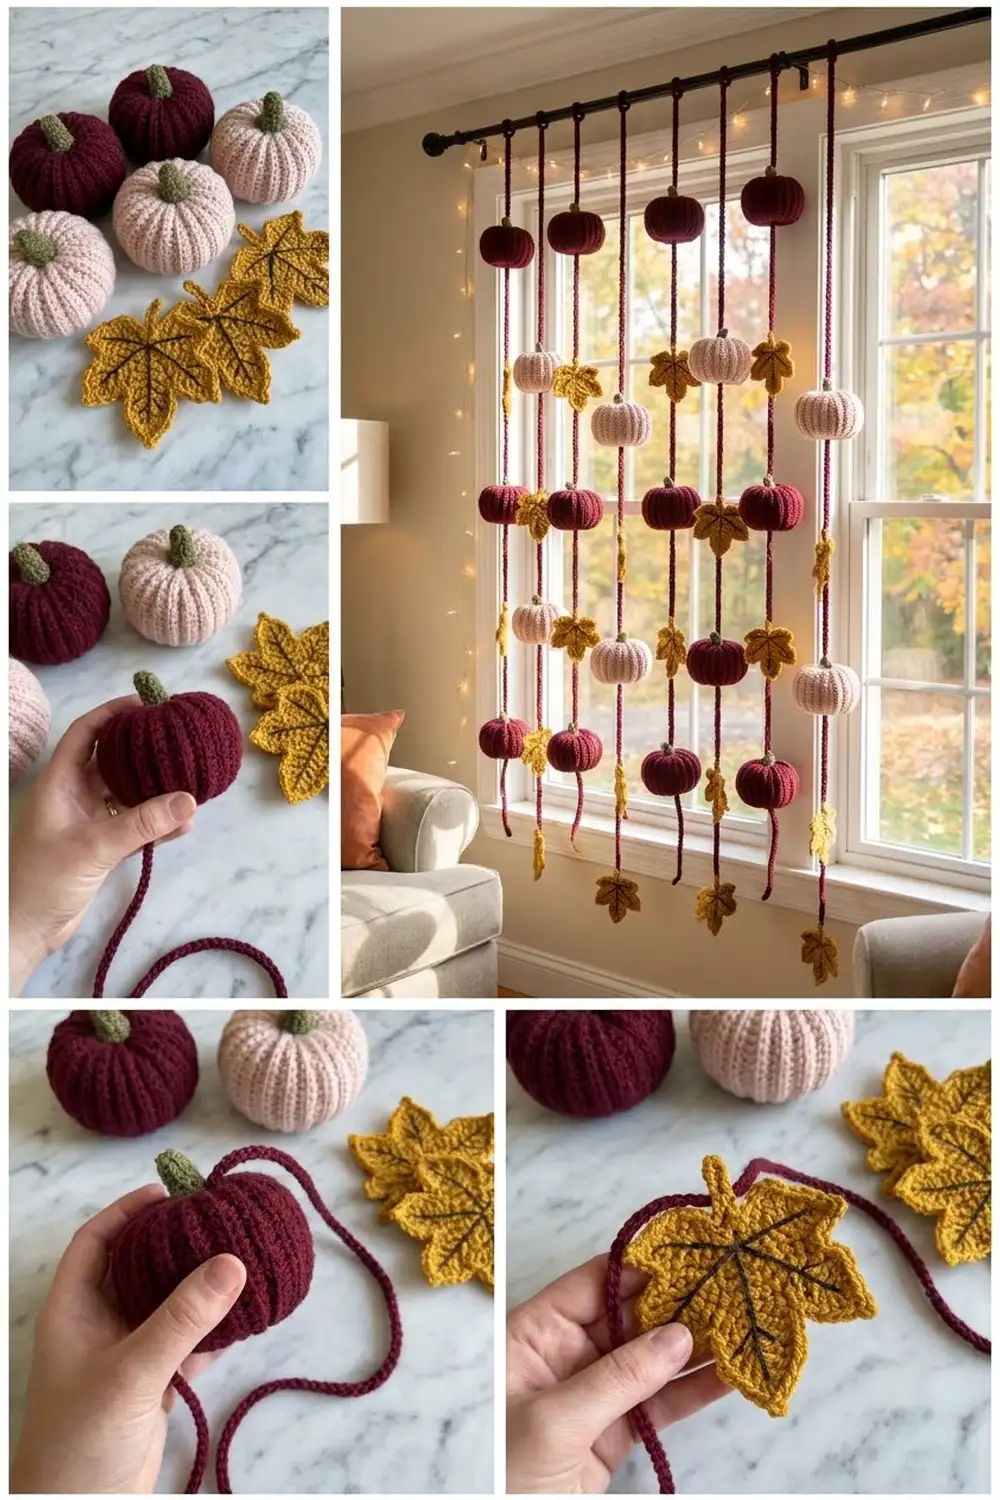
This hanging curtain fills an autumn window with seven vertical strands of plump ribbed pumpkins and textured maple leaves. Each strand alternates pumpkins and leaves on a burgundy chain cord, so daylight shows between the motifs.
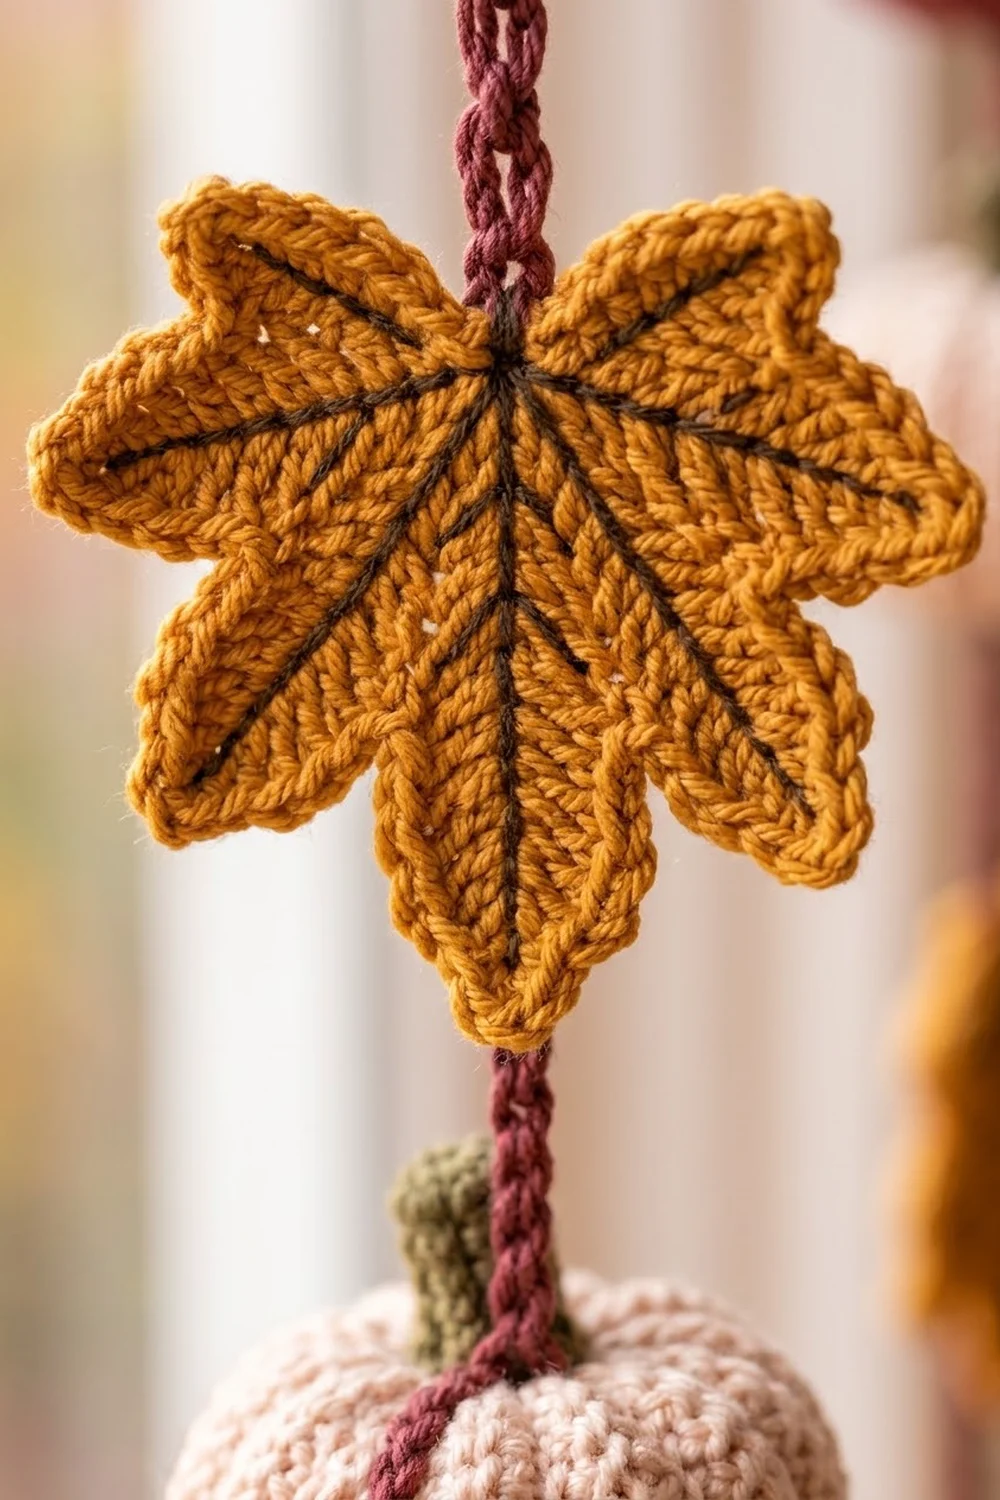
The colors are deep burgundy and pale blush pumpkins with olive green stems, plus golden mustard leaves. Each leaf has a rope-textured edge and fine dark brown veins. The style is cozy farmhouse: easy to repeat, and detailed enough to look good up close.
All instructions use US crochet terms. The finished curtain is about 33.25 in (84.5 cm) wide and 46 in (116.8 cm) long. Each pumpkin is 2.5 in (6.4 cm) wide, and each leaf is 3.25 in (8.3 cm) across.
The curtain is built from separate pieces:
– Pumpkins: worked flat in back-loop rows, then seamed, gathered and cinched into segments.
– Leaves: worked in the round and finished with a reverse single crochet border.
– Cords: seven chain cords, with each motif slip-stitched on as you go.
Finished Size and Construction
- Finished size: 33.25 in (84.5 cm) wide x 46 in (116.8 cm) long
- Skill level: Intermediate
- Terminology: US
- Yarn weight: Worsted (#4)
- Hook: 4.0 mm (G-6)
- Number of pieces: 35 pumpkins, 35 stems, 35 leaves, 7 cords
- Layout: 7 strands x 10 motifs each, with strands spaced 5 in (12.7 cm) apart
- Pumpkin size: 2.5 in (6.4 cm) wide x 2 in (5.1 cm) tall, or 2.75 in (7.0 cm) tall with the stem
- Leaf size: 3.25 in (8.3 cm) tip to tip
- Leaf size before border: 3 in (7.6 cm)
- Border depth: 0.125 in (0.3 cm) on each leaf edge
Materials
Use a smooth worsted acrylic or cotton blend with about 200 m per 100 g. Smooth yarn shows the ribs and the rope edge clearly. Avoid fuzzy yarn, which blurs the veins.
- Burgundy: 260 g (520 m) for 17 pumpkins and all 7 cords
- Blush: 240 g (480 m) for 18 pumpkins
- Mustard: 200 g (400 m) for 35 leaves
- Olive green: 40 g (80 m) for 35 stems
- Dark brown: 30 g (60 m) for the leaf veins
All quantities include a margin of about 10–15%.
Tools:
– 4.0 mm (G-6) hook
– Polyester fiberfill, about 250 g
– Tapestry needle
– Stitch markers
– Measuring tape
– Rust-proof pins and a blocking board
– Spray bottle
– Curtain rod with 7 small hooks or clips
Abbreviations (US Terms)
- ch – chain
- sl st – slip stitch
- sc – single crochet
- hdc – half double crochet
- dc – double crochet
- tr – treble crochet
- BLO – back loop only
- st(s) – stitch(es)
- rep – repeat
- rev sc – reverse single crochet
Special stitches:
– Picot: Ch 3, sl st in 3rd ch from hook.
– Reverse single crochet (rev sc): Work from left to right. Insert hook in the next st to the right, yarn over, pull up a loop, yarn over, pull through both loops. This makes the twisted rope edge.
Gauge and Checkpoints
- Fabric gauge: 18 sc and 20 rows = 4 in (10.2 cm) in sc BLO rows.
- Chain gauge: 5 ch = 1 in (2.5 cm).
Make one complete pumpkin and one complete leaf first. Check these measurements:
- Pumpkin strip before seaming: 3.1 in (7.9 cm) x 7.2 in (18.3 cm)
- Stuffed pumpkin: 2.5 in (6.4 cm) wide x 2 in (5.1 cm) tall
- Leaf after Rnd 2: 1.75 in (4.4 cm) across
- Leaf after Rnd 3: 3 in (7.6 cm) tip to tip
- Leaf after the border: 3.25 in (8.3 cm) tip to tip
- Cord: 10 ch = 2 in (5.1 cm)
If your pieces come out too big, go down a hook size. If they’re too small, go up a hook size. Pumpkins need firm fabric so the stuffing doesn’t show, so pick the smaller hook if you’re unsure.
Pumpkin
Make 17 in burgundy and 18 in blush.
Body (worked flat): Ch 15.
Row 1: Sc in 2nd ch from hook and in each ch across, ch 1, turn. (14 sts)
Rows 2–36: Sc BLO in each st across, ch 1, turn. (14 sts)
Checkpoint: the strip is 3.1 in (7.9 cm) x 7.2 in (18.3 cm), with 18 ridges on each side.
Seam: Fold the strip so Row 36 meets the foundation chain. Sl st through both layers in each st across (14 sl st). Fasten off and leave a 24 in (61.0 cm) tail.
Gather:
1. With a separate length of matching yarn, weave through the 36 row-ends at the bottom edge. Pull tight and secure.
2. Stuff firmly.
3. Weave the long tail through the 36 row-ends at the top edge. Pull tight and knot.
Segments:
1. Using the long tail, pass the needle down through the center top and out at the center bottom.
2. Wrap the yarn up the outside along a ridge and go back in at the top center. Pull until the pumpkin dents.
3. Repeat 5 more times, placing a wrap every 6 rows. That gives 6 segments (36 rows ÷ 6 = 6 rows each).
4. Secure the tail and hide it inside.
Stem (olive green):
Rnd 1: Magic ring, 6 sc in ring. Don’t join; mark the first st. (6 sts)
Rnds 2–4: Sc in each st around. (6 sts)
Sl st in the next st and fasten off with a 10 in (25.4 cm) tail. The stem is 0.8 in (2.0 cm) tall. Sew it over the top gather. The pumpkin now stands 2.75 in (7.0 cm) tall.
Maple Leaf
Make 35 in mustard.
Rnd 1: Magic ring. Ch 2 (doesn’t count as a st), 10 hdc in ring. Join with a sl st to the first hdc. (10 sts) The piece is about 1 in (2.5 cm) across.
Rnd 2: Ch 1, 2 sc in each st around. Join with a sl st. (20 sts) The piece is 1.75 in (4.4 cm) across.
Rnd 3 (lobes): Don’t ch. *Sl st in next st, (hdc, 2 dc) in next st, (tr, picot, tr) in next st, (2 dc, hdc) in next st; rep from * 4 more times. Join with a sl st to the first sl st. (45 sts + 5 picots, or 9 sts per lobe)
Each lobe uses 4 sts of Rnd 2, and 5 lobes x 4 sts = 20 sts, matching Rnd 2 exactly. The sl st makes a deep valley and the picot makes a sharp point. The leaf now measures 3 in (7.6 cm) tip to tip.
Number the lobes 1 to 5 in working order. Lobe 1 is the top point. The valley between Lobes 3 and 4 is the bottom of the leaf.
Leaf Border
Work this border on every leaf before assembly. It makes the twisted rope edge.
Border gauge: Rev sc works at the same rate as sc, 4.5 sts per inch. The border adds 0.125 in (0.3 cm) to each edge, so the leaf grows from 3 in (7.6 cm) to 3.25 in (8.3 cm).
Rnd 4: Ch 1. Working left to right in rev sc: *sl st in valley sl st, rev sc in each of next 4 sts, (rev sc, ch 2, rev sc) in picot, rev sc in each of next 4 sts; rep from * around. Join with a sl st and fasten off.
- Per lobe: 1 sl st + 4 rev sc + 2 rev sc in the picot + 4 rev sc = 11 sts, plus a ch-2 tip.
- Round total: (45 sts worked 1 per existing stitch: 5 sl st + 40 rev sc) + (10 extra rev sc in the 5 picots) = 55 sts + 5 ch-2 tips.
Why the math works: Each of the 9 lobe stitches gets exactly one border stitch, so the edge lies flat. The only extra stitches go into the picot, which gives the point enough length to turn sharply. The valley stays a plain sl st, so it stays deep without ruffling.
Stem: Join mustard with a sl st in the bottom valley. Ch 6, sl st in 2nd ch from hook and in each of the next 4 ch (5 sl st), then sl st in the valley. The stem is 1 in (2.5 cm) long.
Veins: With dark brown, backstitch a line from the center to each of the 5 tips and one line down the stem. Add 2 to 3 short angled side veins along each main vein. Keep the stitches loose so the leaf stays flat. From the Lobe 1 tip to the end of the stem, the leaf measures 3.5 in (8.9 cm).
Make All Pieces
- Burgundy pumpkins (W): 17
- Blush pumpkins (S): 18
- Olive stems: 35
- Mustard leaves (L): 35, all bordered and veined
There are two strand types. Strand A starts with a pumpkin and Strand B starts with a leaf. Hang them left to right as B, A, B, A, B, A, B.
Motif  S1 S2 S3 S4 S5 S6 S7
       B  A  B  A  B  A  B
 1     L  W  L  W  L  W  L
 2     S  L  S  L  S  L  S
 3     L  S  L  S  L  S  L
 4     W  L  W  L  W  L  W
 5     L  W  L  W  L  W  L
 6     S  L  S  L  S  L  S
 7     L  S  L  S  L  S  L
 8     W  L  W  L  W  L  W
 9     L  W  L  W  L  W  L
10     S  L  S  L  S  L  S
- Strand A: W, L, S, L, W, L, S, L, W, L (3 W, 2 S, 5 L)
- Strand B: L, S, L, W, L, S, L, W, L, S (2 W, 3 S, 5 L)
Count check:
– Burgundy: 3 A strands x 3 W + 4 B strands x 2 W = 17
– Blush: 3 A strands x 2 S + 4 B strands x 3 S = 18
– Leaves: 7 strands x 5 L = 35
Joining (Building the Strands)
A burgundy chain cord runs down the back of each motif. It’s secured with a sl st at the motif’s top and bottom.
Attachment points:
– Pumpkin: a st in the stem’s last round at the top, and the center of the bottom gather.
– Leaf: the ch-2 tip of Lobe 1 at the top, and the end of the stem at the bottom.
Each strand:
1. Hanging loop: Ch 12, sl st in the first ch. The loop is 2.4 in (6.1 cm) around and hangs 1.2 in (3.0 cm).
2. Lead: Ch 10 (2 in / 5.1 cm).
3. Motif:
– Drop the loop from your hook. Insert the hook from front to back through the motif’s top point, pick up the dropped loop and pull it through. Sl st to secure.
– Ch 14 behind a pumpkin (2.8 in / 7.1 cm) or ch 18 behind a leaf (3.6 in / 9.1 cm).
– Sl st through the bottom point.
4. Gap: Ch 6 (1.2 in / 3.0 cm).
5. Repeat Steps 3 and 4 for all 10 motifs in strand order. Skip the gap after motif 10. Fasten off and weave the tail into the last motif.
Stitch count per strand: lead 10 + pumpkins 5 x 14 = 70 + leaves 5 x 18 = 90 + gaps 9 x 6 = 54, for 224 ch total. That’s 44.8 in (113.8 cm). Add the 1.2 in (3.0 cm) loop and each strand hangs 46 in (116.8 cm). Strands A and B use the same totals, so all seven strands are the same length.
Each back chain is a little longer than its motif: 2.8 in vs 2.75 in for a pumpkin and 3.6 in vs 3.5 in for a leaf. This keeps the cord relaxed so the motifs don’t curl.
Tension: Chain evenly at your gauge. Tight chains shorten a strand and loose chains make it sag. After motif 5, measure below the loop:
– Strand A: 112 ch, or 22.4 in (56.9 cm)
– Strand B: 116 ch, or 23.2 in (58.9 cm)
Size checkpoint: All 7 finished strands should measure 46 in (116.8 cm), within 0.5 in (1.3 cm) of each other.
Final Blocking
- Pin each leaf flat with one pin in each of its 5 ch-2 tips.
- Mist the leaves until damp and let them dry completely, about 6–8 hours.
- Don’t block the pumpkins. Roll each one gently between your palms to even out the stuffing.
- Hang each strand by its loop with a clothespin clipped to the last motif. Mist the cord lightly and let it dry overnight.
- Hang the strands 5 in (12.7 cm) apart. That’s 30 in (76.2 cm) from the first strand to the last, and 33.25 in (84.5 cm) wide overall with the motifs.
Final Quality-Control Checklist
- Each pumpkin has 14 sts x 36 rows, 6 even segments and a centered stem.
- Each pumpkin is 2.5 in (6.4 cm) wide and firm, with no fiberfill showing.
- Each leaf has 55 border sts, 5 sharp tips and a 1 in (2.5 cm) stem.
- The veins are even and the leaves lie flat.
- The strands match the grid: 17 burgundy pumpkins, 18 blush pumpkins and 35 leaves.
- Each cord has 224 ch below the loop and measures 46 in (116.8 cm).
- All tails are hidden.
Troubleshooting
- The pumpkin looks round: Tighten the segment wraps.
- The gather hole won’t close: Weave through every row-end and pull in two stages.
- The leaf cups: Your Rnd 3 is too tight. Loosen your tr stitches.
- The leaf ruffles: Recount the border to 11 sts per lobe.
- The points look blunt: Work the (rev sc, ch 2, rev sc) into the picot itself.
- Strands are uneven lengths: Recount the back chains (14 and 18) and the gaps (6).
- Motifs twist on the cord: Always attach from front to back.
Care
Hand wash in cool water, press the water out in a towel, and dry flat. Keep string lights resting on the rod rather than on the motifs.
Final Notes
Here’s how the measurements connect. A gauge of 18 sc x 20 rows gives a 3.1 in x 7.2 in (7.9 cm x 18.3 cm) strip, which becomes a 2.5 in (6.4 cm) pumpkin. The leaf grows from 3 in (7.6 cm) to 3.25 in (8.3 cm) with its border. At 5 ch per inch, 224 ch plus the loop makes a 46 in (116.8 cm) strand. Seven strands spaced 5 in (12.7 cm) apart give a curtain 33.25 in (84.5 cm) wide.
Happy crocheting!