

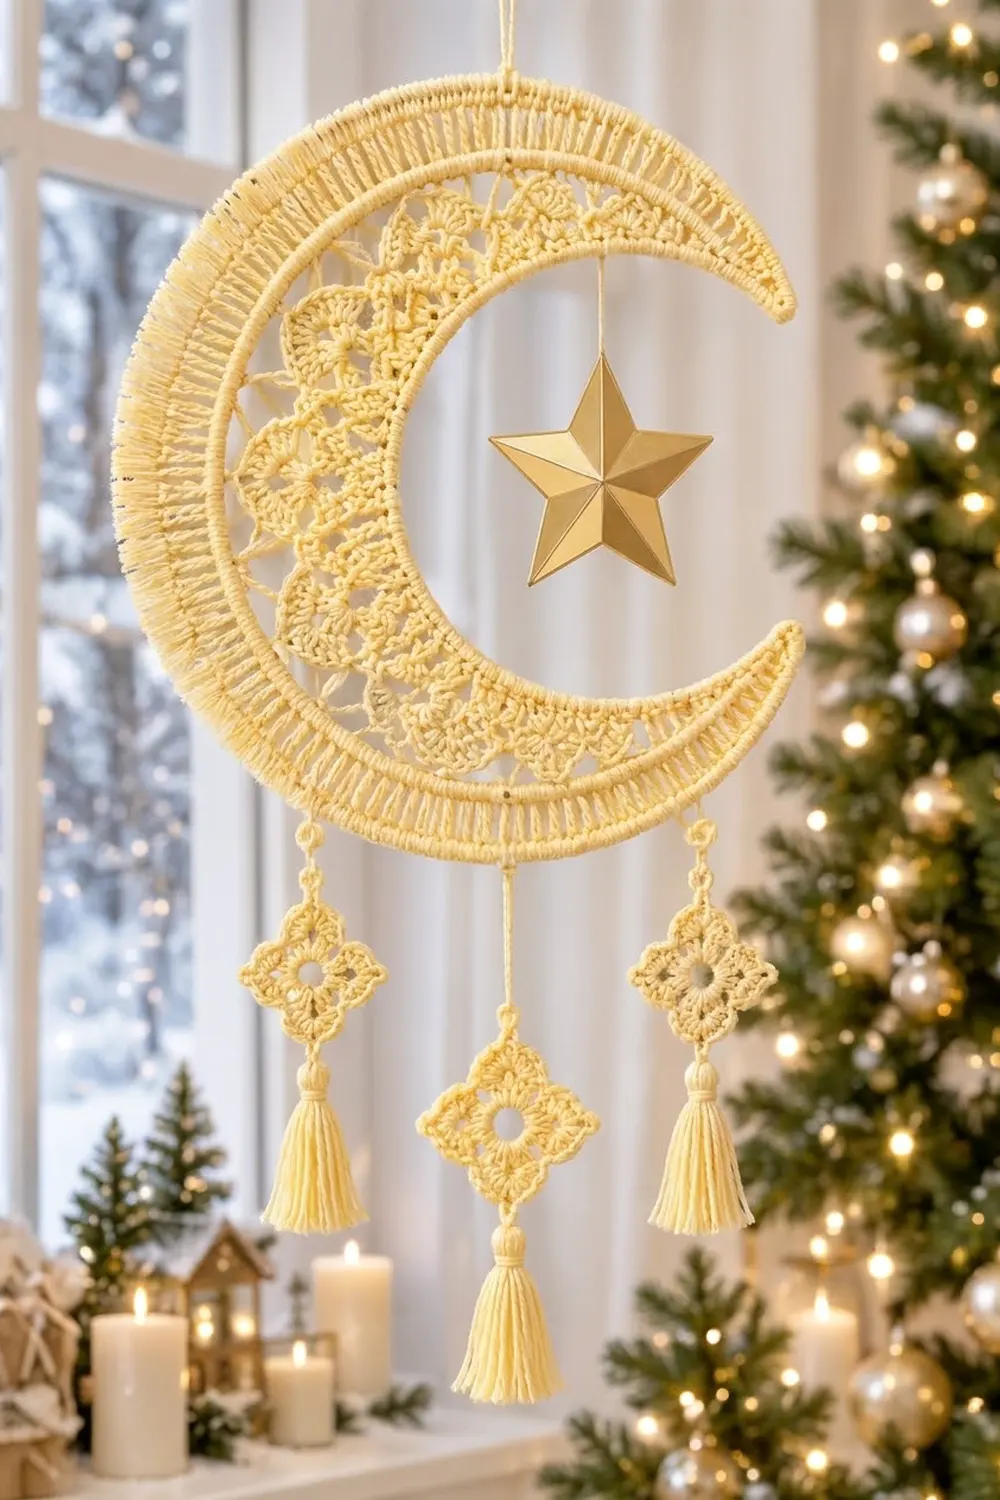
The Starlit Crescent is a lacy moon wall hanging in soft butter yellow. A dense corded rim curves around the outside, a ladder of tall radiating spokes sits just inside it, and a row of rounded shell scallops fills the inner curve. Three small diamond motifs on chain cords hang from the lower edge, each with a full tassel.
The whole piece uses one color, so the texture does the work. It looks calm and warm against a window or tree, and a small purchased gold star hung inside the crescent finishes it off. This pattern is written in US crochet terms.
The finished crescent is 9 in (22.9 cm) tall and 6.75 in (17.1 cm) wide. From the top of the crescent to the bottom of the center tassel, the hanging measures about 18 in (45.7 cm).
You work the crescent flat in turned rows, starting at the outer edge. Each row is shorter than the one before it, which tapers the tips, and a decrease row curves the band inward. After that you make three diamond motifs and three tassels. Chain cords join everything, and a light stiffening holds the shape.
Finished Size and Construction
- Finished crescent: 9 in (22.9 cm) tall x 6.75 in (17.1 cm) wide
- Total hanging length: about 18 in (45.7 cm), not counting the hanging loop
- Skill level: Intermediate
- Terminology: US
- Yarn weight: Sport (#2) mercerized cotton
- Hook: 2.75 mm (C-2)
- Number of pieces: 7 (1 crescent, 3 diamond motifs, 3 tassels), plus an optional purchased star
- Layout: crescent opening to the right, 3 drops hanging from the lower outer rim
- Motif size: 1.5 in (3.8 cm) per side, 2.25 in (5.7 cm) point to point
- Crescent band width before border: 1.6 in (4.1 cm) at the widest point
- Border depth: 0.3 in (0.8 cm), for a final band width of 1.9 in (4.8 cm)
Materials
Pick a smooth, tightly plied mercerized cotton. It shows stitch definition well and takes stiffener evenly. Acrylic and wool blends will not hold a crisp curve.
- Butter yellow, sport weight cotton: 60 g, about 190 m
That covers the crescent (about 22 g), three motifs (about 9 g), three tassels (about 14 g), and the cords and hanging loop (about 3 g). These quantities include a safety margin of roughly 25%.
Tools and extras:
- 2.75 mm (C-2) crochet hook
- Tapestry needle
- Stitch markers (4)
- Stiff card, 3 in (7.6 cm) wide, for the tassels
- Optional: 20 in (50.8 cm) of 20-gauge craft wire for the rim
- Fabric stiffener or heavy spray starch
- Blocking board and rustproof pins
- Optional: 2.25 in (5.7 cm) purchased gold star ornament and 4 in (10.2 cm) of gold thread
- Scissors
Abbreviations (US Terms)
- ch = chain
- sl st = slip stitch
- sc = single crochet
- hdc = half double crochet
- dc = double crochet
- tr = treble crochet
- sk = skip
- sp = space
- st(s) = stitch(es)
- rev sc = reverse single crochet
Special stitch – reverse sc (rev sc): Without turning, work from left to right (right to left if you are left-handed). Insert the hook into the next stitch to the right, yarn over, pull up a loop, then yarn over and pull through both loops. This gives the rounded, corded rim.
Gauge and Checkpoints
Gauge: 24 sc and 26 rows = 4 in (10.2 cm). One tr is about 0.6 in (1.5 cm) tall.
Make one diamond motif before you start the crescent. It’s quick, and it will show you whether your tension matches.
Checkpoints:
- Motif Round 1: 1 in (2.5 cm) across
- Finished motif: 1.5 in (3.8 cm) per side
- Crescent Row 1: 113 sc = 18.8 in (47.8 cm) long
- Crescent after Row 3: band is 0.9 in (2.3 cm) wide
- Crescent after Row 6: band is 1.6 in (4.1 cm) wide
- After the border: band is 1.9 in (4.8 cm) wide, crescent is 9 in (22.9 cm) tall
If your piece is too big, go down a hook size (2.5 mm). If it’s too small, go up to 3.0 mm. If Row 1 lands within 0.5 in (1.3 cm) of 18.8 in (47.8 cm), you’re fine, because blocking will cover the difference.
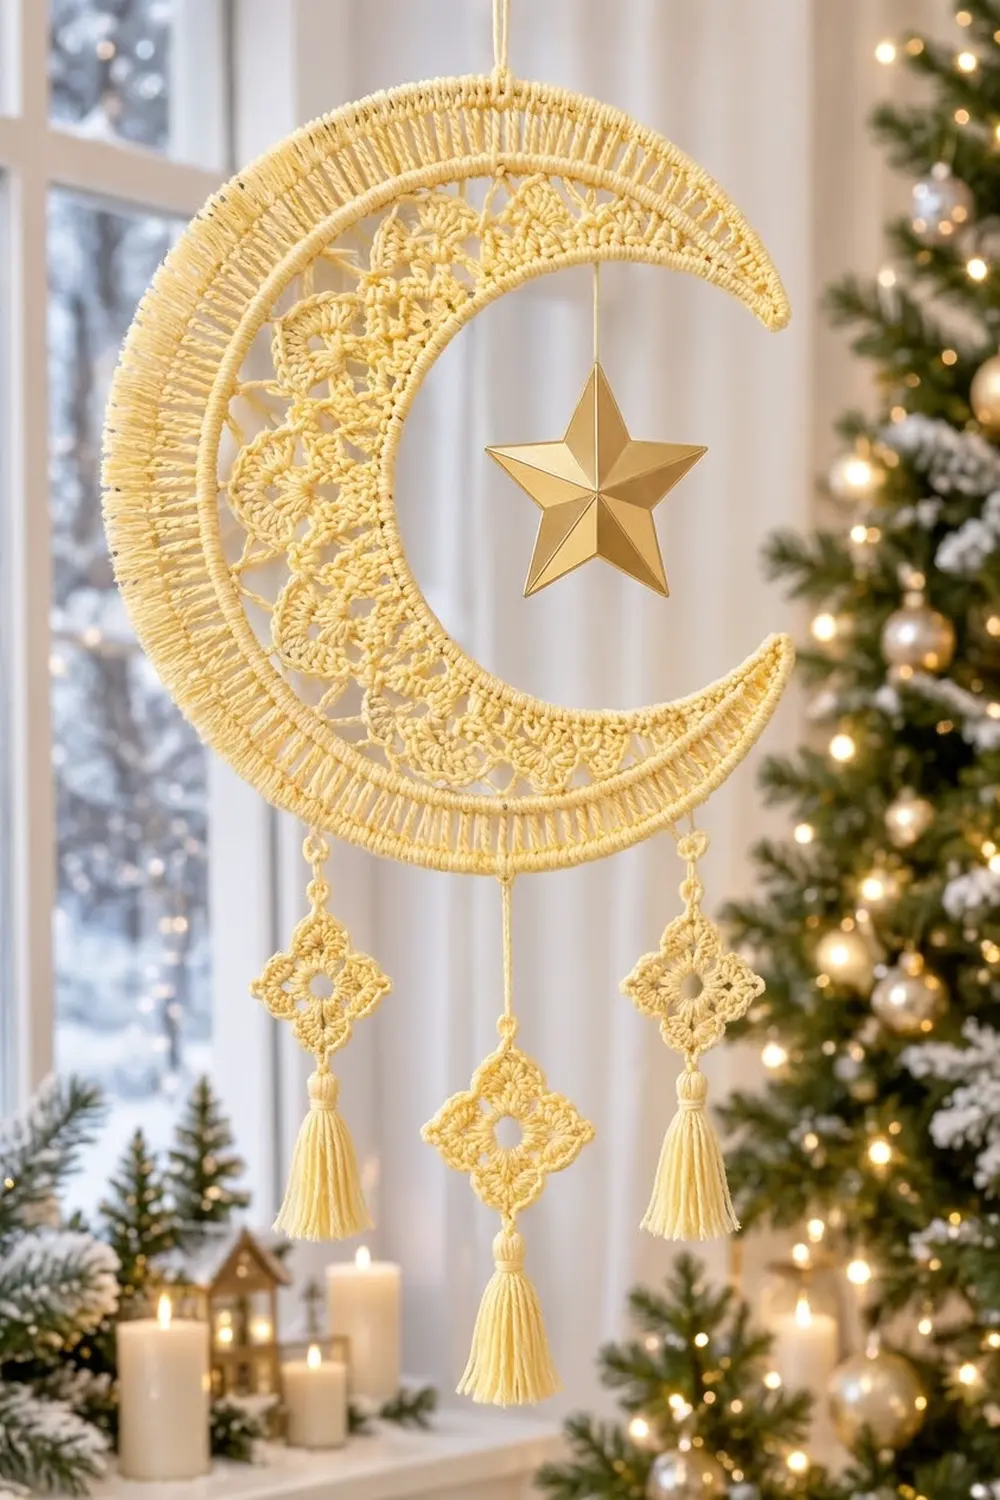
Crescent
The crescent is worked flat in turned rows from the outer edge inward. Row 1 forms the outer edge, and the border is added to its other side later.
Row 1: Ch 114, sc in 2nd ch from hook and in each ch across. Turn. (113 sc)
Row 2: Ch 1 (does not count as a stitch), sc in each st across. Turn. (113 sc)
Row 3 (spoke row): Ch 1, sl st in first 4 sts, sc in next 4 sts, hdc in next 4 sts, dc in next 4 sts, tr in next st, ch 1, sk next st, tr in next st; repeat from * 39 more times (40 times total), dc in next 4 sts, hdc in next 4 sts, sc in next 4 sts, sl st in last 4 sts. Turn.
(41 tr and 40 ch-1 sps in the center, plus 16 graded sts at each end = 113 positions)
The graded stitches at each end are what taper the tips. The tr spokes form the open ladder band.
Checkpoint: the band is now 0.9 in (2.3 cm) wide at the center.
Row 4 (curving row): Ch 1, sl st in first 8 sts, sc in next 8 sts, sc in first tr, sc in next ch-1 sp, sc in next tr, sk next ch-1 sp, sc in next tr; repeat from * 19 more times (20 times total), sc in next 8 sts, sl st in last 8 sts. Turn.
(61 center sc + 8 sc at each end = 77 sc, plus 16 sl sts)
The center section goes from 81 positions down to 61 sc, so the inner edge is about 75% as long as the outer edge. That’s what pulls the band into a crescent. Place a marker in the first and last of the 61 center sc.
Row 5 (shell row): Ch 1, sl st in first 16 sts, sc in next (marked) sc, sk next 2 sc, 5 dc in next sc, sk next 2 sc, sc in next sc; repeat from * 9 more times (10 times total), ending in the second marked sc. Leave the remaining 16 sts unworked. Turn.
(10 shells, 11 sc)
Check the math: 1 + (10 x 6) = 61, which uses up every center sc exactly.
Row 6 (scallop edging): Ch 1, sl st in first sc, sc in next 2 dc, 3 sc in next (center) dc, sc in next 2 dc, sl st in next sc; repeat from * 9 more times (10 times total). Fasten off.
(70 sc and 11 sl sts)
The 3 sc at each shell’s center give the scallops a rounded point, so they read as small flower-like fans along the inner curve.
Checkpoint: the band is 1.6 in (4.1 cm) wide at the center, and the tips taper to about one row deep.
Diamond Motifs (make 3)
Round 1: Ch 6, sl st in first ch to form a ring. Ch 3 (counts as dc), 15 dc in ring, sl st in top of beginning ch-3. (16 dc)
The ring leaves the open center hole.
Checkpoint: 1 in (2.5 cm) across.
Round 2: Ch 3 (counts as dc), (dc, ch 2, 2 dc) in same st, dc in next 3 sts, (2 dc, ch 2, 2 dc) in next st, dc in next 3 sts; repeat from * 2 more times, sl st in top of beginning ch-3. (28 dc: 7 per side, plus 4 ch-2 corner sps)
Round 3: Sl st in next dc and into the ch-2 corner sp. Ch 1, (sc, hdc, dc, ch 2, dc, hdc, sc) in corner sp, sk next dc, sc in next dc, sk next dc, 3 dc in next dc, sk next dc, sc in next dc, sk next dc; repeat from * 3 more times, sl st in first sc. Fasten off and leave a 6 in (15.2 cm) tail.
(4 corner clusters of 6 sts + ch-2, and 4 sides of 5 sts = 44 sts)
Check the math: there are 7 dc between each pair of corner spaces (2 from each corner group plus 3 straight dc). The side repeat uses exactly 7 sts (sk, sc, sk, 3 dc, sk, sc, sk), and the 3-dc group lands in the center dc.
Checkpoint: 1.5 in (3.8 cm) per side, 2.25 in (5.7 cm) point to point.
Tassels (make 3)
- Wrap yarn 25 times around the 3 in (7.6 cm) card.
- Slide a 10 in (25.4 cm) strand under the wraps at one edge and tie it tightly. This is the tie strand.
- Cut through the wraps at the opposite edge.
- Wrap a separate strand 6 times around the bundle, 0.25 in (0.6 cm) below the top, to form the neck. Knot it and bury the ends inside.
- Trim the bottom evenly to 2.75 in (7.0 cm).
Make All Pieces
| Piece | Quantity | Color |
|---|---|---|
| Crescent | 1 | Butter yellow |
| Diamond motif | 3 | Butter yellow |
| Tassel | 3 | Butter yellow |
Layout (front view, crescent opening to the right):
              [loop]
        ( crescent   [star] )
     |          |          |
    M1          |         M3
    T1         M2         T3
               T2
M = motif, T = tassel. M2 hangs lower than the others because its cord is longer.
Border
The border goes along the outer edge, into the free loops of the foundation chain on the other side of Row 1.
Border gauge: 6 sc per inch, the same as Row 1.
Border Row 1: With the RS facing, join yarn in the first free loop at the upper tip. If you’re using wire, lay it along the edge and work each sc over it. Ch 1, sc in each free loop across. (113 sc)
Border Row 2: Ch 1, do not turn. Rev sc in each sc across. Fasten off. (113 rev sc)
Why the math works: Row 1 has 113 sts, so there are 113 free loops, and the border puts one stitch in each. Because the border’s gauge matches Row 1, both edges are 18.8 in (47.8 cm) long. The rim lies smooth with no ruffling or cupping, and the rev sc row rolls into a firm, corded outer ring.
If you used wire, trim it so 0.5 in (1.3 cm) sticks out at each tip. Bend each end into a small loop and tuck it inside the tip stitches.
Hanging loop: Count from the upper tip and join yarn in the 15th rev sc. Ch 15, sl st in the same st, then work 20 sc into the loop. Fasten off. The loop stands 1.25 in (3.2 cm) tall.
Joining
Count each drop position from the upper tip along the border and mark it:
- M1: rev sc 75
- M2: rev sc 90
- M3: rev sc 105
Cords: Join yarn in one corner ch-2 sp of a motif. Ch until the chain measures 2 in (5.1 cm) for M1 and M3, or 3.5 in (8.9 cm) for M2. Sl st into the marked rev sc, inserting the hook under both loops plus the matching Border Row 1 sc, so the weight is spread over two rows. Then sl st back down each ch to the motif to make a firm cord. Fasten off.
Join stitch to stitch: one cord goes into one marked stitch. Don’t spread a cord over several stitches, or the drop will twist. Keep the chain tension even. A loose chain stretches once the tassel’s weight is on it.
Tassels: Pass the tie strand through the opposite (bottom) corner ch-2 sp, knot it securely, and weave the ends into the motif.
Star (optional): Tie the gold thread to the Row 4 sc directly in line with the hanging loop. Let the star hang so it sits inside the curve.
Checkpoint: hang the piece. It should measure about 18 in (45.7 cm) from the top of the crescent to the bottom of the center tassel.
Final Blocking
- Draw a circle with a 4.5 in (11.4 cm) radius on paper and put it under plastic wrap on your blocking board.
- Saturate the crescent and motifs with stiffener. Squeeze out the excess, but do not wring them.
- Pin the outer rim along the circle. Start at the center (rev sc 57) and work toward both tips.
- Pin each tr spoke so it points straight in toward the center of the circle.
- Pin each shell scallop at its center sc so the inner curve is smooth.
- Pin each motif flat as a square on point, with one pin in each corner.
- Let everything dry completely, about 24 hours. Don’t stiffen the tassels; comb them straight instead.
Final Quality-Control Checklist
- Row 1 and Border Row 1 both have 113 sts
- Row 3 has 41 tr and 40 ch-1 sps
- Row 4 has 61 center sc
- There are 10 even shells and 10 rounded scallops
- Each motif has 44 sts and 4 sharp corners
- The crescent is 9 in (22.9 cm) tall and the band is 1.9 in (4.8 cm) wide
- The cords measure 2 in (5.1 cm), 3.5 in (8.9 cm), and 2 in (5.1 cm)
- The tassels match at 2.75 in (7.0 cm)
- The piece hangs level from the loop
- All ends are woven in
Troubleshooting
The crescent lies straight instead of curving. Check Row 4. If you didn’t skip every second ch-1 sp, the inner edge is too long.
The crescent cups. Your Row 4 tension is too tight. Rework it with a looser hand, or go up half a hook size for that row only.
The shells ruffle. Use a smaller hook for Rows 5 and 6, and check that you skipped 2 sc on each side of every shell.
The tips are blunt. Pull the Row 3 and Row 4 sl sts snug, and pin the tips to a point when blocking.
The piece hangs crooked. Move the hanging loop one or two sts toward the heavier side.
The motifs twist. Make sure each cord comes out of a single corner sp and goes into a single rim st.
Care
Spot clean only with a damp cloth. If the piece softens over time, reshape it and refresh it with spray starch.
Final Notes
Each measurement in this pattern builds on the one before. Gauge sets Row 1 at 18.8 in (47.8 cm). Row 1 sets the 113-stitch border. The Row 4 decrease turns that length into a 9 in (22.9 cm) crescent with a 1.9 in (4.8 cm) band, and each motif’s 1.5 in (3.8 cm) sides keep the three drops in proportion. Check each number as you reach it and the hanging will come out as planned.
Happy crocheting!