

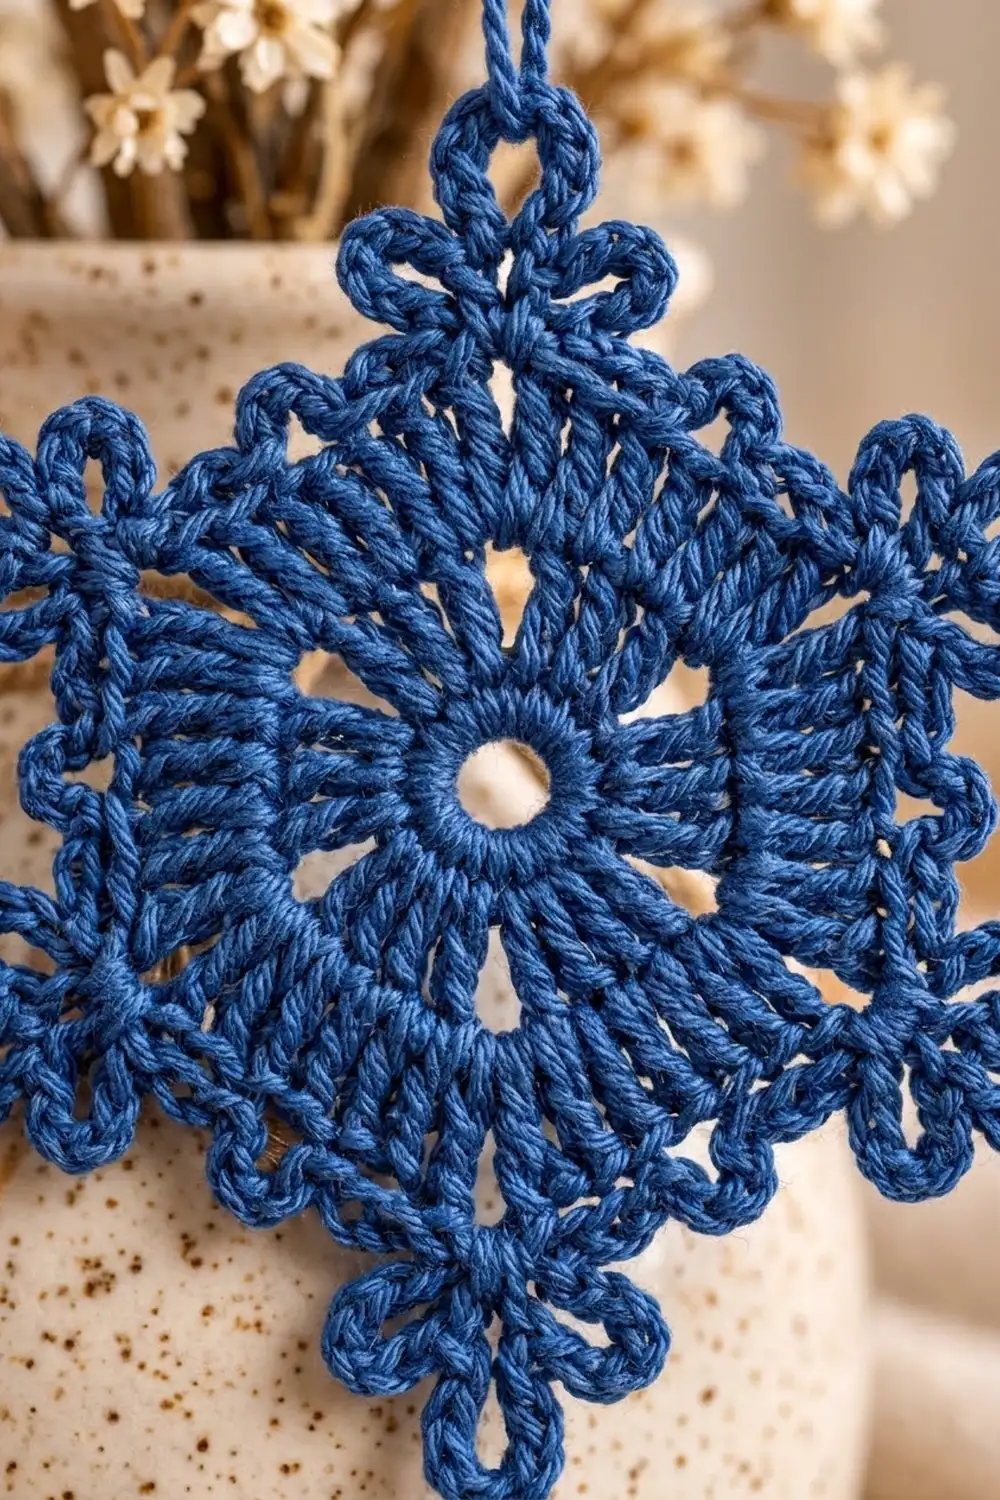
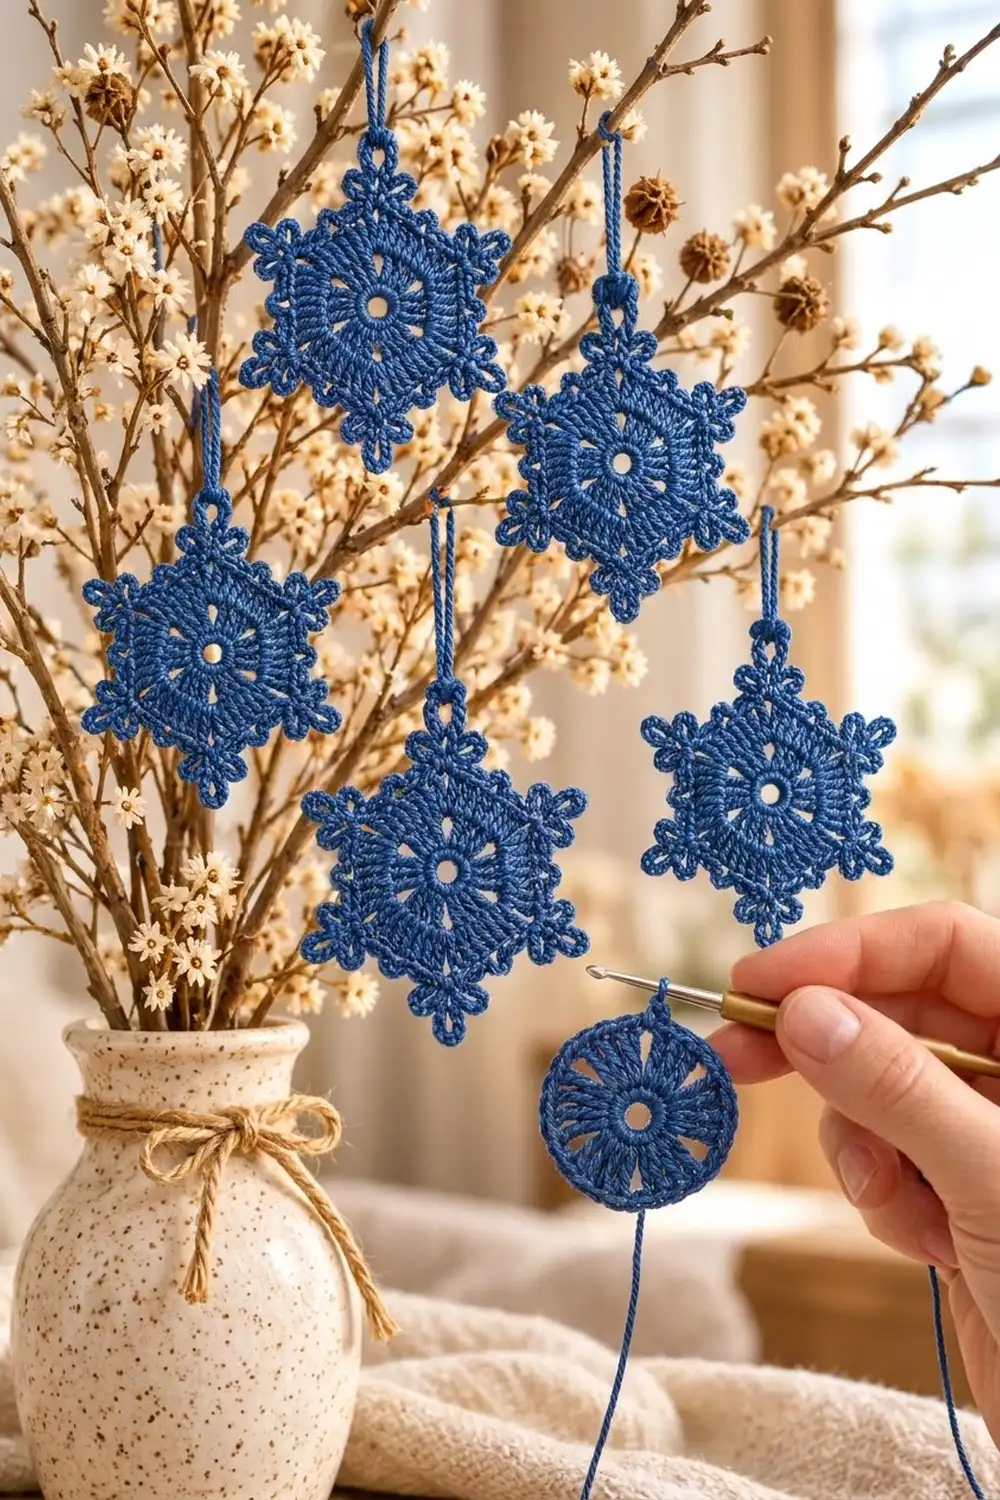
The Bluebell Frost Snowflake is a small, crisp hexagon ornament in a single shade of deep cornflower blue cotton. It has a tidy open ring at the center and six spokes of double crochet separated by narrow wedge-shaped openings. Around that sits a solid hexagon body with a three-loop trefoil at each of its six points.
It looks frosty and a little vintage, almost like a pressed snowflake. A fine mercerized cotton shows the stitches clearly, so each spoke, eyelet, and loop stands out when the ornament hangs against branches or a window.
This pattern uses US crochet terms. The finished ornament measures about 2.8 in (7.1 cm) across the flat sides of the hexagon and about 4 in (10.2 cm) from trefoil tip to trefoil tip, not counting the hanging loop.
The ornament is a single piece worked in the round from the center out:
- Make a ring and build six double crochet spokes.
- Close the circle with a round of single crochet.
- Shape it into a hexagon with chain-2 corners.
- Finish with a single crochet edge that adds the trefoil points.
- Add a chain hanging loop last.
Finished Size and Construction
- Finished size: 2.8 in (7.1 cm) from flat side to flat side; 4 in (10.2 cm) from point to point
- Skill level: Easy+ (advanced beginner)
- Terminology: US crochet terms
- Yarn weight: Super Fine (#1) / fingering-weight mercerized cotton
- Hook: 2.5 mm (US B-1 or C-2, depending on brand)
- Number of pieces: 1 (single motif)
- Layout: one hexagon snowflake with 6 trefoil points and 1 hanging loop
- Piece size before edging (after Round 5): 2.4 in (6.1 cm) from flat side to flat side
- Edging depth: about 0.2 in (0.5 cm) along the sides; the trefoils reach about 0.4 in (1.0 cm) past each corner
- Hanging loop: about 1.5 in (3.8 cm) tall
Materials
Yarn advice: Choose a smooth, tightly plied mercerized cotton in fingering weight. Cotton holds the trefoils open after blocking and doesn’t get fuzzy. Acrylic will work, but the points will be softer and harder to stiffen.
- Blue (main and only color): 5 g / about 17 m (18.6 yd) per ornament
- For a set of six ornaments: 30 g / about 102 m (111.5 yd)
These amounts include about 25% extra for your gauge swatch, yarn tails, and the hanging loop.
Tools:
- 2.5 mm crochet hook
- Tapestry needle
- Small scissors
- Stitch marker
- Ruler or tape measure
- Blocking mat or folded towel, and rustproof pins
- Fabric stiffener, or a sugar-water or starch solution (optional, but recommended)
Abbreviations (US Terms)
- ch – chain
- sl st – slip stitch
- sc – single crochet
- dc – double crochet
- sp – space
- st(s) – stitch(es)
- rep – repeat
- [ ] – work the instructions inside the brackets the number of times stated
Special stitch – Trefoil Point:
- Ch 9, then sl st in the 7th ch from the hook. This makes a 6-ch loop on top of a 3-ch stem, and the sl st lands in the top chain of the stem.
- [Ch 6, sl st in the same top stem ch] twice. You now have three 6-ch loops fanning out from one point.
- Sl st in each of the 2 remaining stem chains to work back down to the base.
Gauge and Checkpoints
Gauge isn’t critical for an ornament, but it controls how open the wedges look and how crisp the points are. Make one test snowflake before you start a set.
Main gauge: Rounds 1–4 = 2 in (5.1 cm) across, measured flat without stretching.
Checkpoints:
- After Round 1: the ring is about 0.6 in (1.5 cm) across
- After Round 2: about 1.2 in (3.0 cm) across
- After Round 3: about 1.7 in (4.3 cm) across
- After Round 4: 2 in (5.1 cm) across, lying flat
- After Round 5: 2.4 in (6.1 cm) from flat side to flat side
- After Round 6: 2.8 in (7.1 cm) from flat side to flat side; 4 in (10.2 cm) from point to point
If your circle is too big after Round 4, or it ruffles, go down to a 2.25 mm hook. If it’s too small, or it curls up like a bowl, go up to a 2.75 mm hook. A difference of 0.2 in (0.5 cm) at Round 4 grows to about 0.4 in (1.0 cm) from point to point, so fix it early.
Pattern
Leave a 4 in (10.2 cm) starting tail. Join each round with a sl st to the first st unless the pattern says otherwise. Don’t turn.
Tip: Put a stitch marker in the first st of each round. Counting from a marked starting point keeps the corners in Round 5 in the right place.
Center Ring
Foundation: Ch 6, sl st in the first ch to make a ring.
Round 1: Ch 1, 18 sc in the ring, sl st in the first sc to join. (18 sc)
The ring should leave a clean, round hole about 0.25 in (0.6 cm) wide in the center. Spread the sc evenly around the ring rather than bunching them to one side.
Spokes
Round 2: Ch 3 (counts as dc), dc in next 2 sc, ch 2, dc in next 3 sc, ch 2; rep from * 4 more times, sl st in top of the beginning ch-3 to join. (18 dc in 6 groups of 3, plus 6 ch-2 sps)*
This round sets up the six spokes. Each ch-2 sp is the start of a wedge opening.
Round 3: Ch 3 (counts as dc), dc in same st as join, dc in next dc, 2 dc in next dc, ch 3, skip ch-2 sp, 2 dc in next dc, dc in next dc, 2 dc in next dc, ch 3, skip ch-2 sp; rep from * 4 more times, sl st in top of the beginning ch-3 to join. (30 dc in 6 groups of 5, plus 6 ch-3 sps)*
Each spoke now widens from 3 to 5 dc. The ch-3 sps make the openings wider, so they look like narrow wedges pointing toward the center.
Closing the Circle
Round 4 (conversion round): Ch 1, sc in same st as join and in next 4 dc, 3 sc in next ch-3 sp, sc in next 5 dc, 3 sc in next ch-3 sp; rep from * 4 more times, sl st in first sc to join. (30 sc worked 1 in each dc + 18 sc worked into the 6 ch-3 sps = 48 sc)*
The piece is now a flat circle with a solid sc rim. Each group of 8 sc is one repeat: 5 sc over a spoke, then 3 sc over a wedge. Check your 2 in (5.1 cm) gauge here.
Hexagon Body
In this round, each corner goes in the middle sc of a wedge group, so all six wedges point straight at the six corners.
Round 5: Ch 3 (counts as dc), dc in next 5 sts, (dc, ch 2, dc) in next st, dc in next 7 sts, (dc, ch 2, dc) in next st; rep from * 4 more times, dc in last st, sl st in top of the beginning ch-3 to join. (54 dc, 6 ch-2 corner sps)*
Stitch check: you worked into 6 + 1 + (5 × 8) + 1 = 48 sts of Round 4, so every st was used exactly once.
Each side now has 9 dc: the second dc of one corner, 7 dc along the side, and the first dc of the next corner. 6 sides × 9 dc = 54 dc. The ch-2 corners make small eyelets at the six points.
Checkpoint: 2.4 in (6.1 cm) from flat side to flat side.
Edging with Trefoil Points
Round 6: Ch 1, sc in same st as join and in next 6 dc, (sc, Trefoil Point, sc) in next ch-2 corner sp, sc in next 9 dc, (sc, Trefoil Point, sc) in next ch-2 corner sp; rep from * 4 more times, sc in last 2 dc, sl st in first sc to join. (66 sc and 6 Trefoil Points)*
Fasten off, leaving a 4 in (10.2 cm) tail.
Hanging Loop
Pick one point to be the top. Join the yarn with a sl st in the tip of the middle 6-ch loop of that trefoil. Ch 30, then sl st in the same spot. Fasten off, and weave the tail into the trefoil stem so the join doesn’t show.
The loop stands about 1.5 in (3.8 cm) tall. For a longer hanger, add chains in groups of 10. Each extra 10 ch adds about 0.5 in (1.3 cm) of height.
Weave in all ends on the wrong side. Run each tail through the sc for at least 1 in (2.5 cm), then go back the other way for a few stitches.
Edging Math
Round 6 is the border of this single motif. Here’s how the counts work.
Edging gauge: about 7 sc per 1 in (2.5 cm) along the edge.
Per-side count: Each side has 11 sc:
- 1 sc in the corner sp at one end
- 9 sc, 1 in each of that side’s 9 dc
- 1 sc in the corner sp at the other end
Each corner sp holds 2 sc with a Trefoil Point between them. Each of those 2 sc belongs to only one side, so no corner stitch is counted twice.
Total: 6 sides × 11 sc = 66 sc. You can also count it as 54 sc (1 in each dc) + 12 corner sc (2 in each of the 6 corner sps) = 66 sc.
Why it lies flat: Round 5 already made each side the right length. Working 1 sc in each dc adds height without stretching or bunching the edge. The 2 corner sc turn the corner, and the Trefoil Point sits beyond it. That lengthens the points without pulling the sides in.
Size check: The sc edge adds about 0.2 in (0.5 cm) on each flat side, so 2.4 in (6.1 cm) becomes 2.8 in (7.1 cm). A hexagon that is 2.8 in (7.1 cm) across the flat sides is about 3.2 in (8.1 cm) from corner to corner. Add about 0.4 in (1.0 cm) of trefoil at each end, and you get about 4 in (10.2 cm) from point to point.
Final Blocking
- Wet the ornament. Soak it in cool water for a few minutes, then gently press the water out in a towel. Don’t wring it.
- Stiffen it (optional). Dip it in fabric stiffener, or in a mix of equal parts sugar and warm water, stirred until the sugar dissolves. Squeeze out the extra until no liquid sits in the wedges or eyelets.
- Pin the center. Lay the snowflake flat on the mat and put one pin through the center ring so it stays round.
- Pin the corners. Pin the six corner sps so the hexagon measures 2.8 in (7.1 cm) from each flat side to the opposite side. Check all three pairs of sides.
- Open the trefoils. Pin the tip of each middle loop straight out from its corner. Then pin each side loop at a slight angle so all three loops open evenly. Check that the ornament measures 4 in (10.2 cm) from point to point across all three pairs of points.
- Shape the spokes. Use a pin or a blunt needle to open each wedge so all six openings are the same size.
- Let it dry completely. Leave it pinned until fully dry, usually 12–24 hours. Then unpin it and hang it by the loop.
Final Quality-Control Checklist
- Round 1 has 18 sc and leaves a round hole in the center.
- There are six spokes, each 5 dc wide at Round 3.
- There are six wedge openings, all about the same size.
- Round 4 has 48 sc and lies flat.
- Round 5 has 54 dc, with 9 dc per side and 6 ch-2 corner eyelets.
- Each wedge points at a corner.
- Round 6 has 66 sc, with 11 sc per side.
- There are six Trefoil Points, each with three 6-ch loops.
- The ornament is 2.8 in (7.1 cm) across the flat sides and 4 in (10.2 cm) across the points.
- The hanging loop is secure and centered on one trefoil.
- All ends are woven in and don’t show.
Troubleshooting
The center hole is closed or puckered. Your Round 1 sc are too tight. Work them more loosely, or start with a ch-7 ring.
The circle curls up after Round 4. Your tension is tight. Go up a hook size, or loosen the ch-3 sps in Round 3.
The circle ruffles after Round 4. Your tension is loose. Go down a hook size, and make sure you put exactly 3 sc in each ch-3 sp.
The wedges don’t point at the corners. You probably started the corners in Round 5 one stitch early or late. Count 5 dc after the beginning ch-3 before you work the first corner.
One side has 8 or 10 dc. You skipped or doubled a stitch. Make sure Round 4 has 48 sts before you work Round 5.
The trefoils twist or flop. Make sure each sl st goes into the same top stem chain. Then stiffen the ornament and pin each loop open.
The hanging loop pulls the point out of shape. Attach the loop at the tip of the middle loop, not at the stem, and weave in the tail firmly.
Care
Hand wash in cool water with mild soap, press dry in a towel, and block flat again. If you used stiffener, stiffen again after washing so the points stay crisp.
Final Notes
Here’s how the measurements build from the center out:
- An 18-sc ring grows into 18 dc spokes, then 30 dc spokes with open wedges.
- A 48-sc rim closes the circle at 2 in (5.1 cm).
- Round 5 makes a 54-dc hexagon with 9 dc per side, measuring 2.4 in (6.1 cm).
- The 66-sc trefoil edging brings it to 2.8 in (7.1 cm) across the flat sides and 4 in (10.2 cm) from point to point.
If you check each of these numbers as you go, every snowflake in your set will match.
Happy crocheting!