

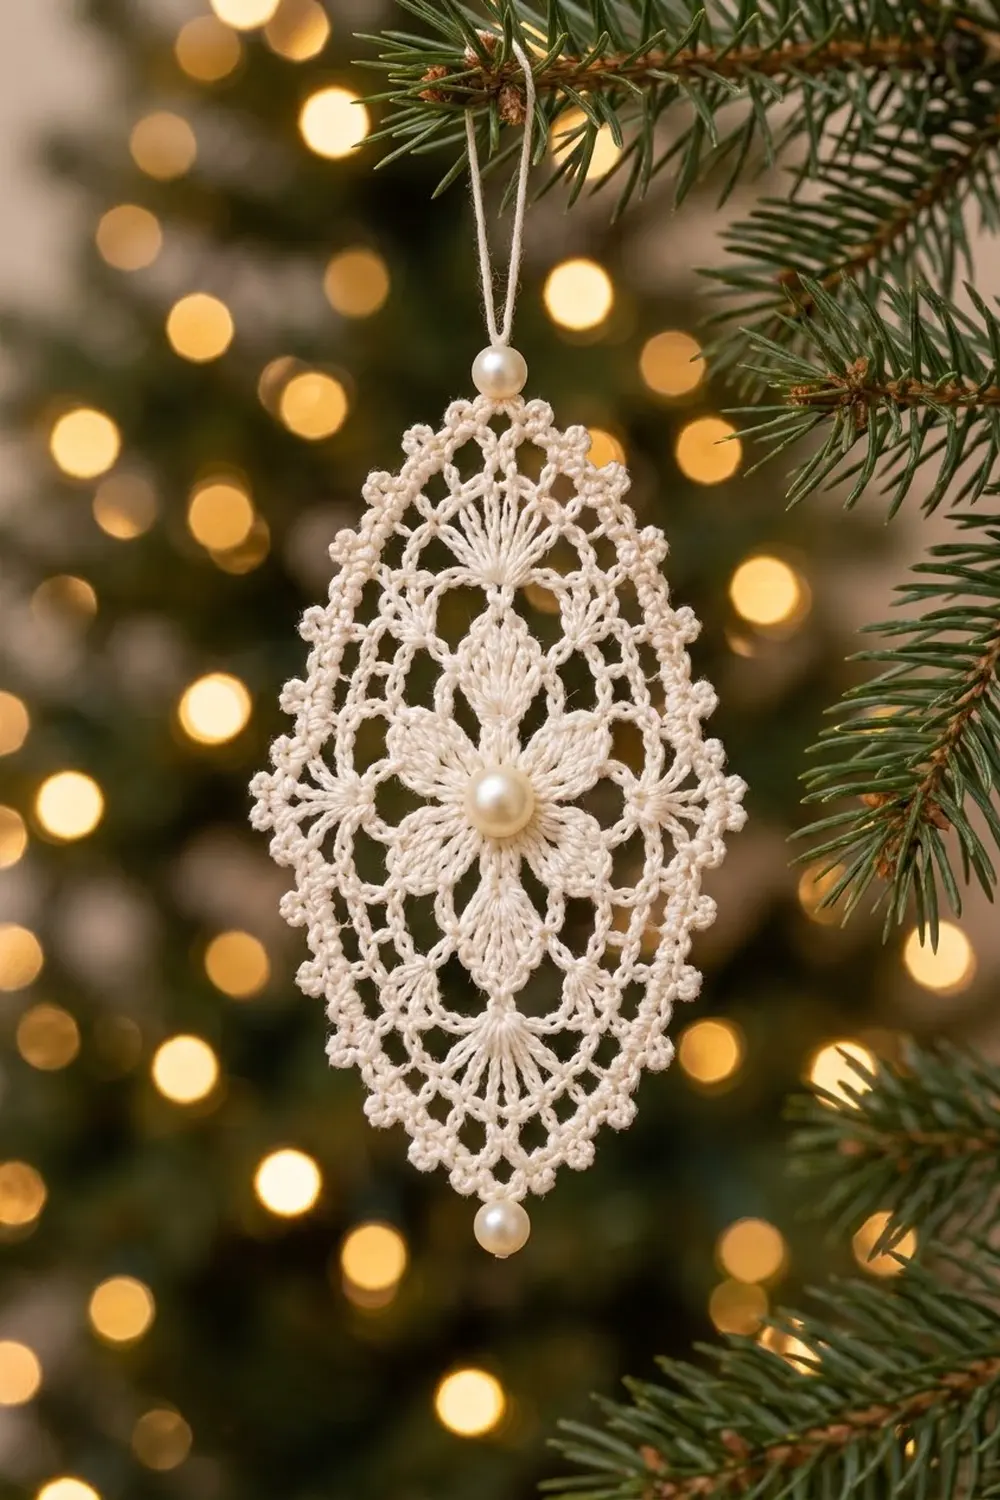
The Pearl Frost Lace Ornament is a pointed-oval lace ornament worked in fine ivory cotton thread. An eight-petal flower sits at its heart, framed by open chain-loop mesh and two tall stitch fans that pull the shape into a soft almond. A picot edge finishes the outline, and three pearls add a quiet shine: one in the center, one at the top, and one at the bottom point.
The look is classic heirloom lace in one creamy color, the kind that reads well on a green tree, a gift package, or a window. Make one as a keepsake, or make several identical copies to hang together.
This pattern uses US crochet terms. The finished ornament is 2.75 in (7.0 cm) wide and 4.5 in (11.4 cm) tall without the hanger. The hanging loop adds about 1.5 in (3.8 cm), and the bottom pearl adds about 0.25 in (0.6 cm).
Construction is simple: you work one piece in joined rounds, starting from the center. Rounds 1–4 form the flower, Rounds 5–8 build the mesh and the two point fans, and Rounds 9–10 are the border. After that you add the pearls and hanger, then starch and block the ornament.
Finished Size and Construction
- Finished size: 2.75 in × 4.5 in (7.0 cm × 11.4 cm), not counting the hanger
- Skill level: Intermediate (fine thread, tall stitches, chain spaces)
- Terminology: US crochet terms
- Yarn weight: Size 10 crochet cotton thread (lace weight, 0)
- Hook: 1.5 mm steel hook
- Number of pieces: 1
- Layout: Single motif worked in the round, hung vertically with points at top and bottom
- Piece size: 2.75 in × 4.5 in (7.0 cm × 11.4 cm)
- Size before border: 2.25 in × 4 in (5.7 cm × 10.2 cm)
- Border depth: 0.25 in (0.6 cm) on every side
Materials
Thread: Use mercerized size 10 cotton. Mercerized thread has a soft sheen that suits the pearls, and it holds starch well. Avoid fuzzy or acrylic thread, which blurs the open mesh.
- Ivory/cream: 5 g, about 25 m
That amount includes a margin for testing your gauge and weaving in ends. A typical ornament uses roughly 4 g (about 20 m).
Tools and notions:
- 1.5 mm steel crochet hook
- One 8 mm cream pearl bead (flower center)
- Two 6 mm cream pearl beads (top and bottom)
- Beading needle or very fine sewing needle
- Ivory sewing thread
- Tapestry needle for weaving in ends
- Scissors
- Fabric stiffener or heavy spray starch
- Blocking board or foam, plus rustproof pins
- Plastic wrap to protect the board
Abbreviations (US Terms)
- ch – chain
- sl st – slip stitch
- sc – single crochet
- dc – double crochet
- tr – treble crochet (yarn over twice)
- dtr – double treble crochet (yarn over 3 times)
- sp(s) – space(s)
- st(s) – stitch(es)
- rep – repeat
- beg – beginning
Special stitch – picot: Ch 3, sl st in the 3rd ch from hook (the first ch made).
Standing sc: With a slip knot on the hook, insert the hook in the stitch or space, yarn over, pull up a loop, yarn over and pull through both loops.
Gauge and Checkpoints
Gauge is not critical for an ornament, but it controls the final shape. Make the center flower first and check it before you continue.
Gauge: Rounds 1–3 = 1 in (2.5 cm) across, measured petal tip to petal tip.
Checkpoints:
- After Round 1: 0.5 in (1.3 cm) across.
- After Round 4: 1.25 in (3.2 cm) across.
- After Round 6: about 1.75 in (4.4 cm) wide × 2.5 in (6.4 cm) tall.
- After Round 8 (before border), lightly pinned: 2.25 in × 4 in (5.7 cm × 10.2 cm).
- After Round 10 and blocking: 2.75 in × 4.5 in (7.0 cm × 11.4 cm).
If your flower is too big, try a 1.25 mm hook, or keep your chains snugger. If it is too small, go to a 1.75 mm hook. Change hooks now, not at the border, so the whole ornament changes size evenly.
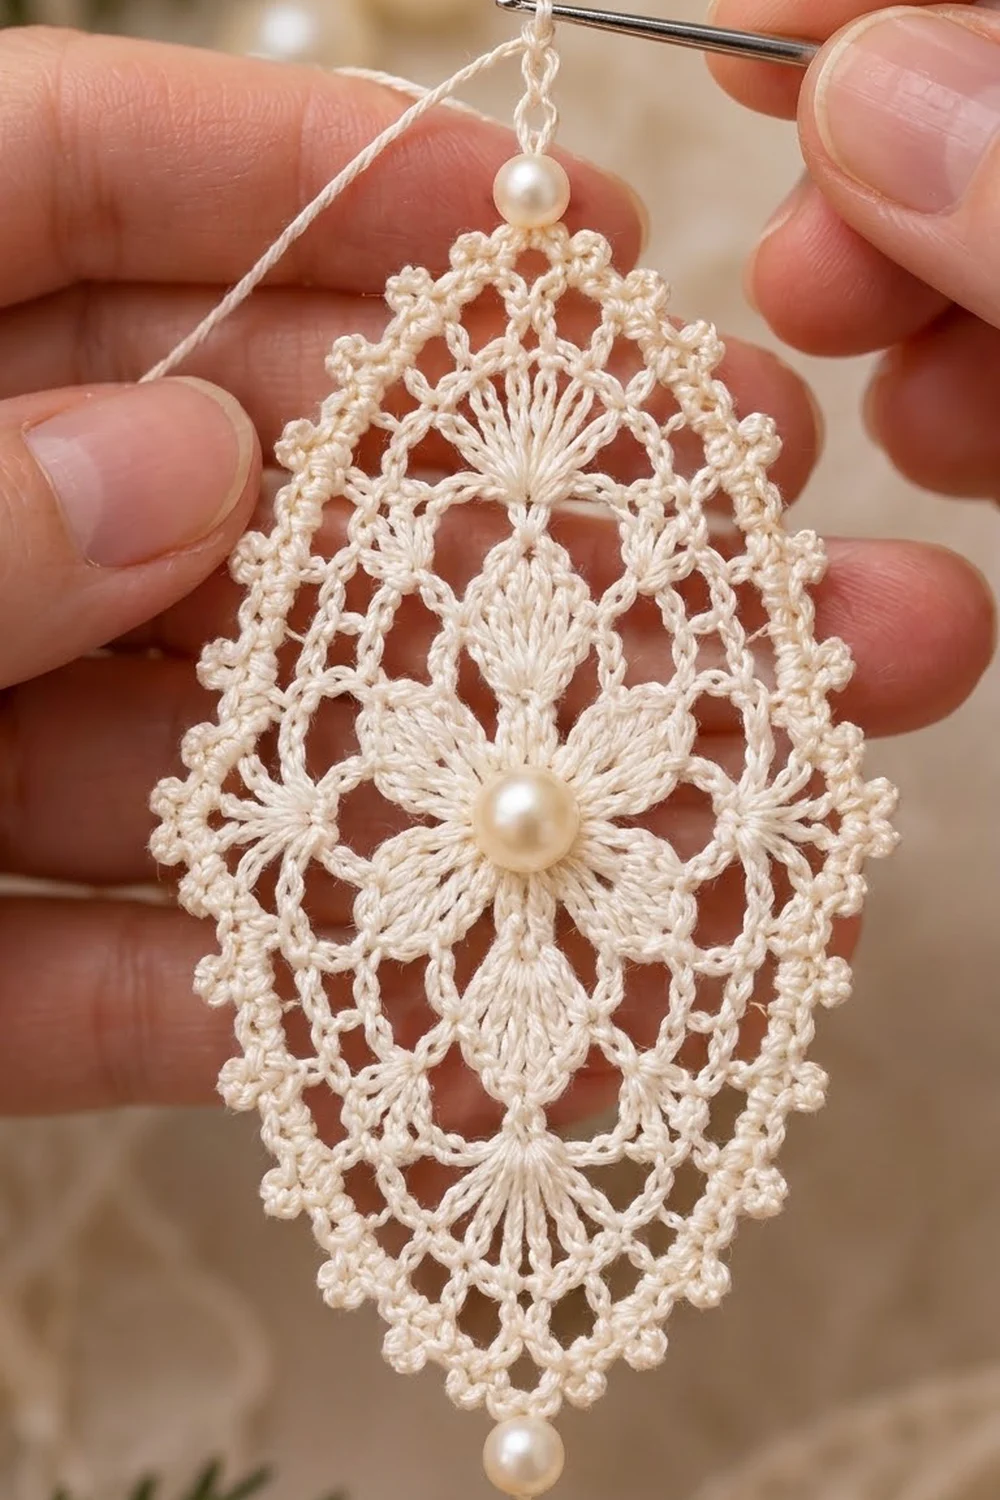
Pattern: Center Flower
Round 1: Ch 4, sl st in first ch to form a ring. Ch 3 (counts as dc), 15 dc in ring, sl st in top of beg ch-3. (16 dc)
Round 2: Ch 1, sc in same st, ch 4, skip next st, *sc in next st, ch 4, skip next st*; rep from * 6 more times, sl st in first sc. (8 sc, 8 ch-4 sps)
Round 3 (petals): Sl st in next ch-4 sp. In each ch-4 sp work: (sc, dc, tr, ch 2, tr, dc, sc). Sl st in first sc. (8 petals; 48 sts and 8 ch-2 tips)
Each petal comes out as a pointed leaf, and the ch-2 tip is its point. Press the petals flat with your fingers before going on.
Round 4: Sl st in next dc, sl st in next tr, sl st in ch-2 tip. Ch 1, sc in same tip, ch 7, *sc in next ch-2 tip, ch 7*; rep from * 6 more times, sl st in first sc. (8 sc, 8 ch-7 loops)
The sc you worked at the start of this round is Tip 1, and it becomes the top of the ornament. Tip 5 is directly opposite it and becomes the bottom. Mark Tip 1 with a scrap of thread.
Pattern: Mesh and Point Fans
Round 5: Sl st in next 3 ch, so you are at the center of the first ch-7 loop. Ch 1, (sc, ch 5, sc) in same loop, *ch 5, (sc, ch 5, sc) in next ch-7 loop*; rep from * 6 more times, ch 2, dc in first sc to join. (16 sc, 16 ch-5 loops)
The ch-2 and dc join counts as the last ch-5 loop. Eight loops sit inside the old ch-7 loops, and eight sit over the petal tips. The joining dc sits over Tip 1, ready for the top fan.
Round 6 (fans): Ch 4 (counts as tr), 8 tr around the post of the joining dc. That gives a top fan of 9 tr. *Ch 5, sc in next ch-5 loop*; rep from * 6 more times (7 sc). Ch 5, 9 tr in next ch-5 loop (the loop over Tip 5, for the bottom fan). Rep from * to * 7 times, ch 5, sl st in top of beg ch-4. (18 tr, 14 sc, 16 ch-5 loops)
Both fans should line up with your marked tips, so the motif already looks taller than it is wide.
Round 7: Ch 6 (counts as dtr + ch 1), *dtr in next tr, ch 1*; rep from * 6 more times, dtr in last tr of fan. That makes the top fan 9 dtr with 8 ch-1 sps. Ch 7, sc in next ch-5 loop, *ch 5, sc in next ch-5 loop*; rep from * 6 more times, ch 7. That gives 8 sc and 9 loops on the side. Work the bottom fan the same way: dtr in first tr, *ch 1, dtr in next tr*; rep from * 7 more times (9 dtr, 8 ch-1 sps). Ch 7, sc in next ch-5 loop, *ch 5, sc in next ch-5 loop*; rep from * 6 more times, ch 7, sl st in 5th ch of beg ch-6. (18 dtr, 16 ch-1 sps, 16 sc, 4 ch-7 loops, 14 ch-5 loops)
The ch-7 loops next to each fan bridge the height of the tall dtr stitches down to the short side mesh.
Round 8: Sl st in first ch-1 sp. Ch 1, sc in same sp, *ch 3, sc in next ch-1 sp*; rep from * 2 more times. Ch 7 (this is the point loop), sc in next ch-1 sp, *ch 3, sc in next ch-1 sp*; rep from * 2 more times. That uses all 8 ch-1 sps of the fan. Ch 5, sc in next ch-7 loop, *ch 5, sc in next loop*; rep from * 7 more times, ch 5. That gives 9 sc and 10 ch-5 loops on the side. Work the bottom fan and the second side the same way, then sl st in first sc. (34 sc, 12 ch-3 loops, 2 ch-7 point loops, 20 ch-5 loops)
Check: the ring has 34 sc and 34 loops (12 + 2 + 20). Each fan has 8 sc and 7 loops, and each side has 9 sc and 10 loops.
Pin the motif lightly into the almond shape and measure. It should be 2.25 in × 4 in (5.7 cm × 10.2 cm).
Border
Border gauge: 15 sc = 1 in (2.5 cm) along the edge.
Round 9 (conversion round): Sl st in first ch-3 loop. Ch 1, 3 sc in same loop, 3 sc in each of next 2 ch-3 loops. In the point loop work (4 sc, ch 3, 4 sc). Work 3 sc in each of next 3 ch-3 loops, then 5 sc in each of next 10 ch-5 loops. Work 3 sc in each of next 3 ch-3 loops, (4 sc, ch 3, 4 sc) in the bottom point loop, 3 sc in each of next 3 ch-3 loops, and 5 sc in each of the last 10 ch-5 loops. Sl st in first sc. Fasten off.
Count: 150 sc worked one per chain (12 × 3 + 20 × 5 + 2 × 7) + 2 extra sc (one in each point loop) = 152 sc, plus 2 ch-3 tips.
Counting from tip to tip, each half has 76 sc: 4 + 9 at the top fan, 50 along the side, and 9 + 4 at the bottom fan.
Round 10 (picots): Join with a standing sc in the top ch-3 tip, then work picot and sc in that same tip. *Sc in next 2 sc, picot, sc in next 2 sc*; rep from * 18 more times (19 repeats, 76 sc). Work (sc, picot, sc) in the bottom ch-3 tip, rep from * 19 times along the second half, then sl st in first sc. Fasten off. (156 sc, 40 picots)
Why the math works: A 2.25 in × 4 in (5.7 cm × 10.2 cm) almond has an outline of about 10 in (25.4 cm). At 15 sc per inch, that calls for about 150 sc. Round 9 has 152, so the edge lies flat without ruffling or cupping. Since 76 divides evenly by 4, the picots space out perfectly: every picot has exactly 4 sc between it and the next one, including the ones at the tips. The sc round adds about 0.1 in (0.3 cm) and the picots add about 0.15 in (0.4 cm), which together make the 0.25 in (0.6 cm) border on each side.
Pearls and Hanger
Top pearl and hanger: Thread one 6 mm pearl onto the ivory thread with a beading needle. Make a slip knot, then sl st in the top tip picot and ch 2. Slide the pearl up to the hook and ch 1 to lock it in place. Ch 30, sl st in the locking ch to close the loop, then fasten off. The finished loop is about 1.5 in (3.8 cm) long.
Bottom pearl: Sew the second 6 mm pearl to the bottom tip picot with sewing thread so that it hangs just below the point.
Center pearl: Sew the 8 mm pearl over the Round 1 ring, passing the needle through twice and knotting on the back.
Final Blocking
- Weave in all ends along the back of the stitches. Leave the tails until after starching, then trim them.
- Dilute the stiffener as the label directs, or use undiluted starch for a crisp ornament.
- Soak the ornament fully, then press out the extra liquid in a towel. Do not wring it.
- Cover your board with plastic wrap. Draw a 2.75 in × 4.5 in (7.0 cm × 11.4 cm) almond shape on paper and put it under the wrap.
- Pin the top and bottom points first, then the two widest side points.
- Pin each ch-5 loop of Round 8 outward so it opens into a round arch.
- Pin every picot. Open the petals and fans with a pin tip.
- Let it dry completely, at least 12 hours, before you unpin it.
Final Quality-Control Checklist
- Size is 2.75 in × 4.5 in (7.0 cm × 11.4 cm) without the hanger.
- The flower has 8 even petals, and the center pearl is centered.
- The top fan and bottom fan line up on one vertical line.
- Each side shows 10 open mesh loops in Round 8.
- Round 9 has 152 sc and two ch-3 tips.
- There are 40 picots, evenly spaced.
- The edge lies flat, with no ruffling or cupping.
- The pearls are secure and the hanger is closed firmly.
- The ornament hangs straight and is stiff when dry.
Troubleshooting
Petals curl: Your Round 3 tension is too tight. Block the petals firmly, or rework them with a slightly looser tr.
Fans are not opposite each other: You miscounted the loops in Round 6. There should be exactly 7 sc between the fans on each side.
Shape is too round: The dtr in Round 7 are short. Pull up each loop a little taller, and pin the points out further when you block.
Border ruffles: Your stitches are looser than the border gauge. Use 4 sc in the ch-5 loops instead and spread the picots evenly.
Border cups: Your stitches are too tight. Go up a hook size for Rounds 9 and 10 only.
Pearl hole is too small: Sew the pearl on with sewing thread instead of stringing it.
Care
Hand wash gently in cool water only if needed, then re-starch and re-block. Store the ornament flat in tissue paper so the points do not bend.
Final Notes
The measurement chain is short and easy to check. The flower should be 1 in (2.5 cm) after Round 3 and 1.25 in (3.2 cm) after Round 4. The motif should be 1.75 in × 2.5 in (4.4 cm × 6.4 cm) after Round 6 and 2.25 in × 4 in (5.7 cm × 10.2 cm) after Round 8. The border adds 0.25 in (0.6 cm) on each side, for a finished ornament of 2.75 in × 4.5 in (7.0 cm × 11.4 cm). If each stage matches, the finished ornament will match too.
Happy crocheting!