

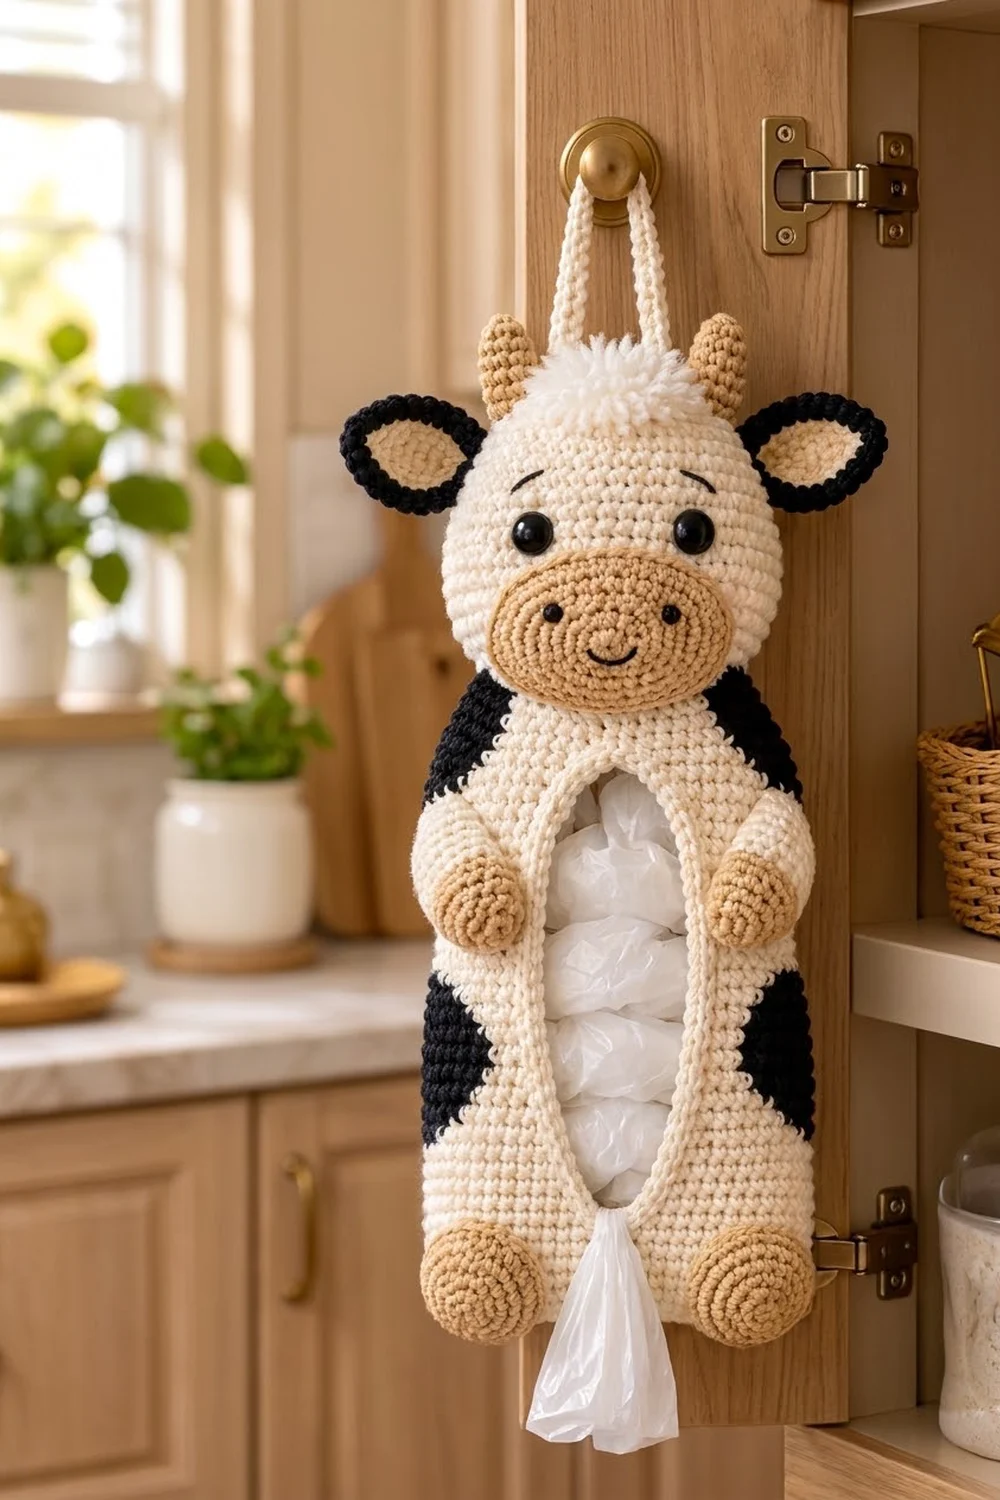
Daisy Moo is a cheerful cow that hangs inside a cabinet door and keeps your grocery bags in one place. You push bags in through the long oval window on her tummy and pull them out one at a time from the small opening at the bottom, between her round tan feet.
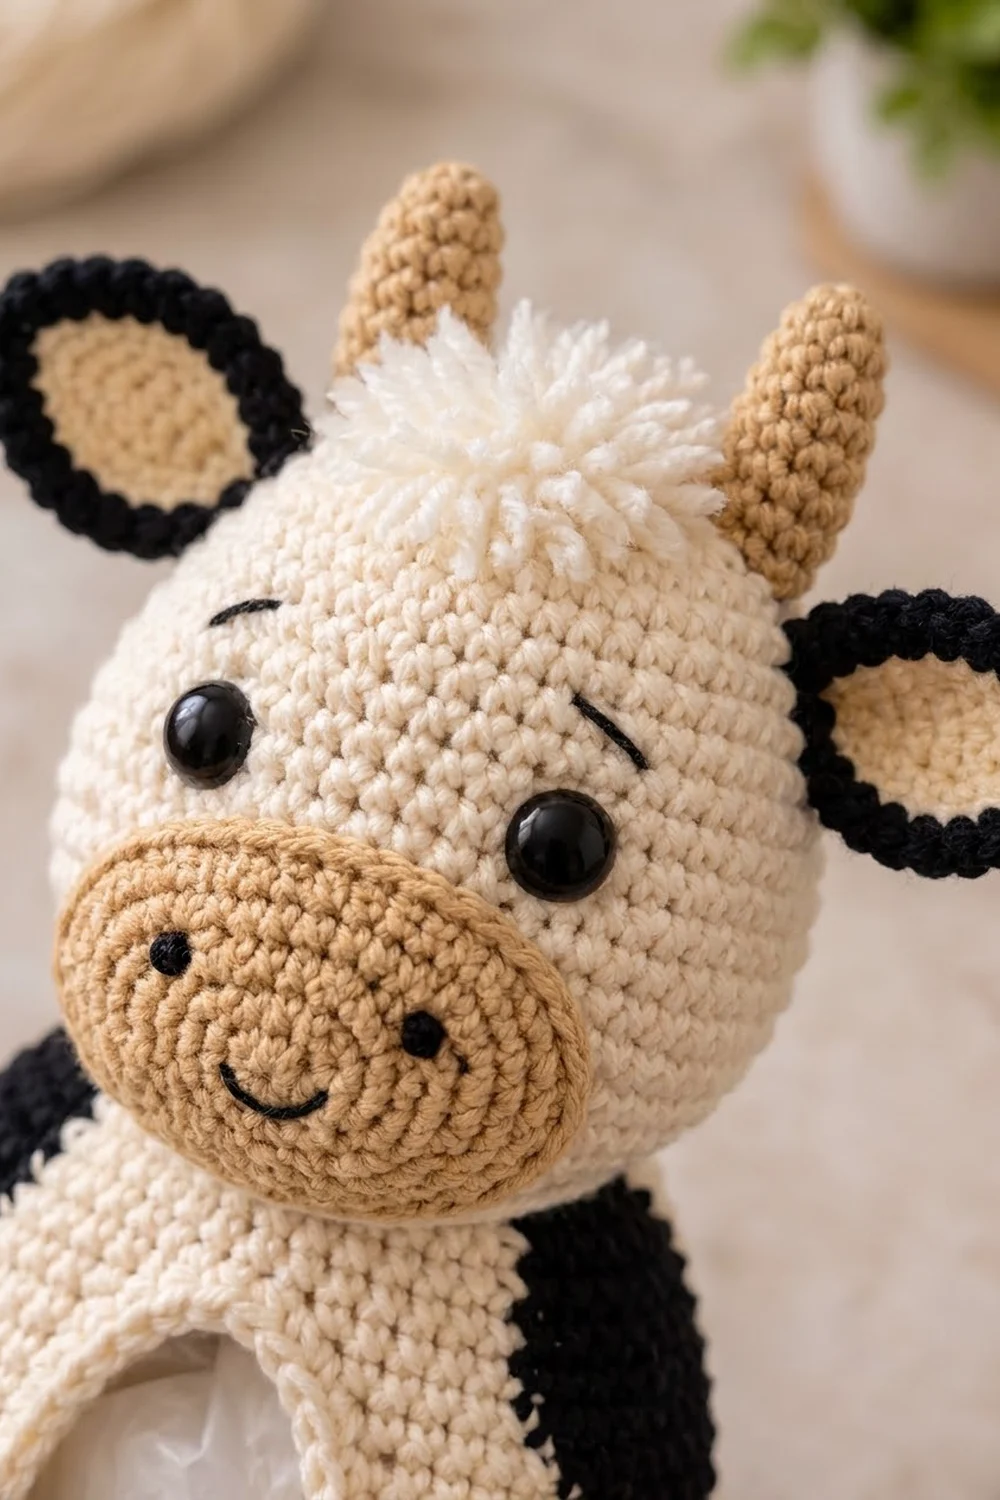
The palette is classic dairy cow: a cream body, black side spots and ear rims, and warm tan for the muzzle, horns, paws, and feet. A fluffy cream pompom sits on top of her head. The look is soft and amigurumi-style, but the body stays flat, so it’s practical in a kitchen.
This pattern uses US crochet terms. The finished holder measures about 6 in (15.2 cm) wide at the body and about 16.5 in (41.9 cm) from the top of the head to the bottom of the feet, plus a 3.5 in (8.9 cm) hanging loop.
Construction overview: You work the body from the bottom up as a tube in joined rounds. You switch to rows to shape the front oval opening, then go back to rounds and close the top flat. The head, muzzle, ears, horns, arms, feet, and spots are worked separately and sewn on. Edging rounds finish both openings.
Finished Size and Construction
- Finished size: 6 in (15.2 cm) wide x 16.5 in (41.9 cm) tall, plus a 3.5 in (8.9 cm) loop
- Width across ears: about 8 in (20.3 cm)
- Skill level: Easy-intermediate
- Terminology: US
- Yarn weight: Worsted (#4)
- Hook: 4.0 mm (G-6)
- Number of pieces: 1 finished holder, made from 17 sewn components (body, head, muzzle, 2 ears, 2 horns, 2 arms, 2 feet, 4 spots, loop, tuft)
- Layout: Single vertical holder with the head overlapping the top of the body
- Body size: 6 in (15.2 cm) wide x 13 in (33.0 cm) tall, flat
- Size before border: 6 in x 13 in (15.2 cm x 33.0 cm). The border only goes around the openings, so it doesn’t change the outer size.
- Border depth: about 0.25 in (0.6 cm)
Materials
Use a smooth worsted-weight cotton or acrylic. Cotton holds its shape well. Acrylic is softer and a little lighter. Avoid fuzzy yarns, because plastic bags catch on them.
- Cream (main color): 75 g / 150 m
- Tan: 15 g / 30 m
- Black: 10 g / 20 m
These quantities include a margin of about 15–20%.
Tools and notions:
– 4.0 mm (G-6) crochet hook
– Two 12 mm black safety eyes
– About 30 g polyester fiberfill
– Tapestry needle
– Stitch markers
– Pompom maker or a cardboard template
– Sewing pins
– Scissors
Abbreviations (US Terms)
- ch – chain
- sl st – slip stitch
- sc – single crochet
- inc – 2 sc in the same stitch
- sc2tog / dec – single crochet 2 together: insert hook in next st, pull up a loop, insert in following st, pull up a loop, yarn over and pull through all 3 loops
- BLO – back loop only
- MR – magic ring
- rnd – round
- st(s) – stitch(es)
- RS / WS – right side / wrong side
- FO – fasten off
Gauge and Checkpoints
Gauge: 16 sc x 18 rnds = 4 in (10.2 cm) in sc, worked in rounds.
Work the body first and check it as you go. That way you’ll find gauge problems before you make the small parts.
- After Rnd 4: The bottom should flare gently to 48 sts. Flattened, it should be 6 in (15.2 cm) wide.
- After Rnd 14: The tube should be about 3.1 in (7.9 cm) tall.
- After Row 50: The opening should be 8 in (20.3 cm) long and about 2 in (5.1 cm) wide at its widest.
- After the closing row: The body should be about 13 in (33.0 cm) tall.
If your body is too wide, go down half a hook size. If it’s too narrow, go up half a hook size. If only your height is off, add or remove even rounds in Rnds 5–14 or Rnds 51–56. Don’t change the opening rows.
Body
Use cream. Work in joined rounds. The join stays at the center front, where the opening will be.
Foundation: Ch 24, then sl st to the first ch to form a ring, taking care not to twist it.
Rnd 1: Ch 1, sc in each ch around, sl st to the first sc. (24 sts)
Rnd 2: Ch 1, (sc 2, inc) x 8, join. (32 sts)
Rnd 3: Ch 1, (sc 3, inc) x 8, join. (40 sts)
Rnd 4: Ch 1, (sc 4, inc) x 8, join. (48 sts)
Rnds 5–14: Ch 1, sc 48, join. (48 sts)
Shaping the opening: Now work back and forth in rows. Don’t join at the end of each row. A gap opens at the center front.
Row 15 (RS): Ch 1, do not turn, sc2tog, sc 44, sc2tog. Ch 1, turn. (46 sts)
Row 16: Sc2tog, sc 42, sc2tog. Ch 1, turn. (44 sts)
Row 17: Sc2tog, sc 40, sc2tog. Ch 1, turn. (42 sts)
Row 18: Sc2tog, sc 38, sc2tog. Ch 1, turn. (40 sts)
Rows 19–46: Sc 40. Ch 1, turn. (28 rows, 40 sts)
Row 47: Inc, sc 38, inc. Ch 1, turn. (42 sts)
Row 48: Inc, sc 40, inc. Ch 1, turn. (44 sts)
Row 49: Inc, sc 42, inc. Ch 1, turn. (46 sts)
Row 50 (WS): Inc, sc 44, inc. (48 sts)
At the end of Row 50, sl st to the first sc of Row 50 to close the gap. Ch 1 and turn so the RS faces you.
The decreases and increases at each edge give the window its tapered top and bottom. The 8-stitch gap at the middle spreads into a 2 in (5.1 cm) wide oval.
Rnds 51–56: Sc 48, join. (48 sts)
Rnd 57: Ch 1, (sc 4, sc2tog) x 8, join. (40 sts)
Rnd 58: Ch 1, (sc 3, sc2tog) x 8, join. (32 sts)
Closing row: Sc 8 to reach the side fold. Flatten the tube so the opening is centered on the front. Work 16 sc through both layers. (16 sts) FO.
Head
Use cream. Work in continuous spiral rounds.
Rnd 1: 6 sc in MR. (6)
Rnd 2: Inc x 6. (12)
Rnd 3: (sc 1, inc) x 6. (18)
Rnd 4: (sc 2, inc) x 6. (24)
Rnd 5: (sc 3, inc) x 6. (30)
Rnd 6: (sc 4, inc) x 6. (36)
Rnd 7: (sc 5, inc) x 6. (42)
Rnds 8–16: Sc 42. (42)
Insert the safety eyes between Rnds 11 and 12, with 7 sts between them.
Rnd 17: (sc 5, dec) x 6. (36)
Rnd 18: (sc 4, dec) x 6. (30)
Rnd 19: (sc 3, dec) x 6. (24)
Stuff lightly.
Rnd 20: (sc 2, dec) x 6. (18)
Rnd 21: (sc 1, dec) x 6. (12)
Rnd 22: Dec x 6. (6)
FO and close the hole. Press the head flat front to back. It should measure about 5 in (12.7 cm) wide x 4.5 in (11.4 cm) tall.
Muzzle
Use tan.
Foundation: Ch 7.
Rnd 1: Sc in the 2nd ch from the hook, sc 4, 3 sc in the last ch. Working along the other side of the chain, sc 4, then 2 sc in the last ch. (14)
Rnd 2: Inc, sc 4, inc x 3, sc 4, inc x 2. (20)
Rnd 3: (sc 1, inc), sc 4, (sc 1, inc) x 3, sc 4, (sc 1, inc) x 2. (26)
Rnd 4: (sc 2, inc), sc 4, (sc 2, inc) x 3, sc 4, (sc 2, inc) x 2. (32)
FO, leaving a long tail. The muzzle measures about 3.25 in x 2 in (8.3 cm x 5.1 cm). Use black yarn to embroider two short nostril stitches and a curved smile.
Ears (Make 2)
Foundation: With tan, ch 6.
Rnd 1: Sc in the 2nd ch from the hook, sc 3, 3 sc in the last ch. Working along the other side, sc 3, then 2 sc in the last ch. (12)
Rnd 2: Inc, sc 3, inc x 3, sc 3, inc x 2. (18)
Rnd 3: Change to black. (sc 2, inc) x 6. (24)
Rnd 4: Sl st loosely in each st around. (24)
FO. The black sl st round gives the ears their thick, bold rim.
Horns (Make 2)
Use tan.
Rnd 1: 4 sc in MR. (4)
Rnd 2: (sc 1, inc) x 2. (6)
Rnd 3: (sc 2, inc) x 2. (8)
Rnds 4–7: Sc 8. (8)
Stuff lightly and FO.
Arms (Make 2)
Rnd 1: With tan, 6 sc in MR. (6)
Rnd 2: Inc x 6. (12)
Rnds 3–4: Sc 12. (12)
Rnd 5: Change to cream. (sc 1, dec) x 4. (8)
Rnds 6–11: Sc 8. (8)
Stuff the paw lightly. Flatten the arm and work 4 sc through both layers. FO. Each arm is about 2.4 in (6.1 cm) long.
Feet (Make 2)
Use tan.
Rnds 1–4: Work as for Head Rnds 1–4. (24)
Rnd 5: BLO sc 24. (24)
Rnd 6: Sc 24. (24)
Rnd 7: (sc 2, dec) x 6. (18)
Stuff lightly.
Rnd 8: (sc 1, dec) x 6. (12)
Rnd 9: Dec x 6. (6)
FO. The flat sole faces forward and measures about 1.8 in (4.6 cm) across.
Spots (Make 4)
Foundation: With black, ch 8.
Rnd 1: Sc in the 2nd ch from the hook, sc 5, 3 sc in the last ch. Working along the other side, sc 5, then 2 sc in the last ch. (16)
Rnd 2: Inc, sc 5, inc x 3, sc 5, inc x 2. (22)
Rnd 3: (sc 1, inc), sc 5, (sc 1, inc) x 3, sc 5, (sc 1, inc) x 2. (28)
FO. Each spot is about 3 in x 1.75 in (7.6 cm x 4.4 cm).
Hanging Loop and Tuft
Loop: With cream, ch 36.
Row 1: Sc in the 2nd ch from the hook and in each ch across. (35)
Rows 2–3: Ch 1, turn, sc 35. (35)
FO. The strap is 8.75 in (22.2 cm) long x 0.7 in (1.8 cm) wide.
Tuft: Make a 1.5 in (3.8 cm) cream pompom.
Assembly
- Spots: Sew one spot near the top and one near the bottom of each side, wrapping each spot around the side fold.
- Head: Sew the head over the top of the body so it overlaps by 1.5 in (3.8 cm).
- Muzzle: Sew the muzzle to the lower half of the head, leaving a thin cream rim showing below it. Add a little stuffing before you close the seam.
- Ears and horns: Pinch the base of each ear and sew it to the sides of the head around Rnds 6–8. Sew the horns between the ears.
- Tuft and brows: Sew the pompom to the top center of the head. Embroider short black brows above the eyes.
- Arms: Sew one arm to each side of the opening at about Rows 44–50, with the paws angled inward.
- Feet: Sew the feet to the lower front corners so they hang 0.5 in (1.3 cm) below the body.
- Loop: Sew both ends of the loop to the back of the head, 1 in (2.5 cm) deep and 1.25 in (3.2 cm) apart.
Border
Border gauge: 4 sc = 1 in (2.5 cm) along the edge, the same as the body’s stitch gauge.
Front opening, Rnd 1: Join cream at the bottom point of the opening. Along the first side, (sc in each of the next 8 row ends, skip 1) x 4, for 32 sc. Work 1 sc at the top point. Repeat along the second side for another 32 sc, then work 1 sc at the bottom point. Join. (66 sts: 32 per side + 2 points)
Front opening, Rnd 2: Sl st in each st around. (66) FO.
Bottom opening, Rnd 1: Join cream in the remaining loops of the foundation chain. Sc 24, join. (24)
Bottom opening, Rnd 2: Sl st in each st around. (24) FO.
Why the math works: Each side of the opening has 36 row ends, which is 8 in (20.3 cm) at 4.5 rows per inch. Working 32 sc gives exactly 8 in (20.3 cm) at 4 sts per inch, so the edge lies flat without ruffling or puckering.
The bottom border has 24 sts, matching the 24-ch foundation. That’s 6 in (15.2 cm) around, so the opening is 3 in (7.6 cm) wide when flat, which is right for pulling bags out one at a time.
After the border, the visible window is about 7.5 in x 1.5 in (19.1 cm x 3.8 cm).
Final Blocking
- Lay the holder face down on a towel.
- Smooth the body flat so the opening is centered and both side folds are straight.
- Pin the body to 6 in x 13 in (15.2 cm x 33.0 cm).
- Steam the body lightly, holding the iron above the fabric without touching it, or mist it with water.
- Don’t steam the stuffed head, feet, or arms.
- Let it dry completely, then unpin.
Final Quality-Control Checklist
- The body measures 6 in x 13 in (15.2 cm x 33.0 cm).
- The opening is centered, with 32 border sc on each side.
- Both openings lie flat, with no ruffling.
- The eyes are level and the muzzle is centered.
- The ears and horns are symmetrical.
- The arms and feet are firmly attached.
- The loop holds the full weight without stretching.
- All yarn ends are woven in securely.
Troubleshooting
- The opening edge ruffles: You have too many border stitches. Recheck that you skip one row end in every 9.
- The opening puckers: Your border tension is too tight. Work Rnd 2 with a larger hook.
- The body twists: Your joins may be drifting. Check that each round starts at the center front.
- The head flops forward: Sew the back of the head to the body as well, not just the lower edge.
- Bags fall out the bottom: Your bottom opening is loose. Work Rnd 2 tighter or skip 2 sts evenly.
Care
Remove the safety eyes before washing if your eyes are removable. Otherwise, hand wash cool, reshape, and dry flat. Spot cleaning is usually enough.
Final Notes
The measurement chain is simple. A gauge of 16 sts per 4 in (10.2 cm) gives a 48-st tube that measures 6 in (15.2 cm) wide flat. 36 opening rows make an 8 in (20.3 cm) window, and 32 border sc fit each side exactly. The full body comes to 13 in (33.0 cm). Add the head and feet, and Daisy Moo hangs about 16.5 in (41.9 cm) tall.
Happy crocheting!