

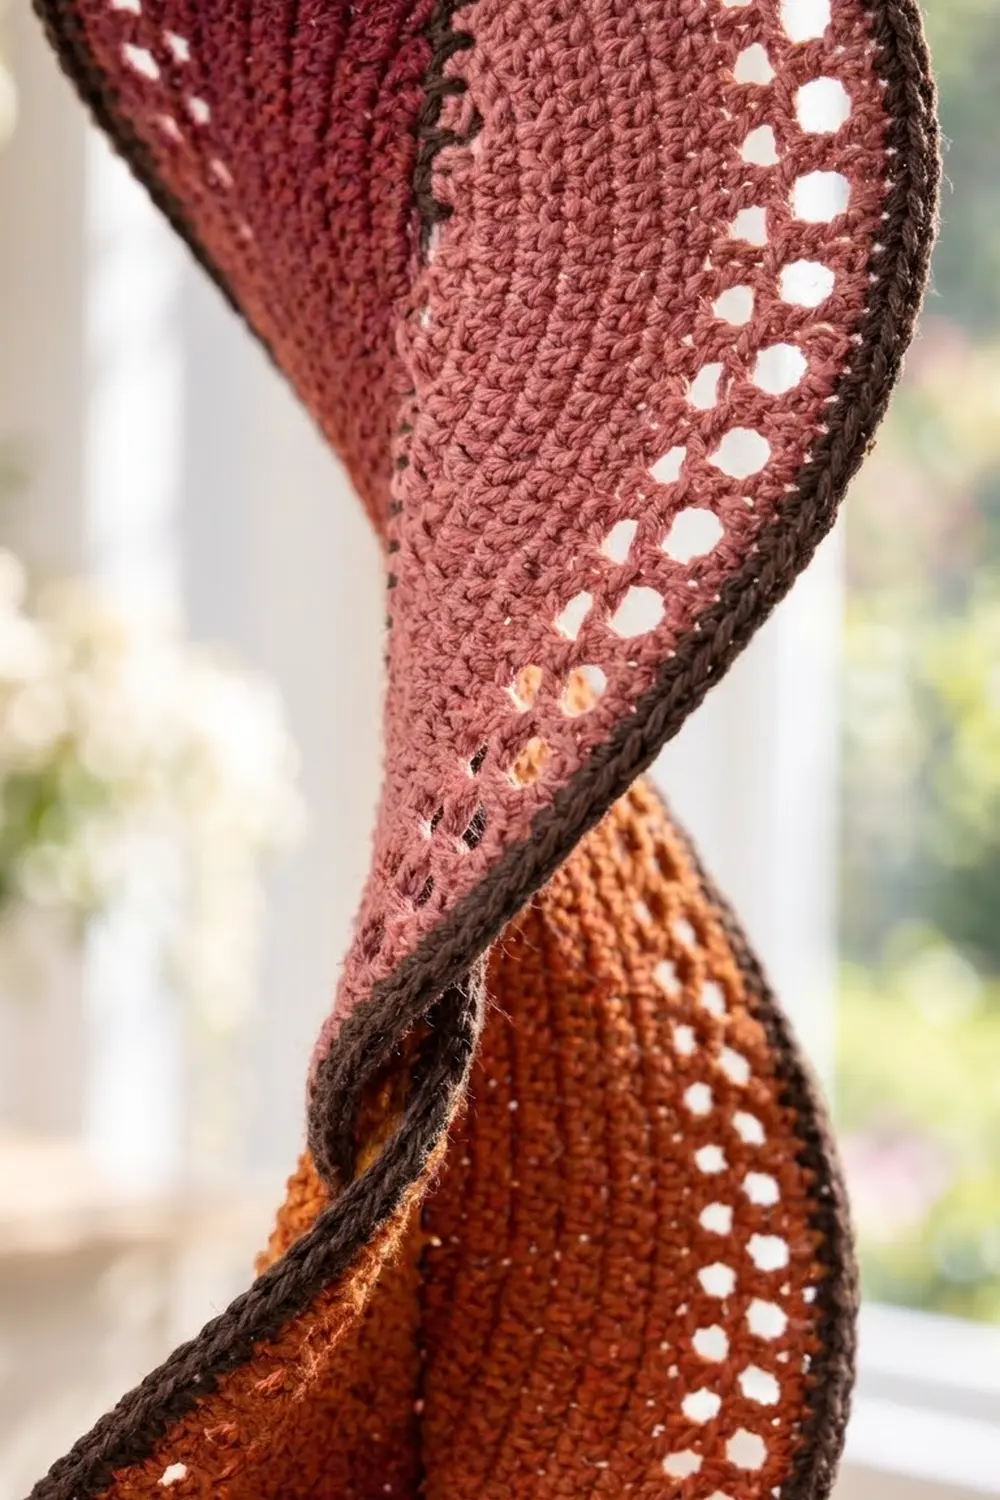
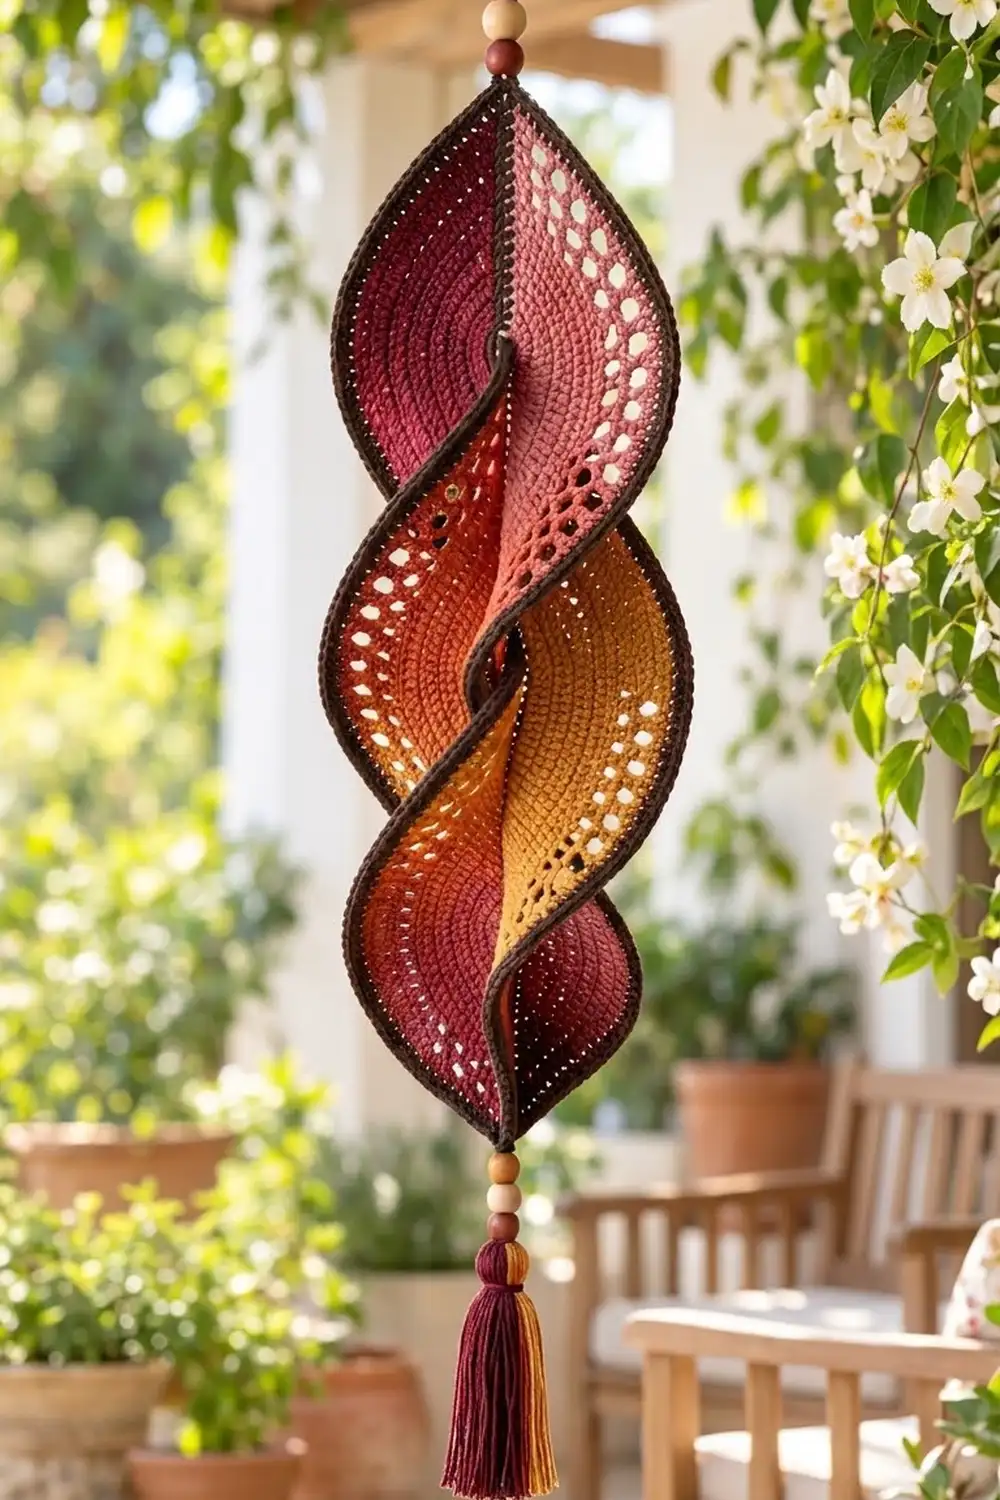
The Ember Twist is a hanging spiral made from two leaf-shaped panels. Each panel has a different color on each side of its spine. When the joined strip is blocked into a twist, those colors turn into each other as the spinner moves: burgundy into dusty rose at the top, rust into mustard below.
The colors are warm and autumn-like, and a dark chocolate brown edge holds them together. A curved row of eyelets near each outer edge lets light through, so the spinner looks especially good in a window.
This pattern uses US crochet terms. The finished spinner measures 5 in (12.7 cm) wide by 17.5 in (44.5 cm) long when laid flat before twisting. With beads and tassel it is about 26.5 in (67.3 cm) long, plus the hanging loop.
Construction is simple. You crochet two leaf panels, each worked outward from a center chain, one color per side. You add a brown edge round to each panel, sew the panels tip to tip, and work one reverse single crochet border around the whole strip. Then you starch it into a twist.
Finished Size and Construction
- Finished size (flat): 5 in × 17.5 in (12.7 cm × 44.5 cm)
- Total hanging length: about 26.5 in (67.3 cm) including beads and tassel
- Skill level: Intermediate
- Terminology: US
- Yarn weight: DK (#3) cotton
- Hook: 3.5 mm (E-4)
- Number of pieces: 2 leaf panels
- Layout: 1 column × 2 panels, stacked tip to tip
- Piece size before border: 4 in × 8 in (10.2 cm × 20.3 cm)
- Piece size after edge round: 4.5 in × 8.5 in (11.4 cm × 21.6 cm)
- Border depth: 0.25 in (0.6 cm) per round, 0.5 in (1.3 cm) total per edge
Materials
Use a smooth, mercerized DK cotton. Cotton holds a crisp edge and takes starch well, both of which matter for keeping the twist. Avoid acrylic: it relaxes, and the spiral will flatten over time.
- Color A, Burgundy: 25 g / 58 m (panel 1 side A, plus tassel)
- Color B, Dusty Rose: 12 g / 28 m (panel 1 side B)
- Color C, Rust: 12 g / 28 m (panel 2 side A)
- Color D, Mustard: 15 g / 35 m (panel 2 side B, plus tassel accents)
- Color E, Chocolate Brown: 20 g / 46 m (spines, edges, border, hanging loop)
These quantities include a margin of about 20% for gauge swatches and tails.
Tools:
– 3.5 mm (E-4) crochet hook
– Tapestry needle
– 7 wooden beads, 12 mm (0.5 in / 1.3 cm), natural and burgundy, with holes wide enough for doubled yarn
– Fabric stiffener, or a starch solution (1 part white glue to 1 part water)
– Stitch markers
– Rustproof pins and a foam blocking mat
– Small weight for hanging while drying (a clip with a coin works)
Abbreviations (US Terms)
- ch – chain
- sl st – slip stitch
- sc – single crochet
- hdc – half double crochet
- dc – double crochet
- sk – skip
- sp – space
- st(s) – stitch(es)
- RS – right side
- rev sc – reverse single crochet
Special stitch: Reverse single crochet (rev sc). Work from left to right (right-handed). Insert the hook into the next stitch to the right, yarn over, pull up a loop, yarn over, and pull through both loops. This makes a twisted, corded edge.
Gauge and Checkpoints
Gauge: 18 sc and 20 sc rows = 4 in (10.2 cm) square.
Make one complete panel before starting the second. The twist depends on both panels matching, so the first panel is your real gauge test.
Checkpoints:
– After Row 1 (side A): the spine measures 8 in (20.3 cm).
– After Row 5 (side A): from the spine to the outer edge at the widest point measures 2 in (5.1 cm).
– After side B: the panel measures 4 in × 8 in (10.2 cm × 20.3 cm).
– After the edge round: 4.5 in × 8.5 in (11.4 cm × 21.6 cm).
– After joining and border: 5 in × 17.5 in (12.7 cm × 44.5 cm).
Too big? Go down to a 3.25 mm (D-3) hook. Too small? Go up to a 3.75 mm (F-5) hook. If only the width is off, your double crochet height is the problem. Adjust how far you pull up each loop rather than changing the hook.
Panel Pattern (Make 2)
Each panel is worked from a center foundation chain. Side A is worked into one side of the chain. Side B is worked into the other side, in the second color.
Every row keeps the same layout. The double crochet center always covers stitches 9 to 28, and the shorter stitches at each end make the pointed tips.
Foundation
With the side A color, ch 37.
Side A
Row 1 (RS): Sc in 2nd ch from hook and in each ch across. Turn. (36 sc)
Row 2: Ch 1 (does not count as a st throughout), sl st in first st, sc in next 3 sts, hdc in next 4 sts, dc in next 20 sts, hdc in next 4 sts, sc in next 3 sts, sl st in last st. Turn. (36 sts: 1 sl st, 3 sc, 4 hdc, 20 dc, 4 hdc, 3 sc, 1 sl st)
Row 3: Ch 1, sl st in first 2 sts, sc in next 3 sts, hdc in next 3 sts, dc in next 20 sts, hdc in next 3 sts, sc in next 3 sts, sl st in last 2 sts. Turn. (36 sts)
Row 4 (eyelet row): Ch 1, sl st in first 3 sts, sc in next 3 sts, hdc in next 2 sts, dc in next st, ch 1, sk next st, dc in next st; repeat from * to * 3 more times, dc in next 3 sts, ch 1, sk next st, dc in next st; repeat from ** to ** 3 more times, hdc in next 2 sts, sc in next 3 sts, sl st in last 3 sts. Turn. (36 sts, counting each ch-1 sp as 1 st: 3 sl st, 3 sc, 2 hdc, 12 dc, 8 ch-1 sps, 2 hdc, 3 sc, 3 sl st)
This gives 8 eyelets in two groups of 4, separated by 4 solid dc at the center.
Row 5: Ch 1, sl st in first 3 sts, sc in next 3 sts, hdc in next 2 sts, dc in each dc and ch-1 sp across the next 20 sts, hdc in next 2 sts, sc in next 3 sts, sl st in last 3 sts. Fasten off. (36 sts)
Work the slip stitches loosely so the tips can still take a hook in the edge round.
Side B
Rotate the panel so the unused loops of the foundation chain face up. Join the side B color in the first loop.
Row 1 (RS): Ch 1, sc in each of the 36 foundation loops. Turn. (36 sc)
Rows 2–5: Repeat side A Rows 2–5. Fasten off. (36 sts in each row)
Checkpoint: The panel is now a pointed oval, 4 in × 8 in (10.2 cm × 20.3 cm).
Brown Spine Line
With Color E, work 36 surface sl sts along the foundation line on the RS, one into each foundation stitch. Fasten off. This gives the dark center line between the two colors.
Edge Round
With Color E, join with a sl st in the first st of Row 5 on side A, right next to a tip.
Rnd 1: Ch 1, sc in each of the 36 sts across the top of side A Row 5. At the tip, work (sc, ch 2, sc) into the point where the row ends meet. Sc in each of the 36 sts across the top of side B Row 5. At the second tip, work (sc, ch 2, sc). Join with a sl st to the first sc. Fasten off.
Count: 76 sc and 2 ch-2 tip spaces. Each long side has 38 sc: the 36 worked across the row, plus the corner sc on each side of a tip. Those 38 already include both corner stitches.
Checkpoint: 4.5 in × 8.5 in (11.4 cm × 21.6 cm).
The panel will cup slightly because the graded rows add height in the middle. This is intentional, since the cupping helps the twist set later.
Make All Pieces
- Panel 1: side A in Burgundy, side B in Dusty Rose
- Panel 2: side A in Rust, side B in Mustard
- Both panels get a Chocolate Brown spine line and edge round.
Layout:
      [top tip]
   +-------------+
   |  Panel 1    |
   | Burgundy |  |
   |    Rose     |
   +------x------+   <- tips sewn together
   |  Panel 2    |
   |  Rust |     |
   |   Mustard   |
   +-------------+
     [bottom tip]
Line them up so the burgundy side of Panel 1 sits above the rust side of Panel 2.
Joining
Lay both panels RS up, tip to tip, with their spines in one straight line. The burgundy edge should flow into the rust edge, and the rose edge into the mustard edge.
Method: Using a 12 in (30.5 cm) length of Color E, whipstitch the two meeting ch-2 tip spaces together. Then sew the last corner sc of each panel to the facing corner sc on both sides. This is about 0.5 in (1.3 cm) of seam, so the joint stays firm without flattening the tips.
Stitch logic: The joined tip spaces close up into the seam and are not used in the border. The corner sc stay as live stitches for the border, so no stitches are added at the seam.
Tension: Pull each whipstitch snug but not tight. A tight seam makes a pinched waist that fights the twist.
Checkpoint: The joined strip measures 4.5 in × 17 in (11.4 cm × 43.2 cm).
Border
Border gauge: 1 rev sc into each sc of the edge round, so the edge stays the same length as the round below it.
With Color E, join at the top tip ch-2 space.
Rnd 1 (rev sc): Ch 1. Work 2 rev sc in the top ch-2 sp. Work 1 rev sc in each of the 76 sc down the first long side (38 from Panel 1 + 38 from Panel 2). Work 2 rev sc in the bottom ch-2 sp. Work 1 rev sc in each of the 76 sc up the second long side. Join with a sl st to the first rev sc. Fasten off, leaving a 6 in (15.2 cm) tail.
Count: 76 per long side + 2 at each outer tip = 156 rev sc.
Why the math works: Each long side is 2 panels × 38 sc per side = 76 sc, with nothing added at the seam. Because rev sc goes 1 into 1, the edge does not ruffle or pull in. Each outer tip gets 2 stitches, which turn the point without flattening it.
Checkpoint: 5 in × 17.5 in (12.7 cm × 44.5 cm).
Hanging Loop, Beads, and Tassel
Top: Make a ch 40 (about 9 in / 22.9 cm) in Color E. Thread it through the top tip, fold it in half, and slide 3 beads over both strands (burgundy, natural, burgundy). Knot it above the beads and leave a loop for hanging.
Tassel: Wrap Burgundy 30 times and Mustard 6 times around a 4 in (10.2 cm) card. Tie the top, then wrap the neck 0.5 in (1.3 cm) below the top with Burgundy. Cut the bottom loops and trim the ends evenly.
Bottom: Thread a 10 in (25.4 cm) doubled strand of Color E through the bottom tip. Slide on 4 beads, tie on the tassel, and knot it tightly.
Final Blocking
- Mix the stiffener or glue-water solution in a bowl.
- Soak the joined spinner, without beads or tassel if you can, until it is fully wet.
- Press out the extra liquid in a towel. Don’t wring it.
- Hold the top tip and turn the bottom tip 360° clockwise, so each panel gets a half twist.
- Hang it from the top tip and clip a small weight to the bottom tip to keep the spine straight.
- Shape each edge with your fingers so the curves flow evenly, and open the eyelets with a hook tip.
- Let it dry completely for 24 hours.
- Add the beads and tassel if you removed them.
Twisted, the spinner reads about 3 in (7.6 cm) wide when it hangs.
Final Quality-Control Checklist
- [ ] Both panels measure 4.5 in × 8.5 in (11.4 cm × 21.6 cm) after the edge round.
- [ ] Every Row 5 has 36 sts, and each edge-round side has 38 sc.
- [ ] Each half has 8 open eyelets in two groups of 4.
- [ ] The spine lines run in one straight line across the joint.
- [ ] The border has 156 rev sc and no puckers.
- [ ] The tips are sharp and firmly sewn.
- [ ] The twist is the same in both panels and the spinner hangs straight.
- [ ] All tails are woven in and trimmed.
Troubleshooting
Tips are blunt or rounded. Your slip stitches are too loose, or the hdc sections are too tall. Tighten the slip stitches slightly and check your stitch placement.
The panel is too wide. Your dc are tall. Shorten the yarn-over loop, or drop to a 3.25 mm (D-3) hook.
The edge ruffles. You probably added stitches at the tips. Recount: the edge round should be exactly 36 + 2 corner sc per side.
The edge pulls in. Your rev sc is too tight. Loosen it or go up half a hook size for the border only.
The twist relaxes. Use a stronger stiffener mix and let it dry fully while weighted.
Hard to spot the eyelets. Push them open while the piece is wet during blocking.
Care
Dust gently, or spot-clean with a damp cloth. Washing removes the stiffener, so if you do wash it, re-starch it and re-block the twist while it is still damp.
Final Notes
The measurements build on each other. A 36-stitch spine gives 8 in (20.3 cm). Five graded rows per side give a 4 in (10.2 cm) wide panel. The edge round brings each panel to 4.5 in × 8.5 in (11.4 cm × 21.6 cm). Two panels sewn tip to tip make 17 in (43.2 cm), and the 156-stitch rev sc border finishes the strip at 5 in × 17.5 in (12.7 cm × 44.5 cm). If each checkpoint matches, the twist will turn out right.
Happy crocheting!