

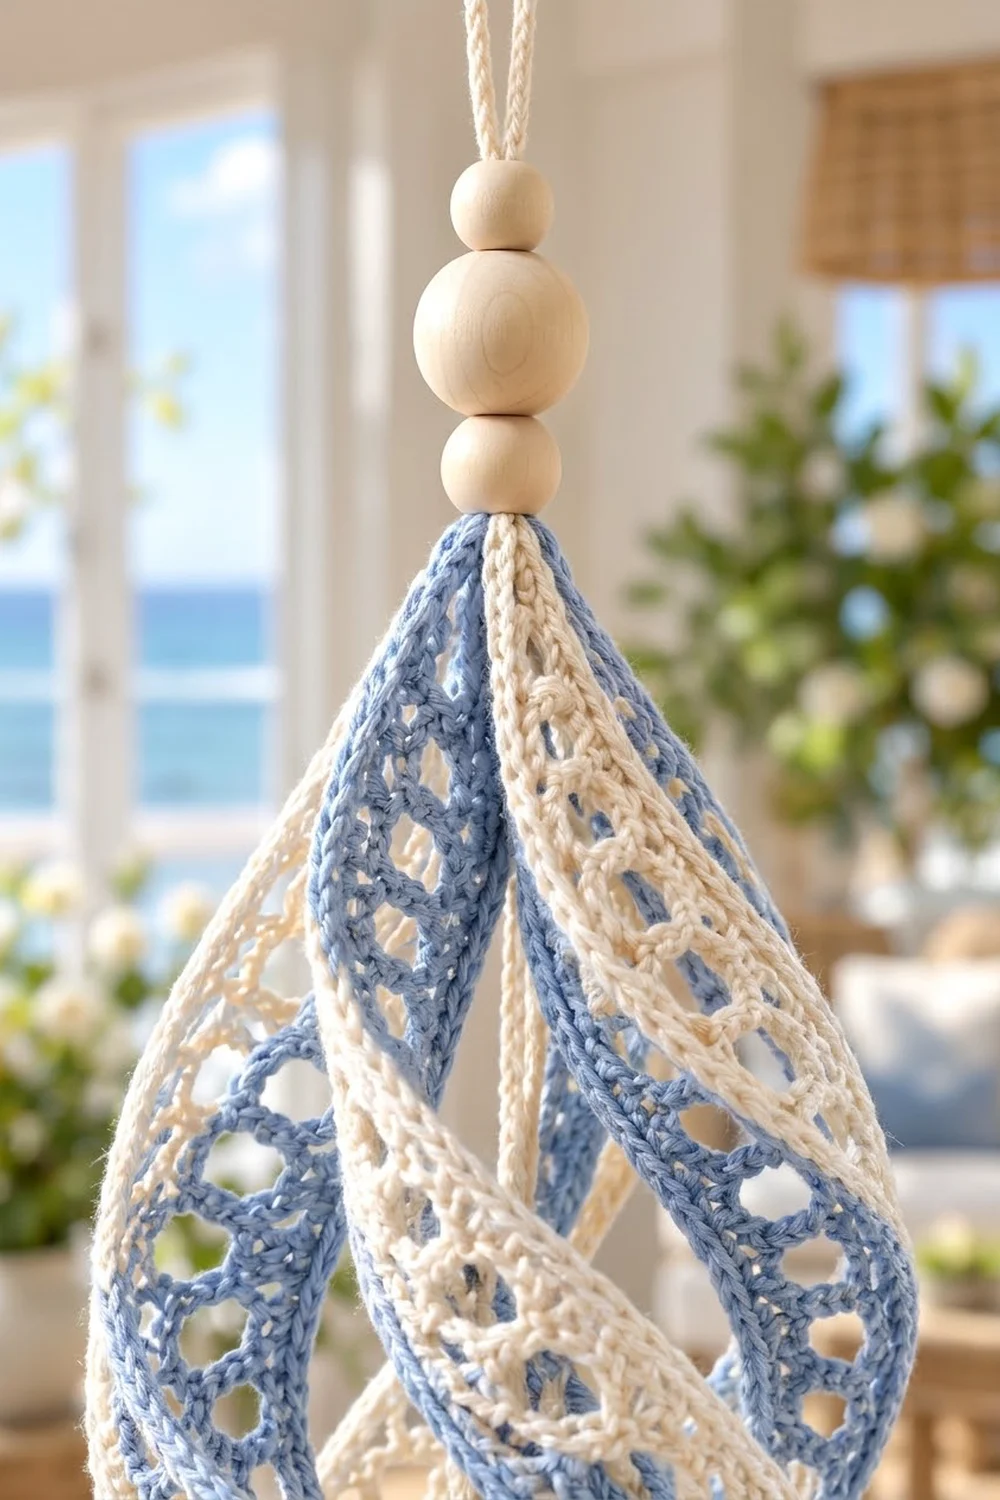
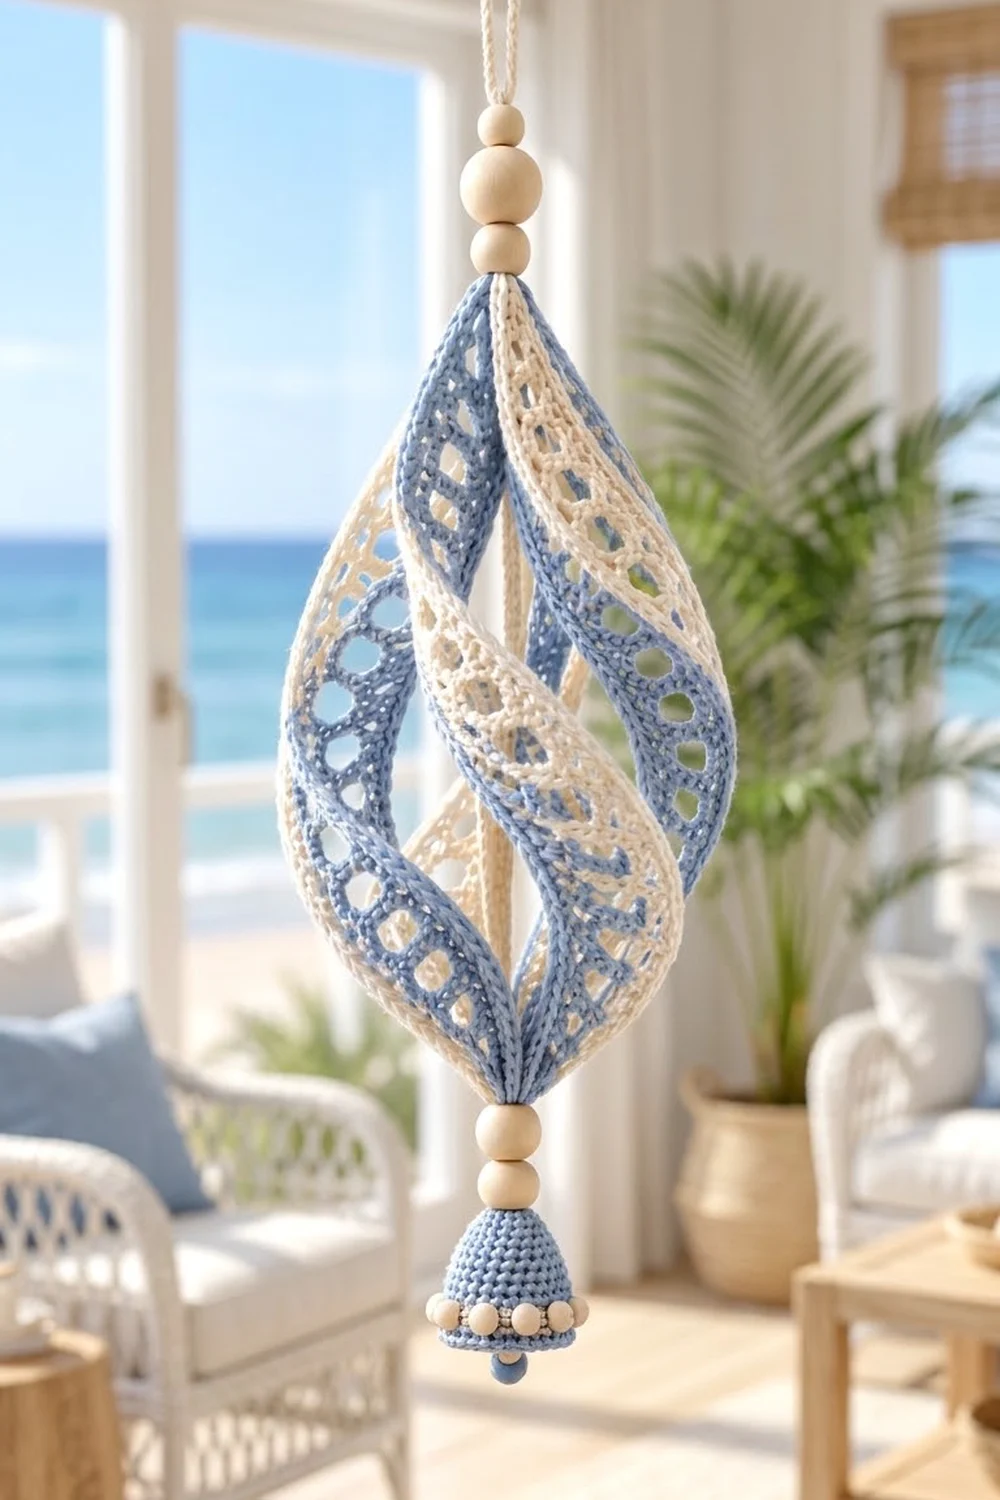
The Seaside Swirl is a hanging ornament made of six lace strips in soft cornflower blue and cream. The strips are gathered at both ends and given a half twist, so together they make an open teardrop spiral. Natural wooden beads sit above and below the swirl, and a small blue bell with a ring of cream beads hangs at the bottom.
Each strip is narrow and tapers to a point at both ends. Two columns of open windows run down its length, split by a solid center spine and framed by raised edge rails. The look is light and coastal.
This pattern uses US crochet terms. The finished swirl body is about 8 in (20.3 cm) tall and 4.5 in (11.4 cm) wide at its widest. From the top of the hanging loop to the bottom bead, the ornament measures about 15 in (38.1 cm).
You’ll crochet six identical tapered strips in short rows, edge each one with a two-round border, and block them. A slip-stitch cord runs up the center and forms the hanging loop. To finish, you gather the strips around the cord, twist them, stiffen the whole piece, and add beads and a little crocheted bell.
Finished Size and Construction
- Finished size: body 8 in (20.3 cm) tall x 4.5 in (11.4 cm) wide; about 15 in (38.1 cm) long overall
- Skill level: Intermediate
- Terminology: US crochet terms
- Yarn weight: DK (3) mercerized cotton
- Hooks: 3.5 mm (E-4) for the strips and cord; 3.0 mm (C/D) for the bell
- Number of crocheted pieces: 8 (6 strips, 1 center cord, 1 bell)
- Layout: 6 strips spaced evenly around the center cord, colors alternating, with a half twist (180 degrees)
- Strip size before border: 1.4 in (3.6 cm) wide x 10.8 in (27.4 cm) long
- Strip size after border: 1.8 in (4.6 cm) wide x 11.2 in (28.4 cm) long
- Border depth: 0.2 in (0.5 cm) on each edge
Materials
Use a smooth, mercerized DK cotton. It shows the windows clearly and holds fabric stiffener well. Acrylic won’t hold the spiral shape as well.
- Color A, cornflower blue: 30 g, about 70 m (77 yd), for 3 strips and the bell
- Color B, cream: 25 g, about 58 m (63 yd), for 3 strips and the center cord
Both quantities include a margin for your test strip and for tails.
Tools and notions:
- 3.5 mm (E-4) and 3.0 mm (C/D) crochet hooks
- Tapestry needle and a sewing needle
- Strong cream sewing thread
- 2 wooden beads, 14 mm, and 1 wooden bead, 20 mm (top stack)
- 2 wooden beads, 16 mm (bottom stack)
- 10 cream round beads, 6 mm (bell rim)
- 1 blue bead, 8 mm (bell drop)
- All wooden beads should have holes at least 4 mm wide
- Fabric stiffener, spray bottle, rustproof pins, blocking mat
- A small balloon or a scrunched plastic bag, to hold the shape while it dries
- Stitch marker and a tape measure
Abbreviations (US Terms)
- ch – chain
- sl st – slip stitch
- sc – single crochet
- dc – double crochet
- inc – 2 sc in the same stitch
- sk – skip
- sp – space
- st(s) – stitch(es)
- tch – turning chain
- BLO – back loop only
- MR – magic ring
- dc2tog – (yarn over, insert hook in next st, pull up a loop, yarn over, pull through 2 loops) twice, then yarn over and pull through all 3 loops
- dc3tog – work like dc2tog but over 3 sts, then yarn over and pull through all 4 loops
Turning chain note: On the strips, the ch 3 at the start of a row counts as the first dc, worked into the first st. The last dc of each row goes into the top of the previous row’s ch-3.
Gauge and Checkpoints
Gauge: 20 dc and 10 rows = 4 in (10.2 cm) with the 3.5 mm hook. Each dc row is 0.4 in (1.0 cm) tall.
Make one full strip first and use it as your gauge swatch. Check it at these points:
- After Row 3: 7 sts, 1.4 in (3.6 cm) wide.
- After Row 13: about 5.2 in (13.2 cm) long from the tip.
- After Row 27: 10.8 in (27.4 cm) long.
- After the border: 1.8 x 11.2 in (4.6 x 28.4 cm).
If your strip is too big, go down to a 3.25 mm hook. If it’s too small, go up to 3.75 mm. Most important, all six strips must be the same length, or the spiral will lean to one side.
Strip (Make 6: 3 in Color A, 3 in Color B)
Each strip is worked in short rows from one tip to the other. Through the middle section the strip stays 7 sts wide.
Tip increase:
Row 1: With the 3.5 mm hook, ch 5. Dc in the 4th ch from the hook (the skipped 3 ch count as a dc), then dc in the last ch. Turn. (3 sts)
Row 2: Ch 3, dc in the same st, dc in the next st, 2 dc in the top of the tch. Turn. (5 sts)
Row 3: Ch 3, dc in the same st, dc in each of the next 3 sts, 2 dc in the top of the tch. Turn. (7 sts)
Window pattern:
Row 4 (window row): Ch 3, ch 2, sk the next 2 sts, dc in the next st (the center st), ch 2, sk the next 2 sts, dc in the top of the tch. Turn. (3 dc + 2 ch-2 sps = 7 sts) This row opens two windows. The center dc is the start of the spine.
Row 5 (bar row): Ch 3, 2 dc in the ch-2 sp, dc in the center dc, 2 dc in the next ch-2 sp, dc in the top of the tch. Turn. (7 sts) This solid row closes the windows and stacks the spine st directly above the one below.
Rows 6–25: Repeat Rows 4 and 5 ten more times. Even-numbered rows are window rows and odd-numbered rows are bar rows, so Row 25 is a bar row. (7 sts)
You now have 11 window rows, for 22 windows in total (11 in each column).
Tip decrease:
Row 26: Ch 3, dc2tog over the next 2 sts, dc in the next st (center), dc2tog over the next 2 sts, dc in the top of the tch. Turn. (5 sts)
Row 27: Ch 3, dc3tog over the next 3 sts, dc in the top of the tch. (3 sts) Don’t fasten off. Go straight on to the Border section.
The two tips are mirror images: 3 sts, then 5 sts, then a solid 7-st row. Each strip is 27 rows long.
Center Cord (Make 1, Color B)
With the 3.5 mm hook, ch 102. Sl st in the back bump of the 2nd ch from the hook and in each ch across. (101 sl sts)
The finished cord should be 17 in (43.2 cm) long. If it comes out short, add chains in groups of 6; each group adds about 1 in (2.5 cm). The lower 8 in (20.3 cm) runs through the center of the swirl. The other 9 in (22.9 cm) passes through the top beads and forms the loop. Leave a 6 in (15.2 cm) tail at each end.
Bell (Make 1, Color A)
Use the 3.0 mm hook and work in continuous rounds, marking the first st of each round.
Rnd 1: 6 sc in MR. (6)
Rnd 2: (Sc in next st, inc) 3 times. (9)
Rnd 3: (Sc in next 2 sts, inc) 3 times. (12)
Rnd 4: (Sc in next st, inc) 6 times. (18)
Rnd 5: (Sc in next 2 sts, inc) 6 times. (24)
Rnd 6: Sc in each st around. (24)
Rnd 7: (Sc in next 3 sts, inc) 6 times. (30)
Rnd 8: Sc in each st around. (30)
Rnd 9 (flare): (Sc in next 2 sts, inc) 10 times. (40) Sl st in the next st and fasten off.
Checkpoint: After Rnd 8 the bell is about 1.5 in (3.8 cm) across. The finished bell is about 1.25 in (3.2 cm) tall, and the rim flares to about 1.75 in (4.4 cm).
With thread, sew a 6 mm cream bead onto every 4th st of Rnd 9, just above the rim. That gives you 10 evenly spaced beads.
Make All Pieces
- Color A: 3 bordered strips and 1 bell
- Color B: 3 bordered strips and 1 center cord
Layout seen from above, with the cord in the center:
            A1
     B3            B1

           CORD

     A3            A2
            B2
Going clockwise, the order is A1, B1, A2, B2, A3, B3. Each blue strip sits between two cream ones.
Joining (Gathering and Twisting)
Method: The strips are joined only at their tips. You sew the tips into a tight bundle at each end and lock each bundle with beads. The long edges are never joined, which keeps the swirl open.
Stitch-to-stitch logic: Each tip has 5 border sc (1 + 3 + 1). Line up the middle sc of each tip’s 3-sc group. Those six middle sc together form the point of the teardrop.
- Bottom gather: Lay the strips out in order, A1 through B3. Thread a 12 in (30.5 cm) strand of Color B through the middle sc of each Row 1 tip, then through the lower end of the cord. Pull tight, wrap the strand around the bundle 4 times, and knot.
- Top gather: Measure 8 in (20.3 cm) up the cord from the bottom gather. Bring the six Row 27 tips together at that point, keeping the same order but rotating the group a half turn (180 degrees) clockwise. Whipstitch each middle sc to the cord, then wrap and knot.
- Top beads: Thread the long cord end and the yarn tails up through a 14 mm bead, the 20 mm bead, and the second 14 mm bead. Form a 2.5 in (6.4 cm) loop, pass the end back down through all three beads, and sew it firmly into the top gather.
- Bottom beads and bell: Thread the bottom tails through both 16 mm beads and then through the bell’s MR. Tie a knot inside the bell that’s bigger than the ring. Slide the 8 mm blue bead onto one tail so it hangs just below the rim, then knot and trim.
Tension: Pull the gathers firmly so the strips can’t slip and untwist. Leave the strips themselves relaxed.
Size checkpoint: The gathers sit 8 in (20.3 cm) apart, but each strip is 11.2 in (28.4 cm) long. That leaves 3.2 in (8.1 cm) of extra length per strip, and it’s this slack that makes the strips bow out to about 4.5 in (11.4 cm).
Border
Work this border on each strip right after Row 27, before assembly. It appears here only to follow the standard section order.
Border gauge: Each border sc is 0.2 in (0.5 cm). A dc row-end is 0.4 in (1.0 cm) tall, so 2 sc fit exactly along each row-end.
Rnd 1: Ch 1. Across Row 27: sc in the first st, 3 sc in the dc3tog, sc in the last st. (5 sc, top tip)
Down the first long edge: 2 sc in each row-end, 27 rows x 2 = 54 sc.
Across the base of Row 1: sc at the base of the first st, 3 sc at the base of the center st, sc at the base of the last st. (5 sc, bottom tip)
Up the second long edge: 2 sc in each row-end. (54 sc)
Sl st to the first sc. (5 + 54 + 5 + 54 = 118 sc)
Rnd 2 (rail): Ch 1, then loosely sl st in the BLO of each sc around. (118 sl sts) This makes the raised, chain-like edge rail. Fasten off, leaving a 6 in (15.2 cm) tail at each tip.
Why the math works: Each long edge is 27 rows x 0.4 in (1.0 cm) = 10.8 in (27.4 cm). At one sc per 0.2 in (0.5 cm), that edge needs 54 sc. The 3-sc group at each tip turns the point without cupping. Rnd 2 is worked one-to-one, so it stays at 118. The border adds 0.2 in (0.5 cm) on every edge, taking the strip from 1.4 x 10.8 in (3.6 x 27.4 cm) to 1.8 x 11.2 in (4.6 x 28.4 cm).
Final Blocking
- Before assembly, wet the bordered strips and gently press out the excess water.
- Pin each strip flat to 1.8 x 11.2 in (4.6 x 28.4 cm). Open up the windows and straighten the spine.
- Let the strips dry completely.
- After assembly, slip a small balloon inside the swirl and inflate it to about 4.5 in (11.4 cm) wide.
- Mist the strips generously with stiffener, nudging each one along the twist so the gaps between strips are even.
- Hang the ornament by its loop and let it dry for 24 hours. Then deflate the balloon and ease it out between two strips.
Final Quality-Control Checklist
- All six strips measure 1.8 x 11.2 in (4.6 x 28.4 cm).
- Each strip has 22 open windows and a straight spine.
- Border Rnd 1 has 118 sc: 54 on each long side and 5 at each tip.
- Colors alternate A, B, A, B, A, B around the cord.
- The gathers are 8 in (20.3 cm) apart.
- The half twist is even, and no strips cross each other.
- The bell has 10 evenly spaced beads, and the blue drop bead is secure.
- The loop is 2.5 in (6.4 cm) tall and firmly sewn.
Troubleshooting
- Strip curls as you work: Your tension is uneven between window and bar rows. Block the strip flat before stiffening.
- Windows look closed: Your ch-2s are too tight. Work them more loosely.
- Border ruffles: Work 3 sc over every 2 row-ends instead of 4, and change both long sides the same way.
- Spiral leans: One strip is longer than the others. Re-block it or rework its last rows.
- Swirl looks flat: The gathers are more than 8 in (20.3 cm) apart. Shorten the length of cord between them.
- Beads won’t fit over the tails: Trim some of the bulk inside the gathers, or use beads with larger holes.
Care
Dust with a soft brush or a hairdryer on the cool setting. Spot clean only, because soaking softens the stiffener; re-stiffen if the piece loses its shape.
Final Notes
Every measurement builds on the one before it. A gauge of 20 dc and 10 rows per 4 in (10.2 cm) gives you a 7-st strip 1.4 in (3.6 cm) wide. At 27 rows, the strip is 10.8 in (27.4 cm) long, and the 118-sc border brings it to 1.8 x 11.2 in (4.6 x 28.4 cm). Gather six of these strips 8 in (20.3 cm) apart with a half twist and they bow out into a 4.5 in (11.4 cm) swirl. With the beads, loop, and bell added, the ornament hangs about 15 in (38.1 cm) long.
Happy crocheting!