

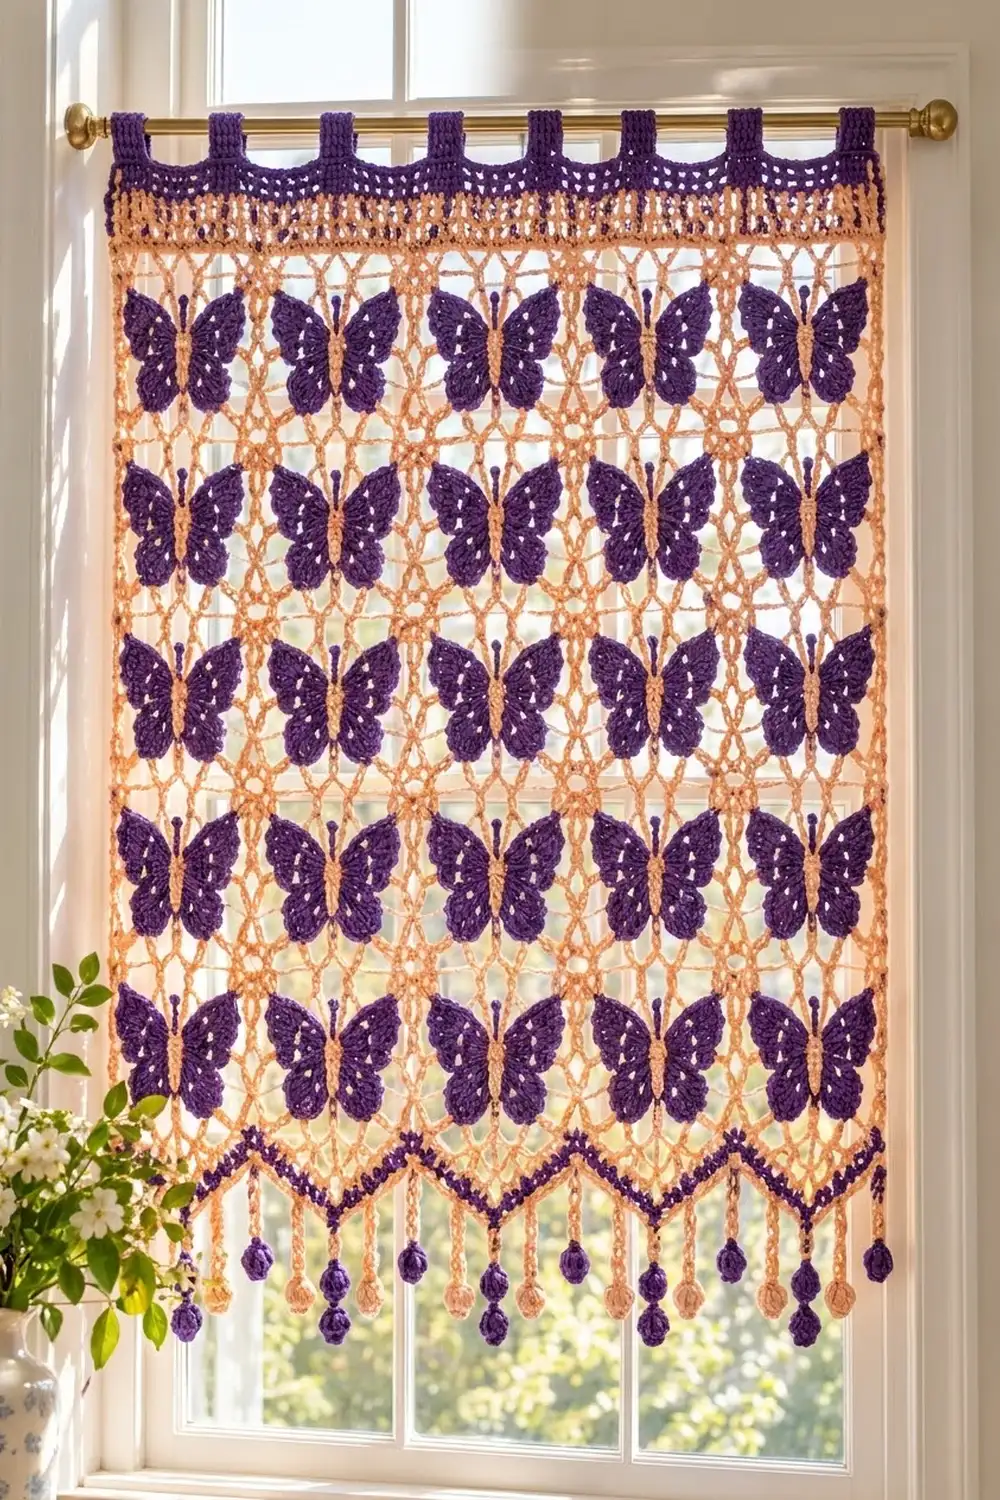
This café curtain has a light peach diamond mesh with rows of solid violet butterflies on it. When it hangs in a sunny window, the open net glows and the butterflies stand out as dark shapes, so it reads as a garden scene.
Only two colors are used: soft peach for the mesh, header band, body stripes and short fringe drops, and deep violet for the butterflies, tab top, zigzag outline and long fringe drops. The style is airy filet-mesh lace with a cottage finish. All instructions use US crochet terms.
The finished panel measures 30 in (76.2 cm) wide and about 45.25 in (114.9 cm) long, measured from the top of the tabs to the tip of the longest drop. The 25 butterflies sit in a 5 x 5 grid.
The construction is simple. You work the peach mesh panel in rows from the bottom up, then finish the top with a solid header and violet hanging tabs. Next you add a band of peach triangle points along the bottom, outline them in violet and hang bobble drops from them. Finally, you crochet the butterflies separately and sew them onto the mesh.
Finished Size and Construction
- Finished size: 30 in x 45.25 in (76.2 cm x 114.9 cm) including tabs and drops
- Skill level: Intermediate
- Terminology: US
- Yarn weight: DK (#3) cotton
- Hook: 4.0 mm (G-6)
- Number of pieces: 1 mesh panel, 25 butterflies, 25 butterfly bodies
- Layout: 5 columns x 5 rows of butterflies appliquéd onto the mesh
- Butterfly size: 4.5 in x 3.5 in (11.4 cm x 8.9 cm)
- Mesh panel before border: 30 in x 35.5 in (76.2 cm x 90.2 cm)
- Border depth: top header 2 in (5.1 cm) plus tabs standing about 1.5 in (3.8 cm) above it; bottom band 2.75 in (7.0 cm) plus drops up to 3.5 in (8.9 cm)
Materials
Use a smooth mercerized or combed DK cotton, roughly 110 m per 50 g. Cotton keeps the mesh crisp, takes blocking well and doesn’t fuzz in sunlight.
- Peach: 250 g (about 550 m)
- Violet: 200 g (about 440 m)
These amounts include a margin of roughly 15% for swatching and sewing.
Tools
- 4.0 mm (G-6) crochet hook
- Tapestry needle
- Stitch markers (at least 30)
- Rust-proof pins and a blocking surface large enough for 30 in x 45 in (76.2 cm x 114.3 cm)
- Measuring tape
- Scissors
Abbreviations (US Terms)
- ch – chain
- sl st – slip stitch
- sc – single crochet
- sc2tog / sc3tog – single crochet 2 / 3 together
- hdc – half double crochet
- dc – double crochet
- tr – treble crochet
- dtr – double treble crochet
- sp – space
- st(s) – stitch(es)
- RS / WS – right side / wrong side
Special stitch – 5-dc bobble: (Yo, insert hook in st, pull up a loop, yo, draw through 2 loops) 5 times in the same st. You now have 6 loops on the hook. Yo and draw through all 6.
Gauge and Checkpoints
Sc gauge: 20 sc and 22 rows = 4 in (10.2 cm).
Mesh gauge: 5 ch-5 loops = 5 in (12.7 cm) across, and 8 mesh rows = 4 in (10.2 cm) tall, after light blocking.
Test piece first: Make one butterfly, then a mesh swatch. For the swatch, ch 27, sc in 2nd ch from hook and across (26 sc). Then work Mesh Rows 1–9 below, using 5 loops instead of 30. Block both pieces.
Checkpoints
- Butterfly after Round 1: 1.25 in (3.2 cm) across
- Butterfly after Round 3: 4.5 in x 3.5 in (11.4 cm x 8.9 cm)
- Foundation row: 30.2 in (76.7 cm) unstretched
- Mesh after Row 24: 12 in (30.5 cm) tall
- Finished mesh: 30 in x 35.5 in (76.2 cm x 90.2 cm)
If your pieces are too big, change to a 3.75 mm hook. If they’re too small, change to a 4.5 mm hook. Mesh rows can also be fine-tuned by adding or removing 1–2 rows, as long as the total stays odd.
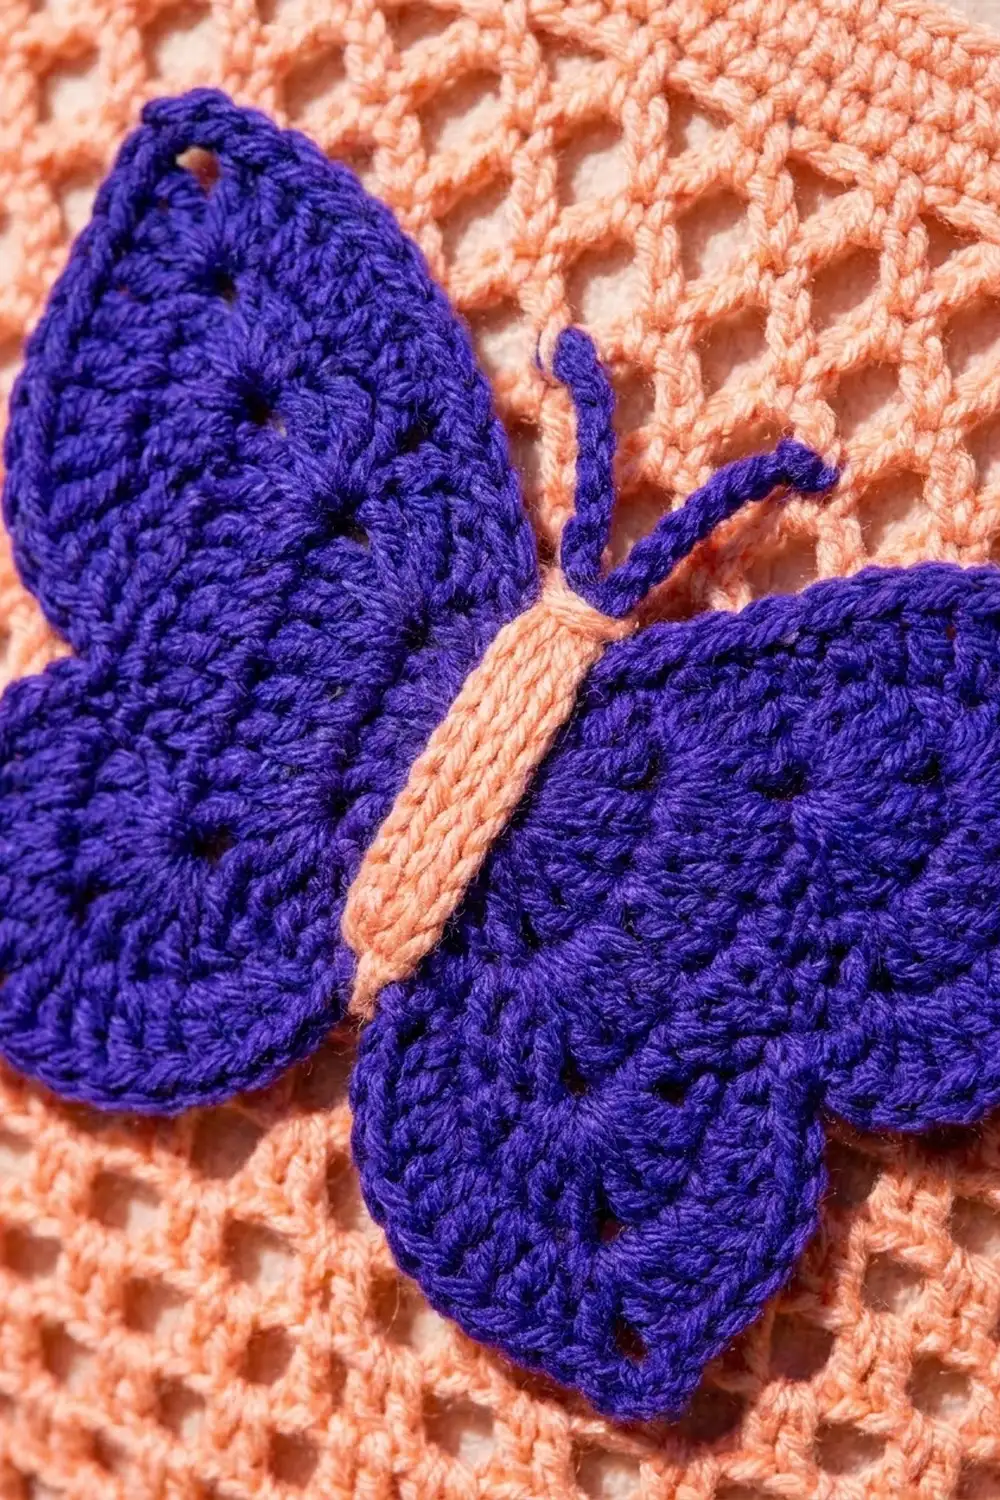
Mesh Panel (Peach)
Foundation: Ch 152. Sc in 2nd ch from hook and in each ch across, turn. (151 sc)
Row 1 (RS): Ch 1, sc in first sc, ch 5, skip 4 sc, sc in next sc; repeat from * across, turn. (30 ch-5 loops, 31 sc)
Row 2: Ch 5 (counts as dc + ch 2), sc in first ch-5 loop, ch 5, sc in next loop; repeat from * 28 more times, ch 2, dc in last sc, turn. (29 full loops + 2 half loops, 30 sc)
Row 3: Ch 1, sc in first dc, ch 5, sc in next ch-5 loop; repeat from * 28 more times, ch 5, sc in 3rd ch of turning ch, turn. (30 loops, 31 sc)
Rows 4–71: Repeat Rows 2 and 3 alternately, ending with a Row 3 repeat. Don’t fasten off.
On odd rows, the sc anchors fall at exactly 0, 1, 2 … 30 in across. That makes it easy to place butterflies later. The mesh now measures 30 in x 35.5 in (76.2 cm x 90.2 cm).
Butterflies (Violet, make 25)
Round 1: Ch 4, sl st to form a ring. Ch 3 (counts as dc), 11 dc in ring, sl st to top of ch-3. (12 dc)
Number the stitches: st 1 is the ch-3 (the head), and sts 2–12 follow counterclockwise.
Round 2 (wings):
- Upper right wing: In st 2 work (dc, 2 tr). In st 3 work (2 dtr, ch 2, 2 dtr). In st 4 work (2 tr, dc). (10 sts + ch-2 tip)
- Lower right wing: In st 5 work (hdc, 2 dc, tr). In st 6 work (tr, 2 dc, hdc). (8 sts)
- Tail: Sl st in st 7.
- Lower left wing: Work sts 8–9 the same as sts 5–6. (8 sts)
- Upper left wing: Work sts 10–12 the same as sts 2–4. (10 sts + ch-2 tip)
- Finish: Sl st in st 1.
Round 2 total: 36 sts, 2 ch-2 tips and 2 sl sts. Small gaps open naturally between the tall stitches.
Round 3 (outline): Ch 1. Sc in each st of the upper right wing, working 3 sc in the ch-2 tip (13 sc). Sc in each st of the lower right wing (8 sc). Sl st in the tail sl st. Sc around the lower left wing (8 sc), then the upper left wing with 3 sc in its tip (13 sc). Sl st in the head st. (42 sc + 1 sl st = 43 sts)
Antennae: Still in violet, ch 7, sl st in 4th ch from hook to make a small knob, sl st in the next 3 ch, sl st in the head. Repeat once. Fasten off.
Body (peach, make 25): Ch 13, sc in 2nd ch from hook and across. (12 sc, 2.4 in / 6.1 cm long) Fasten off, leaving a 10 in (25.4 cm) tail.
Sew one body vertically down the center of each butterfly, from head to tail.
Make All Pieces
- Peach: 1 mesh panel and 25 bodies
- Violet: 25 butterflies, with antennae
Layout grid (each B = one butterfly, centered in a 6 in x 7 in / 15.2 cm x 17.8 cm cell):
Row 64:  B  B  B  B  B
Row 50:  B  B  B  B  B
Row 36:  B  B  B  B  B
Row 22:  B  B  B  B  B
Row 8:   B  B  B  B  B
Anchor:  3" 9" 15" 21" 27"
Joining (Appliqué)
Method: Whipstitch each butterfly to the mesh with violet yarn and a tapestry needle.
Placement: The column centers are the sc anchors at 3, 9, 15, 21 and 27 in (7.6, 22.9, 38.1, 53.3 and 68.6 cm) from the left edge. The row centers are Mesh Rows 8, 22, 36, 50 and 64. That’s 14 rows (7 in / 17.8 cm) apart, with 4 in (10.2 cm) of mesh below the bottom row and 3.5 in (8.9 cm) above the top row.
Pin a marker at each of the 25 centers. Lay each butterfly RS up with its head pointing toward the top of the curtain and its center ring over a marker.
Stitch logic: Go through every second sc of Round 3, and each time catch the nearest mesh strand underneath. Always tack the two wing tips, the tail sl st and the head. This adds up to about 21 tacks per butterfly. Then tack the center ring at 4 points so the middle doesn’t lift.
Tension: Pull each stitch just snug. If you pull harder, the mesh diamonds pucker and the panel narrows. Lay the panel flat after every row of five butterflies.
Size checkpoint: The panel should still measure 30 in x 35.5 in (76.2 cm x 90.2 cm), within 0.5 in (1.3 cm).
Border
Border gauge: 20 sc = 4 in (10.2 cm). The side edges are not bordered, because the alternating sc and dc row ends already form straight sides.
Top Header
Continue from Row 71 in peach.
- H1 (conversion): Ch 1, sc in first sc, 4 sc in next ch-5 loop, sc in next sc; repeat from * across, turn. Count: 31 sc worked 1-per-existing-sc + 120 sc added in the loops (30 loops x 4) = 151 sc.
- H2: Ch 3 (counts as dc), dc in each st across, turn. (151 dc)
- H3: Repeat H2. (151 dc)
- H4: Ch 1, sc in each st across. (151 sc) Fasten off.
The peach header is about 1.25 in (3.2 cm) deep.
- P1–P4 (violet): Join violet. Work 4 rows of 151 sc, with ch 1 to turn each row. Don’t fasten off after P4. This band is about 0.75 in (1.9 cm) deep.
Tabs: Make 7 tabs. Each tab is 11 sts wide, with 4 sts at each edge and 11-st gaps between tabs: 4 + (7 x 11) + (6 x 11) + 4 = 151.
Start the tabs at sts 5, 27, 49, 71, 93, 115 and 137 of P4. For each tab, join violet and work Row 1: sc in 11 sts. Then work 17 more rows of ch 1, 11 sc, for 18 rows in total (3.25 in / 8.3 cm). Fasten off, leaving a 12 in (30.5 cm) tail.
Fold each tab to the WS and whipstitch its last row to P1, one stitch to one stitch. Each loop takes a rod up to 1 in (2.5 cm) thick.
Why the math works: Each mesh loop plus its anchor sc spans 1 in, and in the header that inch becomes 5 sc. 5 sc per inch is exactly the 20 sc / 4 in gauge, so 30 loops x 5 + 1 = 151 sc measures 30 in. The header lies flat and doesn’t flare or pull in.
Bottom Band
- B1 (peach): Turn the panel upside down. Join in the free loop of the first foundation ch and sc in each free loop across. (151 sc)
Work 6 points. Stitch 1 is a single anchor st, and each point uses 25 sts: sts 2–26, 27–51, 52–76, 77–101, 102–126 and 127–151. That’s 1 + (6 x 25) = 151.
Each point:
- Row 1: Sc in 25 sts, turn. (25)
- Rows 2–12: Ch 1, sc2tog, sc to the last 2 sts, sc2tog, turn. Each row loses 2 sts, ending with 3 sts on Row 12.
- Row 13: Ch 1, sc3tog. (1) Fasten off.
Each point is 5 in (12.7 cm) wide and about 2.4 in (6.1 cm) deep.
Outline (violet): Join in anchor st 1 and sc in it.
- Point 1: 12 sc down the left-side row ends, 3 sc in the tip, then 11 sc up the right side.
- Valley: Sc2tog over the last row end of this point and the first row end of the next.
- Points 2–5: 11 sc, 3 sc in the tip, 11 sc. Work a valley sc2tog after each one.
- Point 6: 11 sc, 3 sc in the tip, then 12 sc up the outer side.
Total: 1 + 26 + (4 x 25) + 26 + 5 = 158 sts. Fasten off.
Drops:
- Long drops (violet, 6): Join in the center sc of each tip. Ch 19, work a 5-dc bobble in the 4th ch from hook, sl st in each of the remaining 15 ch, then sl st in the base st. Fasten off. Each drop is 3.5 in (8.9 cm).
- Short drops (peach, 7): Join in each valley sc2tog and in the first and last outline sts. Ch 13, work a bobble in the 4th ch from hook, sl st in the remaining 9 ch, then sl st in the base st. Each drop is 2.5 in (6.4 cm).
Final Blocking
- Weave in all ends along solid areas, never across open mesh.
- Soak the curtain in cool water for 15 minutes, then press out the water in a towel. Don’t wring it.
- Pin the top edge straight at 30 in (76.2 cm).
- Pin the sides straight down so the mesh measures 35.5 in (90.2 cm) from header to B1.
- Pin each point tip and pull every drop straight.
- Open each butterfly’s wings with your fingers and pin the 4 wing tips.
- Let it dry completely, at least 24 hours.
Final Quality-Control Checklist
- [ ] Mesh has 71 rows and 30 loops on odd rows
- [ ] Header rows each have 151 sts
- [ ] 7 tabs, evenly spaced and securely sewn
- [ ] 25 butterflies, all with heads up, centered on the grid
- [ ] Every body and antenna is secure
- [ ] Outline has 158 sts and 6 points
- [ ] 6 violet drops and 7 peach drops
- [ ] Width is 30 in (76.2 cm) at the header, mesh middle and B1
Troubleshooting
- Mesh leans diagonally: You’ve skipped the half loops on even rows. Check that each even row starts with ch 5 and ends with ch 2, dc.
- Header ruffles: Your sc gauge is loose. Rework H1 with a hook one size smaller.
- Header pulls in: Your sc gauge is tight. Rework with a hook one size larger.
- Butterflies cup: Round 2 is too tight. Block the butterflies flat before sewing them on.
- Points twist: You’ve decreased on only one edge. Work sc2tog at both ends of every row.
- Drops curl: Your sl sts are tight. Work them loosely, then steam the drops.
Care
Hand wash cool with mild soap, roll in a towel and dry flat, pinning the edges lightly. Keep the curtain out of harsh afternoon sun if you want the violet to stay rich.
Final Notes
The measurement chain is simple. Your swatch sets 1 in per mesh loop and 5 sc per inch, so a 151-st foundation gives 30 loops and a 30 in (76.2 cm) width. Seventy-one rows give 35.5 in (90.2 cm) of mesh. The header converts back to 151 sts with no flare, and the bottom splits those 151 sts into 1 anchor plus 6 points of 25. If you check your gauge at every stage, the butterflies will land in their grid and the curtain will hang straight and even.
Happy crocheting!