

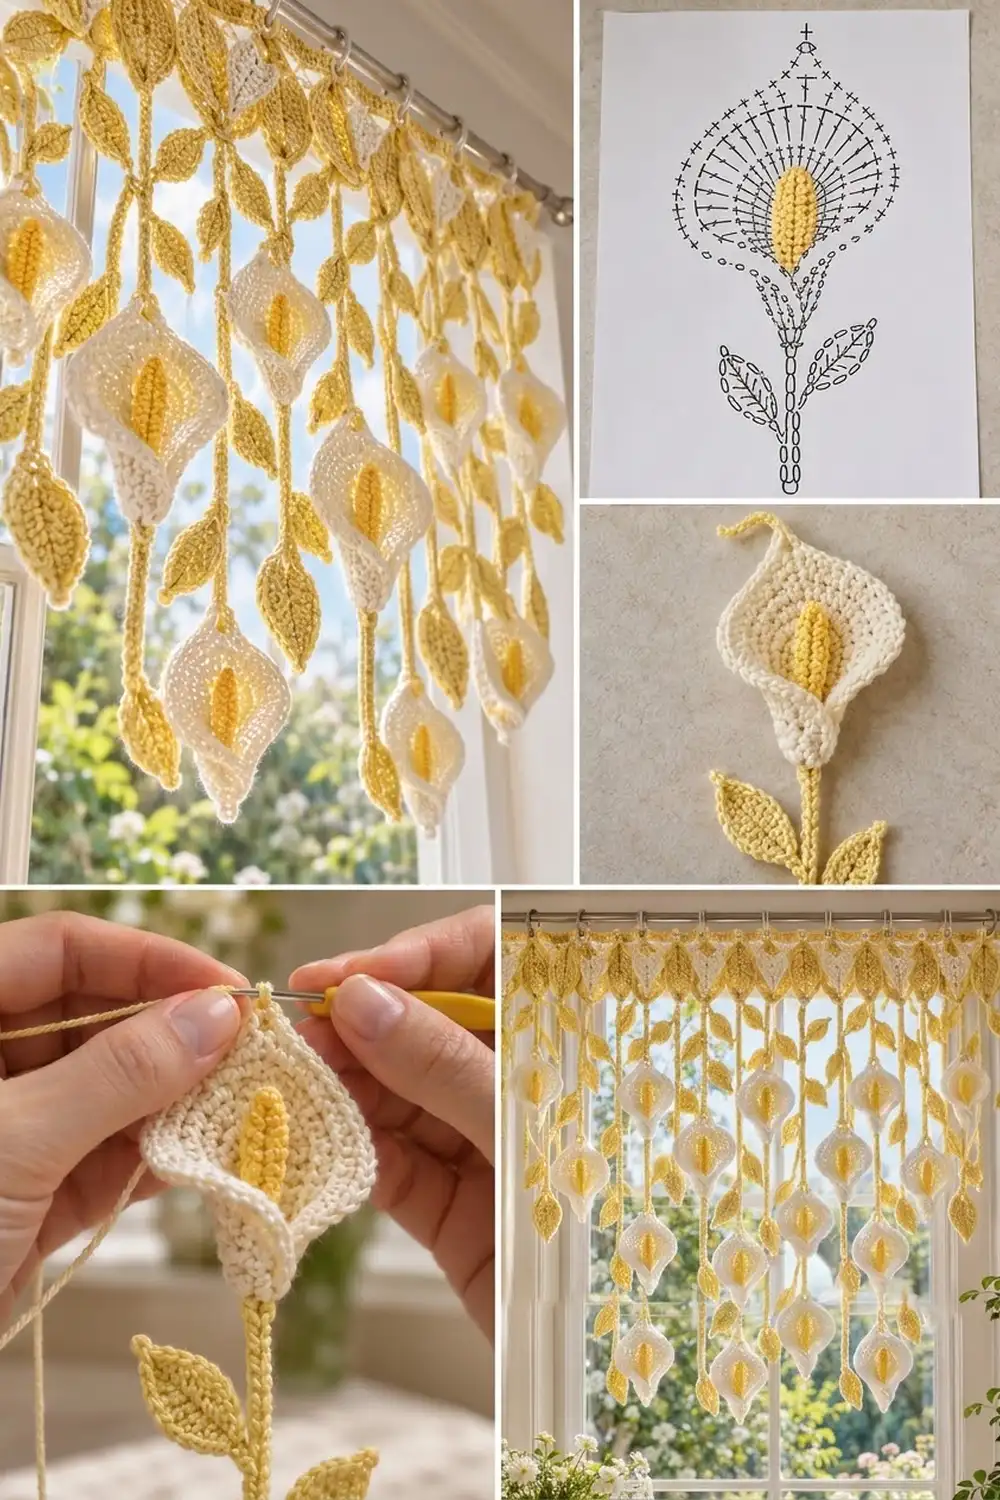
This valance is a curtain of cream calla lilies hanging from yellow vine stems, with a leafy header band across the top. Each lily is a flat cream spathe whose lower edges fold over each other, with a raised yellow spadix sewn down the center. The flowers hang at two staggered heights, and paired leaves sit along every stem.
The palette is just two colors. Butter yellow is used for the header, stems, leaves, and spadices, and soft cream for the lilies and small header buds. In a sunny window the cream glows, and the open vines frame the view without blocking it.
This pattern uses US crochet terms. The finished valance is 40.5 in (102.9 cm) wide. The long strands drop 24.5 in (62.2 cm) and the short strands drop 18.5 in (47.0 cm), measured from the top of the header.
You crochet a rectangular header band, then make 10 stem cords, 10 lilies, 10 spadices, 10 buds, and 72 leaves. Everything is sewn to the bordered band, and 11 rings let it hang from a rod.
Finished Size and Construction
- Finished size: 40.5 in (102.9 cm) wide; strands drop 24.5 in (62.2 cm) and 18.5 in (47.0 cm)
- Skill level: Intermediate
- Terminology: US
- Yarn weight: DK / light worsted (#3) cotton
- Hook: 3.5 mm (E-4)
- Number of pieces: 1 header band, 10 stems, 10 lilies, 10 spadices, 10 buds, 72 leaves
- Layout: 10 strands in mirrored order A-B-A-B-A-A-B-A-B-A, spaced 4 in (10.2 cm) apart
- Lily size: 2.5 in (6.4 cm) × 3.5 in (8.9 cm) laid flat; 2.25 in (5.7 cm) × 3 in (7.6 cm) folded
- Header before border: 40 in (101.6 cm) × 2 in (5.1 cm)
- Border depth: 0.25 in (0.6 cm) per side, so the header ends up 40.5 in (102.9 cm) × 2.5 in (6.4 cm)
Materials
Use mercerized or matte cotton. It gives crisp stitch definition, holds the lily folds, and doesn’t sag. Avoid stretchy fibers, because the long stems will lengthen under the weight of the flowers.
- Yellow: 200 g / about 460 m (503 yd)
- Cream: 100 g / about 230 m (252 yd)
- 3.5 mm (E-4) crochet hook
- Tapestry needle
- 11 metal curtain rings, 1 in (2.5 cm) diameter
- Stitch markers
- Rustproof pins, blocking mat, spray bottle
- Measuring tape
These quantities include a margin of about 15% for gauge differences, sewing tails, and a test swatch.
Abbreviations (US Terms)
- ch – chain
- sl st – slip stitch
- sc – single crochet
- hdc – half double crochet
- dc – double crochet
- st(s) – stitch(es)
- sp – space
- FLO – front loop only
- rnd – round
Special stitch – back-bump slip stitch: Turn the chain over and insert the hook under the single bump on the back of the chain. Yarn over and pull through the bump and the loop on your hook. This gives a firm, round cord that won’t twist.
Gauge and Checkpoints
Gauge: 18 sc and 20 rows = 4 in (10.2 cm).
Cord gauge: 10 ch with a back-bump sl st worked back along them = 2 in (5.1 cm).
Make one leaf and one complete lily before anything else, and measure them:
- Leaf after Rnd 2: 2 in (5.1 cm) × 1 in (2.5 cm)
- Spathe after Rnd 1: 2.5 in (6.4 cm) × 0.5 in (1.3 cm)
- Spathe after Rnd 3: 3.25 in (8.3 cm) × 2.25 in (5.7 cm)
- Spathe after Rnd 4: 3.5 in (8.9 cm) × 2.5 in (6.4 cm)
- Spadix: 1.5 in (3.8 cm) × 0.5 in (1.3 cm)
If your pieces come out too big, go down to a 3.25 mm hook. If they’re too small, go up to a 3.75 mm hook. Check the cord separately. If your cord comes out longer or shorter than 2 in (5.1 cm) per 10 ch, adjust the stem chain counts to match the stem lengths given in inches.
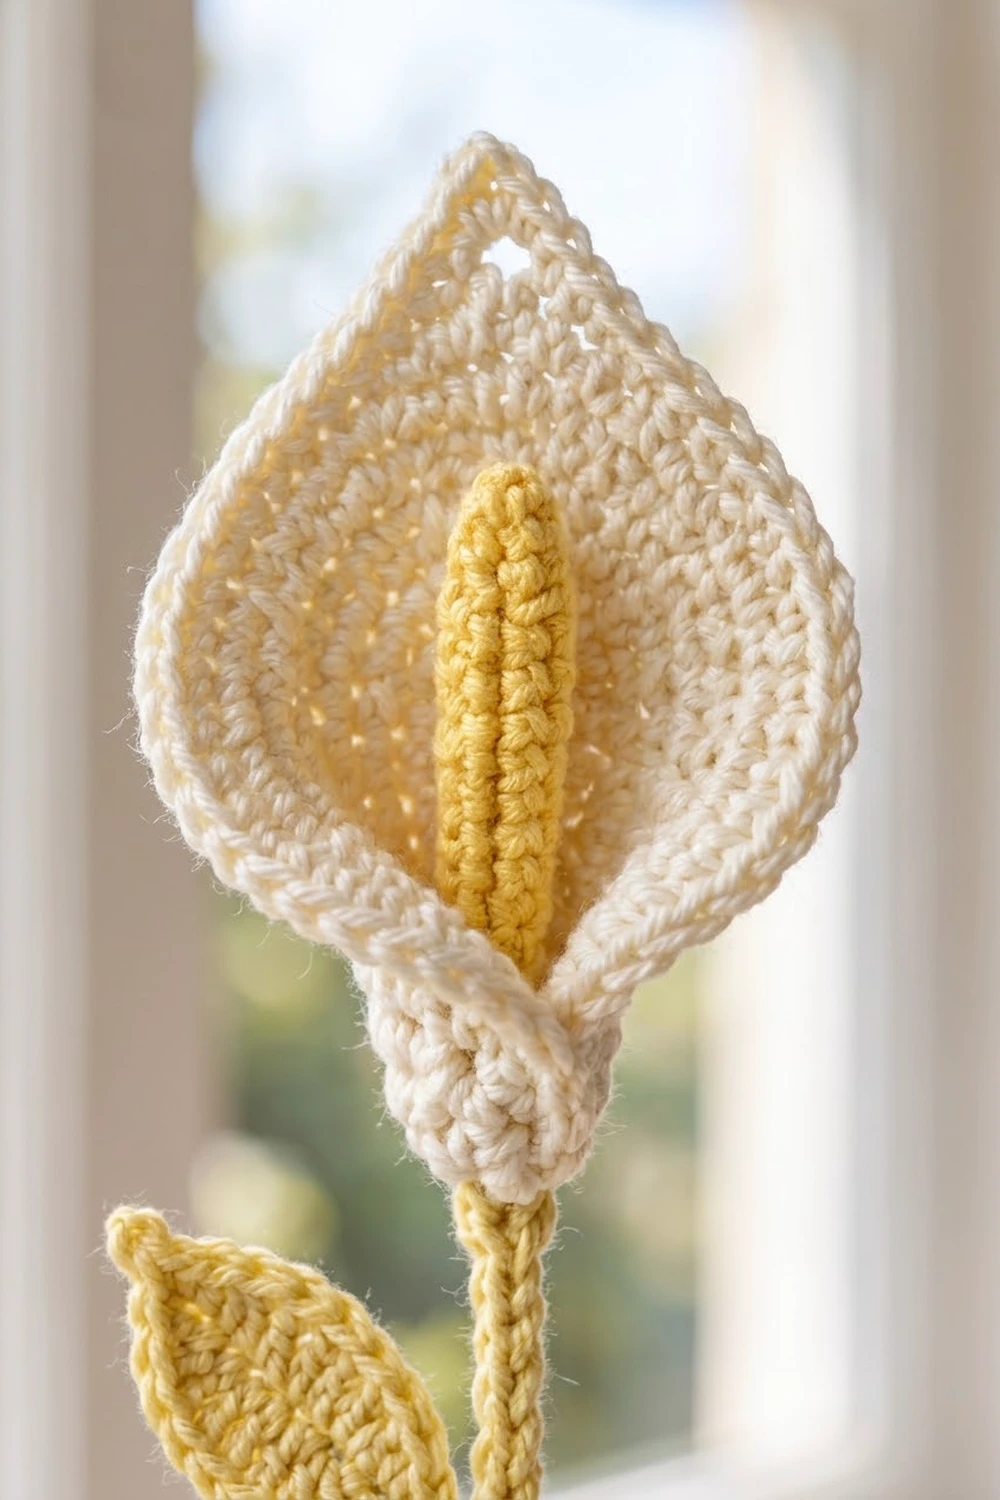
Leaf (make 72, Yellow)
The two sides of the foundation chain meet in a line down the center, and that line forms the leaf’s vein.
Rnd 1: Ch 10. Sc in 2nd ch from hook, hdc in next ch, dc in next 4 ch, hdc in next ch, sc in next ch, 3 sc in last ch (base). Working along the opposite side: sc in next ch, hdc in next ch, dc in next 4 ch, hdc in next ch, sc in last ch (same ch as first sc), ch 2 (tip), sl st to first sc. (19 sts + ch-2 tip sp: 8 per side, 3 at base)
Rnd 2: Sl st in each st around, working (sl st, ch 2, sl st) in the tip sp. Sl st to join. (21 sl st: 19 worked one into each st, plus 2 extra at the tip; ch-2 tip)
Fasten off and leave an 8 in (20.3 cm) tail.
Calla Lily Spathe (make 10, Cream)
Rnd 1: Ch 12. Sc in 2nd ch from hook and next 9 ch (10 sc), 3 sc in last ch (tip end). Working along the opposite side: sc in next 9 ch, 2 sc in same ch as first sc (base end). Sl st to first sc. (24 sc)
In working order, Rnd 1 has: 1 base st, 9 side sts, 3 tip sts, 9 side sts, 2 base sts.
Rnd 2: Ch 1. 2 sc in first st, sc in next 9 sts, 2 sc in next st, (sc, ch 2, sc) in next st (tip center), 2 sc in next st, sc in next 9 sts, 2 sc in each of last 2 sts. Sl st to join. (30 sc + ch-2 tip sp)
Rnd 3: Ch 1. Sc in first 2 sts, sc in next 3 sts, hdc in next 3 sts, dc in next 3 sts, 2 dc in each of next 2 sts, dc in next st, (dc, ch 2, dc) in tip sp, dc in next st, 2 dc in each of next 2 sts, dc in next 3 sts, hdc in next 3 sts, sc in next 3 sts, sc in last 4 sts. Sl st to join. (36 sts + ch-2 tip sp)
Check the count by section: 2 + 9 + 4 + 1 + 2 + 1 + 4 + 9 + 4 = 36. The sides step up from sc to hdc to dc, so the spathe is widest in its upper half. That’s what gives it the teardrop outline.
Rnd 4: Ch 1. Sc in each st around, working (sc, ch 2, sc) in the tip sp. Sl st to join. (38 sc: 36 worked one into each st, plus 2 extra at the tip; ch-2 tip sp)
Fasten off and leave a 12 in (30.5 cm) tail.
Spadix (make 10, Yellow)
Rnd 1: Ch 8. Sc in 2nd ch from hook and next 5 ch (6 sc), 3 sc in last ch. Working along the opposite side: sc in next 5 ch, 2 sc in same ch as first sc. Sl st to join. (16 sc)
Rnd 2: Working in FLO, sl st in each st around. (16 sl st)
The unworked back loops form a raised ridged rim. Fasten off and leave a 10 in (25.4 cm) tail.
Header Bud (make 10, Cream)
Work Spathe Rnds 1–2 only. (30 sc + ch-2 tip sp)
The bud should measure 2.75 in (7.0 cm) × 1 in (2.5 cm). Fold the base edges inward so they overlap by 0.25 in (0.6 cm), then tack them. Leave a 10 in (25.4 cm) tail.
Assembling Each Lily
- Lay the spathe right side up with the tip pointing up.
- Center the spadix on the spathe with its 3-sc end toward the tip. Its lower end should sit 0.75 in (1.9 cm) above the base point.
- Whipstitch around the spadix through the outer loops of its Rnd 1 sts. The Rnd 2 ridge stays raised.
- Fold the lower left edge of the spathe across the base of the spadix. Then fold the lower right edge over it so the edges overlap by 0.5 in (1.3 cm), forming the wrapped funnel.
- Tack through all layers at the base point with 3 or 4 stitches, keeping the upper half flat and open.
The folded lily measures 2.25 in (5.7 cm) × 3 in (7.6 cm).
Stem Cords (Yellow)
Stem A (make 6): Leave an 8 in (20.3 cm) tail. Ch 96, then sl st in the back bump of the 2nd ch from hook and each ch across. (95 sl st = 19 in / 48.3 cm)
Stem B (make 4): Leave an 8 in (20.3 cm) tail. Ch 66, then sl st in the back bump of the 2nd ch from hook and each ch across. (65 sl st = 13 in / 33.0 cm)
Place markers at sl st 20, 45, and 70 on Stem A, and at sl st 20 and 45 on Stem B. Those points are 4 in (10.2 cm), 9 in (22.9 cm), and 14 in (35.6 cm) from the top.
Make All Pieces
| Piece | Color | Quantity |
|---|---|---|
| Header band | Yellow | 1 |
| Stem A / Stem B | Yellow | 6 / 4 |
| Leaves | Yellow | 72 (20 header, 36 on A stems, 16 on B stems) |
| Spadices | Yellow | 10 |
| Spathes | Cream | 10 |
| Buds | Cream | 10 |
Strand layout (left to right):
Strand:  1    2    3    4    5    6    7    8    9    10
Type:    A    B    A    B    A    A    B    A    B    A
Drop:   24.5 18.5 24.5 18.5 24.5 24.5 18.5 24.5 18.5 24.5 in
The layout mirrors around the center. Strands 5 and 6 are both long, so the lowest flowers frame the middle of the window.
At each marker, sew 1 leaf to each side of the stem by its base, with the tip angled down and outward at about 45 degrees. Stem A gets 3 pairs and Stem B gets 2. Sew the last sl st of each stem into the tacked base of a lily so the lily hangs tip-down.
Header Band (Yellow)
Row 1: Ch 181. Sc in 2nd ch from hook and each ch across. (180 sc)
Rows 2–10: Ch 1, turn, sc in each st across. (180 sc)
Checkpoint: The band should measure 40 in (101.6 cm) × 2 in (5.1 cm). Think of it as 10 sections of 18 sts each (10 × 18 = 180). Each section is 4 in (10.2 cm) wide.
Border (Yellow)
Work the border before joining.
Border gauge: 1 rnd of sc plus 1 rnd of sl st = 0.25 in (0.6 cm) per side.
In this border, the “per side” counts are the sts between corner groups. Each corner group is 3 sc.
Rnd 1: Ch 1. Working across Row 10: 3 sc in first st, sc in next 178 sts, 3 sc in last st. Sc in each of the 10 row ends. Working across the foundation chain: 3 sc in first st, sc in next 178 sts, 3 sc in last st. Sc in each of the 10 row ends. Sl st to join.
Per side: top 178, bottom 178, ends 10 each, 4 corners × 3. Total: 178 + 178 + 10 + 10 + 12 = 388 sc.
Why the math works: Each long row of 180 sts is 178 middle sts plus 2 corner sts. Each corner st becomes a 3-sc group, so the total is 180 + 180 + 10 + 10 + (4 × 2 extra) = 388. At 5 rows per inch, 10 row ends match the band’s 2 in (5.1 cm) height, so the short ends don’t flare.
Rnd 2: Sl st in each st around. (388 sl st) Fasten off.
Checkpoint: 40.5 in (102.9 cm) × 2.5 in (6.4 cm).
Joining
Whipstitch all joins with Yellow. Each bottom-border sc sits directly above a foundation st, so you can use the foundation st numbers to place everything.
Strands: Sew the top 2 sl st of each stem to the back of the bottom border over sts 9 and 10 of each section. Those are sts 9/10, 27/28, 45/46, 63/64, 81/82, 99/100, 117/118, 135/136, 153/154, and 171/172. Each pair adds up to 181, so the spacing is symmetric.
Buds: Sew each bud on the front of the band over the same sts, point down. It should overlap the lower edge by 1.5 in (3.8 cm) and cover the stem join.
Header leaves: In each section, sew 1 leaf over sts 4/5 and 1 over sts 14/15 (mirror positions), tips angled down and outward.
Rings: Sew 11 rings to the top edge 4 in (10.2 cm) apart: one at each top corner, and one each between sts 18/19, 36/37, 54/55, 72/73, 90/91, 108/109, 126/127, 144/145, and 162/163.
Tension: Keep the stitches snug but not tight. If you pull too hard, the band ripples at the attachment points. When you’re done, the band should still measure 40.5 in (102.9 cm).
Final Blocking
- Weave in all tails.
- Pin the header face up to 40.5 in (102.9 cm) × 2.5 in (6.4 cm), with the strands lying straight below it.
- Pin each leaf flat, and pin each leaf tip and spathe tip to a sharp point.
- Mist everything until it’s damp but not soaked.
- Shape each lily’s fold with your fingers, and slip a rolled scrap of paper towel inside to hold the funnel open.
- Let it dry completely, which takes about 24 hours.
- Hang the valance for a day so the stems settle. If any stem is wavy, steam it lightly while it hangs.
Final Quality-Control Checklist
- Header measures 40.5 in (102.9 cm) × 2.5 in (6.4 cm)
- 11 rings sit 4 in (10.2 cm) apart
- Strands hang in A-B-A-B-A-A-B-A-B-A order
- Long strands drop 24.5 in (62.2 cm) and short strands drop 18.5 in (47.0 cm)
- Spadices are centered, with the ridges raised
- All lily folds overlap the same way, right edge over left
- Leaf pairs match in angle
- No tails show on the front
Troubleshooting
- Spathe cups instead of lying flat: Rnd 3 is too tight. Rework that round one hook size up.
- Spathe tip is rounded: Work the tip increase into the ch-2 sp, not the st beside it, and pin the tip to a point when blocking.
- Stems twist: Work into the back bump only.
- Stems stretch: The yarn is too elastic. Switch to mercerized cotton.
- Header ripples: Redo border Rnd 1 with exactly 178 sts per long side.
- Leaves curl: Rework Rnd 2 with looser sl sts, then block.
Care
Hand wash in cool water with mild soap. Press out the water in a towel, then reshape the lilies and dry the valance flat.
Final Notes
Each measurement depends on the one before it. A gauge of 18 sc = 4 in (10.2 cm) sets the size of every piece: the 2 in (5.1 cm) leaf, the 3 in (7.6 cm) folded lily, and the ten 18-st sections that make the 40 in (101.6 cm) band. The 0.25 in (0.6 cm) border brings the band to 40.5 in (102.9 cm). A cord gauge of 10 ch = 2 in (5.1 cm) gives the 19 in (48.3 cm) and 13 in (33.0 cm) stems. Together, these give drops of 24.5 in (62.2 cm) and 18.5 in (47.0 cm). If your first leaf and lily match gauge, the rest of the valance will come out the right size.
Happy crocheting!