

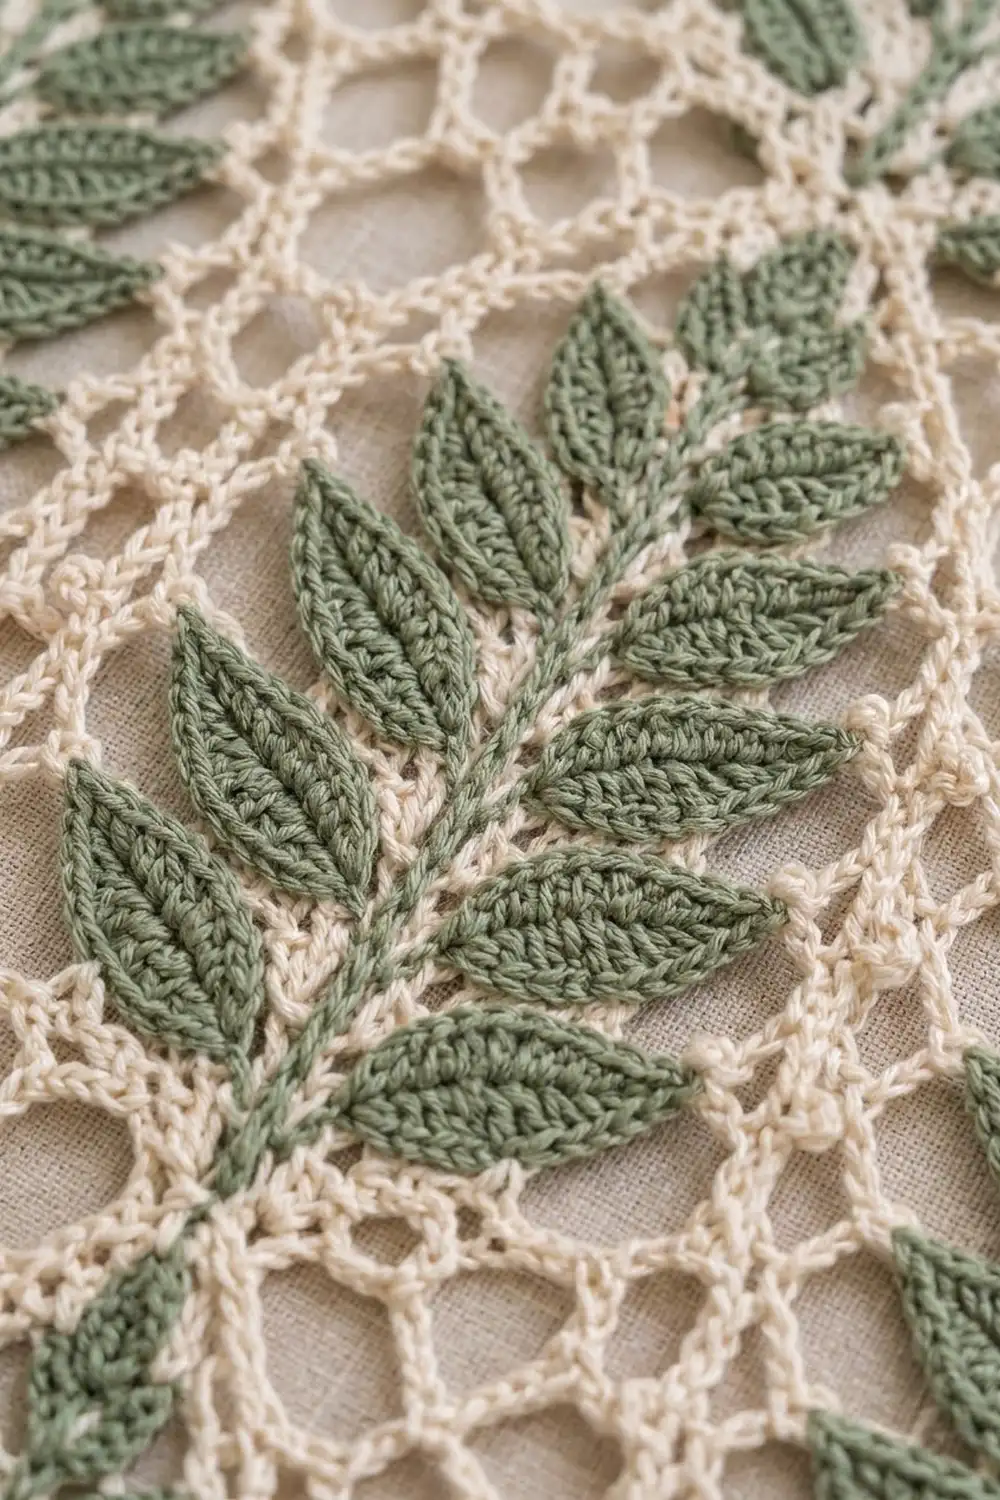
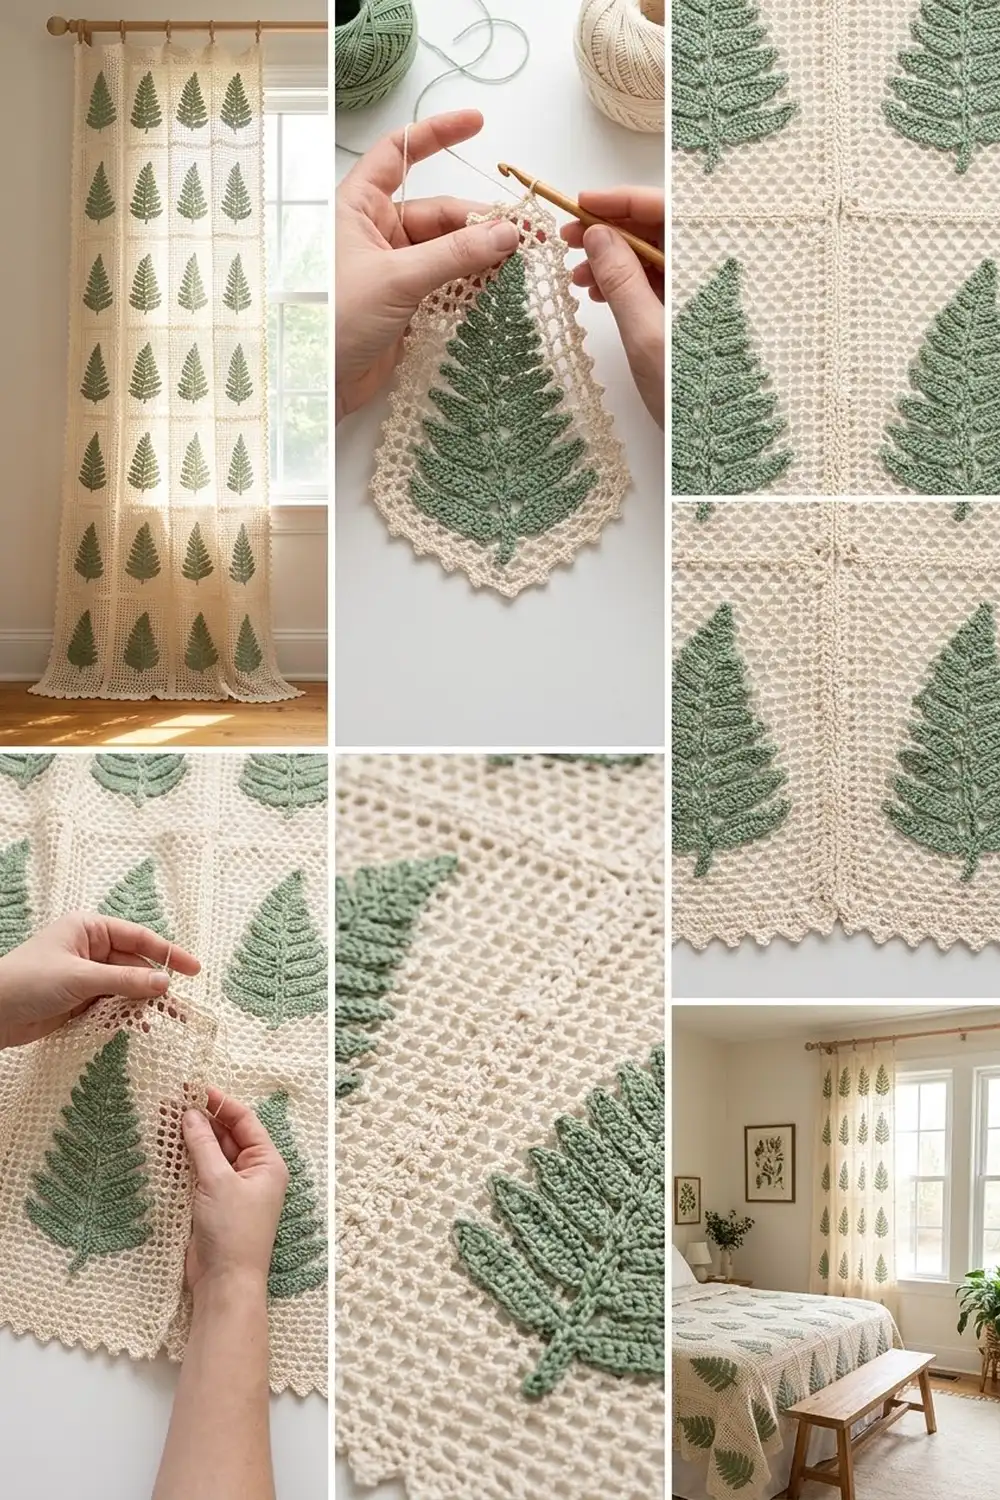
This curtain panel pairs a soft cream picot lattice with tall sage-green ferns. Each fern climbs a slim chain stem, with pointed leaves set in pairs that get smaller toward a single tip leaf. When the panel hangs, the ferns line up into unbroken green columns, and light comes through the open mesh around them.
The palette is just two colors: warm cream for the lattice, joins, and border, and muted sage green for the ferns. The look is calm, botanical, and cottage-style.
All instructions use US crochet terms. The finished panel measures 42 in wide x 86 in long (106.7 cm x 218.4 cm), which is a full floor-length drop on a standard rod.
Construction is modular. You crochet 16 rectangular picot-mesh motifs, then make 16 fern appliqués (a stem plus separate leaves) and sew one fern to each motif. The motifs are joined into a 4 x 4 grid with a flat slip-stitch seam, and a three-round scalloped picot border finishes the edge.
Finished Size and Construction
- Finished size: 42 in x 86 in (106.7 cm x 218.4 cm)
- Skill level: Intermediate
- Terminology: US
- Yarn weight: DK (#3 light) cotton
- Hook: 3.5 mm (E-4)
- Number of pieces: 16 mesh motifs, each with 1 fern appliqué
- Layout: 4 motifs across x 4 motifs down
- Motif size: 10 in x 21 in (25.4 cm x 53.3 cm)
- Size before border: 40 in x 84 in (101.6 cm x 213.4 cm)
- Border depth: 1 in (2.5 cm) on every side
Materials
Pick a smooth mercerized or combed DK cotton, around 113 m per 50 g. Cotton keeps the picots crisp and holds its shape on a rod. Choose a warm cream rather than bright white so the sage leaves look soft.
- Cream (lattice, joins, border): 850 g, about 1,920 m (2,100 yd)
- Sage green (ferns): 200 g, about 450 m (490 yd)
These quantities already include a margin of roughly 15%.
Tools:
- 3.5 mm (E-4) crochet hook
- Tapestry needle
- Stitch markers
- Rust-proof pins and blocking mats
- Measuring tape
- Clip rings or a rod for hanging
Abbreviations (US Terms)
- ch – chain
- sl st – slip stitch
- sc – single crochet
- hdc – half double crochet
- dc – double crochet
- sk – skip
- st(s) – stitch(es)
- sp – space
- lp – loop
- RS – right side
- rep – repeat
Special stitches:
- Picot: ch 3, sl st in 3rd ch from hook.
- PL (picot loop): ch 3, picot, ch 2. This makes a lattice loop with a small picot “dot” at its peak.
Gauge and Checkpoints
Sc gauge: 51 sc = 10 in (25.4 cm), about 5 sts per inch.
Mesh gauge: 10 rows of picot mesh = 4.9 in (12.4 cm), lightly blocked.
Stem gauge: about 5.5 sl sts per inch along the fern stem.
Make one complete motif before anything else, including the edging, then block it. Every later step depends on this first motif.
Checkpoints:
- After Row 1: 49 sc measure 9.6 in (24.4 cm).
- After Row 42: the piece measures about 20.3 in (51.6 cm) tall.
- After Row 43: 9.6 in x 20.5 in (24.4 cm x 52.1 cm).
- After the edging: 10 in x 21 in (25.4 cm x 53.3 cm).
If your motif is too big, go down to a 3.25 mm hook. If it is too small, go up to 3.75 mm. Never change the stitch counts. The joining and border math depends on exactly 51 sts on each short side and 106 sts on each long side.
Mesh Motif (make 16)
With cream, ch 50.
Row 1 (RS): Sc in 2nd ch from hook and in each ch across. (49 sc)
Row 2: Ch 1, turn. Sc in first sc, *PL, sk 3 sc, sc in next sc; rep from * 11 more times. (12 PL, 13 sc)
Row 3: Ch 5 (counts as dc + ch 2), turn. Sc in picot of first PL, *PL, sc in picot of next PL; rep from * 10 more times, ch 2, dc in last sc. (11 PL, 12 sc, 2 half-loops)
Row 4: Ch 1, turn. Sc in first dc, *PL, sc in picot of next PL; rep from * 10 more times, PL, sc in 3rd ch of turning ch-5. (12 PL, 13 sc)
Rows 5–42: Rep Rows 3–4 nineteen more times. Row 42 ends with 12 PL and 13 sc.
Mesh rows 2–42 total 41 rows: 21 full-loop rows (the even rows) and 20 half-loop rows (the odd rows). Each sc is anchored into the picot below it, so the picots sit at the lattice intersections and give the dotted diamond look.
Row 43: Ch 1, turn. Sc in first sc, *3 sc in next PL (1 sc in ch-3 before picot, 1 sc in picot, 1 sc in ch-2 after picot), sc in next sc; rep from * 11 more times. (49 sc) Fasten off.
Motif Edging
With RS facing, join cream with a sl st in the first sc of Row 43.
Rnd 1: Ch 1, 3 sc in same st (the middle sc is the corner st). Sc in next 47 sc, 3 sc in last sc.
Work down the side, working into the row ends from Row 42 to Row 2. Put 2 sc in the end of each full-loop row and 3 sc around the dc edge of each half-loop row. Skip the end of Row 1.
3 sc in first free loop of the foundation ch, sc in next 47 ch, 3 sc in last ch. Work up the second side the same way. Join with a sl st to first sc.
Count per side, including both corner sts:
- Short sides: 1 + 47 + 1 = 49 side sts, + 2 corners = 51 sts
- Long sides: 1 + (21 x 2) + (20 x 3) + 1 = 104 side sts, + 2 corners = 106 sts
- Total: (2 x 49) + (2 x 10⁴) + 4 corners = 310 sts
Fasten off, weave in ends, and block the motif to 10 in x 21 in (25.4 cm x 53.3 cm).
Fern Appliqué (make 16)
Each fern is made of 1 stem and 17 leaves: 6 large, 6 medium, and 5 small. Use sage green.
Stem
Ch 91. Sl st in back bump of 2nd ch from hook and in each ch across. (90 sl sts) The stem measures about 16.4 in (41.7 cm). Leave an 8 in (20.3 cm) tail at both ends.
Leaves
Start each leaf with an 8 in (20.3 cm) tail. That tail sits at the leaf base and is used to sew the leaf to the stem. The first skipped chain becomes the pointed tip.
Small leaf (make 5):
– Ch 8. Sl st in 2nd ch from hook, then sc, hdc, dc, hdc, sc. (6 sts)
– 3 sc in last ch (this is the base).
– Working in the free loops on the other side: sc, hdc, dc, hdc, sc, sl st. (6 sts)
– (Sl st, ch 2, sl st) in the skipped tip ch.
Total: 15 sts + pointed tip. Length about 1.4 in (3.6 cm).
Medium leaf (make 6):
– Ch 10. Sl st in 2nd ch from hook, then sc, hdc, 3 dc, hdc, sc. (8 sts)
– 3 sc in last ch.
– Other side: sc, hdc, 3 dc, hdc, sc, sl st. (8 sts)
– (Sl st, ch 2, sl st) in tip ch.
Total: 19 sts + tip. Length about 1.8 in (4.6 cm).
Large leaf (make 6):
– Ch 12. Sl st in 2nd ch from hook, then sc, hdc, 5 dc, hdc, sc. (10 sts)
– 3 sc in last ch.
– Other side: sc, hdc, 5 dc, hdc, sc, sl st. (10 sts)
– (Sl st, ch 2, sl st) in tip ch.
Total: 23 sts + tip. Length about 2.2 in (5.6 cm).
Each leaf tapers at both ends, and the foundation chain down the middle looks like a center vein.
Assembling the Fern
Count stem sts from the bottom and place markers at sts 8, 18, 28, 38, 48, 58, 68, and 78. That gives eight pair points, about 1.8 in (4.6 cm) apart.
- Sts 8, 18, 28: 1 large leaf on each side
- Sts 38, 48, 58: 1 medium leaf on each side
- Sts 68, 78: 1 small leaf on each side
- St 90 (top): the fifth small leaf, pointing straight up as the tip
Sew each leaf base to the stem, angled upward at about 45°. Tack the center vein in two spots. The finished fern is about 17.8 in (45.2 cm) tall and 3.5 in (8.9 cm) wide.
Attaching the Fern
Center the stem on the RS of a blocked motif, 5 in (12.7 cm) from each long edge. Place the bottom of the stem 1.6 in (4.1 cm) above the bottom edge, so the tip leaf ends 1.6 in (4.1 cm) below the top edge.
Sew the stem down with small running stitches. Then tack each leaf at its tip and at the middle of each side. Stitch into lattice strands and picots only, so the stitches don’t show.
Make All Pieces
- Cream: 16 mesh motifs, edged and blocked
- Sage green: 16 stems, 96 large leaves, 96 medium leaves, 80 small leaves
- Assembled: 16 fern motifs
Layout (all ferns point up):
[F1]  [F2]  [F3]  [F4]
[F5]  [F6]  [F7]  [F8]
[F9]  [F10] [F11] [F12]
[F13] [F14] [F15] [F16]
Ferns in the same column line up end to end and read as one long climbing fern.
Joining
Lay two motifs side by side with RS facing up and the edges matched. With cream, work a sl st through the inner (back) loops of each pair of matching sts. That is 1 sl st per matched pair, so no sts are added or lost.
- Join the columns first. Join 4 motifs top to bottom along their short edges. Each seam matches 51 sts to 51 sts, corner to corner.
- Then join the columns together. Join the 4 columns along their long edges. Each seam matches 4 x 106 = 424 sts to 424 sts, and the corner sts meet exactly at every four-way intersection.
Tension: Keep each sl st as tall as a sc. Tight seams pucker and shorten the drop. If your seams run tight, use a 4.0 mm hook for joining only.
Checkpoint: The joined body measures 40 in x 84 in (101.6 cm x 213.4 cm). Its outer edge has 4 x 51 = 204 sts along the top and bottom and 4 x 106 = 424 sts along each side. These counts already include the motif corner sts.
Border
Border gauge: Rnd 1 uses exactly 1 sc per edge st, so the body keeps its 40 in x 84 in (101.6 cm x 213.4 cm) size. The three rounds together add 1 in (2.5 cm) on every side.
Rnd 1 (RS): Join cream in the top right corner st. Ch 1, (sc, ch 2, sc) in the corner st. Sc in each st to the next outer corner st, and work (sc, ch 2, sc) in it. Rep around and join with a sl st to first sc.
- Top and bottom: 204 sc each
- Sides: 424 sc each
- Total: 1,256 sc + 4 corner ch-2 sps. That is 1,252 edge sts, plus 1 extra sc at each of the 4 corners.
Rnd 2: Sl st into the corner ch-2 sp. Ch 1, (sc, ch 5, sc) in same sp. Ch 5, sk 4 sc, sc in next sc. Rep from * to * along the side, ending with ch 5, sk 4 sc. Work (sc, ch 5, sc) in the next corner sp. Rep around and join.
- Top and bottom: 41 ch-5 lps each (40 anchor sc)
- Sides: 85 ch-5 lps each (84 anchor sc)
- Corners: 4 corner lps
- Total: 256 lps
Rnd 3: Sl st into first lp. In each ch-5 lp work (sc, hdc, 2 dc, picot, 2 dc, hdc, sc). Join and fasten off. (256 scallops, 2,048 sts + 256 picots)
Why the math works: Count the gaps along each side from one corner sp to the next. The 204 sts on the top and bottom give 205 gaps, and 205 = 41 x 5. The 424 sts on each side give 425 gaps, and 425 = 85 x 5. Each ch-5 lp covers exactly 5 gaps, so the loops land evenly with nothing to fudge.
Final Blocking
- Weave in all ends, running green tails through green sts only.
- Soak the panel in cool water for 15 minutes, then press the water out gently without wringing.
- Roll the panel in towels to remove extra moisture.
- Lay it flat, working in sections if you need to.
- Pin the body to 40 in x 84 in (101.6 cm x 213.4 cm), keeping the seam lines straight.
- Pin out each scallop so its picot comes to a point. The panel should measure 42 in x 86 in (106.7 cm x 218.4 cm).
- Smooth the leaves flat and let everything dry fully before unpinning.
Final Quality-Control Checklist
- Every motif has 51 sts on each short side and 106 on each long side.
- All 16 ferns point up and line up in four columns.
- Every leaf is tacked at its tip and sides.
- Seams lie flat and the corners meet at every intersection.
- The border has 204 / 424 sc in Rnd 1, 256 loops in Rnd 2, and 256 scallops in Rnd 3.
- The panel measures 42 in x 86 in (106.7 cm x 218.4 cm).
- All ends are hidden and trimmed.
Troubleshooting
- The mesh leans diagonally: Anchor each sc into the picot, not the ch-sp.
- The motif edges wave: Recheck the row ends: 2 sc on full-loop rows and 3 sc on half-loop rows.
- The leaves curl: Block them before sewing, or use a smaller hook for the leaves.
- The panel is too short: The joins are too tight. Re-block and pin to length.
- The border ruffles: Recount Rnd 1. It needs exactly 204 and 424 sc per side.
- The fern columns don’t line up: Measure the 1.6 in (4.1 cm) margins on every motif before sewing the fern down.
Care
Hand wash in cool water with mild detergent and dry flat, reshaping as it dries. Avoid hot dryer cycles, which can shrink the cotton and distort the leaves.
Final Notes
Here is the measurement chain from start to finish:
- One motif is 10 in x 21 in (25.4 cm x 53.3 cm), with 51 sts on each short side and 106 on each long side.
- Four motifs across and four down make a 40 in x 84 in (101.6 cm x 213.4 cm) body, with 204 and 424 edge sts.
- The 1 in (2.5 cm) border brings the panel to 42 in x 86 in (106.7 cm x 218.4 cm).
If your first motif matches its checkpoints, every piece after it will fit.
Happy crocheting!