

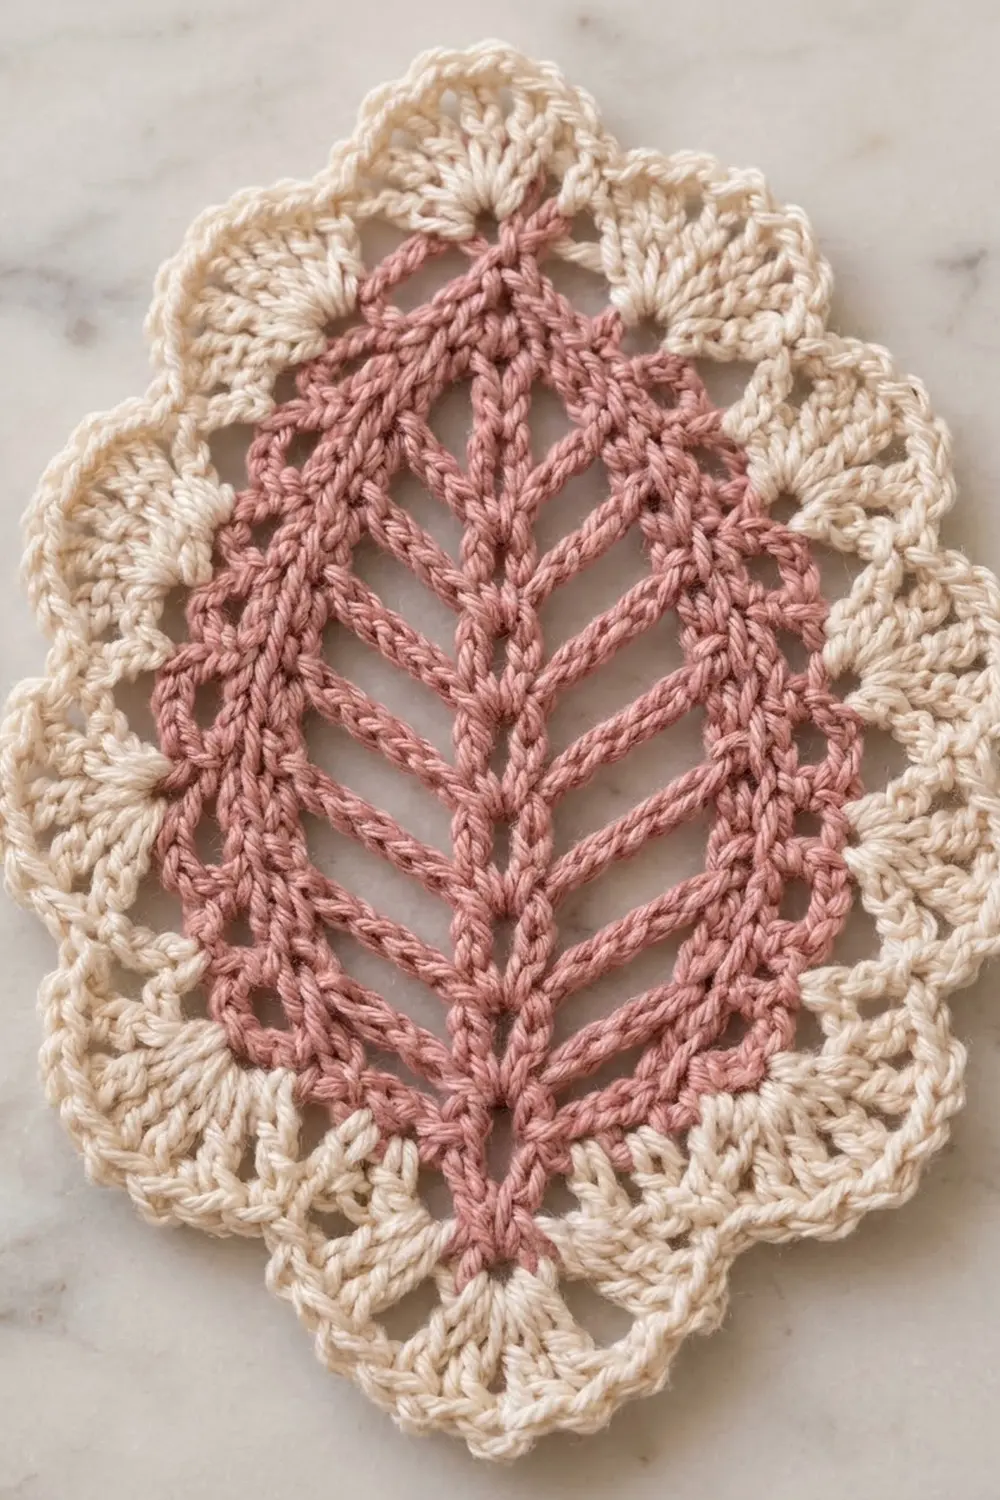
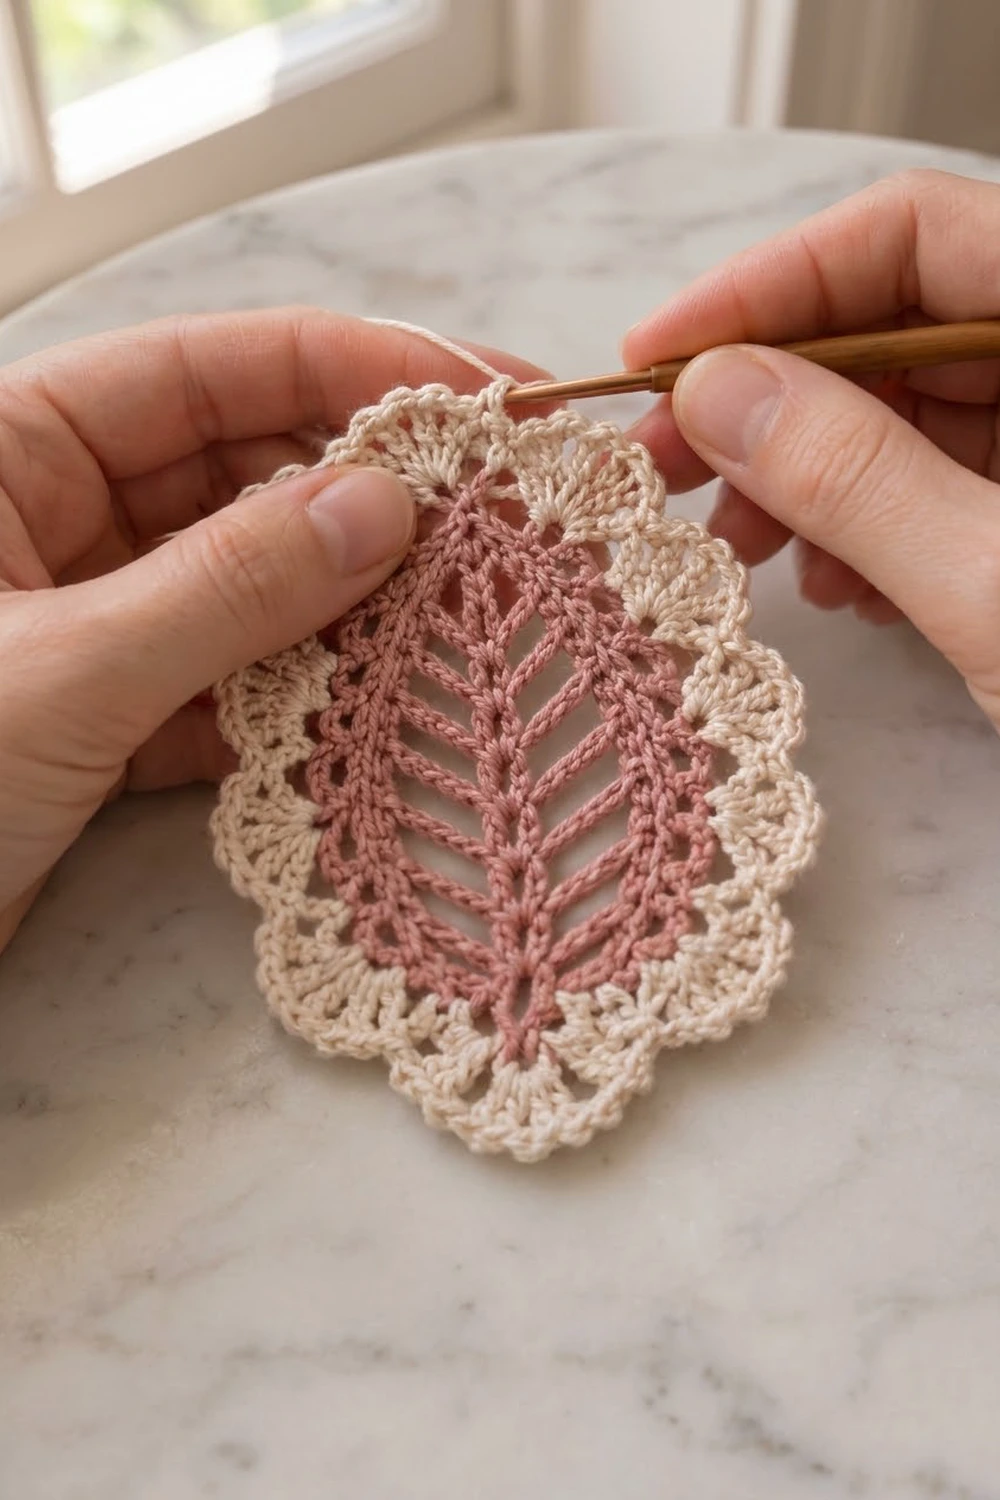
The Rosewood Lace Leaf is a single teardrop motif with a vintage, romantic look. A dusty rose center holds a raised spine and diagonal rib bars with airy gaps between them, like the veins of a real leaf. A cream border of shell scallops frames it and ends in a neat point at the tip.
The two colors give a soft cottage feel. The rose center reads as the “leaf,” and the cream border works like lace trim. The piece works well as an appliqué, a coaster, a sachet front or a decorative accent.
This pattern uses US crochet terms. The finished motif measures about 4.5 x 6 in (11.4 x 15.2 cm) after blocking.
The construction is all in the round. You start with a foundation chain for the spine, crochet around both sides of it, and add chain-and-single-crochet rib bars. Next, an outline round links the rib tips, and a solid rose round fills in the edge. Two cream rounds finish the piece with the scallop border.
Finished Size and Construction
- Finished size: 4.5 in wide x 6 in tall (11.4 x 15.2 cm)
- Skill level: Intermediate
- Terminology: US crochet terms
- Yarn weight: DK (#3), cotton or cotton blend
- Hook: 3.5 mm (E-4)
- Number of pieces: 1 (single motif)
- Layout: Single leaf, tip pointing up
- Leaf center (Rnds 1–4): 3 x 4.5 in (7.6 x 11.4 cm)
- Size before border: 3 x 4.5 in (7.6 x 11.4 cm)
- Border depth: 0.75 in (1.9 cm) on each side, in 2 rounds
Materials
Yarn: Use a smooth, mercerized DK cotton. Cotton keeps the ribs crisp and the scallops defined. Acrylic gives a softer leaf, but you will need firmer blocking.
- Color A, Dusty Rose: 12 g (about 29 m)
- Color B, Cream: 10 g (about 24 m)
The quantities assume roughly 120 m per 50 g and include a margin for your gauge swatch and weaving in ends.
Tools:
- 3.5 mm (E-4) crochet hook
- 2 stitch markers
- Tapestry needle
- Scissors
- Blocking mat and rust-proof pins
- Spray bottle with water
Abbreviations (US Terms)
- ch: chain
- sl st: slip stitch
- sc: single crochet
- dc: double crochet
- sk: skip
- sp: space
- st(s): stitch(es)
- Rnd: round
Special stitches:
- Rib: Ch 9, then sc in the 2nd ch from hook and in each of the next 7 ch. This makes 8 sc and finishes back at the spine. The ch at the far end is the rib tip.
- Shell: 7 dc in the same st.
- Tip shell: (3 dc, ch 2, 3 dc) in the same sp.
Gauge and Checkpoints
Gauge: 20 sc and 22 rows = 4 in (10.2 cm) in sc, which is 5 sc per 1 in (2.5 cm).
Make one full motif before buying extra yarn or committing to a larger plan. A leaf is small, so a full test piece is the most honest swatch.
Checkpoints:
- After Rnd 1: The spine measures about 3.75 in (9.5 cm) from base to tip.
- After Rnd 2: Each rib bar measures about 1.5 in (3.8 cm) long.
- After Rnd 4: The leaf center measures 3 x 4.5 in (7.6 x 11.4 cm), laid flat.
- After Rnd 5: The piece measures about 3.75 x 5.25 in (9.5 x 13.3 cm).
- After Rnd 6: The piece measures 4.5 x 6 in (11.4 x 15.2 cm) after blocking.
If your piece is too big: Go down 0.5 mm in hook size, or tighten your chains. Loose rib chains are the most common reason for an oversized leaf.
If your piece is too small: Go up 0.5 mm in hook size. Check that you are working the ribs into the chain’s back bump or top loop consistently, not tightly into both loops.
Leaf Center (Color A, Dusty Rose)
Foundation: With A, ch 21.
The end where you start working is the base of the leaf. The first chain you made is the tip.
Rnd 1 (spine): Sc in the 2nd ch from hook and in each of the next 18 ch (19 sc). Work 3 sc in the last ch (tip). Rotate, and work along the free loops of the foundation: sc in each of the next 18 ch, then 2 sc in the last ch (the same ch as the first sc). Join with a sl st to the first sc. (42 sc)
The 42 sts break down like this:
- Base: 3 sts (the 2 sc at the end of the round plus the first sc)
- Side A: 18 sts
- Tip: 3 sts
- Side B: 18 sts
Place a marker in the middle sc of the tip.
Rnd 2 (ribs): Ch 1. This ch does not count as a stitch here or in later rounds.
- Sc in the same st as the join.
- Side A: [Sc in each of the next 2 sts, sc in the next st, Rib] 6 times (18 sts worked, 6 ribs).
- Tip: Sc in the next st. In the marked tip st, work sc, Rib, sc. Sc in the next st.
- Side B: [Sc in the next st, Rib, sc in each of the next 2 sts] 6 times (18 sts worked, 6 ribs).
- Base: Sc in each of the last 2 sts. Join with a sl st to the first sc.
(43 spine sc and 13 ribs: 6 per side plus 1 tip rib)
The tip rib points straight up and extends the spine. The side ribs mirror each other. Fold each side rib up toward the tip at about a 45° angle, which gives the chevron look.
Rnd 3 (outline): Lay the leaf flat with all side ribs angled toward the tip.
- Ch 8. This counts as dc + ch 5, and it rises from the join at the base center.
- Side A: Sc in the rib tip of the lowest Side A rib. [Ch 5, sc in the tip of the next rib up] 5 times.
- Tip: Ch 5, then 3 sc in the tip of the tip rib.
- Side B: Ch 5, sc in the tip of the top Side B rib. [Ch 5, sc in the tip of the next rib down] 5 times.
- Base: Ch 5, then join with a sl st in the 3rd ch of the beginning ch-8.
(16 sts: 1 dc, 15 sc, and 14 ch-5 sps)
Rnd 4 (solid outline): Ch 1, sc in the same st.
- [5 sc in the next ch-5 sp, sc in the next sc] around until you reach the tip.
- At the tip: Sc in the first tip sc, 3 sc in the center tip sc, sc in the third tip sc.
- Continue the [5 sc in the ch-5 sp, sc in the next sc] pattern back down to the base. Work 5 sc in the final ch-5 sp, then join.
(88 sc) Check the count: 16 sts + 2 extra at the tip + (14 sps x 5 sc) = 88.
Move your marker to the center sc of the 3-sc tip group (the apex). Counting from the apex to the base center, each side has 43 sc: 35 sc in the spaces + 6 rib-tip sc + 2 tip sc. So 43 + 43 + apex 1 + base 1 = 88.
Fasten off A. Checkpoint: 3 x 4.5 in (7.6 x 11.4 cm).
Border (Color B, Cream)
Border gauge: Each cream round adds about 3/8 in (1.0 cm) on every side, so the 2 rounds add 0.75 in (1.9 cm) per side. 3 in + 0.75 in + 0.75 in = 4.5 in (11.4 cm) wide, and 4.5 in + 0.75 in + 0.75 in = 6 in (15.2 cm) tall.
Rnd 5 (dc foundation): Join B in the marked apex sc.
- Ch 3 (counts as dc). Work (dc, ch 3, 2 dc) in the same st.
- Dc in each of the next 43 sts.
- 3 dc in the base center st.
- Dc in each of the next 43 sts.
- Join with a sl st to the top of the beginning ch-3.
(93 dc and 1 ch-3 sp at the apex)
This round has two kinds of stitches:
- Worked 1-per-existing-stitch: 86 side dc
- Added at the shaping points: 4 dc at the apex and 3 dc at the base, for a total of 86 + 7 = 93.
Counting from the apex space to the base center dc, each side has 46 dc: 2 apex dc + 43 + 1 base-side dc.
Rnd 6 (scallops): Sl st in the next dc and into the ch-3 sp.
- Tip shell: Ch 3 (counts as dc), then (2 dc, ch 2, 3 dc) in the same sp.
- Side B: Sk the next 2 dc, sc in the next dc. [Sk 2 dc, Shell in the next dc, sk 2 dc, sc in the next dc] 7 times.
- Base: Sk 1 dc, Shell in the base center dc, sk 1 dc.
- Side A: Sc in the next dc. [Sk 2 dc, Shell in the next dc, sk 2 dc, sc in the next dc] 7 times. Sk the last 2 dc.
- Join with a sl st to the top of the beginning ch-3.
(15 Shells, 1 tip shell, and 16 sc)
Why the math works: Each side uses exactly 46 sts:
- 2 skipped at the apex
- 1 sc
- 7 repeats of 6 sts = 42
- 1 skipped beside the base shell
2 + 1 + 42 + 1 = 46, so both sides land symmetrically on the base center dc. The 6-st repeat (sk 2, shell, sk 2, sc) spaces the scallops evenly. The single skip on each side of the base shell lets the base curve stay round without ruffling.
Fasten off and weave in all ends on the wrong side, through the matching color.
Final Blocking
- Wet the motif fully in cool water, then gently press out the excess. Do not wring it.
- Lay the motif face up on a blocking mat.
- Pin the apex tip shell straight up and the base shell straight down so the leaf measures 6 in (15.2 cm) tall.
- Pin the widest point to 4.5 in (11.4 cm) across.
- Angle each rib toward the tip at about 45° and pin through the gaps so the ribs stay straight and evenly spaced.
- Pin the center of each scallop, easing them into a smooth, even curve.
- Let the motif dry completely, for at least 12 hours, before unpinning.
- For extra crispness on cotton, mist it lightly with spray starch before drying.
Final Quality-Control Checklist
- Rnd 2 has 13 ribs: 6 per side plus 1 at the tip.
- The side ribs are mirrored and evenly spaced, 3 spine sts apart.
- Rnd 4 has 88 sc, with 43 on each side.
- Rnd 5 has 93 dc plus the apex ch-3 sp.
- Rnd 6 has 15 Shells, 1 tip shell and 16 sc.
- The tip comes to a clean point, and the base is smoothly rounded.
- The motif lies flat without cupping or ruffling.
- The finished size is 4.5 x 6 in (11.4 x 15.2 cm).
- All ends are woven in invisibly.
Troubleshooting
Ribs twist or curl. Work every rib sc into the same part of the chain (the back bump is neatest). Block firmly and pin each rib straight.
The leaf center cups. The ch-5 spaces in Rnd 3 are too tight. Go up a hook size for that round only, or chain more loosely.
The leaf center ruffles. The chains are too loose. Use ch 4 instead of ch 5 in Rnd 3, and work 4 sc per space in Rnd 4. This gives 74 sc, so recount and adjust Rnd 5 to match.
The scallops don’t come out even. Recount Rnd 5. Each side must have exactly 46 sts from the apex space to the base center.
The tip is blunt. Make sure you worked 3 sc into the center tip st in Rnd 4 and that the tip shell sits in the ch-3 sp.
The base looks pointed. Check that you placed 3 dc in the base center in Rnd 5.
Care
Hand wash in cool water with mild soap, and dry flat, reshaping and pinning if needed. Cotton motifs can be pressed lightly with a warm iron through a cloth.
Final Notes
The measurement chain is simple:
- The 3.75 in (9.5 cm) spine
- Ribs about 1.5 in (3.8 cm) long
- A 3 x 4.5 in (7.6 x 11.4 cm) leaf center
- Two cream rounds adding 0.75 in (1.9 cm) per side
- A finished 4.5 x 6 in (11.4 x 15.2 cm) motif
Check your measurements at each stage and the counts will take care of themselves. If you later decide to make more leaves, block every one to the same 4.5 x 6 in (11.4 x 15.2 cm) so they stay consistent.
Happy crocheting!