

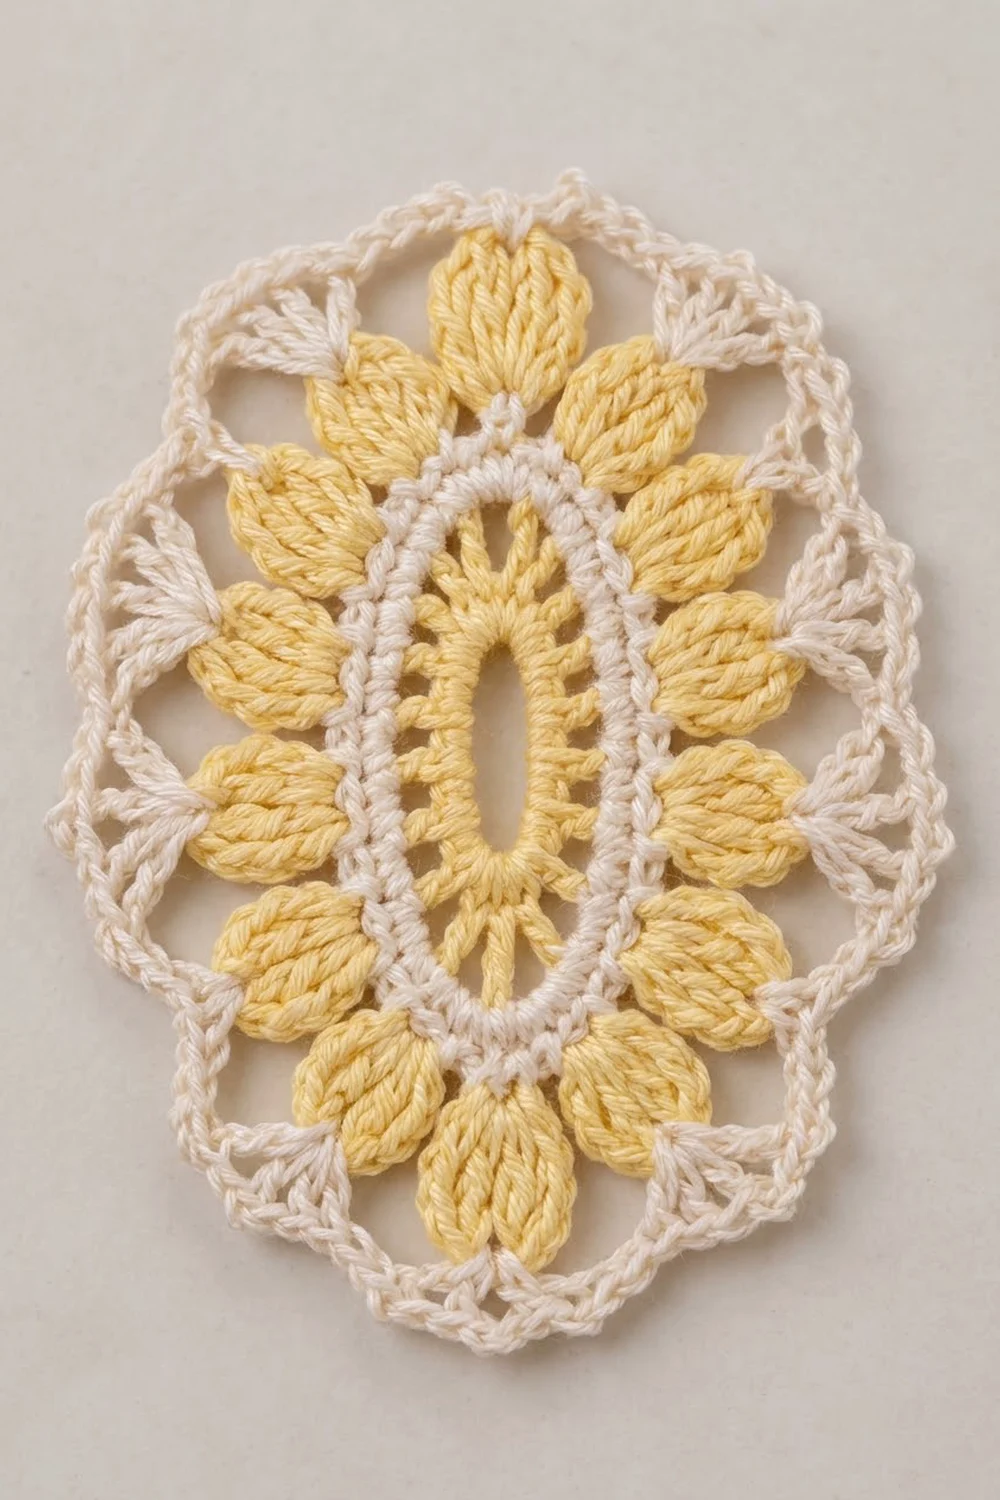
The Buttercup Lace Oval is a soft, vintage-style motif in cream and butter yellow. A slim oval window sits at the center, framed by tall yellow stitches and a smooth cream band. Around that band, sixteen puffy yellow petals point outward like the rays of a flower.
Cream fan shells sit between the petal tips. An airy chain-loop border with tiny picots finishes the edge. The look is light and summery, close to old-fashioned cotton doily work but with stronger color contrast.
This pattern uses US crochet terms. The finished motif measures 5.5 x 7 in (14.0 x 17.8 cm) after blocking.
The motif is one single piece worked in joined rounds. You start with a chain ring that you flatten into an oval. Then you work six rounds outward: four rounds for the motif body and two rounds of lace border. Colors change at the start of Rounds 2, 3 and 4.
Finished Size and Construction
- Finished size: 5.5 x 7 in (14.0 x 17.8 cm), blocked
- Skill level: Intermediate
- Terminology: US crochet terms
- Yarn weight: Sport weight (#2) cotton
- Hook: 3.0 mm
- Number of pieces: 1
- Layout: One single oval motif, no joining
- Piece size: 5.5 x 7 in (14.0 x 17.8 cm)
- Size before border (after Round 4): 4.25 x 5.75 in (10.8 x 14.6 cm)
- Border depth (Rounds 5–6): 0.625 in (1.6 cm) on every edge
Materials
Choose a smooth, mercerized cotton or cotton blend in sport weight. Mercerized cotton gives crisp stitch definition and makes the petals look rounded and glossy. Avoid fuzzy or very soft yarns, because they blur the picots and fan shells.
- Cream / ivory (Color A): 15 g, about 46 m (50 yd)
- Butter yellow (Color B): 10 g, about 31 m (34 yd)
These amounts assume a cotton of about 155 m per 50 g. Both quantities include a margin of about 30 percent for a practice start and the tails left at each color change.
Tools
- 3.0 mm crochet hook
- Tapestry needle
- 4 locking stitch markers
- Scissors
- Rust-proof pins and a blocking mat or folded towel
- Spray bottle with clean water
- Ruler or tape measure
Abbreviations (US Terms)
- ch – chain
- sl st – slip stitch
- sc – single crochet
- hdc – half double crochet
- dc – double crochet
- tr – treble crochet
- st(s) – stitch(es)
- sp(s) – space(s)
- beg – beginning
- rep – repeat
Special stitches
- Standing stitch: With a slip knot on the hook, work the stitch as normal into the stitch or space given. This joins the new color without a slip stitch.
- Petal (5-tr cluster): *Yo twice, insert hook in st, yo and pull up a loop, (yo, draw through 2 loops) twice; rep from * 4 more times in the same st (6 loops on hook), yo and draw through all 6 loops, ch 1 to lock.
- Beg petal: Ch 4 (counts as first tr). Work the * sequence 4 times in the same st (5 loops on hook), yo and draw through all 5 loops, ch 1 to lock.
- Shell: (2 dc, ch 2, 2 dc) in the given sp.
- Picot: Ch 3, sl st in the 3rd ch from hook.
Gauge and Checkpoints
This is a single motif, so the motif itself is your gauge swatch. Work Rounds 1 and 2, lay the piece flat without stretching it, and measure. It should be an oval of about 2 x 3.5 in (5.1 x 8.9 cm).
Measurement checkpoints (laid flat, unblocked, width x height):
- Round 1: 1.5 x 3 in (3.8 x 7.6 cm); center opening about 0.5 x 2 in (1.3 x 5.1 cm)
- Round 2: 2 x 3.5 in (5.1 x 8.9 cm)
- Round 3: 3.5 x 5 in (8.9 x 12.7 cm)
- Round 4: 4.25 x 5.75 in (10.8 x 14.6 cm)
- Round 5: 5.25 x 6.75 in (13.3 x 17.1 cm)
- Round 6: 5.5 x 7 in (14.0 x 17.8 cm)
Up to 0.25 in (0.6 cm) of difference is normal before blocking.
If your piece is too big, go down to a 2.75 mm hook and start again. If it is too small, go up to a 3.25 mm hook. Change the hook, not the stitch counts, because the petal and loop repeats depend on the exact numbers below.
If the piece cups into a bowl, your tension is tight at the ends, so relax your grip on the increase stitches. If it ruffles, your tension is loose; try a smaller hook.
Pattern
Foundation Ring
With Color B (yellow), ch 28 and sl st in the first ch to form a ring. Don’t let the chain twist.
Lay the ring flat and pinch it into a long oval. Count the chains from the joining point and mark four sections:
- End A: ch 1–2
- Side A: ch 3–14 (12 ch)
- End B: ch 15–16
- Side B: ch 17–28 (12 ch)
Place a marker in ch 3 and in ch 15 to show where each side begins.
Round 1 (Color B – yellow center frame)
Ch 3 (counts as first dc), 2 dc in ch 1, 3 dc in ch 2 [End A: 6 dc]. Dc in each of the next 12 ch [Side A: 12 dc]. 3 dc in each of the next 2 ch [End B: 6 dc]. Dc in each of the next 12 ch [Side B: 12 dc]. Join with a sl st to the top of the beg ch-3.
Count: 36 dc (6 + 12 + 6 + 12).
The 3-dc groups fan around the narrow ends, and the 12 single dc on each side stay straight. This makes the slit-like oval opening. Fasten off Color B, leaving a 4 in (10.2 cm) tail.
Move your markers up to the first st of each section so you can find End A, Side A, End B and Side B again.
Color-change tip: Start each new color in a different spot from the last fasten-off whenever the instructions allow, and weave tails in opposite directions. This keeps the joins flat and invisible.
Round 2 (Color A – cream oval band)
Join Color A with a standing hdc in the first st of End A (the beg ch-3), then work 1 more hdc in the same st.
- End A: 2 hdc in each of the next 5 sts [12 hdc, including the first 2]
- Side A: hdc in each of the next 12 sts [12 hdc]
- End B: 2 hdc in each of the next 6 sts [12 hdc]
- Side B: hdc in each of the next 12 sts [12 hdc]
Join with a sl st to the top of the standing hdc.
Count: 48 hdc (12 per section x 4 sections).
Each end grows from 6 to 12 sts, which keeps the curves flat. The sides stay at 12 sts. Fasten off Color A.
Round 3 (Color B – petals)
Join Color B with a sl st in the first st of End A.
Beg petal in the same st, ch 3, skip the next 2 sts. *Petal in the next st, ch 3, skip the next 2 sts; rep from * 14 more times. Join with a sl st to the top of the beg petal.
Count: 16 petals and 16 ch-3 sps.
Each repeat uses 3 sts of Round 2 (1 for the petal and 2 skipped), so 48 sts ÷ 3 = 16 repeats. Each 12-st section holds exactly 4 petals: 4 at each end and 4 along each side.
The tall 5-tr clusters puff into teardrop shapes that point outward. Fasten off Color B.
Round 4 (Color A – fan shells)
Join Color A with a standing dc in the first ch-3 sp after the beg petal. In the same sp, work 1 more dc, ch 2 and 2 dc to complete the first shell.
Ch 2, sc in the ch-1 locking st at the top of the next petal, ch 2.
*Shell in the next ch-3 sp, ch 2, sc in the top of the next petal, ch 2; rep from * 14 more times. Join with a sl st to the top of the standing dc.
Count: 16 shells (64 dc), 16 sc and 32 ch-2 sps between them. Each shell also has its own center ch-2 sp, for 16 shell points.
The shells sit in the gaps between petals and fan outward into V shapes, and each sc anchors a petal tip. Do not fasten off.
The piece should now measure 4.25 x 5.75 in (10.8 x 14.6 cm). This is the motif body before the border.
Border
The border is Rounds 5 and 6, both in Color A with no color change.
Border gauge: Each ch-5 loop in Round 5 should spread about 0.5 in (1.3 cm) along its base and arch about 0.5 in (1.3 cm) out from Round 4. The picots in Round 6 add about 0.125 in (0.3 cm).
For counting, the border keeps the same four sections as the body. Each section has 4 petals and 4 shells.
Round 5 (chain loops)
Sl st in the next dc and in the center ch-2 sp of the first shell.
Ch 1, sc in the same shell sp, ch 5, sc in the sc at the top of the next petal, ch 5. *Sc in the center ch-2 sp of the next shell, ch 5, sc in the next petal-top sc, ch 5; rep from * 14 more times. Join with a sl st to the first sc.
Count: 32 sc and 32 ch-5 loops.
Per section: 8 sc and 8 ch-5 loops. 4 sections x 8 loops = 32 loops.
Each petal and each shell gets one anchoring sc, so the loops alternate between petal tips and shell points. This spreads the lace evenly around the curve.
Round 6 (picot scallops)
Sl st into the first ch-5 loop.
*In the ch-5 loop work (2 sc, picot, 2 sc); rep from * in each ch-5 loop around. Join with a sl st to the first sc. Fasten off.
Count: 128 sc and 32 picots.
Per section: 8 loops x 4 sc = 32 sc and 8 picots.
Why the math works: A ch-5 loop has room for about 5 sc widths. Four sc plus the narrow base of one picot fill that space without crowding, so the edge lies flat. There are 32 loops, exactly 2 per petal (16 x 2), so the scallops line up with the petals and shells all the way around.
After Round 6 the motif measures 5.5 x 7 in (14.0 x 17.8 cm). The total border depth is 0.5 in + 0.125 in = 0.625 in (1.6 cm) on every edge.
Final Blocking
- Weave in every end inside stitches of its own color: yellow ends into yellow rounds, cream ends into cream rounds.
- Soak the motif in cool water for 10 minutes, then press out the water in a towel. Do not wring it.
- Mark a 5.5 x 7 in (14.0 x 17.8 cm) oval on your blocking mat, or draw it on paper under a sheet of plastic.
- Pin the top, bottom and both sides first so the oval is centered.
- Pin each picot outward along the marked line, working in opposite pairs so the shape stays symmetrical.
- With your fingers, open the center slit to about 0.5 x 2 in (1.3 x 5.1 cm) and round out each petal.
- Mist lightly and let the motif dry completely before unpinning, usually 6 to 12 hours.
Final Quality-Control Checklist
- Round 1 has 36 dc and a clean, open oval center.
- Round 2 has 48 hdc and lies flat with no cupping.
- There are 16 petals, 4 in each section.
- There are 16 shells, each centered in a gap between petals.
- Round 5 has 32 ch-5 loops; Round 6 has 32 picots.
- Blocked size is 5.5 x 7 in (14.0 x 17.8 cm), within 0.25 in (0.6 cm).
- No ends show on the right side.
- Colors are crisp, with no cream fibers carried into yellow areas.
Troubleshooting
The center is round instead of a slit. Your foundation chain may be too tight, or you added increases along the sides. Check that each side has 12 single dc only.
The ends ruffle in Round 2. Your hdc are loose. Go down 0.25 mm or tighten your yarn-overs.
Petals look flat, not puffy. Pull each tr loop up to full height before closing the cluster, and always add the ch-1 lock.
Shells crowd together. Check that Round 3 has ch 3 (not ch 2) between petals.
Yellow shows through cream rounds. Weave yellow tails only into yellow stitches, and trim them close after blocking.
The border flips or waves. Count the sc in each loop. More than 4 sc per loop will ruffle the edge, and fewer will make it cup.
The motif is not symmetrical. Re-mark the four sections and recount. Every section should have 4 petals and 8 border loops.
Care
Hand wash in cool water with a mild soap, then press dry in a towel. If the shape relaxes, re-block flat to 5.5 x 7 in (14.0 x 17.8 cm).
Final Notes
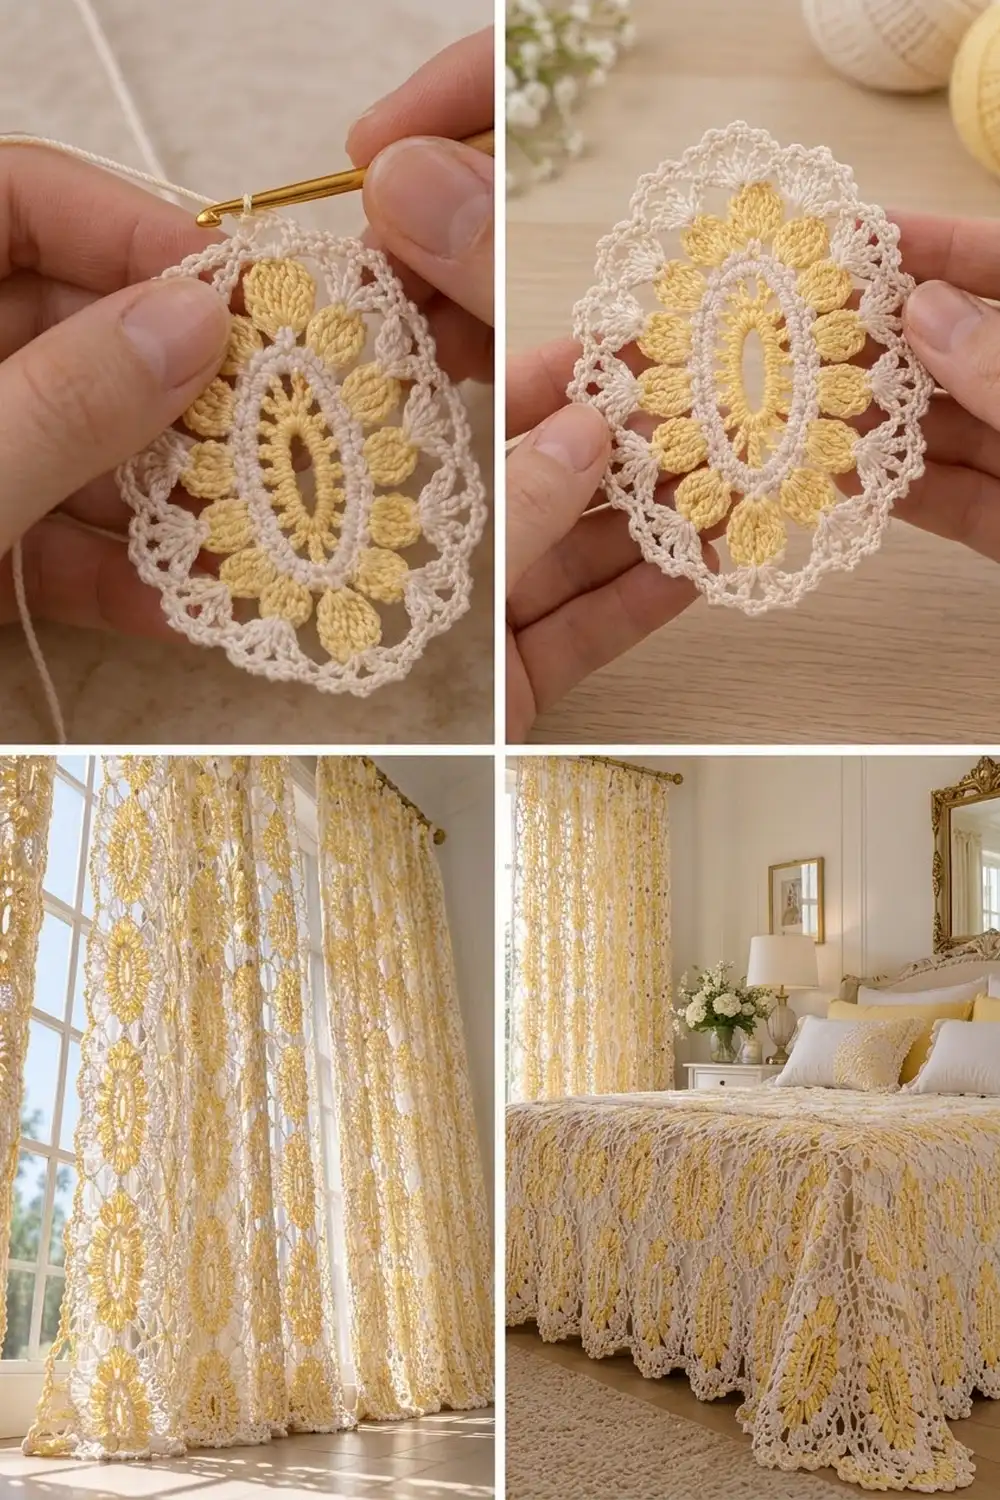
The size of this motif builds in a steady chain. The 28-ch ring becomes a 1.5 x 3 in (3.8 x 7.6 cm) frame in Round 1, then 2 x 3.5 in (5.1 x 8.9 cm) in Round 2. The petals in Round 3 bring it to 3.5 x 5 in (8.9 x 12.7 cm), and the shells in Round 4 take it to 4.25 x 5.75 in (10.8 x 14.6 cm).
The two border rounds add 0.625 in (1.6 cm) on every edge, for a blocked finish of 5.5 x 7 in (14.0 x 17.8 cm). If each checkpoint matches, the final oval will too.
Happy crocheting!