

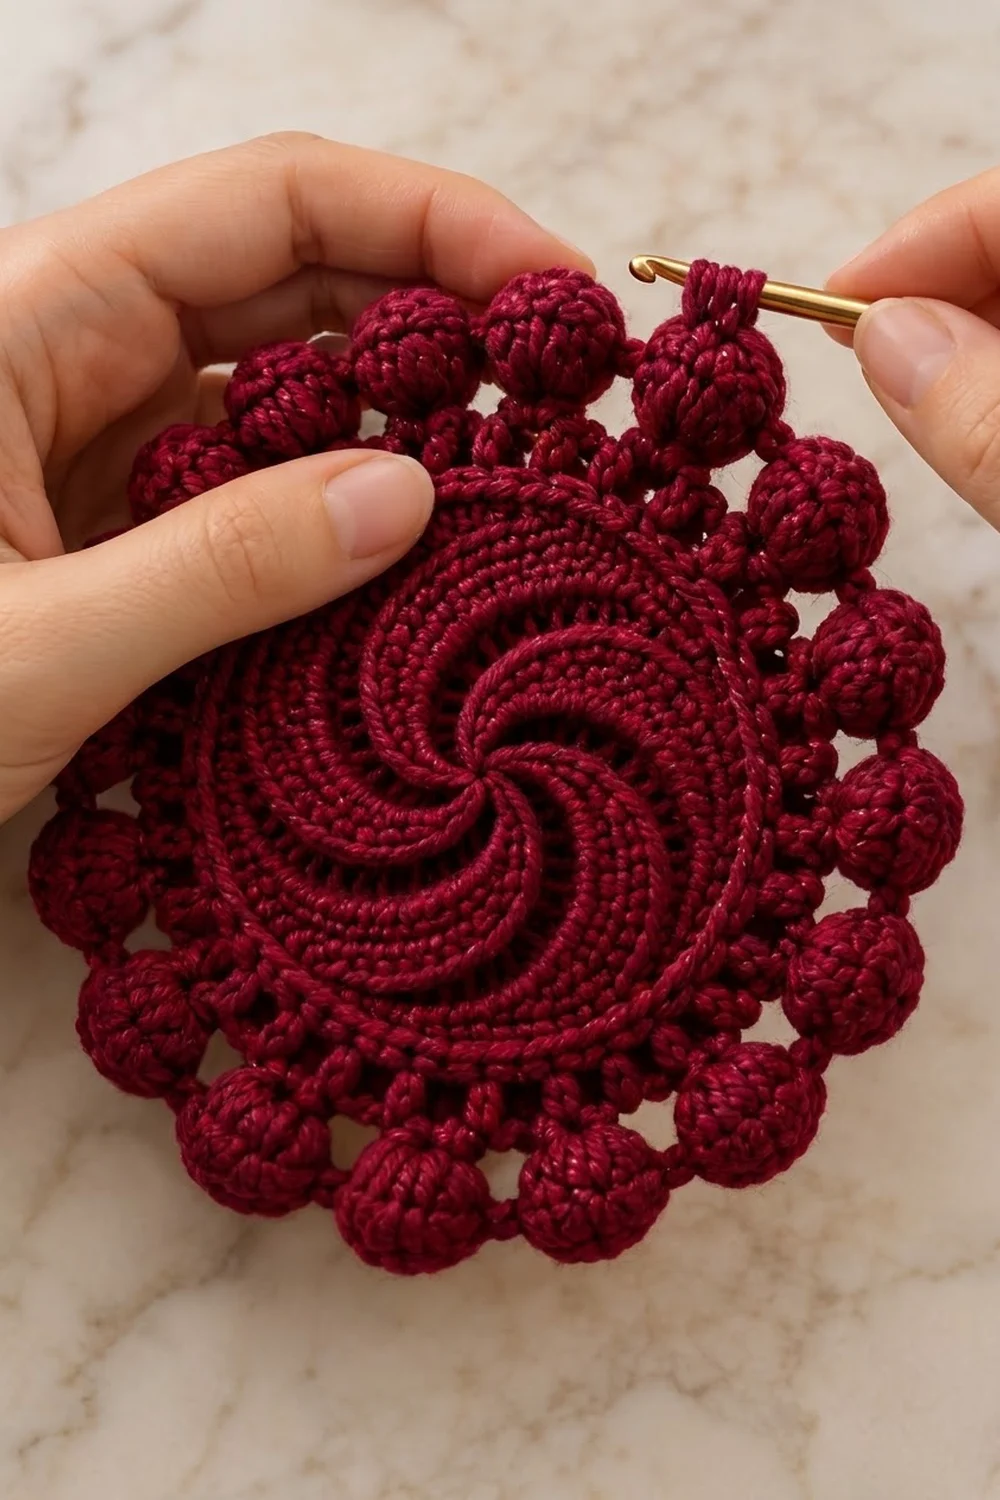
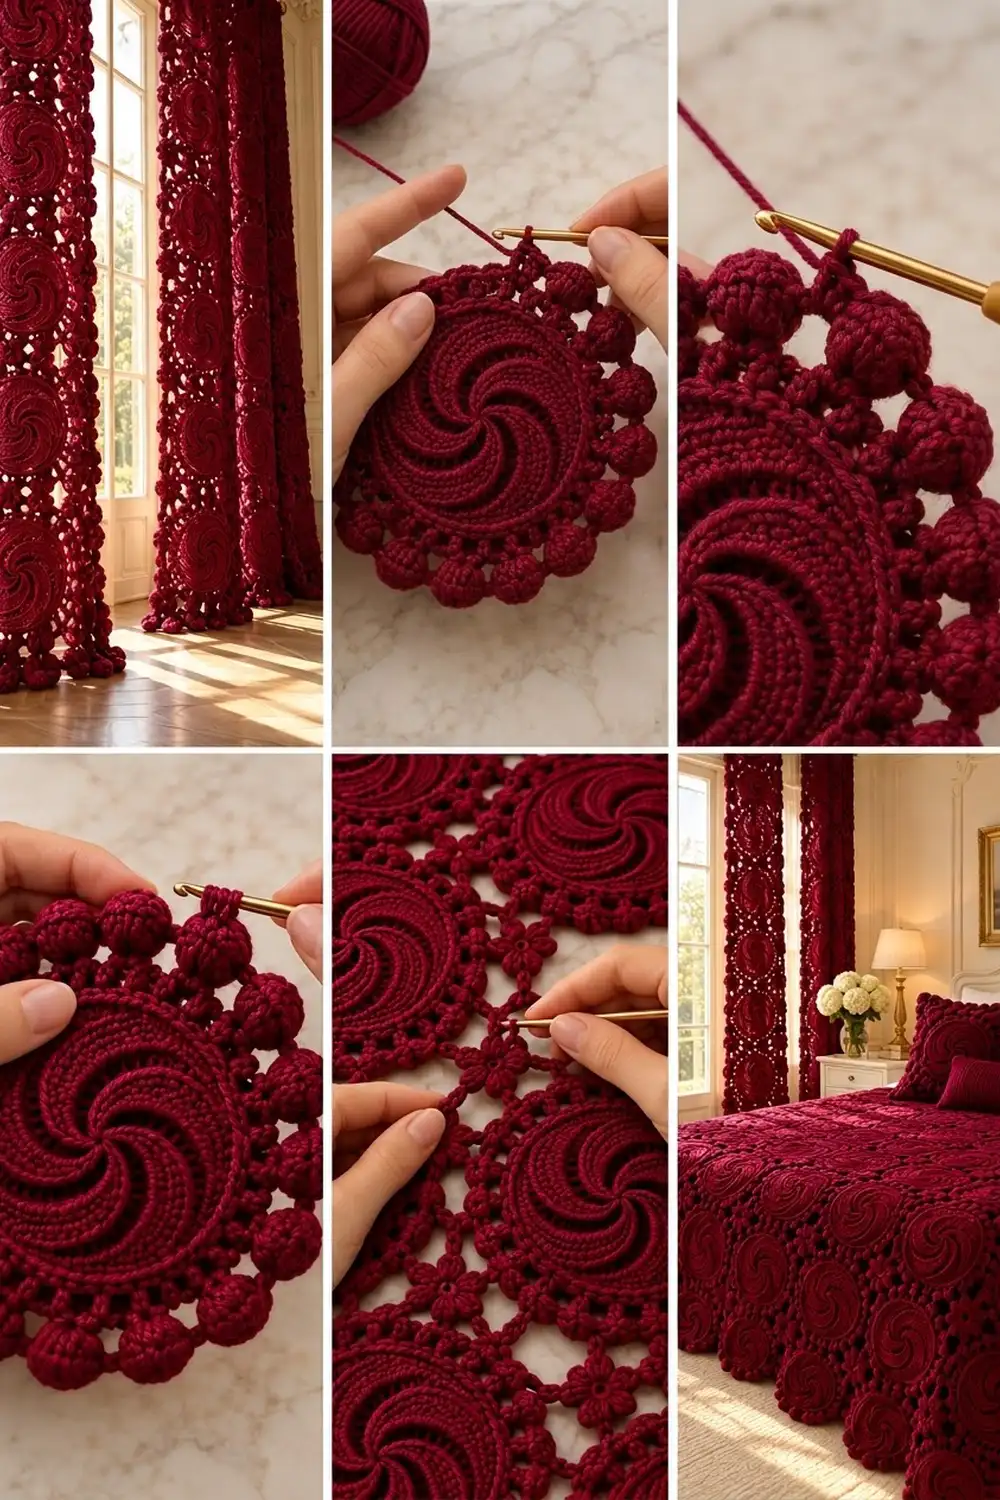
The Velvet Whirl is a single round crochet motif with a lot of texture. Six raised ridges curve out from the center like the arms of a pinwheel. A solid round frames them, an airy ring of chain-space windows follows, and plump bobbles finish the outer edge.
The sample uses one color only: a deep burgundy with a soft sheen. Since there’s no color change, the texture does all the work. Raised post stitches catch the light along each spiral arm, and the bobbles make a scalloped, almost beaded outline. It fits a romantic or vintage style and works well as a doily, a coaster-style accent, a bag appliqué, or a decorative motif.
This pattern uses US crochet terms. The finished motif measures 7.0 in (17.8 cm) across after blocking.
You build it in the round from a magic ring. Rounds 1–6 form the swirl with double crochet and front post double crochet. Round 7 is a single crochet trim round. Rounds 8–9 make the border: an openwork chain-space round and then the bobble edge. You make one piece. There’s no joining.
Finished Size and Construction
- Finished size: 7.0 in (17.8 cm) diameter
- Skill level: Intermediate (post stitches, bobbles, careful counting)
- Terminology: US crochet terms
- Yarn weight: DK / light worsted (weight 3)
- Hook: 4.0 mm (US G-6)
- Number of pieces: 1
- Layout: Single round motif, worked continuously in joined rounds
- Piece size: 7.0 in (17.8 cm) diameter
- Size before border (after Round 7): 5.0 in (12.7 cm) diameter
- Border depth (Rounds 8–9): 1.0 in (2.5 cm) on each side of the circle
Materials
Yarn: Use a smooth DK-weight cotton or cotton blend. A mercerized or slightly shiny cotton gives the best stitch definition on the spiral ridges and makes the bobbles look rounded instead of fuzzy. Avoid very fuzzy or brushed yarns, because they hide the swirl.
- Burgundy (deep wine red): 30 g, about 75 m (82 yd)
This amount includes a margin of about 20 percent for your gauge swatch, weaving in ends, and small tension differences. The motif itself uses roughly 24–25 g.
Tools:
– 4.0 mm (US G-6) crochet hook
– Tapestry needle
– Locking stitch markers (at least 6)
– Scissors
– Measuring tape or ruler marked in inches and cm
– Blocking mat and rustproof pins
– Spray bottle with clean water
Abbreviations (US Terms)
- ch – chain
- sl st – slip stitch
- sc – single crochet
- dc – double crochet
- fpdc – front post double crochet: yarn over, insert the hook from front to back to front around the post of the stated stitch, then complete a dc
- sk – skip
- sp(s) – space(s)
- st(s) – stitch(es)
- rep – repeat
- [ ] – repeat the instructions inside the brackets as directed
Special stitches
- Bobble (bo): [Yarn over, insert the hook into the stated space, yarn over and pull up a loop, yarn over and pull through 2 loops] 5 times, all in the same space (6 loops on the hook). Yarn over and pull through all 6 loops, then ch 1 to close. The ch 1 doesn’t count as a stitch.
- Beginning bobble (beg bo): Ch 2, then work the bobble with only 4 repeats instead of 5 (5 loops on the hook). Yarn over, pull through all loops, and ch 1 to close.
Round notes: At the start of Rounds 1–6, the ch 2 doesn’t count as a stitch. Work the first stitch of the round into the same stitch as the join, and join each round with a sl st to the top of the first real stitch. When the pattern says to work “in the top of” a fpdc, insert the hook under the two top loops of that fpdc, the same as for any other stitch.
Gauge and Checkpoints
Make Rounds 1–3 as a test piece before you commit to the full motif. Lay it flat without stretching it and measure straight across the center.
Gauge: Rounds 1–3 = 2.4 in (6.1 cm) diameter.
Checkpoints (unblocked, tolerance ±0.25 in / 0.6 cm):
– After Round 1: 1.0 in (2.5 cm)
– After Round 2: 1.7 in (4.3 cm)
– After Round 3: 2.4 in (6.1 cm)
– After Round 4: 3.1 in (7.9 cm)
– After Round 5: 3.8 in (9.7 cm)
– After Round 6: 4.5 in (11.4 cm)
– After Round 7: 5.0 in (12.7 cm)
– After Round 8: 5.8 in (14.7 cm)
– After Round 9: 7.0 in (17.8 cm) after blocking
If your test piece is too big, switch to a 3.5 mm hook and try again. If it’s too small, switch to a 4.5 mm hook.
The piece should also lie flat. If it ruffles, your stitches are too loose for the increase rate, so go down a hook size. If it cups, go up a hook size or loosen the post stitches a little. Each spiral arm should look clearly raised but shouldn’t pull the circle into a bowl.
Motif Pattern
The Swirl (Rounds 1–6)
The swirl has 6 repeats, one per spiral arm. In each round, the fpdc moves one stitch further along its repeat, while each repeat grows by 2 stitches. Together those two changes bend each ridge into a curved crescent instead of a straight spoke.
Place a stitch marker in the fpdc of each repeat from Round 2 on. Move the markers up every round. They show you exactly where each arm sits.
Round 1: Make a magic ring. Ch 2 (doesn’t count), work 12 dc into the ring. Pull the ring closed and join with a sl st to the first dc. (12 sts)
Round 2: Ch 2, [fpdc around the next dc, 3 dc in the next dc] 6 times. Join to the first fpdc. (24 sts: 6 fpdc, 18 dc)
Each repeat now reads: fpdc, dc, dc, dc.
Round 3: Ch 2, [dc in the top of the next fpdc, fpdc around the next dc, 2 dc in each of the next 2 dc] 6 times. Join to the first dc. (36 sts: 6 fpdc, 30 dc)
Each repeat uses 4 stitches and makes 6: 1 + 1 + 4. The fpdc is now in position 2 of each repeat.
Round 4: Ch 2, [dc in the next dc, dc in the top of the next fpdc, fpdc around the next dc, dc in the next dc, 2 dc in each of the next 2 dc] 6 times. Join. (48 sts: 6 fpdc, 42 dc)
Each repeat uses 6 stitches and makes 8: 1 + 1 + 1 + 1 + 4. The fpdc is now in position 3.
Round 5: Ch 2, [dc in each of the next 3 sts (the last of these is the top of the fpdc), fpdc around the next dc, dc in each of the next 2 dc, 2 dc in each of the next 2 dc] 6 times. Join. (60 sts: 6 fpdc, 54 dc)
Each repeat uses 8 stitches and makes 10: 3 + 1 + 2 + 4. The fpdc is now in position 4.
Round 6: Ch 2, [dc in each of the next 4 sts (the last of these is the top of the fpdc), fpdc around the next dc, dc in each of the next 3 dc, 2 dc in each of the next 2 dc] 6 times. Join. (72 sts: 6 fpdc, 66 dc)
Each repeat uses 10 stitches and makes 12: 4 + 1 + 3 + 4. The fpdc is now in position 5.
Checkpoint: The swirl measures 4.5 in (11.4 cm). You should see 6 smooth, curved arms, all turning the same way. If one arm jogs sideways, you probably put an fpdc in the wrong position in that repeat. Check your marker against the position listed for that round.
Trim Round (Round 7)
Round 7: Ch 1 (doesn’t count), [sc in each of the next 5 sts, 2 sc in the next st] 12 times. Join to the first sc. (84 sts = 72 worked one per stitch + 12 increases)
Work the sc into the top of each fpdc like any other stitch. This solid round frames the swirl and sets up an even number for the border.
Checkpoint: 5.0 in (12.7 cm) diameter. This is your size before the border.
Border
The border has two rounds: the chain-space windows and the bobble edge. A circle has no straight sides, so the counts below are for the whole round. Every repeat is spread evenly around the circle.
Border gauge: Round 8 adds 0.4 in (1.0 cm) on each side of the circle, so it adds 0.8 in (2.0 cm) to the diameter. Round 9 adds 0.6 in (1.5 cm) on each side, so it adds 1.2 in (3.0 cm) to the diameter. The total border depth is 1.0 in (2.5 cm) on each side.
Round 8 (openwork windows): Ch 5 (counts as dc + ch 2), sk the next sc, [dc in the next sc, ch 2, sk the next sc] 41 times. Join with a sl st to the 3rd ch of the beginning ch-5. (42 dc and 42 ch-2 sps)
Each repeat uses 2 sc: 42 × 2 = 84, which matches Round 7 exactly. The dc posts stand upright, and the ch-2 spaces make the ring of open windows.
Checkpoint: 5.8 in (14.7 cm) diameter.
Round 9 (bobble edge): Sl st into the first ch-2 sp. Work a beg bo in the same sp, ch 3, sc in the next ch-2 sp, ch 3, [bo in the next ch-2 sp, ch 3, sc in the next ch-2 sp, ch 3] 20 times. Join with a sl st to the top of the beg bo. Fasten off. (21 bobbles, 21 sc, 42 ch-3 sps)
Each repeat uses 2 ch-2 spaces: 21 × 2 = 42, which matches Round 8 exactly.
Why the math works: Round 7’s 84 stitches divide evenly by 2 for the window round, which gives 42 spaces. That number divides evenly by 2 again for the bobble round, which gives 21 bobbles with no leftover space and no fudge stitch at the join. The ch-3 loops on either side of each sc give the bobbles room to sit fully rounded. Their combined length also gives enough circumference for the 7.0 in (17.8 cm) outer edge, so the edge lies flat and doesn’t ruffle.
Checkpoint: About 6.8–7.0 in (17.3–17.8 cm) before blocking.
Final Blocking
- Weave in all ends on the wrong side. Run each tail along the back of the dc stitches, not through the open windows, where it would show.
- Spray the motif evenly with clean water until it’s damp but not dripping. Cotton also handles a light steam if you prefer, but hold the iron above the piece and never press it.
- Lay the motif right side up on the blocking mat.
- Draw or picture a 7.0 in (17.8 cm) circle. Pin the top of the first bobble at 12 o’clock and the bobble directly opposite at 6 o’clock, then measure across: it should be 7.0 in (17.8 cm).
- Pin the bobbles at 3 o’clock and 9 o’clock, then pin every remaining bobble so they sit evenly around the circle.
- With your fingers, gently open each ch-2 window in Round 8 so the dc posts stand straight and evenly spaced.
- Press lightly on the swirl to flatten it, but don’t flatten the bobbles. Push each bobble back into a round shape with your fingertip if it gets squashed.
- Leave it to dry completely, usually 6–12 hours, before you remove the pins.
Final Quality-Control Checklist
- The motif measures 7.0 in (17.8 cm) across in two directions.
- The size before the border (Round 7) is 5.0 in (12.7 cm).
- There are 6 spiral arms, all curving the same way, with no jogs.
- Round 7 has 84 sc.
- Round 8 has 42 dc and 42 even ch-2 windows.
- Round 9 has 21 full, rounded bobbles and 21 sc anchors.
- The motif lies flat with no cupping or ruffling.
- All ends are woven in invisibly on the wrong side.
- The joins are neat and don’t leave a visible seam line.
Troubleshooting
The center hole won’t close. Pull the magic ring tail firmly before you join Round 1, then secure it with a few stitches when you weave it in.
The swirl cups into a bowl. Your post stitches are too tight. Pull the first loop of each fpdc up to the full height of the dc stitches around it, or go up a hook size.
The swirl ruffles. Your dc stitches are too loose. Go down a hook size, or check that you haven’t added extra increases.
The arms look straight, not curved. You’ve worked the fpdc in the same position each round. Recheck the position for each round: 1, 2, 3, 4, then 5.
The stitch count is off in Round 7. Count each 12-stitch repeat in Round 6 first. Usually one repeat is short by a single increase.
The bobbles look flat or lean sideways. Make every yarn over the same size, and close each bobble with a firm ch 1. Use the same tension on the ch-3 loops on both sides.
The bobble edge ruffles. Shorten the loops between bobbles from ch 3 to ch 2 and rework the round.
The bobble edge pulls in. Lengthen the loops between bobbles from ch 3 to ch 4.
Care
Hand wash in cool water with mild soap, squeeze gently without wringing, and dry flat, reshaping it to 7.0 in (17.8 cm). A deep burgundy may release dye at first, so wash it on its own the first time.
Final Notes
The Velvet Whirl depends on one clear chain of measurements. Keep each step on target and the next one follows:
- Rounds 1–3 = 2.4 in (6.1 cm)
- The swirl reaches 4.5 in (11.4 cm) at 72 stitches after Round 6.
- The trim round brings it to 5.0 in (12.7 cm) with 84 stitches.
- The window round adds 0.8 in (2.0 cm) to the diameter for 5.8 in (14.7 cm), with 42 spaces.
- The bobble round finishes the motif at 7.0 in (17.8 cm) with 21 bobbles.
If you check your size after Rounds 3, 6, and 7, the border will fall into place without adjustments. You get one solid, textured motif, ready to use alone or to keep as a finished sample.
Happy crocheting!