

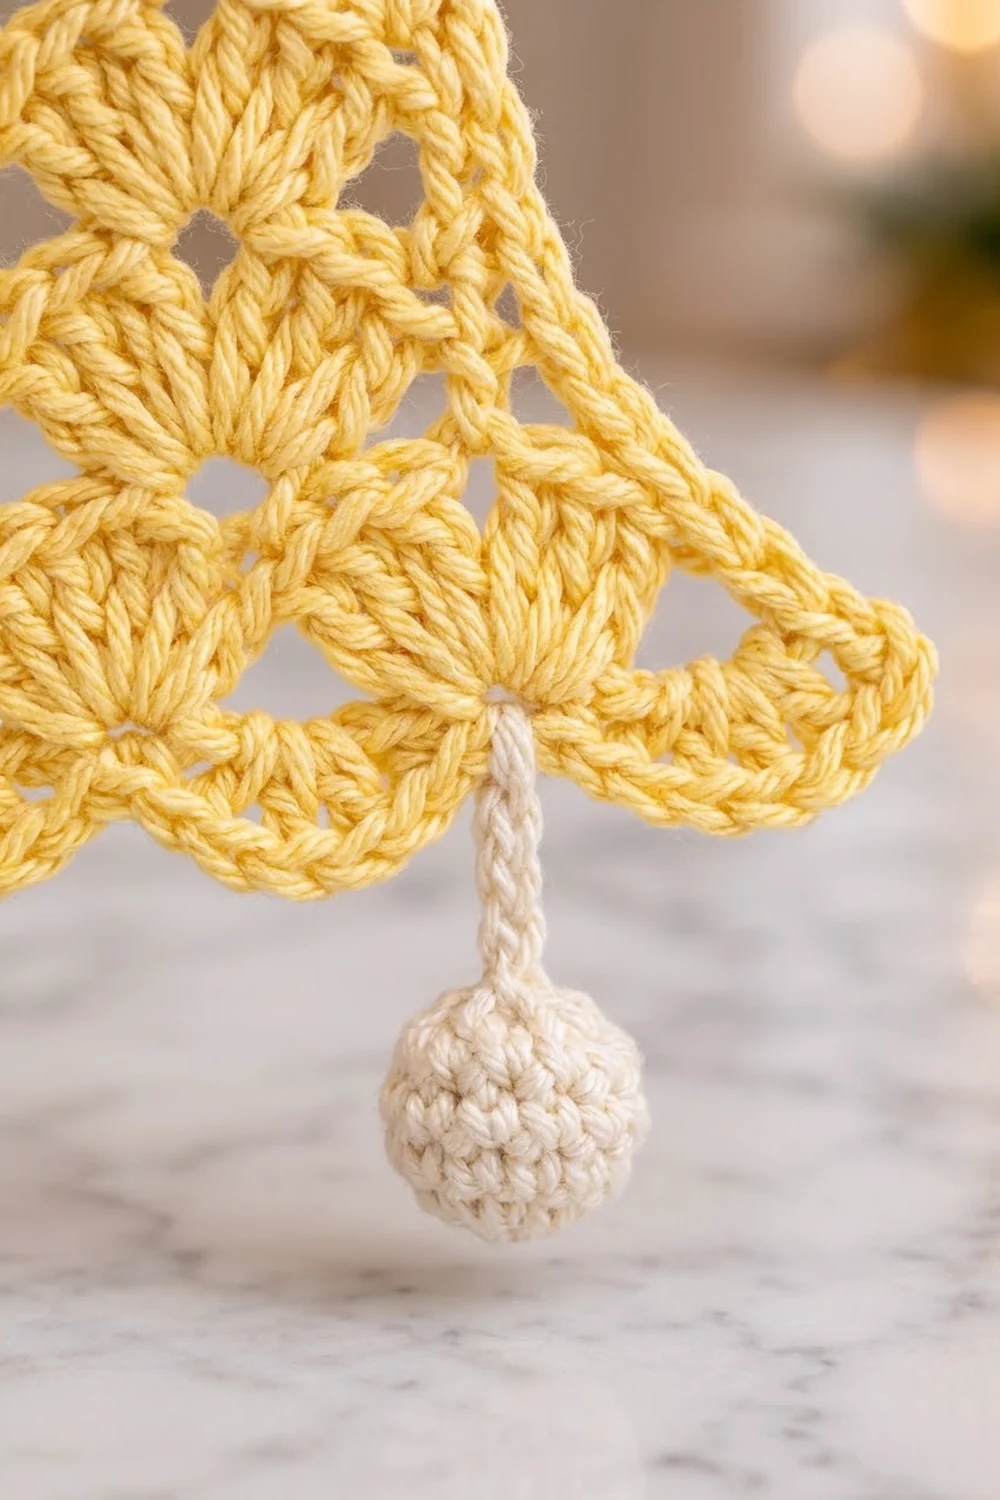
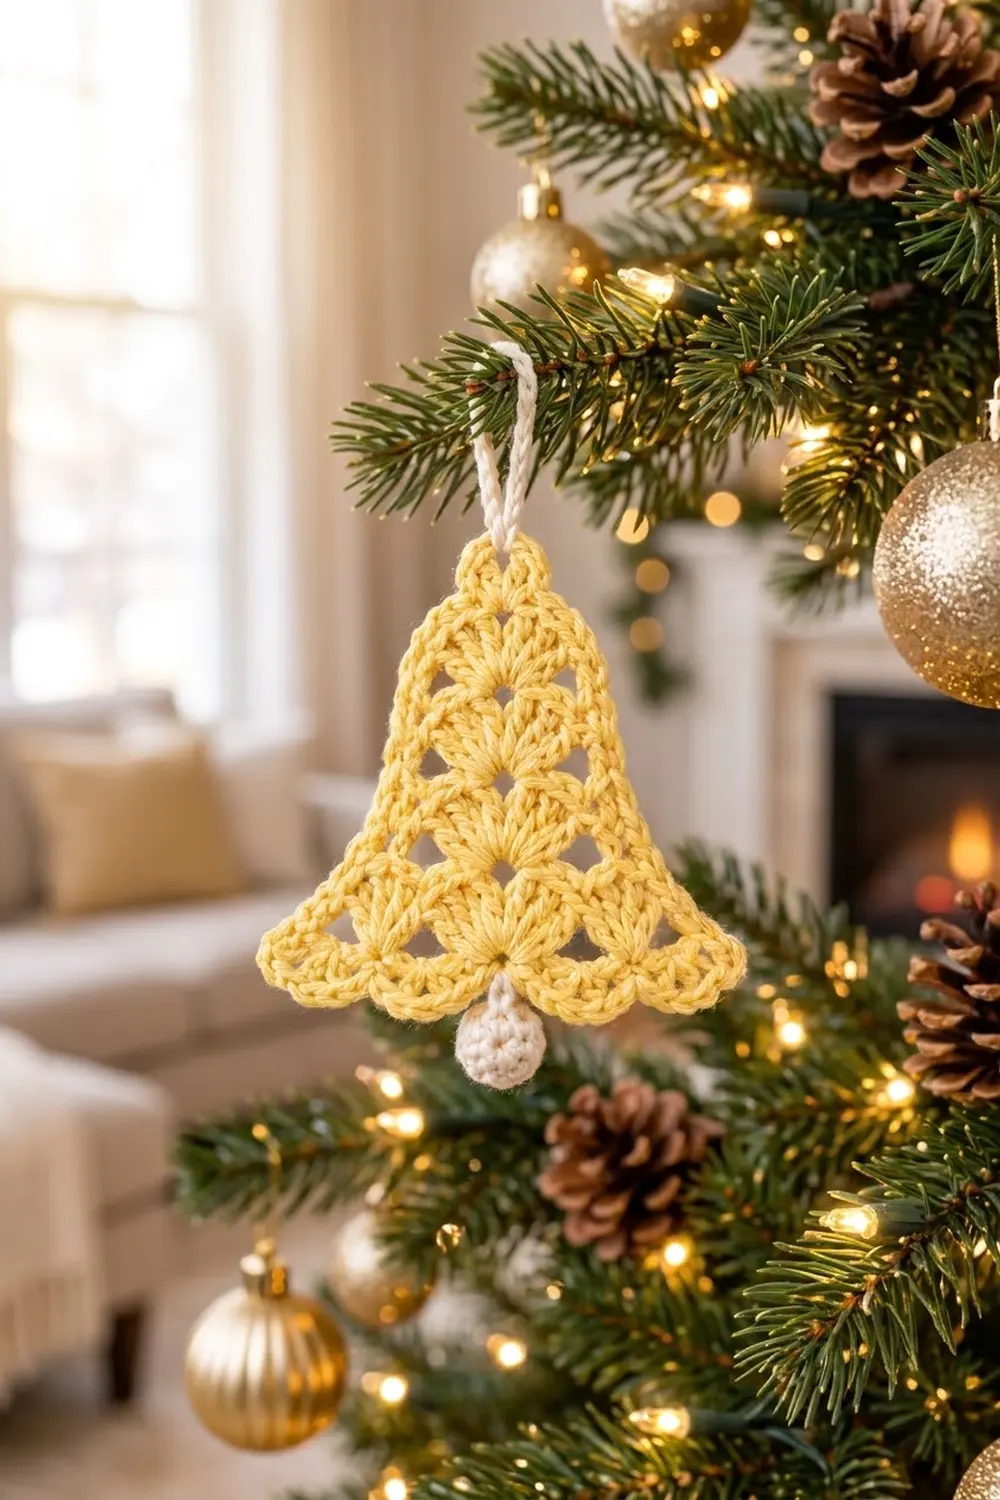
This little lace bell is made for hanging on the tree. Buttercup-yellow fans step down from a small round crown and open into a scalloped hem. A tiny cream ball hangs from the center of the hem as the clapper, and a cream chain loop at the top makes it ready to hang.
It has a light, vintage look. Open diamonds sit between the fans, so tree lights show through. Only two colors are used: pale butter yellow for the bell and warm cream for the clapper and loop.
The pattern uses US crochet terms. The finished bell body is 3.75 in (9.5 cm) wide at the hem and 3.5 in (8.9 cm) tall. With the clapper it is about 4 in (10.2 cm) long, plus a 1.5 in (3.8 cm) hanging loop.
You work the bell flat from the top down, in turned rows. It starts with a small chain ring, which becomes the crown opening. Fan rows and V-stitch rows alternate, and each pair of rows adds one fan. A single border round then outlines the sides and crown and turns the bottom fans into scallops. To finish, you add a mini cream ball and a chain loop.
Finished Size and Construction
- Finished size: 3.75 in (9.5 cm) wide x 3.5 in (8.9 cm) tall (bell body only)
- Length with clapper: about 4 in (10.2 cm), plus a 1.5 in (3.8 cm) loop
- Skill level: Easy+
- Terminology: US crochet terms
- Yarn weight: DK (#3) cotton or cotton blend
- Hook: 3.5 mm (E-4)
- Number of pieces: 1 bell, plus 1 mini clapper ball and 1 chain loop attached to it
- Layout: single ornament, no joining
- Piece size before border: 3.5 in (8.9 cm) wide x 3 in (7.6 cm) tall
- Border depth: 0.25 in (0.6 cm) at the crown and at the hem, 0.125 in (0.3 cm) on each side
Materials
Choose a smooth DK cotton. Cotton holds the fan shapes well and blocks crisp and flat. Acrylic also works, but the lace will look softer and may need a little starch.
- Color A, pale butter yellow: 6 g, about 14 m
- Color B, cream: 2 g, about 5 m
- A pinch of fiberfill or yarn scraps to stuff the clapper
These quantities include a safety margin. One bell uses slightly less.
Tools:
- 3.5 mm (E-4) crochet hook
- Tapestry needle
- Scissors
- Stitch marker
- Blocking mat and rust-proof pins
- Spray bottle, plus spray starch if you like
Abbreviations (US Terms)
- ch – chain
- sl st – slip stitch
- sc – single crochet
- hdc – half double crochet
- dc – double crochet
- sc2tog – single crochet 2 together
- sk – skip
- sp(s) – space(s)
- tch – turning chain
- MR – magic ring
- RS / WS – right side / wrong side
Special stitches:
- Shell: 5 dc in the same stitch or space. The hem shells in Row 7 use 7 dc.
- V-st: (dc, ch 1, dc) in the same stitch or space.
- Edge V-st: ch 4 (counts as dc + ch 1), then dc in the first stitch.
Gauge and Checkpoints
General gauge: 20 dc and 10 rows = 4 in (10.2 cm) on a 3.5 mm hook. For lace, though, the row checkpoints below are more reliable than a swatch. Make one bell up to Row 3 and measure it before you continue.
Lay the piece flat without stretching it and measure the widest point.
- After Row 1: 1 in (2.5 cm) wide, 0.5 in (1.3 cm) tall
- After Row 3: 2 in (5.1 cm) wide, 1.5 in (3.8 cm) tall
- After Row 5: 2.75 in (7.0 cm) wide, 2.25 in (5.7 cm) tall
- After Row 7: 3.5 in (8.9 cm) wide, 3 in (7.6 cm) tall
- After border: 3.75 in (9.5 cm) wide, 3.5 in (8.9 cm) tall
Too big? Go down to a 3.25 mm or 3 mm hook. Also check that your chain spaces aren’t loose.
Too small? Go up to a 3.75 mm or 4 mm hook. Fans worked too tightly also tend to curl.
If you’re within 0.125 in (0.3 cm), that’s fine for an ornament. If you’re off by 0.25 in (0.6 cm) or more at Row 3, the difference will grow, so change your hook.
Bell Body
Use Color A. You work from the crown down to the hem and turn at the end of every row.
Foundation: Ch 4, then sl st in the first ch to form a ring.
Row 1 (RS): Ch 3 (counts as dc), 6 dc in the ring. Turn. (7 dc)
These 7 dc make a small half-circle fan below the ring. The top half of the ring stays open and becomes the crown hole.
Row 2 (WS): Edge V-st in the first dc. Ch 3, sk the next 5 dc, V-st in the top of the tch. Turn. (2 V-sts: 4 dc, 2 ch-1 sps, 1 ch-3 sp)
The ch-3 over the skipped stitches makes the first open diamond under the crown.
Row 3 (RS): Sl st in the first ch-1 sp. Ch 3 (counts as dc), then 4 dc in the same sp. Ch 1, then shell in the ch-1 sp of the next V-st. Turn. (2 shells: 10 dc, 1 ch-1 sp)
Leave the ch-3 sp empty. It stays open below the two fans.
Row 4 (WS): Edge V-st in the first dc. Ch 2, sk the next 4 dc, V-st in the next ch-1 sp. Ch 2, sk the next 4 dc, V-st in the top of the tch. Turn. (3 V-sts: 6 dc, 3 ch-1 sps, 2 ch-2 sps)
Because the edge V-sts go into the first and last stitch, each side moves out by half a fan. That gives the bell its gentle slope.
Row 5 (RS): Sl st in the first ch-1 sp. Ch 3 (counts as dc), then 4 dc in the same sp. Ch 1, shell in the ch-1 sp of the next V-st; repeat from * once more. Turn. (3 shells: 15 dc, 2 ch-1 sps)*
Checkpoint: 2.75 in (7.0 cm) wide.
Row 6 (WS): Edge V-st in the first dc. Ch 2, V-st in the next ch-1 sp between shells; repeat from * once more. Ch 2, V-st in the top of the tch. Turn. (4 V-sts: 8 dc, 4 ch-1 sps, 3 ch-2 sps)*
Each ch-2 crosses one shell. At the edges it skips 4 dc, and over the middle shell it skips all 5 dc.
Row 7 (RS, hem fans): Sl st in the first ch-1 sp. Ch 3 (counts as dc), then 6 dc in the same sp. Ch 1, 7 dc in the ch-1 sp of the next V-st; repeat from * twice more. (4 hem shells: 28 dc, 3 ch-1 sps)*
Don’t turn and don’t fasten off. The larger 7-dc shells make the flare.
Checkpoint: 3.5 in (8.9 cm) wide and 3 in (7.6 cm) tall.
| Row | Type | Fans / V-sts | dc count |
|---|---|---|---|
| 1 | Crown fan | 1 fan | 7 |
| 2 | V row | 2 V-sts | 4 |
| 3 | Shell row | 2 shells | 10 |
| 4 | V row | 3 V-sts | 6 |
| 5 | Shell row | 3 shells | 15 |
| 6 | V row | 4 V-sts | 8 |
| 7 | Hem shells | 4 shells | 28 |
Border
Keep using Color A. This one round outlines the sides and crown and turns each hem fan into a scallop.
Border gauge: Work 2 sc into each dc row-end. A dc row-end is about 0.4 in (1 cm) tall, and 2 sc fill that height without ruffling or pulling in.
Border Round (RS): Ch 1, then rotate the piece to work along the side row-ends.
- Side 1: 2 sc into the end of each row, from Row 7 up to Row 1. (14 sc)
- Crown: 3 sc into the open top of the ring. (3 sc)
- Side 2: 2 sc into the end of each row, from Row 1 down to Row 7. (14 sc)
- Hem: Work across the tops of the Row 7 stitches, starting in the top of the beginning ch-3 of the first shell.
- Scallop: sc in the 1st dc, hdc in the 2nd dc, 2 dc in the 3rd dc, 3 dc in the 4th (center) dc, 2 dc in the 5th dc, hdc in the 6th dc, sc in the 7th dc.
- Sl st in the next ch-1 sp.
- Repeat the scallop and sl st twice more, then work one final scallop. It ends in the last dc of Row 7.
- Sl st to the first sc of Side 1 to join. Fasten off.
Counts:
- Each side: 7 row-ends x 2 sc = 14 sc
- Crown: 3 sc
- Each scallop: 7 sts worked 1 per existing dc + 4 extra sts (1 extra in the 3rd dc, 2 extra in the center dc, 1 extra in the 5th dc) = 11 sts
- Hem: (4 scallops x 11 sts) + 3 sl sts = 47 sts
- Round total: 14 + 3 + 14 + 47 = 78 sts
Why the math works: Each scallop has one stitch for every hem dc, so it sits exactly over its fan without stretching it. All 4 extra stitches go into the middle 3 dc, which rounds each scallop into a point. That makes the hem deeper instead of wider. The sl sts in the valleys pull the gaps between scallops in. On the sides, 2 sc per row-end matches the row height, so the edges stay straight. They add 0.125 in (0.3 cm) on each side, which takes the width from 3.5 in (8.9 cm) to 3.75 in (9.5 cm). The crown sc and the scallops each add 0.25 in (0.6 cm), which takes the height from 3 in (7.6 cm) to 3.5 in (8.9 cm).
Clapper Ball
Use Color B.
Rnd 1: 6 sc in a MR, then pull the ring closed. (6 sc)
Rnd 2: 2 sc in each st around. (12 sc)
Rnd 3: Sc in each st around. (12 sc)
Rnd 4: Sc2tog 6 times. (6 sts)
Stuff the ball firmly. Fasten off, leaving an 8 in (20.3 cm) tail. Thread the tail through the front loops of the last 6 sts, pull it tight to close, and keep the tail for sewing. The ball is about 0.6 in (1.5 cm) across.
Clapper chain: Join Color B with a sl st in the center sl st of the hem, between scallops 2 and 3. Ch 4 and fasten off. Use the ball’s tail to sew the ball to the end of the chain, then hide the end inside the ball.
The ball hangs about 0.25 in (0.6 cm) below the scallop points, which makes the bell about 4 in (10.2 cm) long overall.
Hanging Loop
Join Color B with a sl st in the center sc of the 3 crown sc. Ch 20, then sl st in the same crown sc. Fasten off and weave in the ends on the WS. The finished loop hangs about 1.5 in (3.8 cm) tall.
Final Blocking
- Weave in all the yellow ends along the side sc. Don’t weave them across the open diamonds.
- Mist the bell with water until it is damp but not soaked.
- Lay it RS up on the blocking mat.
- Pin the crown at the top center. Pin the hem center 3.5 in (8.9 cm) directly below it.
- Pin the outer hem corners 3.75 in (9.5 cm) apart.
- Pin each scallop point, spacing the points evenly along a gentle curve.
- Put a pin through each open diamond to open it up neatly.
- Mist with spray starch if you want a stiffer ornament.
- Let it dry completely. Keep the clapper and loop free of pins.
Final Quality-Control Checklist
- Row 7 has 4 shells of 7 dc.
- The border has 14 sc on each side and 3 sc at the crown.
- Each of the 4 scallops has 11 sts, with a sl st in each of the 3 valleys.
- The bell measures 3.75 in (9.5 cm) x 3.5 in (8.9 cm).
- The open diamonds are clear and even.
- The clapper is centered between scallops 2 and 3.
- The loop is centered over the crown.
- All ends are woven in and don’t show on the RS.
Troubleshooting
The fans curl forward. Your tension is too tight. Go up a hook size, or block the bell with starch.
The sides look wavy. Some row-ends have more than 2 sc. Count 14 sc per side.
The sides pull in. Some row-ends have fewer than 2 sc, or your sc are too tight.
The bell leans to one side. Check that the edge V-sts in Rows 2, 4 and 6 went into the first stitch, not the second.
The scallops look flat. Make sure each center dc got 3 dc.
The clapper twists. Shorten its chain to ch 3, or sew the ball on more firmly.
Care
Hand wash in cool water with mild soap and lay flat to dry, reshaping the scallops while the bell is damp. Store it flat in tissue between seasons.
Final Notes
Here’s the full measurement chain. Row 1 is 1 in (2.5 cm) wide, Row 3 is 2 in (5.1 cm), Row 5 is 2.75 in (7.0 cm), and Row 7 is 3.5 in (8.9 cm) wide by 3 in (7.6 cm) tall. The border brings the bell to 3.75 in (9.5 cm) x 3.5 in (8.9 cm), and the clapper makes it about 4 in (10.2 cm) long.
If your bell matches the Row 3 checkpoint, the rest will follow. Make one, check it, then make a whole set for the tree.
Happy crocheting!