

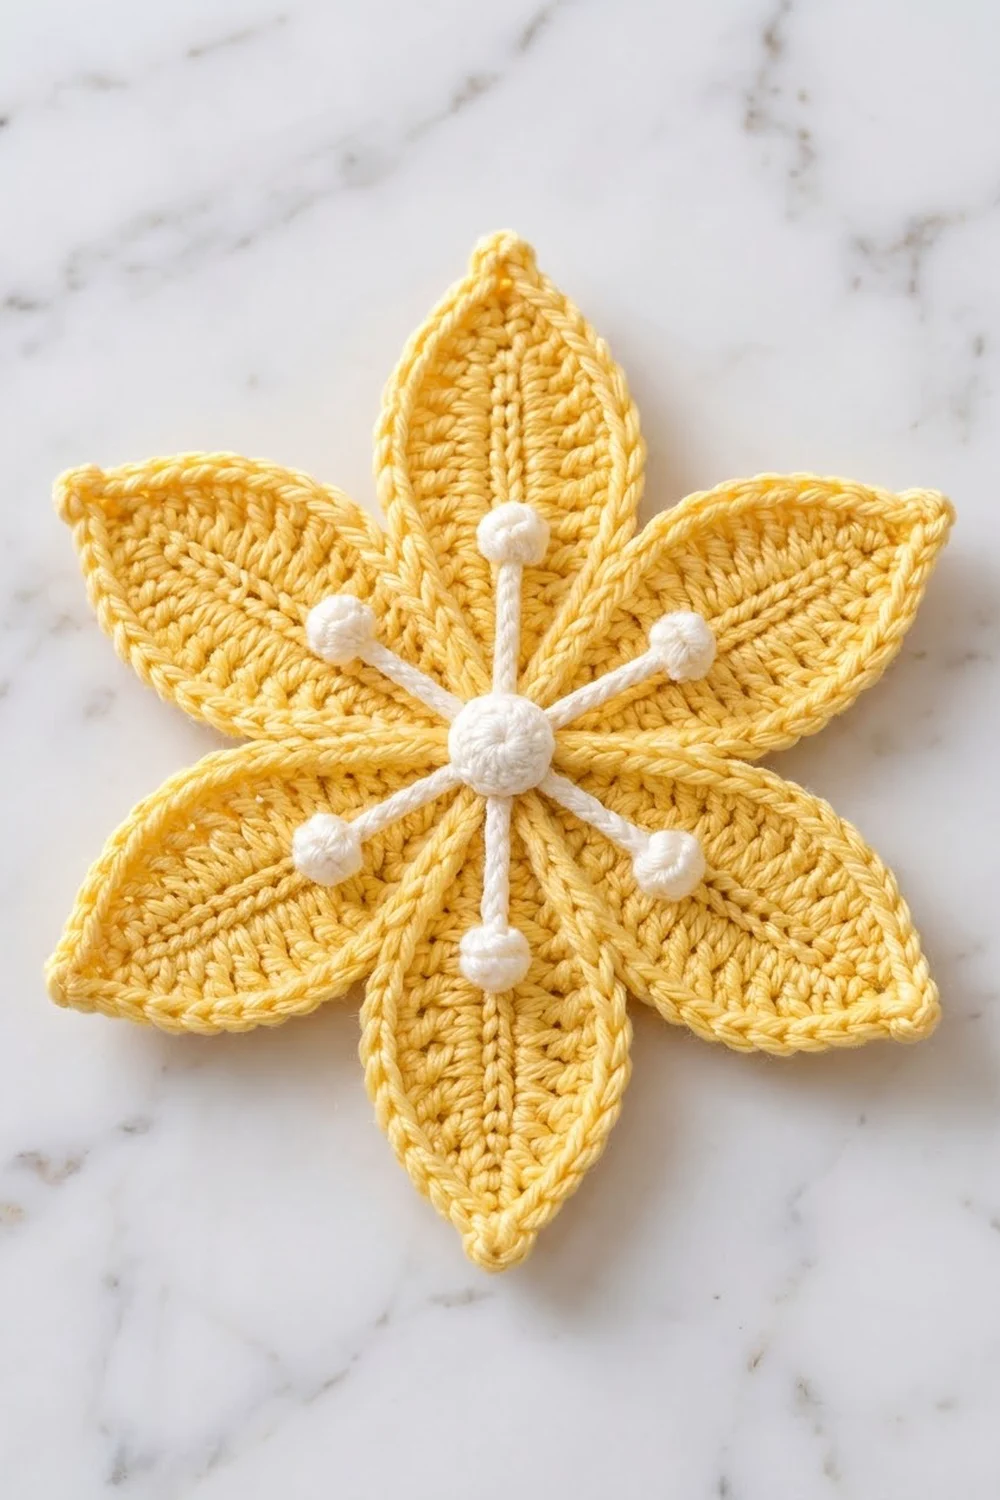
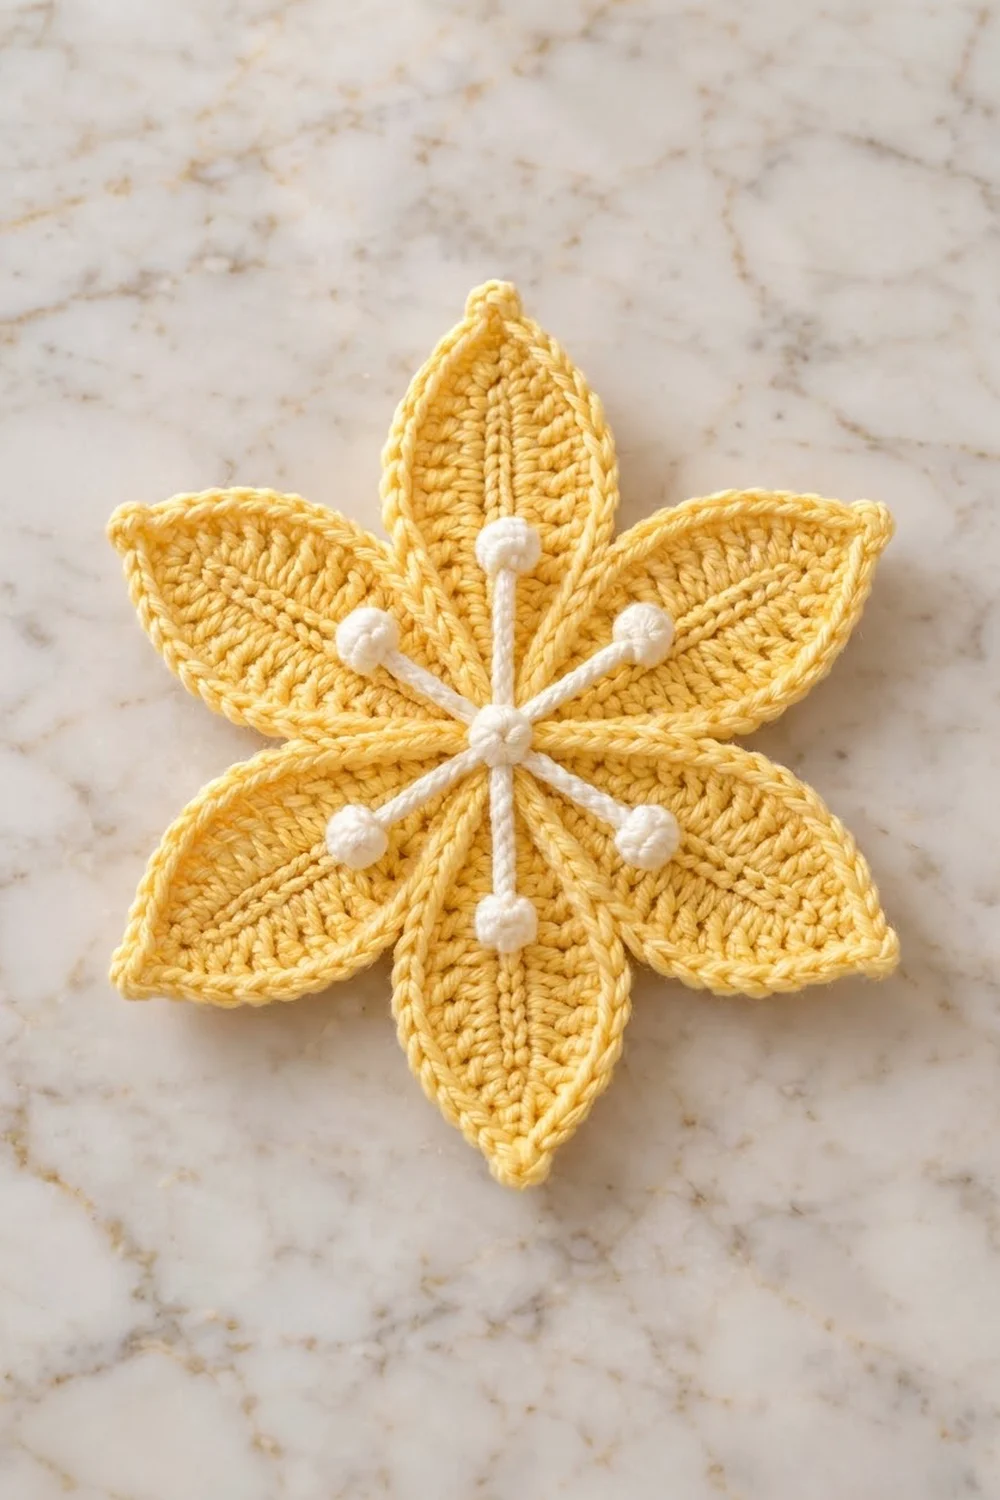
This Buttercream Starflower is a single six-petal flower motif in soft butter yellow, finished with a white “stamen” starburst at its center. Each petal is a pointed almond shape with a raised center vein, fine concentric ridges and a crisp braided outline. Six slender white spokes come out from a small white center ball, and each spoke ends in a round white bobble that sits on top of a petal.
The style is clean and slightly sculptural, with good contrast between the matte yellow petals and the bright white bobbles. You can use it as a standalone appliqué or a coaster-style accent. It also works as a hanging decoration once you add your own loop.
This pattern uses US crochet terms. The finished flower measures 6.5 in (16.5 cm) from petal tip to opposite petal tip.
Construction is simple and modular. You make six identical petals around a foundation chain and add a surface-slip-stitch vein to each one. Then you join them to a small yellow center ring. A two-round border outlines the whole flower in one pass. Finally, a separate white stamen piece and center ball are sewn on top.
Finished Size and Construction
- Finished size: 6.5 in (16.5 cm) tip to opposite tip
- Skill level: Intermediate (surface slip stitch, bobbles, simple assembly)
- Terminology: US crochet terms
- Yarn weight: DK / light worsted (#3), cotton or cotton blend
- Hook: 3.5 mm (US E-4)
- Number of pieces: 6 petals, 1 center ring, 1 stamen piece and 1 center ball (one finished motif)
- Layout: 6 petals spaced evenly around the center ring, 60 degrees apart
- Piece size (one petal): 2.75 in (7.0 cm) long x 1.5 in (3.8 cm) wide
- Size before border: 6 in (15.2 cm) tip to opposite tip
- Border depth: 0.25 in (0.6 cm) added at each petal tip
Materials
Choose a smooth, tightly plied cotton or cotton blend. Mercerized cotton gives the sharpest stitch definition and makes the raised vein and outline stand out. Avoid fuzzy or brushed yarns, which blur the ridges.
- Butter yellow (main color, MC): 25 g, about 58 m
- White (contrast color, CC): 5 g, about 12 m
These quantities include a comfortable margin for a gauge swatch and yarn tails. One flower uses roughly 16 g of yellow and 3 g of white.
Tools:
- 3.5 mm (US E-4) crochet hook
- Tapestry needle
- 4 locking stitch markers
- Scissors
- Rust-proof pins and a blocking mat
- Spray bottle with cool water
- Ruler or tape measure
Abbreviations (US Terms)
- ch – chain
- sl st – slip stitch
- sc – single crochet
- hdc – half double crochet
- dc – double crochet
- sc2tog – single crochet 2 together
- BLO – back loop only
- st(s) – stitch(es)
- MC / CC – main color / contrast color
- RS / WS – right side / wrong side
5-dc bobble: *Yarn over, insert hook in indicated st, yarn over and pull up a loop, yarn over and pull through 2 loops. Repeat from * 4 more times in the same st (6 loops on hook), then yarn over and pull through all 6 loops.
Surface slip stitch: Hold the yarn behind the work. Insert the hook from front to back at the indicated point, pull up a loop, and pull it through the loop on your hook.
Point stitch: The middle stitch of a 3-sc group at a petal tip. Keep a marker in each point stitch.
Gauge and Checkpoints
Gauge: 20 sc and 22 rows = 4 in (10.2 cm) in sc with a 3.5 mm hook.
Gauge matters here because any error is repeated across six petals. Make one complete petal first and measure it before making the rest.
Checkpoints for one petal:
- After Rnd 1: 2 in (5.1 cm) long x 0.75 in (1.9 cm) wide
- After Rnd 2: 2.4 in (6.1 cm) long x 1.1 in (2.8 cm) wide
- After Rnd 3: 2.75 in (7.0 cm) long x 1.5 in (3.8 cm) wide
If your petal is too big: Go down 0.5 mm in hook size. If only the length is too big and the width is right, make your foundation chain tighter.
If your petal is too small: Go up 0.5 mm in hook size. Also check that you aren’t pulling the dc stitches in Rnd 1 short.
A petal within 0.125 in (0.3 cm) of the target in each direction is fine. Any bigger difference doubles across the flower, because two petals span its width.
Petal (Make 6)
With MC, ch 11.
Rnd 1 (RS): Sc in 2nd ch from hook, sc in next ch, hdc in next ch, dc in next 4 ch, hdc in next ch, sc in next ch, 3 sc in last ch. Rotate and work along the opposite side of the foundation chain: sc in next ch, hdc in next ch, dc in next 4 ch, hdc in next ch, sc in next ch, 2 sc in the same ch as the very first sc. Sl st to first sc. (22 sts)
Place a marker in the middle sc of the 3-sc group at the far end. This is the far point stitch. Place a second marker in the second of the final 2 sc. This is the base point stitch. The base end now also has 3 sc in one chain: the first sc of the round plus the final 2 sc.
Count check: 2 point stitches + 2 sides of 10 sts each = 22. Each side is the 8 shaped sts plus the 2 sc on either side of the point stitches.
Rnd 2: Ch 1, working in BLO, sc in each st to far point st, 3 sc in far point st, sc in each st to base point st, 3 sc in base point st. Sl st to first sc. (26 sts)
Move each marker to the middle sc of its new 3-sc group. Count check: 2 point stitches + 2 sides of 12 sts = 26.
Rnd 3: Repeat Rnd 2. (30 sts)
Count check: 2 point stitches + 2 sides of 14 sts = 30. Fasten off, leaving an 8 in (20.3 cm) tail for seaming.
Number the 14 stitches on each side from 1 to 14, starting next to the base point. Sts 1 to 3 on each side are seam stitches. Sts 4 to 14 stay exposed and will get the border.
The BLO rounds leave a fine ridge around the petal. This creates the ringed texture on the finished flower.
Center vein: With RS facing and MC, work surface slip stitches along the foundation chain line, from the base point to the far point. Insert the hook between the Rnd 1 sts of the two sides into each of the 10 foundation chains, for 10 surface sl sts. Fasten off and weave the ends into the WS. The vein should sit as a raised braided line without puckering. If it pulls the petal into a curve, redo it with a larger hook.
Center Ring
With MC, make a magic ring.
Rnd 1: Ch 1, 12 sc in ring. Pull the ring closed and sl st to first sc. (12 sts)
Do not fasten off. The ring should measure about 0.5 in (1.3 cm) across. You’ll work Rnd 2 during joining.
Stamen
With CC, make a magic ring.
Rnd 1: Ch 1, 6 sc in ring. Pull closed and sl st to first sc. (6 sts)
Spokes: Ch 11, 5-dc bobble in 3rd ch from hook, sl st in each of the next 8 ch back toward the ring, sl st in next sc of Rnd 1. Repeat from * 5 more times. (6 spokes)*
The last sl st lands in the first sc of Rnd 1. The 2 skipped chains fold over the top of each bobble and round it off. Each spoke measures about 1.75 in (4.4 cm) from the ring edge to the far side of the bobble. Fasten off, leaving a 12 in (30.5 cm) tail.
Center Ball
With CC, ch 3, 5-dc bobble in 3rd ch from hook. Fasten off, leaving an 8 in (20.3 cm) tail. Push the bobble into a tight ball with your fingertip, about 0.3 in (0.8 cm) across.
Make All Pieces
This flower is a single motif built from small parts. Make these pieces before assembly:
- MC: 6 petals, 1 center ring
- CC: 1 stamen piece, 1 center ball
Layout, RS up, seen from above (P = petal, R = center ring):
         P1
    P6        P2
         R
    P5        P3
         P4
Each petal’s base point stitch faces the ring. The petals sit 60 degrees apart. Later, each white spoke will lie along one petal’s vein.
Joining
Step 1: attach petals to the ring. Pick up the live loop of the center ring.
Rnd 2 of ring: Ch 1, sc in next st. Insert the hook into the next ring st and then through the base point st of a petal from front to back (RS of both facing up), and sc through both. Repeat from * 5 more times. Sl st to first sc. (12 sts)*
This is a strict 1-to-1 join. Each petal uses exactly 1 ring stitch and its own base point stitch. There is 1 plain ring sc between each pair of petals, which spaces them evenly. Fasten off.
Step 2: seam neighboring petals. Lay the flower flat, RS up. Use the petal tails to whipstitch sts 1 to 3 on the side of one petal to sts 1 to 3 on the facing side of the next petal. Match stitch to stitch: st 1 to st 1, st 2 to st 2 and st 3 to st 3. Repeat for all 6 seams. Pull each stitch just snug enough to close the gap. If it’s too tight, the center cups. If it’s too loose, the petals slide apart.
Size checkpoint: The flower should now lie flat and measure 6 in (15.2 cm) from tip to opposite tip. Measure all three pairs of opposite tips. They should agree within 0.125 in (0.3 cm).
Step 3: attach the stamen. Center the white stamen ring over the yellow ring, with one spoke lying along each petal vein. Sew around the white ring with the long CC tail. Tack each bobble to its petal with 2 small stitches so the spokes stay straight. Sew the center ball over the white ring and weave in all ends on the WS.
Border
Border gauge: One sc in each exposed edge stitch, at about 5 sts per 1 in (2.5 cm). Keep the same tension you used for the petals.
The flower has 138 exposed edge stitches: 6 petals x (11 + 1 + 11). That’s sts 4 to 14 on each side plus the far point st.
Border Rnd 1: With RS facing, join MC with a standing sc in st 5 of side A of any petal. Sc in sts 6 to 14 of side A (10 sc on this side, counting the standing sc), 3 sc in far point st, sc in sts 14 to 5 of side B (10 sc). Sc2tog over st 4 of side B and st 4 of side A of the next petal (this is the valley). Sc in sts 5 to 14 of side A (10 sc), 3 sc in far point st, sc in sts 14 to 5 of side B (10 sc), sc2tog across the valley. Repeat from * 4 more times. The last sc2tog uses st 4 of side A of the first petal. Sl st to first sc. (144 sts)*
Per petal: 10 + 3 + 10 + 1 sc2tog = 24 sts.
As a trim round: 138 sts worked 1 per existing stitch + 12 extra sts (2 extra at each of 6 points) − 6 sts merged (1 at each of 6 valleys) = 144 sts.
Border Rnd 2: Working in BLO, sl st loosely in each st around. (144 sl sts) Fasten off with an invisible join and weave in the end.
Why the math works: The petal edges curve outward, so 1 sc per stitch keeps them flat. The 3-sc group at each tip adds the 2 extra stitches needed to turn a sharp point without cupping. Each valley curves inward, so the sc2tog removes 1 stitch to stop it from ruffling. The slip-stitch round adds height but no stitches, which creates the braided outline. Together, the two rounds add 0.25 in (0.6 cm) at each tip. This takes the flower from 6 in (15.2 cm) to 6.5 in (16.5 cm).
Final Blocking
- Weave in any remaining ends through stitches of the same color.
- Mist the flower lightly with cool water until it’s damp but not soaked.
- Lay it RS up on the blocking mat.
- Pin the 6 petal tips evenly so opposite tips are 6.5 in (16.5 cm) apart.
- Pin each valley gently toward the center so the petal outlines curve smoothly.
- Straighten each white spoke along its vein and fluff the bobbles with a fingertip.
- Let it dry completely before unpinning.
Final Quality-Control Checklist
- Each petal has 30 sts after Rnd 3, with 14 sts per side.
- Every vein is straight and raised and runs from base to tip.
- The center ring has 12 sts, with 1 plain sc between petals.
- All 6 seams cover sts 1 to 3 only.
- Border Rnd 1 has 144 sts, with 24 per petal.
- The flower measures 6.5 in (16.5 cm) across all three pairs of opposite tips.
- All 6 spokes lie on veins, with bobbles tacked down.
- The flower lies flat with no cupping or ruffling.
Troubleshooting
Petals curl lengthwise: The foundation chain is too tight. Make the chain again with a hook one size larger, then switch back for Rnd 1.
Tips look rounded, not pointed: Make sure you work all 3 sc into the marked point stitch and not into the stitches beside it.
Center cups upward: The ring join or the whipstitches are too tight. Loosen the seams, or redo ring Rnd 2 with looser tension.
Border ruffles at the tips: You may have worked more than 3 sc in a point. Recount: there should be 24 sts per petal.
Valleys pucker: Check that each valley uses exactly one sc2tog, not two.
Spokes droop or twist: The sl sts along the stem are loose. Rework them firmly, then tack each bobble down.
Care
Hand wash in cool water with mild soap. Lay flat to dry and reshape the petals while damp. Don’t tumble dry, because the bobbles can flatten.
Final Notes
The measurements build on each other, so they’re easy to check. One petal is 2.75 in (7.0 cm) long with 30 sts. Six petals on a 0.5 in (1.3 cm) ring make a 6 in (15.2 cm) flower. Border Rnd 1 turns the 138 exposed sts into 144 sts. The two border rounds add 0.25 in (0.6 cm) at each tip, for a finished flower of 6.5 in (16.5 cm). If every checkpoint matches, the final size will be right.
Happy crocheting!