

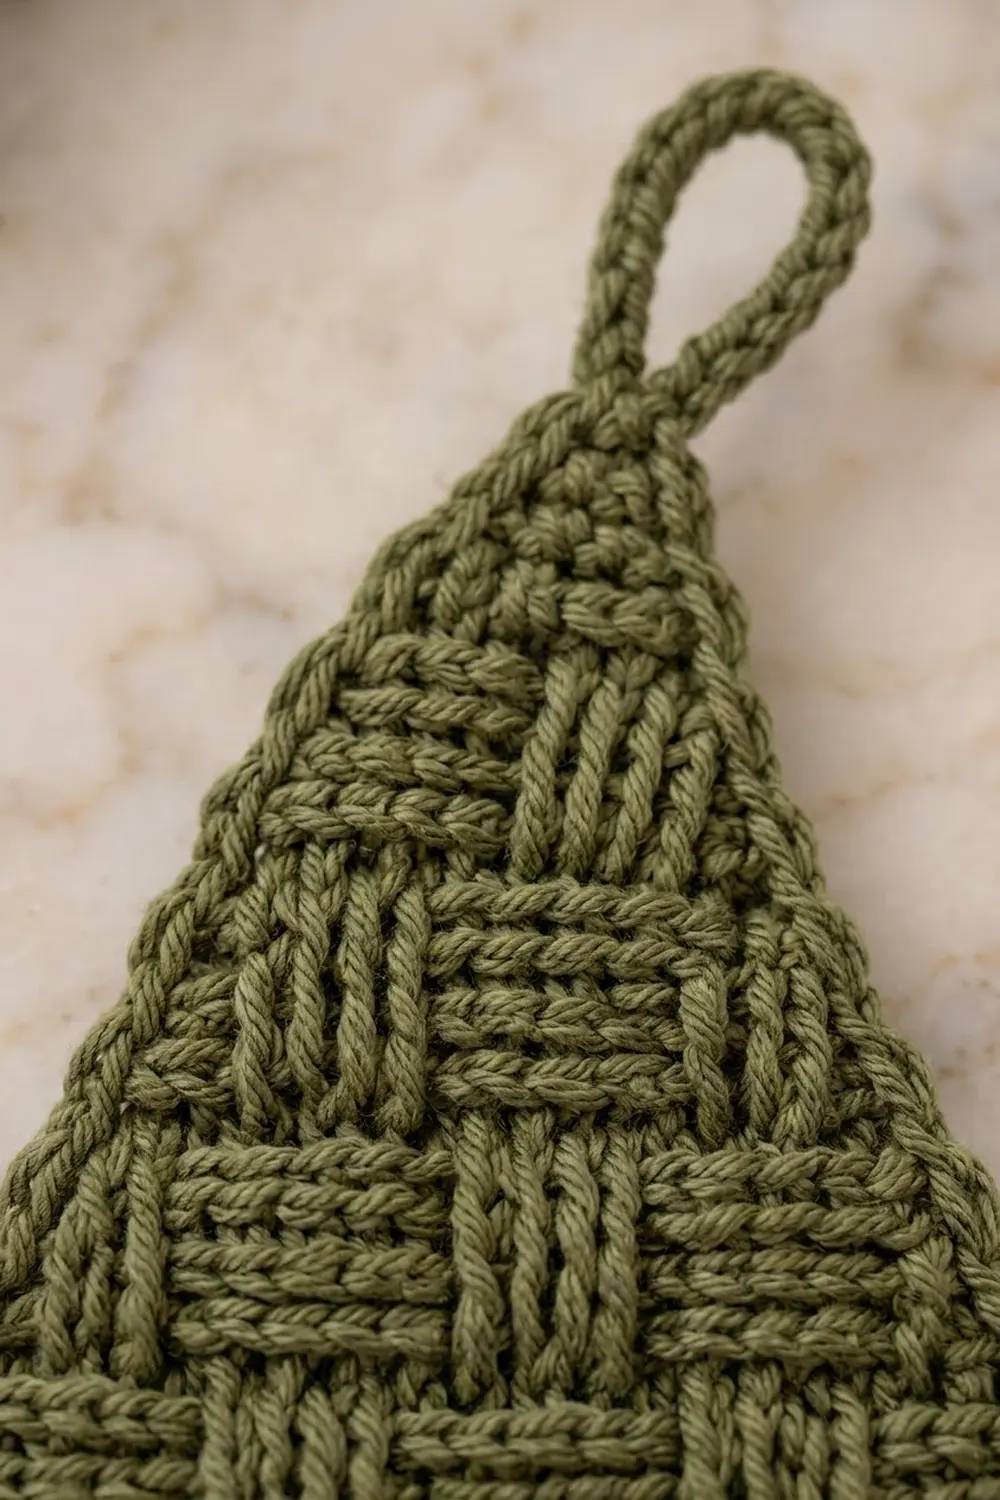
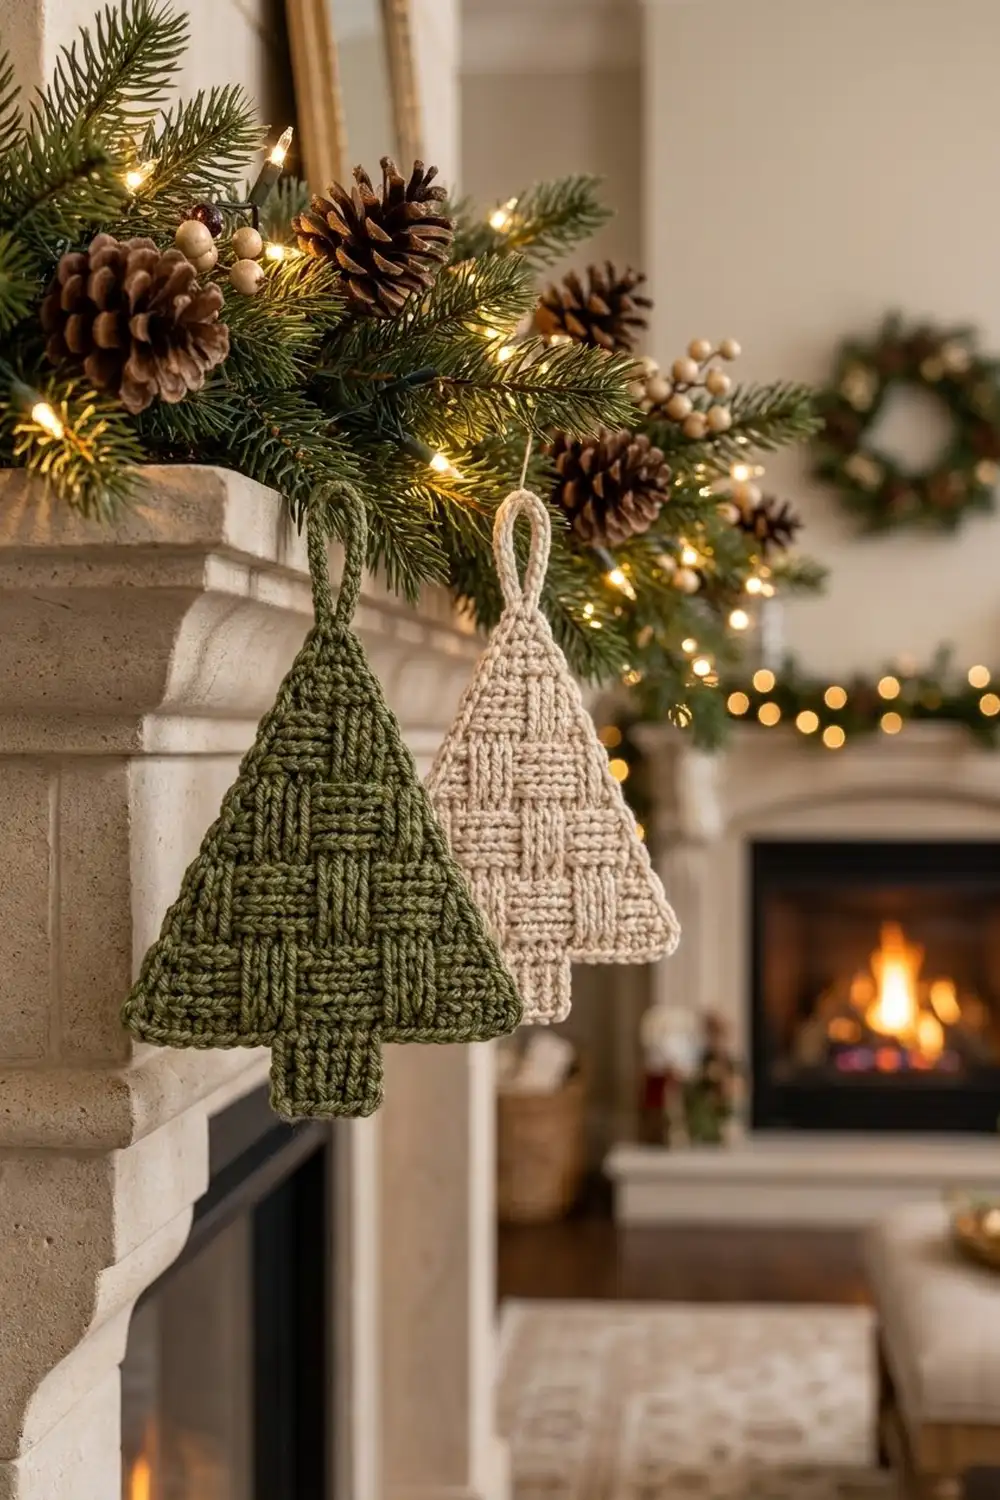
This little tree is a flat ornament with a lot of texture. Raised and recessed post-stitch blocks build a woven basketweave across the triangle, a ribbed trunk sits centered underneath, and one round of single crochet frames the whole shape. A thick, sc-covered loop at the tip lets it hang from a tree, a garland, or a gift.
The sample colors are a soft olive green and a warm cream. The tree also looks good in forest green, burgundy, or metallic-flecked yarn. Since the texture comes entirely from post stitches, smooth, light-colored yarn shows the weave best.
This pattern uses US crochet terms. The finished ornament measures 5 in (12.7 cm) wide by 5.4 in (13.7 cm) tall, not counting the hanging loop, which adds about 1.25 in (3.2 cm).
You work the tree from the top down. Starting at the tip, you increase on every wrong-side row while the basketweave blocks form in two-row bands. Then you work the trunk into the center stitches of the last row, add a single crochet border all the way around, and finish with the hanging loop.
Finished Size and Construction
- Finished size: 5 in (12.7 cm) wide x 5.4 in (13.7 cm) tall, plus a 1.25 in (3.2 cm) loop
- Skill level: Intermediate (front and back post stitches)
- Terminology: US
- Yarn weight: Worsted (#4, medium)
- Hook: 4.0 mm (G-6)
- Number of pieces: 1
- Layout: Single flat triangle with a centered trunk
- Tree body before trunk: 4.5 in (11.4 cm) wide x 4 in (10.2 cm) tall
- Size before border: 4.5 in (11.4 cm) wide x 4.9 in (12.4 cm) tall
- Border depth: 0.25 in (0.6 cm) per side
Materials
Choose a smooth worsted-weight yarn with good stitch definition. Cotton, cotton blends, and firm acrylics all work. Avoid fuzzy or very splitty yarns, because they hide the post-stitch blocks.
Yarn (per ornament, pick one color):
– Olive green: 15 g, about 25 m (27 yd)
– Cream: 15 g, about 25 m (27 yd)
These quantities include a margin of about 25% for your gauge swatch and tails. Post stitches use more yarn than plain double crochet, so don’t trim the estimate.
Tools:
– 4.0 mm (G-6) crochet hook
– Tapestry needle
– Scissors
– 2 removable stitch markers
– Blocking mat and rust-proof pins
– Spray bottle with water
Abbreviations (US Terms)
- ch – chain
- sl st – slip stitch
- sc – single crochet
- dc – double crochet
- st(s) – stitch(es)
- RS / WS – right side / wrong side
- FPdc – front post double crochet
- BPdc – back post double crochet
Special stitches:
- FPdc: Yarn over and insert the hook from front to back to front around the post of the stitch below. Yarn over, pull up a loop, and complete as a regular dc. The stitch post is pushed toward you.
- BPdc: Yarn over and insert the hook from back to front to back around the post of the stitch below. Complete as a regular dc. The stitch post is pushed away from you.
- Standing dc: With a slipknot on the hook, yarn over, insert into the stitch, and complete as a regular dc.
Pattern notes:
- The ch 2 at the start of each row does not count as a stitch. Work the first dc into the first stitch.
- The first and last stitch of every row are always plain dc.
- On RS rows, FPdc makes a raised block and BPdc makes a recessed block. On WS rows it’s the reverse: BPdc makes a block that looks raised from the RS, and FPdc makes one that looks recessed.
Gauge and Checkpoints
Gauge: 16 sts and 9 rows = 4 in (10.2 cm) in the basketweave pattern. That works out to 4 sts and 2.25 rows per 1 in (2.5 cm).
You don’t need a separate swatch. The ornament itself is your test piece: make one tree, check it at each checkpoint, and adjust before making more.
Checkpoints:
– After Row 5: 10 sts = 2.5 in (6.4 cm) wide; height about 2.2 in (5.6 cm)
– After Row 7: 14 sts = 3.5 in (8.9 cm) wide
– After Row 9: 18 sts = 4.5 in (11.4 cm) wide; height 4 in (10.2 cm)
– After the trunk: total height 4.9 in (12.4 cm)
– After the border: 5 in (12.7 cm) x 5.4 in (13.7 cm)
If your tree is too big, go down a hook size, to 3.5 mm. If it’s too small, go up to 4.5 mm. Post stitches tend to tighten as you work, so keep each yarn over relaxed and pull the loops up to full height.
Tree Body
Foundation: Ch 4.
Row 1 (RS): Dc in 3rd ch from hook, dc in next ch. Turn. (2 dc)
Place a marker on this side to mark the RS.
Row 2 (WS, increase): Ch 2, 3 dc in first st, 3 dc in last st. Turn. (6 dc)
Row 3 (RS): Ch 2, dc in first st, FPdc in next 4 sts, dc in last st. Turn. (6 sts)
This is the first raised block, centered at the top of the tree.
Row 4 (WS, increase): Ch 2, 3 dc in first st, FPdc in next 2 sts, BPdc in next 2 sts, 3 dc in last st. Turn. (10 sts)
Row 5 (RS): Ch 2, dc in first st, FPdc in next 4 sts, BPdc in next 4 sts, dc in last st. Turn. (10 sts)
This band has 2 blocks, one raised and one recessed. They’re offset by half a block from the block above, which creates the brick-like weave.
Row 6 (WS, increase): Ch 2, 3 dc in first st, BPdc in next 2 sts, FPdc in next 4 sts, BPdc in next 2 sts, 3 dc in last st. Turn. (14 sts)
Row 7 (RS): Ch 2, dc in first st, FPdc in next 4 sts, BPdc in next 4 sts, FPdc in next 4 sts, dc in last st. Turn. (14 sts)
Row 8 (WS, increase): Ch 2, 3 dc in first st, FPdc in next 2 sts, BPdc in next 4 sts, FPdc in next 4 sts, BPdc in next 2 sts, 3 dc in last st. Turn. (18 sts)
Row 9 (RS): Ch 2, dc in first st, FPdc in next 4 sts, BPdc in next 4 sts, FPdc in next 4 sts, BPdc in next 4 sts, dc in last st. (18 sts) Fasten off.
Stitch logic check:
- Each increase row adds 4 sts: 2 extra in the first stitch and 2 extra in the last. Widths go 2, 6, 10, 14, 18.
- Each increase row puts its post stitches only into the post stitches below. The middle part always equals the previous row’s count minus its 2 edge dc: 4, 8, then 12.
- On each increase row, the 2 extra dc at each edge plus the next 2 post stitches make up the outer block. Those blocks become fully textured on the RS row that follows.
Trunk
The trunk is worked into the center 6 sts of Row 9. That leaves 6 sts free on each side, which form the bottom edge of the branches.
Trunk Row 1 (WS): With the WS facing, skip the first 6 sts of Row 9. Join yarn with a standing dc in the 7th st, then dc in next 5 sts. Turn. (6 dc)
Trunk Row 2 (RS): Ch 2, dc in first st, FPdc in next 4 sts, dc in last st. (6 sts) Don’t fasten off.
The 4 FPdc make the vertical ribbed columns on the trunk. Check the size now: the trunk should be 1.5 in (3.8 cm) wide and about 0.9 in (2.3 cm) tall. The whole piece should measure 4.5 in (11.4 cm) x 4.9 in (12.4 cm).
Border
Border gauge: 4 sc = 1 in (2.5 cm) along the stitch tops, and 2 sc per dc row-end.
Work the border with the RS facing. If you’d like a neater join, you can fasten off and rejoin at the tip. The instructions below assume you rejoin at the tip.
Border Round 1 (RS): Join yarn with sc in the first st of Row 1, at the tip. Then work around in this order:
- Tip: Work 1 more sc in the same st, then 2 sc in the second st of Row 1. (4 sc at tip)
- First diagonal side: Work 2 sc in each of the 9 row-ends, from Row 1 down to Row 9. (18 sc)
- Outer base corner: 3 sc in the first free st of Row 9. (3 sc)
- Branch bottom: Sc in next 5 free sts of Row 9, ending where the trunk starts. (5 sc)
- Trunk side: 2 sc in each of the 2 trunk row-ends. (4 sc)
- Trunk corner: 3 sc in the first st of Trunk Row 2. (3 sc)
- Trunk bottom: Sc in next 4 sts. (4 sc)
- Trunk corner: 3 sc in the last st of Trunk Row 2. (3 sc)
- Trunk side: 2 sc in each of the 2 trunk row-ends. (4 sc)
- Branch bottom: Sc in next 5 free sts of Row 9. (5 sc)
- Outer base corner: 3 sc in the last st of Row 9. (3 sc)
- Second diagonal side: Work 2 sc in each of the 9 row-ends, from Row 9 up to Row 1. (18 sc)
Sl st to the first sc. (74 sc total)
Count check: 4 + 18 + 3 + 5 + 4 + 3 + 4 + 3 + 4 + 5 + 3 + 18 = 74 sc.
Why the math works:
- Each branch bottom is 6 stitches of Row 9. The corner stitch gets 3 sc and the other 5 get 1 sc each, so the edge lies flat and the corner stays sharp.
- Each diagonal side covers 9 dc rows, about 4 in (10.2 cm) tall, plus a 2.25 in (5.7 cm) horizontal step out to the base corner. That makes the slant about 4.6 in (11.7 cm) long. 18 sc at 4 sc per inch covers 4.5 in (11.4 cm), which fits that slant without ruffling or pulling.
- The trunk bottom has 6 stitches, which take 3 + 4 + 3 = 10 sc. That gives two crisp corners.
- Adding the border’s 0.25 in (0.6 cm) on every side brings the width from 4.5 in (11.4 cm) to 5 in (12.7 cm), and the height from 4.9 in (12.4 cm) to 5.4 in (13.7 cm).
Hanging Loop: Ch 14 and sl st into the sl st at the tip to close the ring. Work 20 sc over the chain ring, covering it completely. Sl st into the base of the loop and fasten off.
The finished loop stands about 1.25 in (3.2 cm) tall above the tip.
Weave in all ends along the WS through the post stitches, where they won’t show.
Final Blocking
- Lightly mist the ornament with water until it’s damp but not soaked.
- Lay it RS up on the blocking mat.
- Pin the tip, the two outer base corners, and the two bottom corners of the trunk.
- Measure: 5 in (12.7 cm) across the base and 5.4 in (13.7 cm) from tip to trunk bottom.
- Straighten each diagonal side with a ruler, then pin the middle of each slant.
- Gently pat the raised blocks so they stand forward. Don’t press them flat.
- Pin the loop upright so it dries straight.
- Let it dry completely, which takes about 6-8 hours, before unpinning.
For acrylic yarn, you can steam-block instead: hold the iron 1 in (2.5 cm) above the piece and never touch the stitches.
Final Quality-Control Checklist
- Row 9 has exactly 18 sts and the trunk has exactly 6 sts.
- Raised and recessed blocks alternate across every band, and each band is offset from the one above.
- The trunk sits centered, with 6 free sts on each side.
- Border Round 1 has 74 sc.
- The base corners and trunk corners are crisp, and the tip comes to a clear point.
- The diagonal sides are straight and don’t ripple.
- The loop is fully covered with sc and stands upright.
- Finished size: 5 in (12.7 cm) x 5.4 in (13.7 cm).
- All ends are hidden on the WS.
Troubleshooting
The blocks don’t show. Check whether you swapped FPdc and BPdc on a WS row. Remember that on WS rows, BPdc makes the block that looks raised from the RS.
The tree curls forward. Your post stitches are too tight. Pull each loop up to full dc height, or go up half a hook size.
The diagonal sides ripple. Use 3 sc per 2 row-ends instead of 2 sc per row-end on the sides. Keep the corner counts the same.
The diagonal sides pull in. Work the border more loosely, or block the sides firmly straight.
The trunk sits off-center. Count again: skip exactly 6 sts before joining, and leave 6 sts after the trunk.
There are gaps at the 3-dc increases. Work the 3 dc firmly. The border will close any small gaps that remain.
The loop flops over. Pack the 20 sc tighter, or add 2 more sc.
Care
Hand wash in cool water, press out the water in a towel, and dry flat, reshaping it as it dries. Store the ornament flat or hang it by its loop.
Final Notes
The measurement chain is short and easy to check:
- 16 sts and 9 rows = 4 in (10.2 cm).
- Row 9’s 18 sts give a 4.5 in (11.4 cm) base, and its 9 rows give 4 in (10.2 cm) of height.
- The 2-row trunk brings the height to 4.9 in (12.4 cm).
- A 74-sc border makes it 5 in (12.7 cm) x 5.4 in (13.7 cm).
- The 1.25 in (3.2 cm) loop finishes the ornament.
If your stitch counts and checkpoints match, every tree will come out the same size. Make one in each color to hang together.
Happy crocheting!