

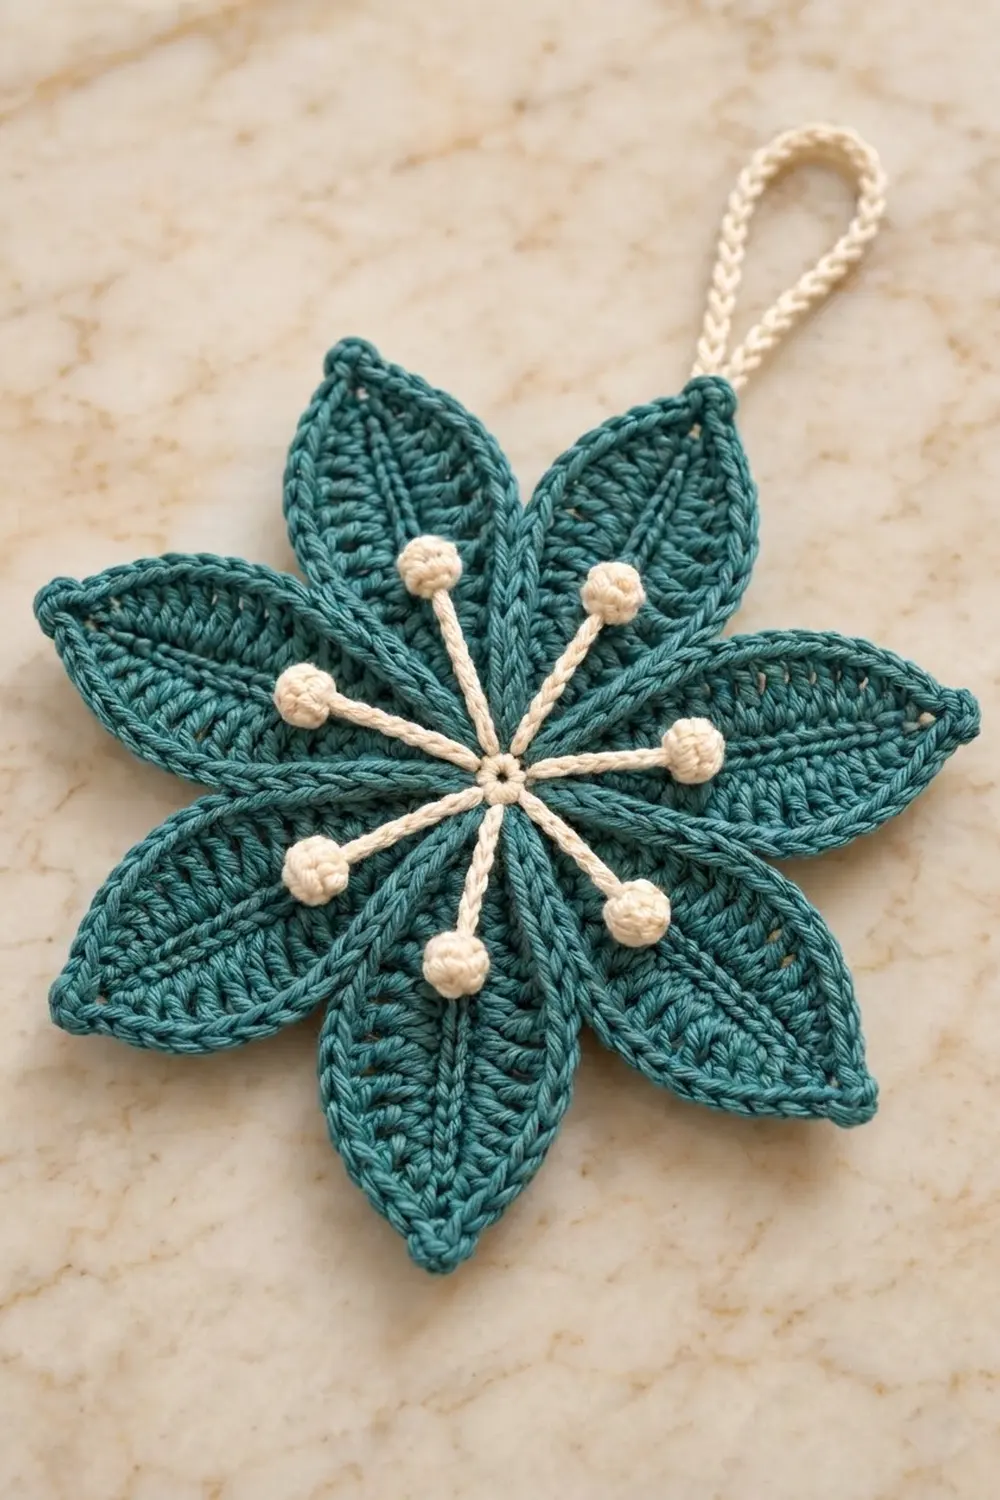
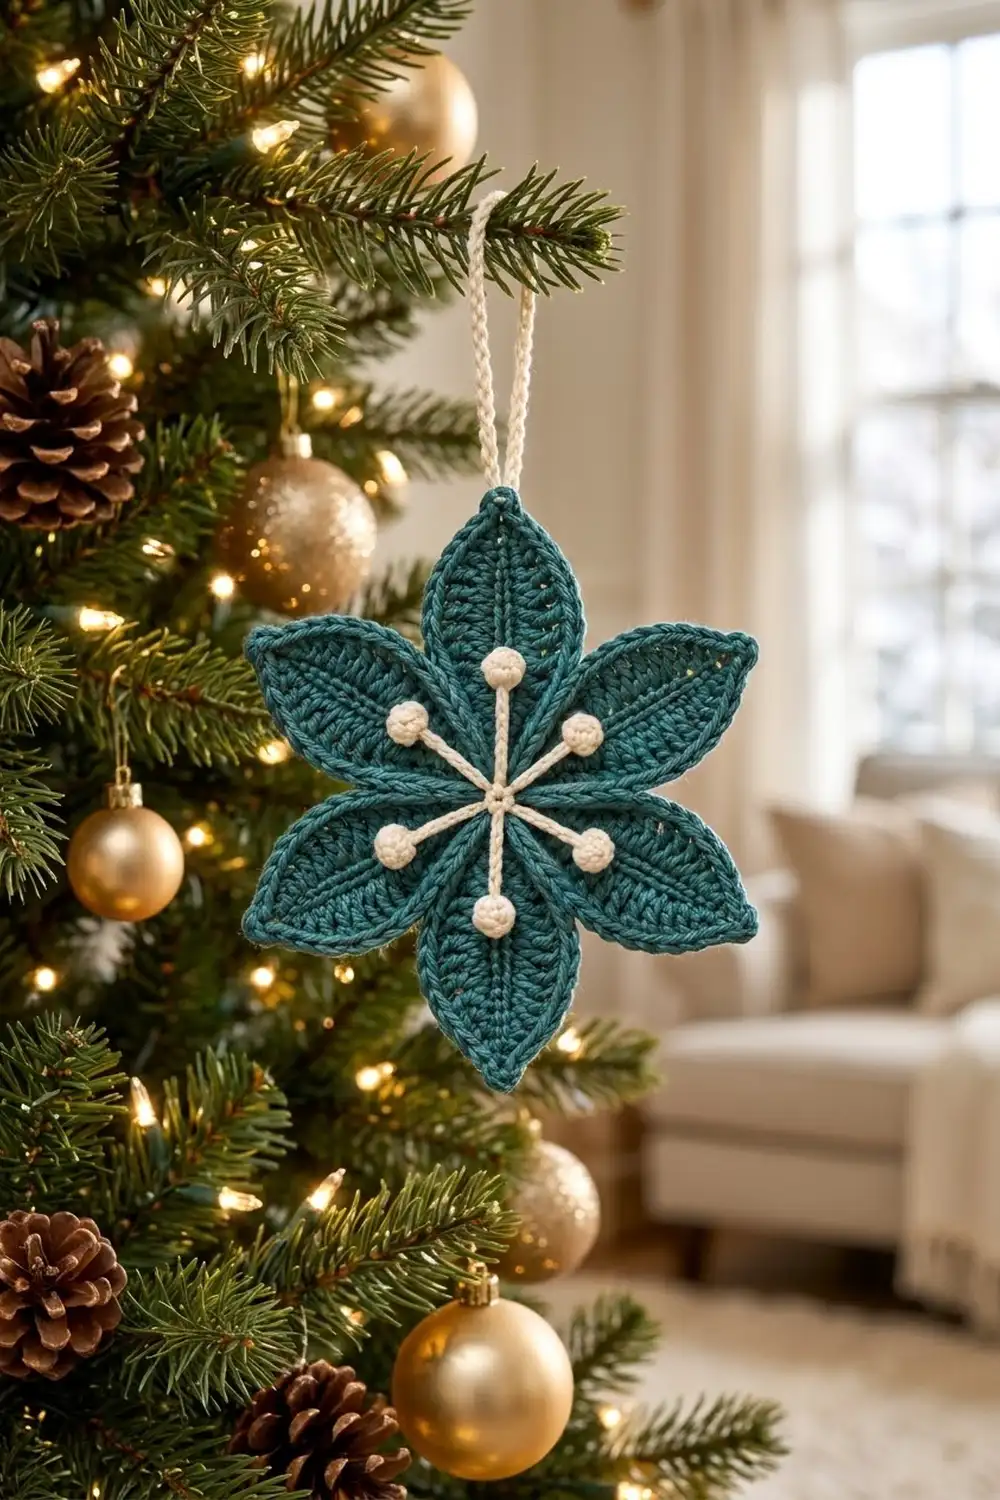
This six-petal flower ornament pairs deep teal leaf-shaped petals with a crisp cream star of bobble-tipped spokes. Each petal has a raised center vein, ridged columns of stitches on both sides, and a neat rope edge that brings both ends to a sharp point. The result looks a little like a poinsettia and a little like a snowflake, which suits a tree, a gift tag or a window.
The palette is simple: one teal and one cream. A smooth cotton or cotton blend gives the best stitch definition, especially along the vein and edge.
The pattern uses US crochet terms. The finished ornament measures about 7 in (17.8 cm) from tip to tip, not counting the hanging loop. The cream star is about 3.5 in (8.9 cm) across, and the loop adds 2.5 in (6.4 cm).
Here is the construction in short. You work each petal in the round around a foundation chain, add a slip-stitch rope edge, and then add a surface-slip-stitch vein. Six petals are joined to a 12-stitch center ring. A separate cream spoke star is sewn on top, and a corded loop is worked at one petal tip.
Finished Size and Construction
- Finished size: 7 in (17.8 cm) tip to tip
- Skill level: Easy-intermediate
- Terminology: US crochet terms
- Yarn weight: DK (light worsted / #3)
- Hook: 3.5 mm (E-4)
- Number of pieces: 6 petals, 1 center ring, 1 spoke star, 1 hanging loop (worked in place)
- Layout: Radial, with six petals spaced evenly around the center ring
- Petal size (finished): 3.25 in (8.3 cm) long x 1.75 in (4.4 cm) wide
- Petal size before border: 3 in (7.6 cm) x 1.5 in (3.8 cm)
- Border depth: about 0.125 in (0.3 cm) on every edge
Materials
Yarn: Use a smooth DK cotton or cotton-acrylic blend with about 2.4 m per gram (roughly 120 m per 50 g). Fuzzy yarns hide the ridges and the vein.
- Teal (Color A): 15 g, about 36 m
- Cream (Color B): 5 g, about 12 m
These quantities include a margin of about 30% for swatching and tails.
Tools:
– 3.5 mm (E-4) crochet hook
– Tapestry needle
– 4 locking stitch markers
– Scissors
– Ruler or tape measure
– Blocking mat and rust-proof pins
– Spray bottle with water
– Optional: fabric stiffener
Abbreviations (US Terms)
- ch – chain
- sl st – slip stitch
- sc – single crochet
- hdc – half double crochet
- dc – double crochet
- BLO – back loop only
- MR – magic ring
- sp – space
- st(s) – stitch(es)
- rnd – round
Special stitch – Bobble: *Yarn over, insert hook in the indicated stitch, yarn over and pull up a loop, yarn over and pull through 2 loops; repeat from * 3 more times in the same stitch (5 loops on hook). Yarn over and pull through all 5 loops. This is a 4-dc bobble.
Surface slip stitch: Hold the yarn behind the work. Insert the hook from front to back through the fabric, pull up a loop, and pull it through the loop on the hook.
Gauge and Checkpoints
Gauge: 20 sc = 4 in (10.2 cm) with a 3.5 mm hook.
Make one complete petal before you commit to all six. A petal is a better gauge test than a flat swatch because the dc columns and the pointed ends show your real tension.
Checkpoints:
– Foundation chain of 14: about 2.6 in (6.6 cm) long
– After Rnd 1: 2.75 in (7.0 cm) long x 1 in (2.5 cm) wide
– After Rnd 2: 3 in (7.6 cm) x 1.5 in (3.8 cm)
– After the border: 3.25 in (8.3 cm) x 1.75 in (4.4 cm)
– Center ring: 0.75 in (1.9 cm) across
– Spoke star: 3.5 in (8.9 cm) across
If the petal is too big: Go down to a 3.25 mm hook, or tighten the foundation chain.
If the petal is too small: Go up to a 3.75 mm hook.
Small changes in petal size are multiplied by two across the flower. A petal that is 0.25 in (0.6 cm) too long makes the flower about 0.5 in (1.3 cm) too wide.
Petal (Make 6)
You work the petal around both sides of a foundation chain. The chain becomes the center vein line. Short stitches at each end make the points, and dc in the middle gives the width.
With Color A, ch 14.
Rnd 1: Sc in the 2nd ch from hook. This is the base end. Then work:
– hdc in next ch
– dc in each of next 9 ch
– hdc in next ch
– 3 sc in last ch (tip)
Rotate the work and continue along the underside of the foundation chain:
– hdc in next ch
– dc in each of next 9 ch
– hdc in next ch
– 2 sc in the last ch (the same ch as the first sc)
Sl st to the first sc. (28 sts)
Here is how the count breaks down: 3 sc at the base + 11 sts on side A + 3 sc at the tip + 11 sts on side B = 28. Number the stitches from the first sc: st 1 is a base sc, sts 2–12 are side A, sts 13–15 are the tip, sts 16–26 are side B, and sts 27–28 are base sc.
Rnd 2 (worked in BLO): This round makes the ridge line parallel to the vein. Ch 1, then work:
– sc in st 1
– sides A: hdc in st 2, hdc in next 2 sts, dc in next 5 sts, hdc in next 2 sts, sc in st 12. That is 11 sts: sc, 2 hdc, 5 dc, 2 hdc, sc…
Correction for clarity, side A is worked over sts 2–12 as: sc in st 2, hdc in next 2 sts, dc in next 5 sts, hdc in next 2 sts, sc in st 12 (11 sts)
– sc in st 13, (sc, ch 2, sc) in st 14 for the tip point, sc in st 15
– side B over sts 16–26: sc, hdc in next 2 sts, dc in next 5 sts, hdc in next 2 sts, sc (11 sts)
– sc in st 27, (sc, ch 2, sc) in st 28 for the base point
Sl st to the first sc. (30 sts and 2 ch-2 sps)
Count check: 1 + 11 + 1 + 2 + 1 + 11 + 1 + 2 = 30.
Between the two ch-2 points, each long side now has 15 sts: the second sc of one point, 13 sts along the side, and the first sc of the next point. 15 + 15 = 30.
This round is a growth round only at the two points. It adds 2 sts, both in the (sc, ch 2, sc) groups. The extra width comes from the taller dc in the middle of each side, while the sc at the ends keep the points sharp. Working in the BLO leaves the front loops of Rnd 1 as a visible ridge, and the dc in both rounds leave the small gaps between columns seen in the finished petal.
Do not fasten off. The border comes next (see Border below), and then the vein.
Center vein: After the border, fasten off and leave a 12 in (30.5 cm) tail for joining. With a new length of Color A held behind the petal, start at the base point. Work 13 surface sl sts along the foundation-chain line, one in each foundation ch, ending at the tip. Fasten off and weave in. This makes the raised, braided vein.
Center Ring (Make 1)
With Color A, make an MR.
Rnd 1: Ch 1, 12 sc in ring, sl st to the first sc. (12 sts)
Pull the ring closed tightly. Fasten off and leave a 6 in (15.2 cm) tail. The ring should measure 0.75 in (1.9 cm) across.
Spoke Star (Make 1)
With Color B, make an MR.
Rnd 1: Ch 1, 8 sc in ring, sl st to the first sc. (8 sts)
Rnd 2: Ch 9, then work a bobble in the 3rd ch from the hook. Sl st in each of the next 6 ch back toward the center. Sl st in the next sc of Rnd 1. Repeat from * 7 more times. The last sl st goes into the first sc. (8 spokes, 8 bobbles)
The 2 skipped chains wrap over the top of each bobble. The 6 slip-stitched chains make a firm spoke about 1.25 in (3.2 cm) long. Fasten off and leave a 12 in (30.5 cm) tail for sewing.
Make All Pieces
| Piece | Color | Quantity |
|---|---|---|
| Petal | A (teal) | 6 |
| Center ring | A (teal) | 1 |
| Spoke star | B (cream) | 1 |
| Hanging loop | B (cream) | 1, worked in place |
Radial layout (view from the front):
            P1
     P6           P2
          [RING]
     P5           P3
            P4
Each petal’s base point sits over 2 sc of the ring. P1 covers ring sts 1–2, P2 covers sts 3–4, and so on, until P6 covers sts 11–12.
Lay all six petals out before joining. Pair the most similar petals opposite each other (P1 with P4, P2 with P5, P3 with P6) so any small size differences stay balanced.
Joining
Method: Whipstitch with the petal tails.
Stitch-to-stitch logic: Place a marker in ring sc 1. Lay P1 with its base point touching the outer edge of the ring.
1. Use the P1 tail to whipstitch through the base ch-2 point and the sl st on each side of it.
2. Anchor those into ring sc 1 and sc 2, with 2 passes per ring stitch.
Repeat for P2 on ring sts 3–4, and continue around. Six petals x 2 ring sts = 12 sts, which uses every ring stitch exactly once.
Neighbor tack: Count 3 border sl sts up from the base point on facing sides of neighboring petals. Join them with a single small stitch. This keeps the petals evenly spaced and stops them from overlapping.
Tension: Pull each whipstitch snug but not tight. If you pull too hard, the ring puckers and the petals cup forward.
Spoke star: Center the star over the ring. Turn it so one spoke runs along the vein of P1 and the opposite spoke runs along the vein of P4. The other six spokes fall between and across the petals. Sew around the star’s ring, then make one hidden tack under each bobble.
Hanging loop: Join Color B with a sl st in the tip ch-2 point of P1. Ch 25 and sl st in the same ch-2 point. Then sl st in each of the 25 ch around the loop and sl st into the tip again. Fasten off. The slip stitches give the loop its corded look and make it about 2.5 in (6.4 cm) tall.
Size checkpoint: Measure from the P1 tip to the P4 tip. You should get about 7 in (17.8 cm): two 3.25 in (8.3 cm) petals plus about 0.5 in (1.3 cm) of exposed ring, with the petal bases resting on its outer edge.
Border (Rope Edging, Worked on Each Petal)
Work this round on each petal right after Rnd 2, before you add the vein and before joining.
Border gauge: Slip stitches add about 0.125 in (0.3 cm) of depth and no extra length along the sides. Each one should match the width of the stitch below it, so work them loosely.
Rnd 3: Ch 1. Working in the BLO:
– sl st in each of the 15 sts along the first side
– (sl st, ch 2, sl st) in the tip ch-2 sp
– sl st in each of the 15 sts along the second side
– (sl st, ch 2, sl st) in the base ch-2 sp
Join to the first sl st. (34 sl sts and 2 ch-2 points)
This is a conversion round: (30 sts worked 1 per existing stitch) + (2 extra sl sts at each of the 2 points = 4) = 34. Per side, that is 15 sl sts between points, and the point stitches are counted separately in the ch-2 groups.
Why the math works: One sl st in each existing stitch keeps each side exactly as long as Rnd 2, so the edge lies flat without ruffling or pulling in. The (sl st, ch 2, sl st) groups give each point a small turning allowance, so the edge wraps around the point and the point stays sharp. Working in the BLO pushes the front loops forward, which makes the rope texture.
Final Blocking
- Weave in all ends except the joining tails, which are already used.
- Lightly spray the whole ornament until it is damp, not soaked.
- Pin the center ring in place on the blocking mat.
- Pin each petal tip outward so it is 3.5 in (8.9 cm) from the center of the ring. Check that opposite tips are 7 in (17.8 cm) apart.
- Pin each petal at its widest point to 1.75 in (4.4 cm).
- Press the spokes straight with your fingers and pin each bobble flat.
- Optional: brush on a thin coat of fabric stiffener for a firmer ornament.
- Leave it to dry completely, usually 12–24 hours.
Final Quality-Control Checklist
- All six petals measure 3.25 in (8.3 cm) x 1.75 in (4.4 cm)
- Each petal has 34 border sl sts and 2 sharp points
- Each vein runs straight from the base to the tip
- Every ring stitch holds exactly one half of a petal base (12 of 12 used)
- The petals are evenly spaced, with neighbor tacks hidden
- Eight spokes run straight, with eight round bobbles
- The star is centered and aligned with the P1 and P4 veins
- The loop is secure and 2.5 in (6.4 cm) tall
- No ends are visible on the front
Troubleshooting
Petal curls along its length: The foundation chain is too tight. Chain with a hook one size larger, then switch back.
Edge ruffles: The border sl sts are too loose, or a stitch was doubled. Count 15 per side.
Edge pulls in or puckers: The sl sts are too tight. Make each loop the width of the stitch below.
Rounded points instead of sharp ones: Make sure the ch-2 groups in Rnds 2 and 3 sit in the center stitch or space.
Bobbles lean sideways: Keep the 2 skipped chains over the top of the bobble before you slip stitch down the spoke.
Flower cups forward: The joining stitches are too tight. Loosen them, or re-block the flower flat.
Care
Hand wash in cool water, roll it in a towel to remove moisture, and dry it flat. If you used fabric stiffener, re-apply it after washing.
Final Notes
The measurement chain stays simple:
– A 14-chain foundation gives a 2.75 in (7.0 cm) Rnd 1.
– Rnd 2 brings the petal to 3 in (7.6 cm) x 1.5 in (3.8 cm).
– The rope border finishes it at 3.25 in (8.3 cm) x 1.75 in (4.4 cm).
– Six petals on a 0.75 in (1.9 cm), 12-stitch ring give a 7 in (17.8 cm) flower.
– A 3.5 in (8.9 cm) cream spoke star and a 2.5 in (6.4 cm) corded loop complete it.
Check each stage as you go, and every ornament you make will match.
Happy crocheting!